
Upgrading your vehicle’s cabin with LED touch lights is an excellent way to improve visibility and customize your driving environment. Whether you need better illumination in a dark glove box, extra cargo lighting in the trunk, or a subtle ambient glow along the footwells, these modern accessories offer a practical solution. The installation process involves planning your layout, routing wires safely behind interior panels, tapping into a reliable 12V power source, and mounting the touch-sensitive modules. By taking a systematic approach, you can achieve a clean, professional-looking result that integrates seamlessly with your car’s existing interior.
Pre-Installation Checks and Safety Boundaries
Before purchasing any aftermarket lighting kit, verify your vehicle’s specific model year, electrical interface, and interior dimensions against the product documentation. Consult your vehicle owner’s manual to locate the fuse box, identify electrical load limits, and pinpoint restricted zones where aftermarket wiring must not interfere. If you are uncomfortable working with automotive electrical systems, always seek qualified professional installation before beginning.
Before starting any physical work, establish a strict safety protocol by switching off the ignition, removing the key, and disconnecting the negative battery terminal. This simple step eliminates the risk of short circuits or accidental electrical shocks while you handle the wiring.
Products mentioned in this guide
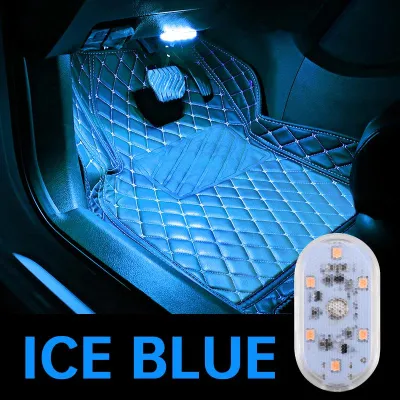
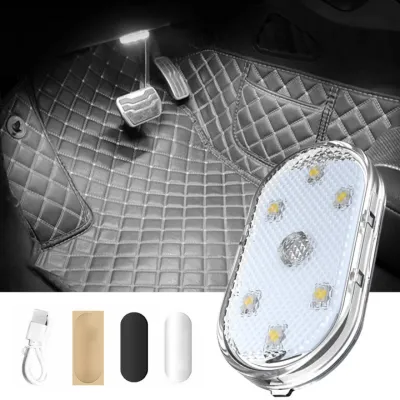
20 Lazada user ratings
weak souble sides tape use velcro instead so far so good bright led can softly illuminate dark spaces
I recieved the product in good condition and complete and all is working. Very nice. I will buy again
hirap patayin pag nakadikit na, kelangan pa tanggalin.
🔌Compatibility:good product
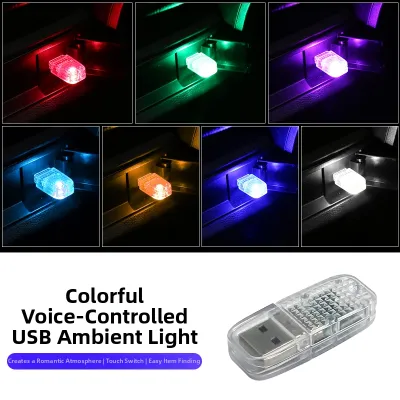
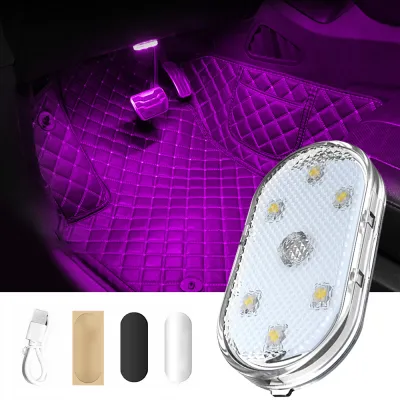
205 Lazada user ratings
recieved my order in good condition and all perfectly working, for the cheap price you got a very nice product and for the seller you are gr…Read full reviewShow less
recieved my order in good condition and all perfectly working, for the cheap price you got a very nice product and for the seller you are great for good costumer service, thank you seller two thumbs up for you
Quality: good Appearance: good Performance: good shipped and delivered as scheduled. well packaged by seller. tiny item but light is bright
Maliwanag siya. Touch sensitive. It's worth the buy. Thanks a lot seller for wrapping it securely . 👍
It's brighter than expected. I plan to use it in the car. It's very sensitive to the touch.
Very good, the light is bright enough. Charging is also very fast~
1,276 Lazada user ratings
Quality:good Appearance:good Performance:sana mgtagal xa..Unique and stylish design, Perfect for car and motorcycle, Bright and colorful lig…Read full reviewShow less
Quality:good Appearance:good Performance:sana mgtagal xa..Unique and stylish design, Perfect for car and motorcycle, Bright and colorful lighting, Great emergency lighting, Adds a cozy atmosphere, Rechargeable and portable, Easy to install with magnets, Waterproof for outdoor use,
Great emergency lighting, Unique and stylish design, Waterproof for outdoor use, Rechargeable and portable,
Great emergency lighting, Convenient touch control, Adds a cozy atmosphere, Easy to install with magnets,
Versatile interior decoration, Bright and colorful lighting, Rechargeable and portable,
Quality: very good maganda sa y box koto saka sa aide pockets ng nmax
Prices are valid at publication and may change. Please refer to the product page for the latest price.
Additionally, map out your installation path to completely avoid airbag deployment zones, the steering column assembly, and any critical safety sensors. Blocking or interfering with these systems can compromise your vehicle’s safety integrity in an emergency.
Tools and Materials Needed for the Job
Gathering the correct tools before you begin prevents mid-project delays and protects your vehicle’s delicate cabin components. To access hidden wiring paths without scratching or cracking your dashboard panels, use plastic trim removal tools. Standard metal screwdrivers can easily gouge soft plastics and vinyl, so non-marring nylon pry bars are highly recommended.

For the electrical work, you will need a reliable wire stripper, a precise crimping tool, and a digital multimeter. The multimeter is indispensable for verifying voltage, identifying positive and negative wires, and checking circuit continuity.
To secure and insulate your connections, prepare high-quality electrical tape, heat shrink tubing, adhesive cable clips, and nylon zip ties. In humid tropical climates, standard electrical tape can degrade and lose its adhesion over time, making heat shrink tubing the preferred choice for long-lasting insulation.
Step-by-Step Installation Process
Installing your LED touch lights requires patience, attention to detail, and a methodical approach. Rushing through the wiring or skipping surface preparation often leads to loose connections, rattling panels, or peeling adhesives. Follow these sequential steps to ensure a secure, reliable, and visually clean installation.
Step 1: Planning the Placement and Routing Wires
Start by selecting the optimal locations for your LED touch lights and their corresponding touch sensors. Choose flat, easily accessible surfaces where you can naturally reach the sensor without distracting yourself from driving controls or interfering with passenger movement.
Once you have selected the mounting points, map out a hidden path for the wiring. Route the cables behind plastic trim panels, under the carpeting, or through existing factory rubber grommets. Ensure that the wires do not pinch against sharp metal brackets behind the dashboard or get caught in moving parts like the steering shaft, brake pedal assembly, or adjustable seat tracks.
To make this process easier, temporarily secure the cables along your planned route using low-tack masking tape. This allows you to verify that the wiring harnesses are long enough and that the placement is correct before committing to permanent mounting.
Step 2: Tapping into the Power Source
Tapping into a safe and reliable power source is critical to prevent overloading your vehicle’s factory electrical circuits. One of the cleanest methods is using an add-a-circuit fuse tap in the passenger cabin fuse box. This device allows you to draw power from an existing circuit—such as the accessory socket or radio—while keeping the new lighting system on its own dedicated, fused line.
Use your digital multimeter to test the fuse slots; confirm the correct voltage, polarity, and whether the circuit is switched (only active when the key is turned) or constant (always receiving power). Always install an inline fuse with the exact amperage rating specified by the LED kit manufacturer to protect your vehicle from short circuits.
Under no circumstances should you splice directly into critical vehicle communication networks, CAN bus lines, or safety-related wiring harnesses like those for the airbag system. Doing so can trigger severe electrical faults or disable safety features.
Step 3: Mounting the Lights and Touch Sensor
Proper surface preparation is the key to ensuring your LED touch lights and sensors remain securely mounted over time. Clean the intended mounting surfaces thoroughly using an automotive interior cleaner that is explicitly labeled safe for your specific cabin materials, whether plastic, vinyl, or leather. Unapproved cleaners can degrade delicate surfaces or leave behind oily residues that prevent adhesives from bonding.
After cleaning, wipe the area dry with a clean microfiber cloth. Apply the double-sided mounting tape or brackets provided in your kit, pressing firmly for at least thirty seconds to activate the adhesive.
In warm, humid environments, allow the adhesive to cure fully as directed by the manufacturer before hanging the weight of the lights or pulling on the wires. When positioning the touch sensor, ensure it is free from obstructions like thick fabric covers, metallic trim pieces, or heavy window films, which can interfere with capacitive or infrared sensing technology.
Step 4: Making the Electrical Connections
Finalizing your electrical connections with high-quality joints ensures long-term reliability and prevents dangerous electrical shorts. Strip the wire insulation back to the length recommended by your connector manufacturer. Use insulated crimp connectors or solder the joints to create a strong mechanical and electrical bond; never rely on simple twist-and-tape methods, which easily pull apart under vehicle vibration.
Slide heat shrink tubing over every completed joint and apply gentle heat to seal the connection against moisture, dust, and humidity. Once all connections are insulated, neatly bundle any excess wiring using nylon zip ties. Secure the new wiring harness to existing factory wiring looms behind the dashboard to prevent annoying rattles, vibrations, or accidental snagging when the vehicle is in motion.
Testing and Troubleshooting Common Issues
Before reassembling your vehicle’s interior panels, verify that the entire system functions correctly. Reconnect the negative battery terminal and turn on the ignition to test the LED touch lights. Tap the sensor repeatedly to check its responsiveness, cycle through any available dimming levels, and verify color-changing modes if your kit includes them.
If a sensor is unresponsive, check for physical obstructions, ensure the ground wire is connected to a clean, unpainted metal chassis point, and adjust the sensitivity settings if your control module supports it. If you notice flickering or partial illumination, inspect your wiring joints for loose crimps, check for voltage drops using your multimeter, or find a better grounding location.
If a fuse blows immediately upon testing or if your vehicle displays a dashboard warning light, disconnect the system immediately. This is your stop condition: do not attempt to bypass the fuse, and consult a qualified automotive electrician to diagnose the issue.
Maintenance and Long-Term Care
To keep your LED touch lights performing optimally, incorporate them into your regular vehicle maintenance routine. When cleaning your car’s interior, gently wipe the LED lenses and touch sensors with a dry or slightly damp microfiber cloth. Avoid using harsh chemical glass cleaners, ammonia-based sprays, or abrasive scrubbing pads, as these can cloud the plastic lenses or strip away the sensitive coatings on touch sensors.
Periodically perform a visual inspection of the visible wiring harnesses and mounting points, especially after driving on rough roads or during seasonal temperature shifts. Check for signs of wire chafing, loose zip ties, or peeling adhesives.
If you notice inconsistent touch responsiveness, flickering that cannot be resolved by tightening connections, or significant dimming of the LEDs, these are signs of component degradation. In such cases, replace the affected module or seek professional assistance to ensure your vehicle’s electrical system remains safe.
Frequently Asked Questions (FAQ)
Can I install LED touch lights if my car has a complex CAN bus system?
Modern vehicles equipped with Controller Area Network (CAN bus) systems constantly monitor electrical current draw to detect failed bulbs or wiring faults. Splicing aftermarket LED lights directly into these monitored circuits can alter the expected resistance, triggering dashboard error codes or causing the vehicle’s computer to shut down power to that circuit. To avoid these conflicts, use CAN bus-compatible LED modules or install your touch lights on an isolated, non-monitored accessory circuit, such as the 12V auxiliary power outlet. If you are unsure about your vehicle’s specific circuit topology, consult the factory service manual or a professional technician before making any modifications.
Will adding aftermarket LED lights drain my car battery?
LED technology is highly energy-efficient, drawing significantly less current than traditional halogen bulbs, which means they pose virtually no threat to a healthy car battery while the engine is running. However, if you wire the lights to a constant 12V power source that remains active when the ignition is turned off, leaving them on overnight can drain your battery. To prevent accidental battery drain, always wire your system to a switched ignition source that cuts power automatically when you turn off the vehicle. If you must use a constant power source, ensure your LED kit features an automatic shut-off timer or a physical master switch that you can manually turn off.
What should I do if the touch sensor stops responding?
If your touch sensor suddenly stops responding after working normally, begin by checking for physical barriers. Dust, moisture, or oily fingerprints on the sensor surface can block capacitive detection, so cleaning the sensor with a dry microfiber cloth often resolves the issue. Next, inspect the wiring connections leading to the sensor and the main control module to ensure nothing has vibrated loose or corroded due to cabin humidity. Finally, check the inline fuse to confirm it has not blown, and use your digital multimeter to verify that the control module is still receiving adequate voltage from your power source before assuming the sensor itself is defective.
Community discussion
Share your experience or ask a question. Comments are reviewed before publication.