
Installing mini driving lights on your vehicle is one of the most effective ways to improve night-time visibility, especially when navigating poorly lit provincial roads, dark highways, or driving through heavy tropical downpours. These compact yet powerful LED auxiliary lights provide a focused beam that fills in the dark spots left by factory headlights, making it easier to spot road hazards, pedestrians, and sudden obstacles.
While the physical size of these lights makes them relatively easy to position, integrating them into your vehicle’s electrical system requires a methodical approach. A proper installation ensures that the lights operate reliably, do not drain your battery, and—most importantly—do not pose a fire hazard or blind oncoming motorists. By following a structured process of preparation, secure mounting, relay-controlled wiring, and precise beam alignment, you can achieve a professional-grade installation that enhances your safety on the road.
Preparation: Legal Checks and Tool Gathering
Before purchasing or installing any auxiliary lighting system, it is essential to understand the local road safety regulations governing their use. In the Philippines, the Land Transportation Office (LTO) maintains strict guidelines regarding the installation of auxiliary lights to prevent road hazards and glare. Generally, regulations dictate that auxiliary lights must be mounted below the level of the original headlights, must not exceed a specific number of lamps, and must be wired to operate independently of the main headlights. Additionally, using highly distracting colors like red or blue is strictly prohibited, as these are reserved exclusively for emergency vehicles.
Products mentioned in this guide
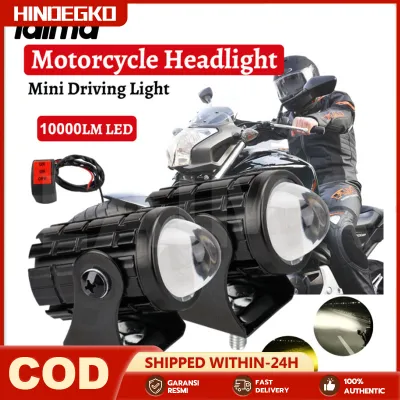
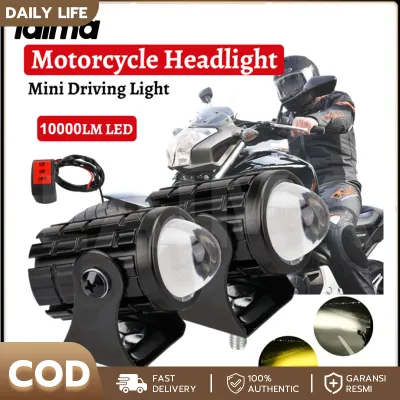
8 Lazada user ratings
di pa naikakabit dri oa din natetesting kin naggagana o diri peru kasasasit sana niya sana magludab ading solo nganing bukong mangitngit pag…Read full reviewShow less
di pa naikakabit dri oa din natetesting kin naggagana o diri peru kasasasit sana niya sana magludab ading solo nganing bukong mangitngit pag lubsok,
ayus..sana tumagal.
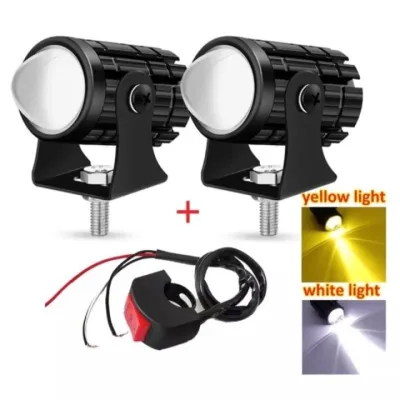
1,093 Lazada user ratings
Suitability: super ganda Appearance: amazing Quality: matibay nmn siguro 5 star sakin tong product na to ang ganda tapos may flash pa siya,.…Read full reviewShow less
Suitability: super ganda Appearance: amazing Quality: matibay nmn siguro 5 star sakin tong product na to ang ganda tapos may flash pa siya,. Dito ulit ako bibili kay seller at etong product na ang aking pipiliin lagi,. Bili na kayo promise worth it ang pera nyo,.👍👍👍👍👍
Appearance: looks good Suitability: great Quality: excellent I like the item looks good and the seller keep sending me message to update my …Read full reviewShow less
Appearance: looks good Suitability: great Quality: excellent I like the item looks good and the seller keep sending me message to update my order where about. I received the item in good packaging and condition. Thank you seller and kuya rider.
wow Ang bilis lng dumating kahapon lng na place order dumating agad ngaun 😍 sakto lhat Ng pinadala Walang damage 😍 thank u Lazada seller at …Read full reviewShow less
wow Ang bilis lng dumating kahapon lng na place order dumating agad ngaun 😍 sakto lhat Ng pinadala Walang damage 😍 thank u Lazada seller at KY kuya rider mabait ❤️ sure order ulit ako dhil kulang pa sya 🙂
quality mga boss bili na din kayo sa shop na to sobrang ganda ng kanilang products at napakamura pa, ang linaw sa gabi promise salamat ❤️
the driving look is very nice, good delivery and fast,thanks po
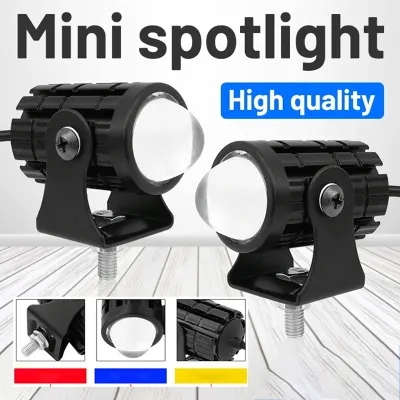
3 Lazada user ratings
🔨Durability:I have not yet used the item,but as what i have seen in the actual product, the item is very good in design and i think it is du…Read full reviewShow less
🔨Durability:I have not yet used the item,but as what i have seen in the actual product, the item is very good in design and i think it is durable... 💡Brightness:I have not tested it yet... Very fast delivery... Accomodating seller/shop.
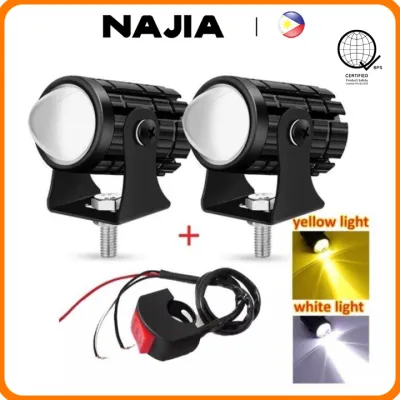
300 Lazada user ratings
Thank you seller at kuya rider sa pag deliver. Ang ganda ng quality at ang secured pa nka bubble rap, i recommend this produck kasi ang gand…Read full reviewShow less
Thank you seller at kuya rider sa pag deliver. Ang ganda ng quality at ang secured pa nka bubble rap, i recommend this produck kasi ang ganda po.
Yellow/white dual color option, Bright LED light output, Durable and long-lasting, malakas talaga ilaw wide lang malapad
Durable and long-lasting, Easy to install, Yellow/white dual color option, sulit kaganda ng ilaw maliwanag
Easy to install, Yellow/white dual color option, Bright LED light output, Durable and long-lasting,
good quality,, 💡Brightness:good 💯
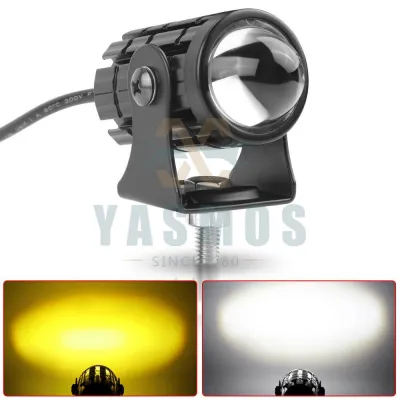
55 Lazada user ratings
Affordable and high-quality lights, Excellent customer service from Yasmos,
mali ang pinadala dpat 12 to 60v ang order ko ang dumating 8 to 80v umay
The packaging is no good. No bibnle wrap. No cartoon.
Brightness:Perfect for off-road adventures,
Satisfied with my purchase,
Prices are valid at publication and may change. Please refer to the product page for the latest price.
Beyond legal compliance, you must verify your vehicle’s physical and electrical compatibility. Consult your vehicle owner’s manual to locate the battery, understand the routing of factory wiring harnesses, and identify any potential mounting restrictions on the front bumper or grille. Modern vehicles are equipped with sensitive alternators and electrical systems, so ensuring your battery is in good health before adding new accessories is a critical preventative step. You can use a multimeter to check your battery’s resting voltage; a healthy battery should read approximately 12.6 volts when the engine is off.
Gathering the correct tools and materials beforehand will prevent unnecessary delays and ensure a clean, durable installation. For this project, you will need a set of wrenches or sockets, screwdrivers, wire strippers, a crimping tool, a multimeter, and a drill with high-speed steel bits if you plan to mount the brackets directly to metal surfaces. For materials, prepare high-quality electrical tape, zip ties, heat shrink tubing, an inline fuse holder with an appropriate fuse, a 12-volt automotive relay, and protective split-loom tubing to shield the wires from heat and abrasion.
Selecting a Safe and Effective Mounting Location
Choosing the right mounting location is a balance between maximizing light output and maintaining the structural and aesthetic integrity of your vehicle. Common mounting areas include the front bumper, behind the grille, or on a dedicated crash guard or bull bar. Each location offers distinct advantages depending on your driving habits and vehicle type.

Mounting the lights low on the front bumper or crash guard is ideal for cutting through fog, heavy rain, and road mist, as it keeps the light beam close to the road surface. However, low-mounted lights are more vulnerable to road debris, water splashes, and minor parking impacts. If you choose this location, ensure the brackets are positioned where they will not block your license plate or interfere with factory parking sensors, adaptive cruise control radar, or front-facing cameras.
If you prefer a cleaner, more integrated look, mounting the lights behind the grille is an excellent option that protects the light pods from physical damage and theft. The primary trade-off is that the grille mesh can block a portion of the light output and may slightly restrict airflow to the radiator. If you choose this route, verify that there is sufficient clearance behind the grille and that the lights do not press against the radiator fins or air conditioning condenser.
Regardless of the location, the mounting surface must be structurally robust. Attaching heavy light pods to thin, flexible plastic bumper covers will cause the lights to vibrate constantly while driving. This vibration not only creates a distracting, flickering beam pattern on the road that causes eye strain, but it also puts mechanical stress on the light brackets and internal components. Look for solid metal mounting points, such as the bumper reinforcement beam, frame extensions, or dedicated metal brackets designed for your specific vehicle model.
Step-by-Step Physical Mounting
Once you have selected the ideal location, the physical installation begins with precise marking and preparation. Place a strip of masking tape over the mounting area to protect the paint and allow you to mark your drill points clearly with a pen or marker. Double-check the alignment of the marks to ensure the lights will be symmetrical and level.
Before drilling any holes, carefully inspect the area behind the mounting surface. Use a flashlight to verify that there are no hidden wiring harnesses, air conditioning lines, radiator hoses, or safety sensors directly behind your drill path. Puncturing any of these components can lead to expensive repairs and safety hazards.
Start by drilling a small pilot hole using a 3mm or 4mm drill bit, which prevents the larger drill bit from slipping and scratching the surrounding surface. Once the pilot hole is complete, switch to the final drill bit size required for your mounting bolts. Keep the drill steady and perpendicular to the surface to ensure a clean, straight hole.
After drilling, it is crucial to protect the exposed metal from corrosion, especially in humid and tropical climates where rust can develop rapidly. Clean away any metal shavings and apply a small amount of rust-preventive primer or touch-up paint to the bare edges of the hole. Allow the paint to dry completely before proceeding with the hardware installation.
Position the mounting brackets over the holes and secure them using high-quality stainless steel bolts, flat washers, and lock washers. Applying a medium-strength thread-locking fluid to the bolt threads is highly recommended to prevent the hardware from backing out due to engine vibrations and rough road conditions. Tighten the brackets securely, then attach the mini driving light pods to the brackets, leaving the pivot bolts slightly loose so you can adjust the beam angle later.
Safe Wiring and Relay Installation
The electrical portion of the installation is where safety and reliability are paramount. Splicing auxiliary lights directly into your vehicle’s factory headlight wiring is a common mistake that can overload the original circuit, melt wires, or trigger error codes on modern computer-controlled electrical systems. To avoid these risks, you must use a dedicated 12-volt automotive relay and an inline fuse.
A relay acts as an electrically operated switch, allowing a low-current signal from your cabin switch to control the high-current power drawn directly from the battery. This setup keeps the high-current wiring short and safely contained within the engine bay, while only low-current wires enter the passenger cabin. The inline fuse must be placed on the main power wire as close to the positive battery terminal as possible to protect the entire circuit from short circuits.
When routing the wiring harness, plan a path that keeps the wires away from high-heat components like the exhaust manifold, turbocharger, and radiator, as well as moving parts like the steering column, suspension components, or cooling fans. Encasing the entire harness in protective split-loom tubing shields the wires from sharp metal edges and environmental wear. Secure the loom with zip ties every 6 to 8 inches to prevent sagging or shifting over time.
Follow this standard connection sequence to wire your system safely:
- Connect a heavy-gauge wire (typically 14 AWG or 16 AWG) from the positive battery terminal to the inline fuse holder. Do not insert the fuse into the holder until the entire installation is complete.
- Connect the other side of the fuse holder to terminal 30 of the relay, which serves as the main power input.
- Connect terminal 87 of the relay to the positive power wires of your mini driving lights. If your lights have dual-color beams (such as yellow for low beam and white for high beam), you may need a specialized multi-position switch and a dual-output relay setup to control each circuit independently.
- Connect the negative ground wires of the mini driving lights directly to a clean, unpainted metal chassis ground point or to the negative battery terminal.
- Route a thin trigger wire (typically 18 AWG) from the cabin switch through a rubber firewall grommet into the engine bay, and connect it to terminal 86 of the relay.
- Connect terminal 85 of the relay to a solid chassis ground to complete the relay's internal control circuit.
- Power the cabin switch from an ignition-switched source inside the vehicle, such as the accessory circuit or cigarette lighter fuse, using an add-a-circuit fuse tap. This ensures that the auxiliary lights can only turn on when the vehicle's ignition is active, preventing accidental battery drain when the vehicle is parked.
Beam Alignment and Final System Testing
With the physical mounting and electrical wiring complete, the final phase involves testing the system and aligning the light beams to ensure optimal road illumination without blinding other drivers. Before inserting the fuse or turning on the switch, perform a quick safety check using a multimeter. Set the meter to measure resistance (ohms) and verify that there is no continuity between the positive power lines and the vehicle chassis, which confirms there are no short circuits in your wiring.
Once you verify the circuit is safe, insert the appropriate fuse into the inline fuse holder and reconnect the negative battery terminal. Sit in the driver’s seat, turn the ignition to the accessory position, and flip the cabin switch. The mini driving lights should illuminate instantly and steadily. Listen for a distinct clicking sound from the relay under the hood, which indicates that the electromagnetic switch is functioning correctly. If the lights flicker or fail to turn on, turn off the switch immediately and inspect your ground connections and wire splices.
To align the light beams correctly, park your vehicle on a flat, level surface facing a light-colored wall at a distance of approximately 25 feet (7.5 meters). Measure the height from the ground to the center of your mini driving lights, and mark this height on the wall with a piece of tape. Turn on the mini driving lights and observe the beam pattern on the wall.
Adjust the light pods manually so that the brightest portion of the beam and its sharp upper cutoff line sit at least 2 to 4 inches below the marked height on the wall. This downward angle ensures that the light projects onto the road surface ahead of you rather than directly into the eyes of oncoming motorists. If your lights feature a yellow low beam, align this beam to cover the immediate foreground, while the white high beam should project further down the road for high-speed driving when no other vehicles are nearby.
Once you are satisfied with the alignment, carefully tighten the pivot bolts on the light brackets to lock the pods securely in place. Double-check that all wiring under the hood and behind the dashboard is neatly organized, free of tension, and secured with zip ties so that nothing can catch on moving parts or road debris.
Knowing When to Call a Professional
While installing mini driving lights is a rewarding DIY project, certain vehicle configurations and technical challenges require the expertise of a professional automotive electrician. Modern vehicles are increasingly complex, and attempting to modify their electrical systems without the proper knowledge can lead to costly complications.
If your vehicle utilizes a complex CAN bus (Controller Area Network) system, traditional methods of tapping into factory wires for a switch trigger signal can trigger dashboard warning lights, disable safety features, or even damage sensitive electronic control modules. A professional installer can safely integrate the auxiliary lights using specialized CAN bus interfaces or isolated wiring harnesses that do not interfere with the vehicle’s computer network.
Additionally, you should seek professional assistance if the installation requires cutting structural body panels, modifying crash bars, or working in close proximity to airbag sensors, which are typically identified by yellow-sleeved wiring harnesses. Accidentally disturbing these sensors can disable your vehicle’s safety systems or cause accidental airbag deployment.
Finally, if you are unsure about calculating the correct fuse ratings, selecting the appropriate wire gauge for your specific light wattage, or identifying safe ignition-switched power sources under the dashboard, it is always best to consult a certified professional. Investing in expert installation ensures your auxiliary lights perform reliably, comply with all safety standards, and protect your vehicle’s warranty.
Frequently Asked Questions (FAQ)
Can I wire mini driving lights directly to the battery without a relay? (FAQ)
No, wiring high-draw auxiliary lights directly to a cabin switch without a relay is highly discouraged and poses a significant safety risk. Standard automotive switches are designed to handle very low current and cannot safely manage the high electrical load required by powerful LED driving lights. Running high current directly through a basic switch will cause it to overheat, melt, and potentially spark a fire behind your dashboard. A relay acts as a heavy-duty switch that safely handles the high current under the hood, allowing you to use a safe, low-current switch inside the cabin to control the system.
Do I need to update my vehicle's registration after installing driving lights? (FAQ)
In the Philippines, standard installations of mini driving lights that comply fully with Land Transportation Office (LTO) guidelines generally do not require you to update your vehicle’s registration. These guidelines typically allow up to two auxiliary lights, provided they are mounted below the headlight level, point downwards, and operate on an independent switch. However, if you install large light bars, make significant structural modifications to your bumper, or add multiple sets of auxiliary lights, you should consult your local LTO office to verify current compliance requirements and avoid potential fines or registration issues during roadside inspections.
Community discussion
Share your experience or ask a question. Comments are reviewed before publication.