
Installing a new hub cup cover on your Bajaj RE is a straightforward maintenance task that keeps your three-wheeler looking sharp while protecting critical wheel components from road debris. In the tropical climate of the Philippines, where heavy monsoon rains, muddy terrain, and dusty roads are common, these covers serve as a vital barrier against moisture and grit. Properly mounting the cover ensures it stays securely attached during daily commutes, preventing it from flying off on uneven provincial roads or busy city streets. By taking a systematic approach to alignment and fastening, you can complete this installation quickly without risking damage to the wheel hub or the new cover itself.
Preparation and Safety Checks Before Installation
Before beginning the installation, you must verify that your replacement hub cup cover is fully compatible with your specific Bajaj RE model and year. Because wheel designs, dimensions, and mounting interfaces can vary between different production years and trim levels, never assume compatibility based solely on a generic product category or broad online listing. Check the product packaging, part number, or manufacturer label against your vehicle’s official documentation to confirm an exact match. Using an ill-fitting cover can lead to poor retention, causing the part to detach while driving, which poses a safety hazard to other motorists.
Next, gather the necessary tools and cleaning supplies to ensure a smooth workflow. You will need a clean microfiber cloth, mild soap, water, and a non-marring plastic pry tool if you are removing an old snap-on cover. Avoid using metal screwdrivers or harsh steel levers, as these can easily scratch the painted finish of your wheels or crack the plastic tabs of the new cover. If your specific Bajaj RE model utilizes threaded fasteners or a central nut to secure the hub cover, consult your owner’s manual to identify the correct wrench or socket size required, ensuring you do not strip the hardware.
Products mentioned in this guide
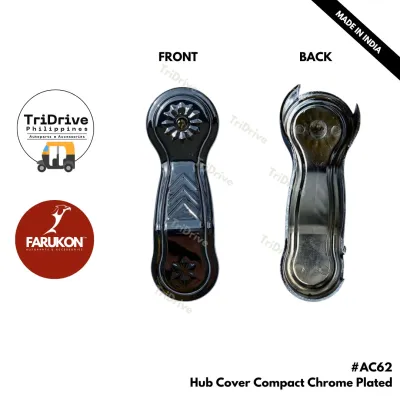
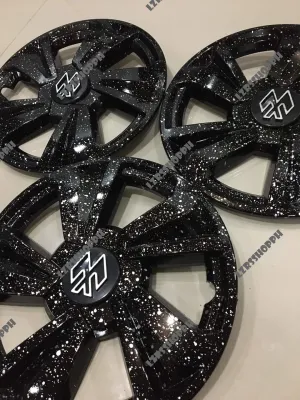
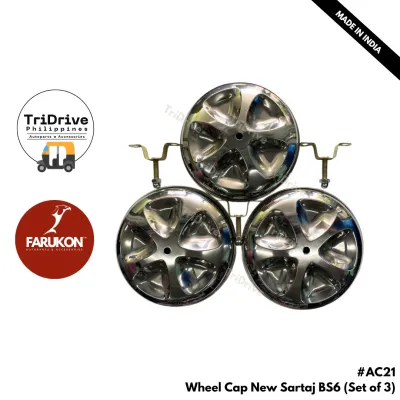
Prices are valid at publication and may change. Please refer to the product page for the latest price.
Safety must be your top priority when working around any vehicle wheel. Park your Bajaj RE on a flat, level concrete surface rather than a slope or loose gravel to prevent the vehicle from rolling. Engage the parking brake firmly and place wheel chocks behind the opposite tires for added stability. While you do not necessarily need to jack up the vehicle to replace a simple hub cup cover, ensuring the target wheel is fully accessible and stable is crucial before you begin applying any physical pressure.
Removing the Old or Damaged Hub Cup Cover
To begin the replacement process, carefully inspect how the existing hub cup cover is attached to the wheel. Bajaj RE models may feature different retention systems depending on their year of manufacture, including snap-on tension clips, small retaining screws, or a central mounting nut. Identifying this mechanism beforehand prevents you from pulling or prying on a bolted component, which could warp the wheel rim or strip the mounting threads. If you notice screws or bolts, use the appropriate hand tool to unthread them completely, storing the hardware in a secure container so it does not get lost.

For snap-on designs, insert your non-marring plastic pry tool gently between the edge of the cover and the wheel rim. Work your way slowly around the circumference, applying gradual outward pressure rather than forcing it off from a single point. This distributed prying method prevents the plastic clips from snapping and protects the wheel hub from bending. If the cover feels stuck due to accumulated road grime or rust, do not resort to heavy hammer blows; instead, apply a small amount of water or a label-authorized mild cleaner to help lubricate the contact points.
Once the old cover is removed, you will likely find a buildup of dirt, brake dust, and road salt on the exposed wheel hub. Use a soft brush, mild soap, and water to clean the mating surface thoroughly, ensuring you do not spray high-pressure water directly into the wheel bearings or brake assemblies. Removing this debris is essential, as any trapped grit can prevent the new hub cup cover from seating flush against the wheel, leading to misalignment and eventual loosening. Allow the area to dry completely, and inspect the hub for any signs of structural damage or deep corrosion before proceeding.
Step-by-Step Installation of the New Hub Cup Cover
With the wheel hub clean and dry, position yourself directly in front of the wheel to begin installing the new hub cup cover. Carefully align the cover with the hub, paying close attention to any specific notches, cutouts for the tire valve stem, or alignment tabs. If your Bajaj RE uses a snap-on cover, failing to align the valve stem cutout with the actual valve stem will pinch the stem, potentially causing a sudden loss of tire pressure or damaging the valve. Double-check that all mounting clips or screw holes line up perfectly with their corresponding slots on the wheel before applying any pressure.
Once aligned, use the palms of your hands to apply even, moderate pressure around the outer edges of the cover. For snap-on designs, work your way in a circular pattern, pressing firmly until you hear or feel the clips click securely into place. If your cover uses threaded fasteners, insert them by hand first to avoid cross-threading, then use a hand tool to tighten them in an alternating, star-like pattern. This ensures the cover seats evenly across the entire hub surface, preventing warping and reducing the risk of the fasteners backing out under vibration.
Never use heavy metal hammers, mallets, or excessive physical force to force a stubborn hub cup cover into place. If the cover does not seat easily, stop immediately and pull it back off to inspect the rear clips and the wheel hub. Forcing a misaligned cover will break the plastic retention tabs or deform the mounting interface, rendering the new part useless. Look for hidden debris, bent metal tabs on the wheel, or a mismatch in part dimensions, and resolve these issues before attempting to press the cover on again.
Post-Installation Verification and Maintenance
After securing the new hub cup cover, perform a thorough physical and visual inspection to verify the quality of the installation. Gently tug on different edges of the cover to ensure it does not wobble, slide, or pull away from the wheel hub easily. Inspect the perimeter visually to confirm that the cover sits completely flush against the wheel rim with no visible gaps or uneven spacing. A flush fit is critical in the Philippines’ tropical environment, as any gaps can allow rainwater and road grime to accumulate behind the cover, accelerating rust on the steel wheel components.
Next, take your Bajaj RE for a brief, low-speed test drive in a safe, quiet area such as a residential street or empty parking lot. Listen closely for any unusual rattling, clicking, or buzzing sounds coming from the wheel, which could indicate a loose cover or a pinched valve stem. After driving a short distance, park the vehicle safely, engage the parking brake, and inspect the cover once more to ensure it has not shifted, loosened, or vibrated out of its original position.
To keep your hub cup covers secure over the long term, integrate a quick inspection into your regular vehicle maintenance routine. Every time you wash your three-wheeler or check your tire pressures, take a moment to press on the covers and verify their tightness. Over time, constant vibrations from rough roads and exposure to high engine heat can cause plastic clips to fatigue or fasteners to back out. Catching a loose cover early allows you to adjust or tighten it before it detaches completely on the road, saving you the cost of a replacement.
Frequently Asked Questions (FAQ)
Can I drive my Bajaj RE without a hub cup cover?
Yes, your Bajaj RE can physically operate without a hub cup cover, as it is primarily a protective and cosmetic accessory rather than a structural component. However, driving with an exposed wheel hub leaves critical parts, such as the wheel bearings, spindle nut, and brake components, vulnerable to direct exposure from dirt, water, and road debris. In the Philippines, where heavy rains and flooded streets are common during the wet season, running without a cover can accelerate rust and lead to premature wear of these vital mechanical parts. Additionally, keeping your vehicle complete and well-maintained helps ensure it passes local roadworthiness inspections and maintains its resale value.
What should I do if the new cover does not fit the wheel hub?
If the new hub cup cover does not fit, stop the installation immediately and do not attempt to force it onto the wheel. First, verify the part number on the packaging against your Bajaj RE’s specific model year and wheel specifications, as minor design updates over different production runs can affect fitment. If you have confirmed that the part number is correct but it still fails to seat, inspect your wheel hub for any pre-existing damage, such as bent rims, warped mounting tabs, or heavy rust buildup that might be obstructing the cover. If the hub is damaged or if you are unsure of the fitment, consult your local authorized parts supplier or a qualified mechanic to inspect the wheel assembly before proceeding.
Community discussion
Share your experience or ask a question. Comments are reviewed before publication.