
Mounting a reliable phone holder on your motorcycle is essential for navigation, whether you are commuting through busy city streets or riding along provincial highways. Installing the Motowolf CP Holder V3 securely requires careful preparation, precise alignment, and regular maintenance to ensure your device remains safe from road vibrations and tropical weather elements. By following a systematic installation process, you can protect both your smartphone and your motorcycle’s handlebar from unnecessary wear and tear.
Preparing Your Motorcycle and Gathering Tools
Before attempting to mount the accessory, verifying the physical dimensions of your handlebar is a critical first step. Most standard motorcycle handlebars feature a diameter of 22mm (7/8 inch) or 28mm (1-1/8 inch) at the clamping area. You should consult your motorcycle’s owner’s manual or use a vernier caliper to measure the exact outer diameter of your handlebar to ensure it falls within the compatible range of the mount.
Gathering the correct tools beforehand prevents delays and protects the hardware from damage. The product typically includes the basic hex keys required for installation, but using a high-quality, dedicated set of Allen wrenches can provide better leverage and reduce the risk of stripping the bolt heads. Additionally, keep a clean microfiber cloth and a mild degreasing agent, such as isopropyl alcohol, nearby to prepare the mounting surface.
Products mentioned in this guide
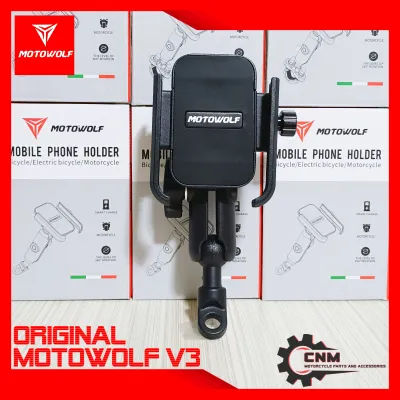
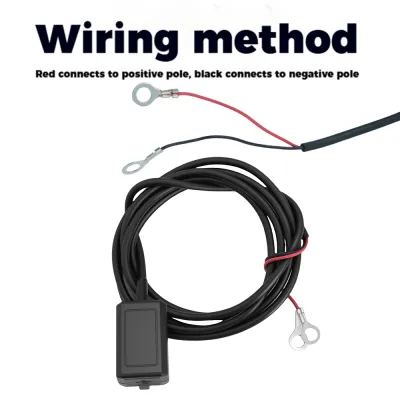
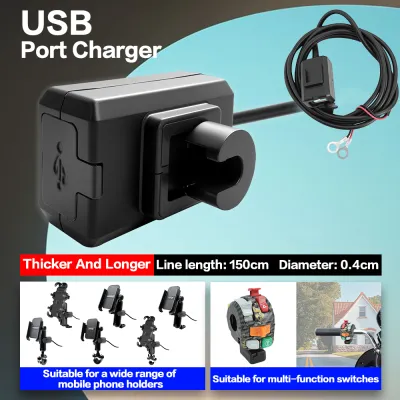
![[Original]MOTOWOLF CELLPHONE HOLDER FULL ALLOY / UNIVERSAL 360° ROTATABLE MOBILE PHONE HOLDER FOR MOTORCYCLE 1PC](https://img.lazcdn.com/g/p/3ffb81c7b3f0a60d6b62807ce3e2aa24.jpg_400x400q80.jpg_.webp)
Prices are valid at publication and may change. Please refer to the product page for the latest price.
A clean mounting surface is essential for preventing the bracket from rotating under the weight of your phone or during sudden stops. Road grime, chain lube fling, wax residues, and moisture can create a slippery film on the metal handlebar. Thoroughly wipe down the target installation area with your cleaning solution and allow it to dry completely before proceeding.
Finally, review the manufacturer’s instruction sheet to identify any specific warnings regarding spacer configurations. The kit often includes different thicknesses of rubber or plastic inserts designed to accommodate various handlebar sizes. Selecting the correct spacer combination ensures a snug fit without gaps that could compromise the structural integrity of the clamp.
Step-by-Step Installation Guide for the Motowolf CP Holder V3
Begin the physical installation by wrapping the protective rubber or silicone anti-slip pad around the designated section of your handlebar. This pad serves a dual purpose: it increases friction to prevent the mount from rotating and acts as a protective barrier to shield your handlebar’s paint or anodized finish from metal-on-metal contact. Ensure the pad is flat, unwrinkled, and positioned exactly where you want the mount to sit.

Next, open the mounting clamp of the holder and position it over the rubber pad. Align the clamp halves carefully, ensuring that the rubber pad remains fully seated underneath and does not get pinched or pushed out of place. Insert the mounting bolts into the clamp holes by hand, turning them clockwise for a few threads to ensure they are properly aligned and not cross-threaded.
Before tightening the bolts completely, sit on your motorcycle in your normal riding position to adjust the viewing angle and rotation of the phone holder. You want the screen to be easily readable at a glance without requiring you to tilt your head excessively or take your eyes off the road for more than a split second. Rotate the bracket on the handlebar and adjust the ball joint or pivot arm until the positioning is optimal.
Once the desired angle is achieved, begin tightening the clamp bolts. It is vital to tighten the bolts evenly and in an alternating pattern—tightening one bolt a few turns, then switching to the other—to ensure the clamp applies equal pressure across the handlebar. Uneven tightening can warp the bracket, strip the threads, or apply concentrated stress points that could crush or deform lightweight aluminum handlebars.
Tighten the fasteners until they are snug and the mount cannot be rotated by hand. If you have access to a torque wrench, refer to the manufacturer’s specifications for the correct torque value, which is typically quite low for handlebar accessories. Avoid using excessive force or extension bars on your wrenches, as over-tightening can easily strip the aluminum threads of the bracket or snap the steel bolts.
During this process, pay close attention to how the hardware feels as you turn it. If you encounter sudden, stiff resistance before the bolt is fully inserted, or if the bracket does not sit flush against the handlebar spacer, stop immediately. These are clear indicators of cross-threading or misalignment; forcing the bolt further will permanently damage the threads, requiring a complete replacement of the mounting hardware.
Securing Your Phone and Performing Safety Checks
With the bracket securely mounted to the handlebar, you can now adjust the holder’s clamping arms to accommodate your specific smartphone. Place your phone—complete with the protective case you intend to use while riding—into the cradle. Adjust the side arms or tensioning screws until they firmly grip the edges of your device, ensuring there is no play or sliding movement.
As you position the phone, verify that the clamping arms do not press against any side buttons, such as the volume controls or the power button, which could cause the phone to restart or malfunction during your ride. If your phone has a thick rugged case, double-check that the corner guards of the holder fully wrap around the front edge of the device to prevent it from slipping out forward.
Next, perform a comprehensive clearance check to ensure the newly installed mount does not obstruct your view of the instrument cluster, gear indicators, or warning lights. It is equally important to verify that the phone and bracket do not block or interfere with the brake fluid reservoir, as you must maintain easy access to check fluid levels and perform maintenance.
Before starting the engine, perform a steering lock-to-lock test by turning the handlebars fully to the left and then fully to the right. Watch the phone holder closely to ensure it does not contact the fuel tank, windscreen, fairings, or any tank bags. Additionally, verify that the mount does not pinch, pull, or rub against any control cables, electrical wiring harnesses, or brake lines throughout the entire range of motion.
Conclude your safety inspection with a physical shake test. Grab the phone holder firmly and attempt to wiggle it in all directions; there should be zero play or movement at the handlebar clamp. Tap the corners of your secured phone to confirm it is locked tightly within the cradle and cannot vibrate loose under simulated road conditions.
Maintaining and Inspecting Your Phone Mount
Motorcycle engines, particularly single-cylinder engines common in scooters and underbones, generate high-frequency vibrations that can gradually loosen threaded fasteners over time. It is highly recommended to check the tightness of all mounting bolts after your first few rides, and subsequently incorporate this check into your weekly pre-ride inspection routine. A quick turn with an Allen key ensures the mount remains securely anchored.
The harsh tropical climate in the Philippines, characterized by intense sunlight, high UV exposure, and heavy seasonal rainfall, can accelerate the degradation of rubber and plastic components. Periodically inspect the rubber anti-slip pads and any plastic dampeners or adjustment knobs for signs of cracking, dry rot, or loss of flexibility. Replacing worn rubber pads promptly prevents the mount from slipping and protects your handlebar from scratches.
Keep the clamping mechanism clean by regularly washing away road dust, mud, and salt residue, especially if you ride near coastal areas or on unpaved roads. Use a soft brush and clean water to clear debris from the threads and moving joints, then apply a small drop of light lubricant to the adjustment screws to maintain smooth operation and prevent rust.
If you observe any structural fatigue, such as hairline cracks in the metal bracket, stripped threads that can no longer hold tension, or severe play in the joints that cannot be tightened, discontinue use immediately. Attempting to ride with a compromised phone mount risks losing your device or, worse, distracting you during a ride; in such cases, replace the damaged components or consult a professional motorcycle mechanic for advice.
Frequently Asked Questions (FAQ)
Can I install the Motowolf CP Holder V3 on a handlebar with handguards?
Yes, installation is generally possible, but it requires careful evaluation of the available straight space on your handlebar. Handguards often clamp near the center of the handlebar, which can limit the flat surface area needed for the phone mount’s bracket. Measure the remaining straight section between your grip controls and the handguard mount to ensure there is sufficient clearance for the clamp.
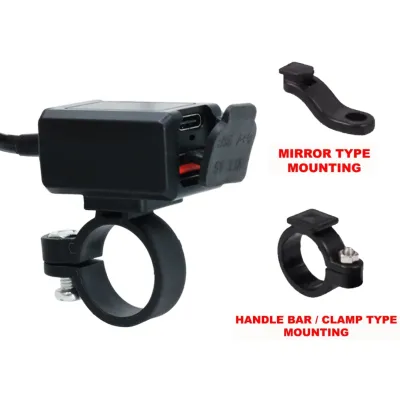
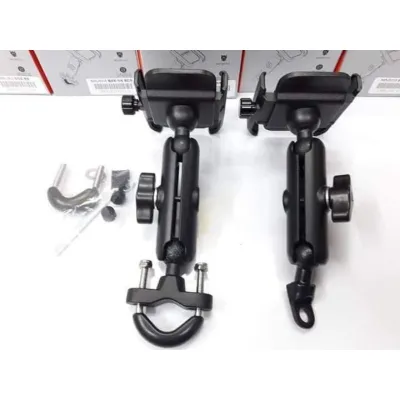
If space is too restricted, you may need to slightly relocate the handguard clamp inward, provided it does not interfere with your control cables or levers. Alternatively, if the handlebar mounting space is completely occupied, consider using a mirror-stem mounting adapter instead of the handlebar clamp version, which allows you to secure the holder directly to your motorcycle’s side mirror mount. Never attempt to bend, cut, or structurally modify your handguards or handlebars to force the phone holder to fit, as this can compromise your motorcycle’s safety and structural integrity.
Will the holder damage my motorcycle's handlebar finish?
The phone holder itself will not damage your handlebar’s finish as long as it is installed correctly using the provided protective components. The kit includes rubber or silicone spacers that act as a protective barrier between the metal clamp and the handlebar. These spacers prevent direct metal-on-metal contact, which is the primary cause of scratches, paint chipping, and anodization wear.
To ensure maximum protection, you must thoroughly clean the handlebar surface to remove any abrasive dirt, sand, or grit before mounting the clamp. If abrasive particles are trapped beneath the rubber pad, the vibrations from riding can grind them into the handlebar’s finish over time. Periodically loosen the mount during your deep cleaning sessions to inspect the condition of the protective pads and wipe away any accumulated dust.
Community discussion
Share your experience or ask a question. Comments are reviewed before publication.