
Installing a universal wheel hub cap cover is a highly effective and budget-friendly way to refresh your vehicle’s appearance while providing a basic layer of protection for your steel wheels. Whether you are looking to cover up rusted steel rims or simply want to customize your car’s aesthetic, a set of hub caps can completely transform your vehicle’s profile. While a complete set of universal covers is an affordable upgrade—often costing between ₱800 and ₱2,500 at local automotive accessory shops or online marketplaces—installing them incorrectly can lead to damaged parts, scratched rims, or covers flying off while driving.
In the tropical climate of the Philippines, where vehicles frequently encounter heavy monsoon rains, flooded streets, and rough road conditions, ensuring a secure and proper fitment is essential. Before purchasing or attempting to install any aftermarket wheel accessories, you must verify your vehicle’s model, year, wheel interface, and exact dimensions by consulting your vehicle’s official documentation. If you are unsure about compatibility, road legality, wheel balance, or the safety impact of modifying your wheels, always seek advice from a qualified automotive professional before proceeding.
Preparation and Tools Needed for Hub Cap Installation
Gathering the correct tools and preparing your wheels beforehand is the key to a smooth, damage-free installation. You do not need specialized mechanical equipment for this project, but using the wrong tools can easily scratch your wheels or crack the plastic clips on your new covers. Prepare a bucket of warm water mixed with a mild, non-abrasive car wash soap that is explicitly labeled safe for your wheel’s finish. You will also need a clean microfiber cloth, a soft sponge, and, if permitted by the manufacturer’s instructions, a soft rubber mallet.
Products mentioned in this guide
16 Lazada user ratings
Hirap na talaga ang buhay ngayon. Dati tuwing naggogrocery ako yung 500 pesos ko meron na kong sampung kilong bigas, isang kilong asukal, da…Read full reviewShow less
Hirap na talaga ang buhay ngayon. Dati tuwing naggogrocery ako yung 500 pesos ko meron na kong sampung kilong bigas, isang kilong asukal, dalawang lata ng gatas at chocolate drink tapos may kape pa. May kasama pang tig aapat na lata ng corned beef, beef loaf at sardinas tsaka may pahabol pang isang kilo na spaghetti pasta at may kasama pang sauce. Ngayon hindi na pwede. Dami nang CCTV.🤣🤣🤣
nice. with few little scratches.
I want to return my item
nice and very useful
40 Lazada user ratings
nice na install na fit na fit ciasa suzuki ertiga 2017 tnks saler.
i order 15 inch but arrived 16inch hayyyysssss seller
Easy to install,
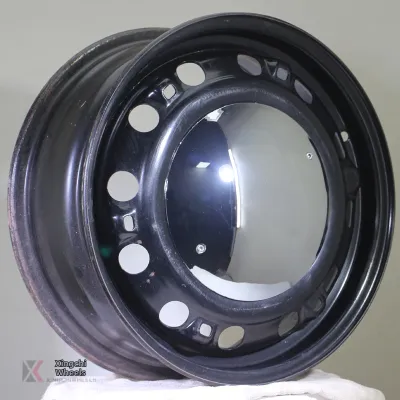
3 Lazada user ratings
🛠️Durability:good and quality 🎨Design:nice
akala ko 4pcs isang peraso lng pla to
413 Lazada user ratings
Great value for money, highly recommended!, Easy to install, love the rim stickers!, Excellent product, exceeded my expectations!, Great des…Read full reviewShow less
Great value for money, highly recommended!, Easy to install, love the rim stickers!, Excellent product, exceeded my expectations!, Great design, adds a stylish touch!, Perfect fit for my Mitsubishi car!,
Great design, adds a stylish touch!, Perfect fit for my Mitsubishi car!, Easy to install, love the rim stickers!, High-quality materials use…Read full reviewShow less
Great design, adds a stylish touch!, Perfect fit for my Mitsubishi car!, Easy to install, love the rim stickers!, High-quality materials used, very durable!,
High-quality materials used, very durable!, Excellent product, exceeded my expectations!, Great value for money, highly recommended!,
Great value for money, highly recommended!, Excellent product, exceeded my expectations!, Performance:maganda dikit at quality
Easy to install, love the rim stickers!, High-quality materials used, very durable!,
Prices are valid at publication and may change. Please refer to the product page for the latest price.
Strictly avoid using harsh metal tools such as screwdrivers, metal claw hammers, or pry bars during the installation process. These tools concentrate force on small areas, which can easily chip the paint or clear coat on your rims, exposing the underlying metal to moisture and rapid corrosion. Furthermore, metal tools can easily shatter the brittle plastic retention clips on the back of the hub caps, rendering them useless before they are even mounted.
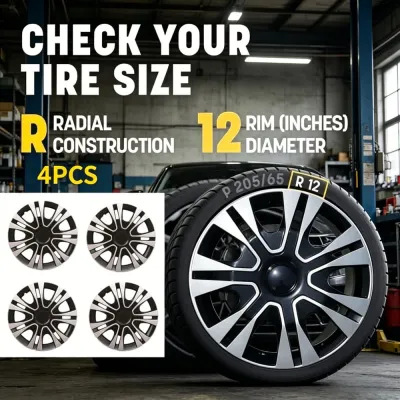
Before you begin cleaning, inspect the packaging of your universal wheel hub cap cover set. Verify that the size matches your tire’s sidewall markings; for example, a tire marked with “R14” requires a 14-inch hub cap. Read the manufacturer’s instructions to identify if the covers use separate metal retention rings or built-in plastic clips, and note any specific orientation requirements. Thoroughly scrub the wheel surface and the inner lip of the rim to remove heavy brake dust, road grime, and mud. If you trap abrasive debris behind the new hub cap, it will act like sandpaper, grinding against your wheel finish as you drive.
Step-by-Step Installation Process for Universal Hub Caps
To install your universal hub caps securely without cracking the plastic, follow a systematic physical installation process. If your hub caps utilize separate metal expansion rings, your first step is to install the ring into the plastic clips on the back of the cover. Locate the curved notch or bend in the metal ring; this notch is specifically engineered to clear the tire’s valve stem. Align this notch perfectly with the valve stem cutout on the plastic hub cap cover. Failing to align these parts will cause the metal ring to press directly against the rubber valve stem, which can lead to slow air leaks or catastrophic stem failure while driving.

Once the retention ring is properly seated on the back of the cap, position the cover against the wheel. Align the plastic valve stem cutout on the hub cap directly over the actual valve stem on your wheel rim. This serves as your primary alignment anchor. Ensure that the plastic retention clips on the back of the cover are positioned to slide cleanly inside the outer lip of the steel wheel, clearing any wheel weights or lug nuts.
Begin securing the cap by applying even pressure with your hands. Many installers find it easiest to start at the bottom of the wheel, holding the lower edge of the cap in place with their knees or one hand, and then working their way upward. Alternatively, you can start at the top and work downward. Use the palms of your hands to press the clips firmly into the rim lip, moving symmetrically down both sides of the cover. You should hear a series of distinct snaps as the plastic clips slip past the outer lip of the metal rim.
Never force one side of the hub cap completely into the wheel while the other side is still protruding. This uneven distribution of force puts immense stress on the plastic clips, causing them to bend or snap. If the last few clips are stubborn and refuse to slide in, do not strike them with your fist or a metal tool. Instead, double-check that the metal retention ring has not slipped out of its groove. Only if the manufacturer’s instructions explicitly permit it, you may use a soft rubber mallet wrapped in a microfiber cloth to gently tap the outer edge of the cap until it seats fully.
Verifying Fitment and Ensuring Secure Attachment
After snapping the hub cap into place, you must verify that it is securely attached before taking your vehicle onto public roads. A loose hub cap can easily detach at high speeds, posing a severe safety hazard to other motorists, cyclists, and pedestrians on busy thoroughfares like EDSA or provincial highways.
Begin with a thorough visual inspection. Walk around the wheel and look closely at the seam where the outer edge of the wheel hub cap cover meets the metal rim. The cap must sit completely flush against the wheel circumference, with no visible gaps, uneven spacing, or protruding plastic clips. If one side of the cap is sticking out even slightly, it is not fully seated and must be adjusted.
Next, perform a physical pull test. Grasp the outer edges of the hub cap at opposite sides—such as the 9 o’clock and 3 o’clock positions—and pull outward with moderate force. The cover should feel solid and show zero play, sliding, or movement. Repeat this test at the 12 o’clock and 6 o’clock positions. If the cap wiggles or pulls away from the rim easily, the retention clips are not fully engaged, or the expansion ring does not provide enough outward tension.
Finally, listen for signs of improper fitment. Tap the face of the installed hub cap with your knuckles. If you hear a hollow, loose rattling sound, the cap is not making proper contact with the wheel surface. Rattling indicates that the cap will vibrate excessively while driving, which will eventually wear down or break the plastic clips. If you detect any rattling or loose fitment, remove the cap immediately, inspect the clips for damage, and re-evaluate the compatibility of the cover with your specific wheel design.
Common Installation Mistakes and How to Avoid Them
One of the most frequent mistakes is attempting to force a universal hub cap onto an incompatible wheel design. While labeled “universal,” these covers are primarily designed for standard, stamped steel wheels. Many modern alloy wheels feature unique spoke contours, protruding center hubs, or shallow outer lips that prevent universal plastic clips from gripping securely. Forcing a plastic cover onto an incompatible alloy wheel will bend the clips, scratch the alloy finish, and ultimately ruin the cover. Always verify that your wheel type matches the hub cap’s intended application before purchase.
Another common error is failing to clean heavy brake dust, grease, and road debris from the hub area before attempting installation. Brake dust contains highly abrasive metallic fibers from brake pads. If left on the rim lip, this grime acts as a lubricant, preventing the plastic clips from making direct, high-friction contact with the metal. Over time, the centrifugal forces of driving, combined with road vibrations, will cause the lubricated clips to slide out of place, resulting in a lost hub cap. Taking a few minutes to scrub the inner lip of the rim ensures a clean, high-traction surface for the clips to bite into.
Lastly, using improper tools during installation or removal is a guaranteed way to damage your vehicle. It can be tempting to use a flathead screwdriver to pry a stubborn clip into place or a standard metal hammer to force a tight fit. However, metal tools will instantly chip the paint or clear coat of your wheels, exposing them to moisture and rust. They will also concentrate force on a small area of the plastic hub cap, causing it to crack or shatter. Stick strictly to hand pressure and, only when authorized, a soft rubber mallet.
Maintenance and Care for Installed Wheel Hub Caps
Maintaining your wheel hub cap covers ensures they remain visually appealing and securely attached for years. Because hub caps are positioned close to the ground, they are constantly exposed to harsh environmental factors, including road grime, brake dust, and intense tropical heat and humidity.
To clean your hub caps, use only mild, non-abrasive household dish soap or specialized automotive car wash soap. Avoid harsh chemical cleaners, acid-based wheel sprays, or abrasive scrubbing pads. These harsh agents can strip away the clear coat or silver paint on plastic hub caps, leading to rapid fading, peeling, and discoloration. A soft sponge or microfiber wash mitt is all that is needed to keep them clean.
Regularly inspect the physical condition of your hub caps. Every few months, or after driving through deep potholes and rough provincial roads, take a moment to check each wheel. Look for hairline cracks in the plastic face and gently wiggle the caps to ensure the clips have not become brittle or loose. Over time, exposure to engine heat and road vibrations can degrade plastic clips, making them prone to snapping.
There are times when you must safely remove the hub caps. During tire rotations, brake servicing, or deep wheel cleanings, the caps must be taken off to prevent damage from heavy shop tools. To remove them safely without scratching your rims, use a plastic trim removal tool or wrap a flathead screwdriver in a thick microfiber cloth. Insert the tool gently under the edge of the cap near a clip and pry outward slowly, working your way around the perimeter until the cap pops free. This prevents trapped moisture and corrosive brake dust from building up behind the cover.
Frequently Asked Questions (FAQ)
Will universal wheel hub caps fit my specific alloy wheels?
Universal hub caps are designed based on standard wheel diameters, such as 14-inch or 15-inch rims, but they do not guarantee a perfect fit for every wheel design. Many alloy wheels feature unique spoke contours, protruding lug nuts, or shallow outer lips that prevent universal plastic clips from seating properly. Before purchasing, you must check your wheel’s exact diameter (printed on your tire sidewall), the clearance of your center bore, and the shape of your wheel lip to ensure the universal clips have a flat, secure surface to grip.
What should I do if the hub cap keeps popping off while driving?
If a hub cap repeatedly comes loose, immediately remove it and inspect the back for bent, cracked, or missing plastic clips. Ensure that the metal retention ring is correctly installed and seated in the proper tension groove on the clips; many rings can be adjusted to a wider setting to increase outward pressure. If the clips are intact but the cap still will not stay secure, your specific wheel rim may lack the necessary inner groove or lip depth required for universal clips to lock onto. In this case, stop using the covers to prevent them from flying off on the road, and consult the manufacturer or a qualified automotive professional for compatible options.

Community discussion
Share your experience or ask a question. Comments are reviewed before publication.