
Upgrading a motorcycle exhaust is one of the most popular modifications among Filipino riders, driven by a desire for better heat management, weight reduction, and a more refined exhaust note. In the tropical climate of the Philippines, heavy monsoon rains, high humidity, and coastal salt air can rapidly corrode stock steel pipes, making high-quality stainless steel or carbon fiber aftermarket mufflers a practical upgrade. However, navigating the legal landscape established by the Land Transportation Office (LTO) is crucial to avoid heavy penalties, vehicle impoundment, or failed inspections. You can legally modify your motorcycle’s muffler by selecting an aftermarket system that meets local noise and emission limits, retains a functional baffle or decibel (DB) killer, and is certified for public road use.
Understanding LTO Rules for Motorcycle Exhaust Modifications
The Land Transportation Office (LTO) maintains strict oversight regarding vehicle modifications to ensure public safety, environmental protection, and order on public roads. Under national transport guidelines, unauthorized alterations that significantly increase a vehicle’s noise levels or toxic emissions beyond original manufacturer specifications are strictly prohibited. The regulatory focus is primarily on maintaining community peace and reducing the environmental impact of thousands of two-wheelers commuting daily through dense urban centers.
While riders often seek a deeper or louder exhaust note, noise pollution is a major regulatory target for both the LTO and local government units (LGUs). Many cities across the Philippines enforce localized “silent muffler” ordinances with active checkpoints, especially during late-night hours in residential zones. Because specific decibel limits and testing procedures can vary between LTO administrative orders and municipal ordinances, riders must verify the latest joint guidelines issued by the LTO and the Department of Environment and Natural Resources (DENR) before purchasing any aftermarket system.
Products mentioned in this guide
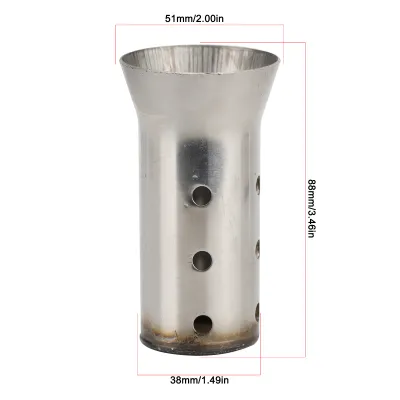
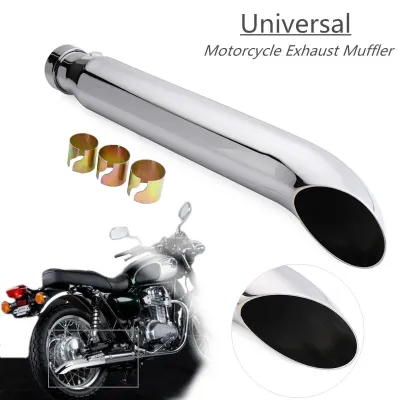
Prices are valid at publication and may change. Please refer to the product page for the latest price.
To stay compliant, it is helpful to distinguish between the three main categories of exhaust components available in the local market:
- Direct stock replacements: These are original equipment manufacturer (OEM) parts or aftermarket components built to identical factory specifications, offering guaranteed compliance and matching original emissions and sound profiles.
- Certified aftermarket upgrades: These systems are engineered by reputable brands to balance flow efficiency with sound suppression, utilizing internal baffling chambers and packing materials to keep sound levels within legal limits.
- Illegal modified pipes: Commonly referred to as open specs, straight pipes, or open headers, these systems lack internal packing, baffles, or catalytic converters, resulting in excessive noise and unregulated emissions that violate road laws.
Prioritizing road legality over raw performance gains or aggressive styling is the most sustainable approach to motorcycle ownership. A non-compliant exhaust might offer a minor boost in high-RPM horsepower, but the risk of being flagged at a highway checkpoint, receiving a citation, or having your motorcycle towed far outweighs these marginal benefits. By choosing a legally compliant system, you ensure hassle-free daily commutes, smooth annual registration renewals, and a respectful presence on shared community roads.
How to Select a Street-Legal Aftermarket Muffler
Selecting a compliant aftermarket muffler requires careful attention to product specifications rather than relying solely on visual appeal or brand reputation. You must verify the exhaust system’s compatibility with your motorcycle’s exact make, model, manufacturing year, and engine displacement. Exhaust systems are carefully engineered to match specific engine backpressure requirements; installing a muffler designed for a different engine type can degrade performance, increase fuel consumption, and potentially damage your exhaust valves.

When shopping at local motorcycle shops or online marketplaces, look for certified systems that carry clear homologation marks or manufacturer-issued certificates of compliance. Reputable international and local manufacturers often provide documentation proving their products meet strict noise and emission standards, such as European Union (ECE/EG) certifications or local regulatory approvals. Keeping these physical certificates or digital copies on hand provides immediate proof of compliance if your setup is questioned during an inspection.
A key component of any street-legal aftermarket muffler is the presence of internal sound-dampening mechanisms, such as baffles, spark arrestors, and removable DB killers. Baffles force exhaust gases through a series of chambers, dissipating sound energy while maintaining the necessary backpressure for low-end torque. If you choose a system with a removable DB killer, you must keep the insert securely bolted inside the muffler tip whenever the motorcycle is operated on public roads, saving the open configuration strictly for closed-circuit track days.
Always read the manufacturer’s product labels and packaging carefully to identify the system’s intended operating environment. Products explicitly labeled as “for closed-course competition use only,” “track use only,” or “off-road use only” are designed without the baffling necessary to meet public road standards. Purchasing and installing these track-oriented systems for daily commuting in the Philippines will almost certainly result in compliance issues at LTO checkpoints.
Essential Preparation and Safety Checks Before Installation
Before beginning any exhaust modification, you must establish clear safety boundaries and review your motorcycle’s original documentation. Always consult your motorcycle’s official service manual to understand the exact mounting locations, sensor routing, and torque specifications for your exhaust studs and frame bolts. If your planned installation requires custom frame welding, bracket fabrication, oxygen (O2) sensor bypasses, or complex engine control unit (ECU) remapping, stop immediately and seek the services of a qualified professional mechanic to ensure the structural and electronic integrity of your motorcycle.
If you are confident that the modification is a direct bolt-on process that matches your mechanical skill level, gather the necessary tools and safety equipment before starting:
- A high-quality socket set and combination wrenches matching your motorcycle's hardware (typically metric).
- A calibrated torque wrench to prevent over-tightening and stripping delicate engine block threads.
- A spring puller tool if you are installing a slip-on muffler held by tension springs.
- Penetrating oil to help loosen stubborn, heat-cycled factory bolts.
- Personal protective equipment, including heavy-duty heat-resistant gloves and safety glasses to protect against falling debris and rust particles.
Take the time to thoroughly inspect your new aftermarket muffler and all accompanying mounting hardware before disassembling your motorcycle. Check the muffler body, mid-pipe, clamps, springs, and hanger brackets for any signs of shipping damage, deep scratches, or manufacturing defects. Ensure that a brand-new exhaust gasket is included in your kit, as reusing a crushed or worn factory gasket is highly likely to cause dangerous exhaust leaks and loud, non-compliant ticking noises.
Step-by-Step Guide to Installing Your New Muffler
Follow this structured installation sequence to ensure your new street-legal muffler is mounted securely, aligned correctly, and sealed against gas leaks.
- Step 1: Cool down and secure the motorcycle
Never attempt to work on an exhaust system that has been recently operated, as exhaust components reach extremely high temperatures that can cause severe burns. Allow the motorcycle to sit idle until the engine block and pipes are completely cool to the touch. Secure the motorcycle on a level concrete surface using a sturdy center stand or a reliable rear paddock stand to prevent the bike from tipping over during the installation process. - Step 2: Remove the stock muffler assembly
Locate the mounting bolts securing the stock muffler to the passenger footpeg bracket or frame, as well as the clamp connecting the muffler to the header pipe. Carefully loosen these fasteners, applying penetrating oil if the bolts are seized from exposure to road moisture. Gently support the weight of the muffler as you slide it off the header pipe, taking care not to lose any rubber vibration-dampening grommets, metal collars, or heat shield spacers that may need to be reused. - Step 3: Position and align the new aftermarket muffler
Clean the connection joint on the header pipe using a soft wire brush to remove any old gasket residue or carbon buildup. Insert a brand-new exhaust gasket into the joint to guarantee a gas-tight seal. Slide the new muffler or mid-pipe onto the header, and loosely align the integrated mounting bracket with the motorcycle's frame mounting point. Hand-tighten the mounting bolts and clamps at this stage; leaving them slightly loose allows you to adjust the alignment and ensure the pipe sits naturally without tension. - Step 4: Torque all fasteners to specification
Once you have verified that the exhaust system is aligned correctly and not binding against any frame components, use your torque wrench to tighten all fasteners. Refer to your motorcycle's service manual and the aftermarket manufacturer's instructions for the correct torque values, which are typically measured in Newton-meters (Nm). Tighten the exhaust joint clamp first, followed by the frame mounting bracket, to ensure the system is pulled flush against the gasket without creating structural stress points. - Step 5: Reconnect sensors and perform clearance checks
Carefully thread any oxygen (O2) sensors back into their designated ports on the exhaust pipe, taking care not to twist or pinch the wiring harness. Route the sensor wires along their original paths, securing them away from direct contact with the hot exhaust pipe. Finally, perform a thorough physical inspection by checking the clearance between the new muffler and the rear tire, swingarm, drive chain or belt, and rear bodywork, ensuring no contact occurs even when the rear suspension is fully compressed.
How to Verify Compliance and Handle LTO Checkpoints
With the installation complete, you must verify that the new exhaust system operates correctly and does not leak. Prepare a simple mixture of dishwashing soap and water in a spray bottle, apply it generously to all exhaust joints and gasket connections, and start the engine. Observe the joints closely for several minutes; if you see expanding soap bubbles or hear a distinct whistling sound, turn off the engine immediately, let it cool, and adjust the clamps or gasket seating to seal the leak. Listen carefully for any unusual metallic rattles or vibrations that could indicate a loose internal baffle or a bracket contacting the frame.
To protect yourself during road travel, establish a dedicated compliance packet within your motorcycle’s storage compartment or U-box. Keep physical copies of your original purchase receipt, the manufacturer’s homologation or compliance certificate, and any official LTO guidelines regarding aftermarket parts. If you are stopped at a routine LTO checkpoint or a local traffic management operation, presenting these documents calmly and professionally demonstrates your commitment to compliance and can quickly resolve any misunderstandings regarding your exhaust system.
When passing through an active checkpoint, remain cooperative and follow the instructions of the law enforcement officers. Officers may perform a visual inspection to confirm that your muffler has a functional, non-modified DB killer installed, or they may use a calibrated sound level meter positioned at a specific angle and distance from your exhaust outlet. Having a certified, baffled system ensures that your motorcycle will easily pass these visual and auditory checks, allowing you to resume your journey without delay.
Finally, avoid the temptation to discard or sell your original factory exhaust system. Store the stock muffler, heat shields, and original mounting hardware in a clean, dry garage space wrapped in protective packaging to prevent rust. Having your original exhaust on hand provides a reliable backup if you ever need to temporarily revert your motorcycle to factory specifications for strict motor vehicle inspection system (MVIS) registration renewals, warranty service, or when preparing the motorcycle for resale.
Frequently Asked Questions (FAQ)
Can I use a straight-pipe exhaust on public roads in the Philippines?
No, straight-pipe exhausts are not legal for use on public roads in the Philippines. Straight pipes lack the internal baffles, chambers, and sound-absorbing materials necessary to control noise levels, and they bypass emissions-control components like catalytic converters. Operating a motorcycle with a straight pipe violates national environmental laws and local city ordinances, exposing you to significant risks of being flagged at checkpoints, receiving heavy violation tickets, having the non-compliant exhaust confiscated, or having your motorcycle impounded.
Do I need to update my LTO registration after changing my muffler?
Generally, a standard bolt-on, street-legal aftermarket muffler swap does not require an update to your Certificate of Registration (CR). Because this modification is considered a minor aesthetic and functional upgrade that does not alter the motorcycle’s engine displacement, frame structure, or vehicle classification, it falls outside the scope of major modifications that must be officially recorded by the LTO. However, if your exhaust modification is part of a larger engine rebuild that alters your motorcycle’s displacement (e.g., a bore-up kit), you must undergo an official LTO inspection and update your registration documents accordingly.
What happens if I am caught with an illegal muffler at an LTO checkpoint?
If you are caught operating a motorcycle with an illegal or non-compliant exhaust system at an LTO checkpoint, law enforcement officers can issue a Temporary Operator’s Permit (TOP) or a local traffic citation ticket. Depending on the specific national regulations or local government unit (LGU) ordinances in effect, penalties can include monetary fines, the confiscation of your driver’s license, or the physical removal and confiscation of the non-compliant exhaust tip. In some cases, you may be required to present your motorcycle at a designated LTO office with the stock or a fully compliant exhaust system reinstalled before the violation can be cleared and your documents returned.
Community discussion
Share your experience or ask a question. Comments are reviewed before publication.