
To measure a motorcycle clutch cable accurately, you must record two primary dimensions: the outer housing length from ferrule to ferrule, and the total inner wire length from the tip of the lever nipple to the tip of the engine actuator barrel. Selecting the correct replacement requires matching these measurements, identifying the shape and size of the end fittings, and verifying the thread specifications of the adjusters. Whether you are dealing with a stiff lever pull in heavy city traffic or preparing your bike for the rainy season, getting these details right ensures smooth gear transitions and prevents sudden cable failure on the road.
Diagnose the Problem: Is It Really the Clutch Cable?
A stiff, heavy, or gritty lever pull is often the first sign of a deteriorating clutch cable. In the highly humid and rainy climate of the Philippines, moisture can easily seep into the cable housing, causing the inner steel wire to rust and bind against the outer sheath. This friction makes gear changes physically exhausting, especially during daily commutes in congested urban areas.
Fraying is another critical warning sign that requires immediate action. This damage usually occurs at high-friction pivot points, such as where the cable nipple sits inside the handlebar lever or where it connects to the engine-side actuator arm. If you notice even a single broken strand of wire during a visual check, the cable’s structural integrity is compromised and it must be replaced before it snaps completely.
Products mentioned in this guide
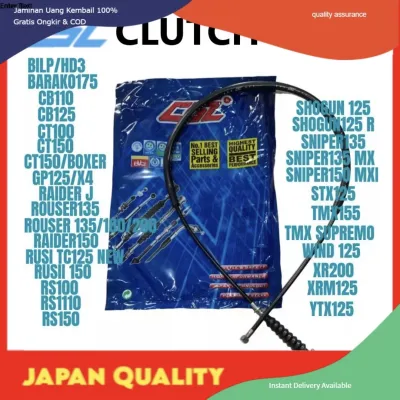
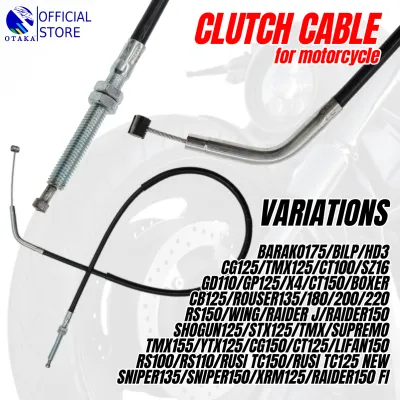
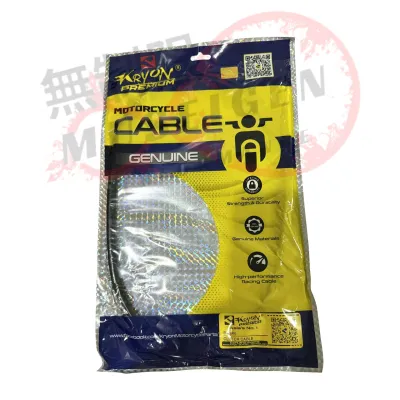
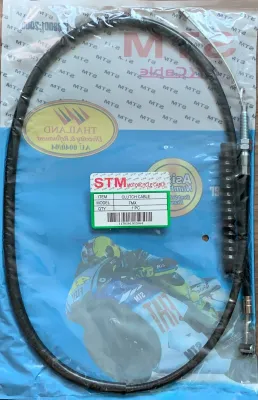
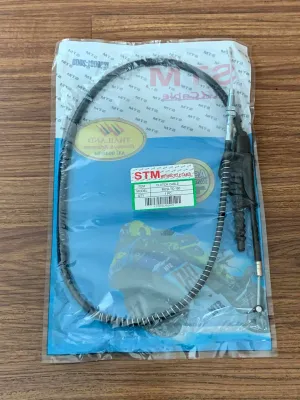
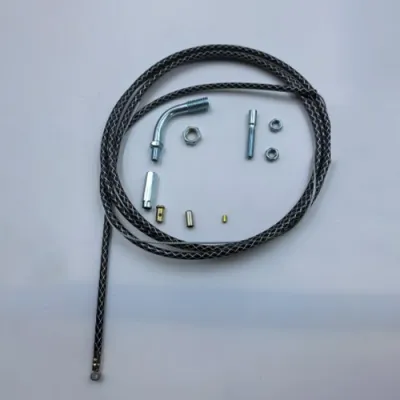
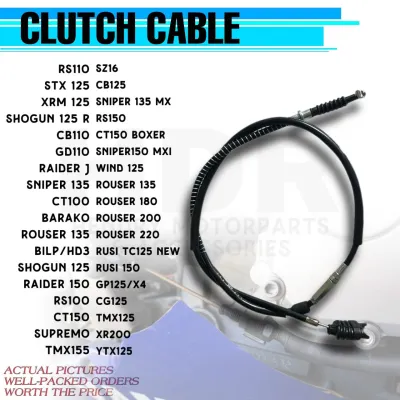
Prices are valid at publication and may change. Please refer to the product page for the latest price.
A cracked, split, or melted outer housing also demands attention. If the protective plastic sheath is damaged by road debris or heat from the exhaust pipe, water and dirt will quickly enter the assembly, leading to rapid internal corrosion. This environmental exposure accelerates wear and can cause the inner wire to seize unexpectedly.
However, it is essential to distinguish between a cable issue and internal clutch wear. If your clutch lever has the correct amount of free play but the engine revs up without the motorcycle accelerating under load—especially when climbing steep inclines or carrying a pillion passenger—your clutch plates are likely worn out and slipping, meaning a new cable will not solve the problem.
Conversely, if the motorcycle drags or tries to creep forward while you have the clutch lever pulled fully to the grip, the cable may have stretched beyond its adjustment limit, or the internal clutch plates may be warped. This dragging indicates that the clutch is not fully disengaging, which places unnecessary strain on your transmission.
Before purchasing any parts, perform a thorough visual inspection of the entire routing path. Trace the cable from the handlebars, down through the steering stem, and along the frame to the engine. Check for any sharp bends, tight kinks, or areas where the cable is pinched by aftermarket accessories, frame clips, or fairings.
Tools and Safety Preparation for Cable Removal
Having the correct tools on hand prevents damage to the delicate threads of your adjustment barrels and lever assemblies. Gather a set of open-ended metric wrenches (typically 8mm, 10mm, and 12mm), needle-nose pliers, flathead and Phillips screwdrivers, a digital caliper or flexible measuring tape, and some clean shop rags to catch any residual grease.

Safety must be your top priority before starting any mechanical work. Park the motorcycle on a level, solid surface and secure it on its center stand or a paddock stand to prevent it from tipping over. Ensure the engine and exhaust system are completely cool to the touch, as the clutch cable often routes very close to the engine block and exhaust header pipes, which can cause severe burns.
If your motorcycle’s clutch cable routing requires you to work near the starter motor, alternator, or main wiring harness, disconnect the negative terminal of the battery. This simple precautionary step avoids accidental short circuits or sparks while you are maneuvering tools in tight spaces.
Before detaching any clips or loosening adjusters, take multiple high-resolution photos of the original cable routing. Capture how the cable passes through the triple clamps, frame guides, and engine brackets, as well as the exact orientation of the lever-end and engine-end fittings. These photos will serve as an invaluable reference guide during the installation of the new cable.
Step-by-Step Guide to Measuring Your Existing Clutch Cable
Accurate measurements are vital, especially if you are sourcing an aftermarket cable or if your motorcycle model has multiple variant specifications. A mismatched cable can lead to a clutch that either fails to disengage fully or slips constantly, both of which compromise your safety on the road.
Measuring the Inner Wire and Outer Housing
To measure the outer housing, lay the removed cable flat on a clean workbench. Use your measuring tape to record the length of the black protective sleeve from one metal end cap (ferrule) to the other. Do not include any part of the exposed inner wire or the adjusters in this specific measurement.
Next, measure the inner wire length, which is the total length of the steel cable running inside the housing. Gently pull the inner wire from one end until the fitting on the opposite end is seated firmly against its ferrule. Measure from the absolute tip of the metal nipple on the lever end to the absolute tip of the metal fitting on the engine end.
It is crucial to calculate the “free length” or “slack” of the cable. This is the difference between the total inner wire length and the outer housing length. This free length determines how much wire is available to bridge the gap between your lever perch and the engine actuator arm, allowing for proper adjustment.
Avoid pulling the inner wire with excessive force while measuring. If the cable is already frayed or stretched, pulling too hard can distort the strands further, leading to an inaccurate, overly long measurement that will result in buying a replacement with too much slack.
Identifying End Fittings and Adjuster Nuts
The metal fittings cast onto the ends of the inner wire are called nipples or barrels, and they come in various shapes and sizes. Common styles include cylindrical barrels, pear-shaped nipples, and T-bars, each designed to lock into specific lever and actuator designs.
Use a digital caliper to measure both the diameter and the width of these end fittings. A replacement fitting that is too large will not seat properly in the handlebar lever slot, while one that is too small can slip out under tension, causing an immediate loss of clutch control while riding.
Examine the inline adjusters and the threaded fittings on the outer housing. Note the thread diameter (typically 6mm or 8mm) and the thread pitch. Mismatched threads will prevent the cable from screwing into your handlebar lever perch or mounting securely to the engine-side bracket.
Take note of any specialized rubber boots, dust caps, or frame grommets attached to the old cable. In tropical climates, these rubber components are essential for sealing out heavy rain and road grime, so ensure your replacement cable includes them or that your old ones can be safely transferred.
How to Select the Right Replacement Clutch Cable
Once you have documented your measurements and fitting types, you can confidently choose between original equipment and aftermarket options to restore your motorcycle’s performance.
OEM vs. High-Quality Aftermarket Cables
Original Equipment Manufacturer (OEM) clutch cables are the safest and most reliable choice for most riders. They are manufactured to the exact specifications of your motorcycle’s make, model, and production year, ensuring a perfect fit, correct routing brackets, and factory-tested durability.
OEM cables are highly recommended if your motorcycle is completely stock and you want to maintain the original lever feel and routing paths without any modifications. They eliminate the guesswork associated with matching specifications.
High-quality aftermarket cables from reputable brands are excellent alternatives, especially if you own a vintage or discontinued motorcycle where OEM parts are no longer available. Some premium aftermarket cables feature advanced upgrades, such as stainless steel inner wires and low-friction Teflon (PTFE) inner liners, which provide an exceptionally smooth lever pull.
However, you must avoid unbranded, ultra-cheap clutch cables commonly found on online marketplaces. These low-quality parts often use inferior steel alloys that stretch rapidly and snap without warning, posing a severe safety hazard on the road. In the local market, a standard OEM clutch cable for a common underbone or commuter motorcycle typically costs between ₱200 and ₱800, while premium aftermarket or big-bike cables can range from ₱1,000 to ₱3,500.
Matching Specifications for Universal or Cross-Referenced Cables
If you must use a universal or cross-referenced cable because an exact OEM match is unavailable, use a strict verification checklist to confirm compatibility before purchasing.
Verification Checklist:
- Overall Housing Length: Must match the original within a small tolerance (no more than 20-30mm longer; never shorter).
- Inner Wire Free Length: Must be identical to the original to ensure the clutch can be adjusted correctly.
- Lever Nipple Dimensions: Diameter and width must match the handlebar lever slot precisely.
- Engine Barrel Dimensions: Must fit securely into the engine actuator arm without binding.
- Adjuster Thread Pitch: Must match the threads on the lever perch and engine bracket.
A replacement cable can be slightly longer than the original, as you can usually accommodate a small amount of extra length by routing the cable in a wider, gentle curve. However, a cable that is even slightly too short must never be installed, as it will pull the clutch open when you turn the handlebars to full lock, potentially causing a crash.
Always cross-reference your motorcycle’s exact year, make, model, and engine displacement (cc) when searching through parts catalogs. Manufacturers frequently update cable specifications mid-generation or during minor model face-lifts, meaning a cable for a slightly older model might not fit a newer version of the same bike.
Routing, Installation, and Free Play Adjustment
Proper routing and precise adjustment are just as important as selecting the correct cable length. Incorrect installation can lead to premature cable failure, stiff operation, or unsafe riding conditions.
Routing: Carefully thread the new cable along the exact factory path documented in your reference photos. Avoid routing the cable near hot exhaust headers or engine cylinders, which can melt the protective plastic housing and damage the inner liner. Ensure the cable does not cross the steering stem in a way that pinches or stretches it when turning the handlebars from lock to lock. The cable should have smooth, sweeping bends with no sharp kinks.
Lubrication: Before final installation, check the manufacturer’s instructions for your specific cable. If the cable is Teflon-lined or pre-lubricated, do not add oil or grease, as standard lubricants can cause the Teflon liner to swell and bind. For standard steel-on-steel cables, apply a dedicated motorcycle cable lubricant using a pressure luber tool until the fluid runs clear out of the opposite end.
Free Play Adjustment: Clutch free play is the small amount of slack or movement in the handlebar lever before the cable begins to pull against the internal clutch springs. This slack is critical because it ensures that when the lever is fully released, there is no tension on the clutch mechanism, allowing the clutch plates to engage fully.
Safety Boundary: Do not rely on generic free play measurements. You must consult your specific motorcycle’s official service manual or owner’s manual for the exact millimeter specification (commonly between 10mm and 15mm measured at the tip of the lever, but this varies by model). Setting too little free play will cause the clutch to slip, overheat, and wear out prematurely. Setting too much free play will prevent the clutch from disengaging fully, making it difficult to shift gears or find neutral, and causing the bike to creep forward at stops.
Stop Condition: If you cannot achieve the specified free play using the inline adjusters, or if the cable binds or pulls tight when you turn the handlebars from left to right, do not attempt to ride the motorcycle. Stop immediately, re-verify your measurements, and consult a qualified professional motorcycle mechanic to diagnose the issue.
Post-Installation Testing and Safety Verification
Before taking your motorcycle out onto public roads, you must perform a series of controlled safety tests to verify that the clutch is operating correctly and safely.
Static Test: Keep the engine turned off. Sit on the motorcycle, pull the clutch lever completely to the grip, and shift through all the gears. Ensure that the gear shifter clicks smoothly into place and that you can find neutral easily. The lever pull should feel smooth, consistent, and free of any gritty or binding sensations.
Running Test: Start the engine with the transmission in neutral. Pull the clutch lever fully, hold it, and shift the transmission into first gear. The motorcycle should remain completely stationary without creeping or jerking forward, and the engine RPM should not drop. If the bike tries to move, the clutch is not fully disengaging, indicating that the cable is too loose and needs further adjustment.
Road Test: Conduct your initial test ride in a safe, empty, and level area, such as a quiet subdivision street or an empty parking lot, away from traffic. Accelerate slowly through the lower gears, checking for smooth engagement and ensuring that the clutch does not slip when you apply throttle.
Re-check: After riding for a few minutes and allowing the engine to reach its normal operating temperature, park the motorcycle and re-check the clutch lever free play. Metal components and engine casings expand slightly as they heat up, which can alter cable tension. Adjust the free play again if necessary to match the manufacturer’s specifications.
Frequently Asked Questions (FAQ)
Can I use a universal clutch cable for any motorcycle?
While universal clutch cables are widely available, they are rarely a direct, plug-and-play solution for modern motorcycles. These kits typically require you to cut the outer housing and inner wire to the correct length, solder or crimp the end nipples yourself, and adapt the threaded adjusters to fit your specific lever perch.
Because a poorly secured nipple or a weak solder joint can fail under the high tension of a clutch pull, universal cables should only be used as a temporary emergency measure or for vintage and highly customized motorcycles where OEM replacements are completely unavailable. For optimal safety and reliability, professional installation is strongly recommended if you must use a universal kit.
How often should I lubricate the clutch cable?
The frequency of cable lubrication depends heavily on your local riding conditions. In dry, clean environments, lubricating your clutch cable every 5,000 to 10,000 kilometers is generally sufficient to maintain smooth operation.
However, if you ride frequently during the rainy monsoon season, or if you regularly travel on unpaved, dusty roads, you should inspect and lubricate your cable more often—ideally every 2,000 to 3,000 kilometers or whenever the lever begins to feel stiff or gritty. Always use a dedicated light motorcycle cable lubricant, and avoid heavy greases or penetrating oils that can attract dirt and degrade the cable’s internal plastic liner.
What are the risks of incorrect clutch free play?
Having incorrect clutch free play poses serious risks to both your motorcycle’s mechanical components and your personal safety. If there is insufficient or zero free play, the cable remains under constant tension, preventing the clutch plates from clamping together fully. This leads to continuous clutch slippage, extreme heat buildup, and the rapid destruction of your friction plates, which can cost thousands of pesos to replace.
On the other hand, excessive free play means the clutch lever cannot pull the cable far enough to separate the clutch plates completely. This prevents full disengagement, making gear shifting difficult, causing the transmission to clank loudly, and making it hard to find neutral. Crucially, it can cause the motorcycle to lurch forward unexpectedly when stopped in gear, potentially leading to a loss of control or a collision.
Community discussion
Share your experience or ask a question. Comments are reviewed before publication.