
Riding a motorcycle with an improperly tensioned drive chain can lead to unsettling drivetrain vibrations, poor throttle response, and a constant worry that the chain might slip off the sprocket mid-ride. To resolve this issue, you must use your motorcycle’s swing arm adjuster to set the chain slack precisely within the manufacturer’s specified range while keeping the rear wheel correctly aligned with the chassis. This guide details how to measure your chain’s current deflection, adjust the tensioning bolts evenly on both sides, and lock down the rear axle safely to restore smooth power delivery and secure handling.
Why Is Correct Chain Tension and Wheel Alignment Critical for Your Motorcycle?
Correct chain tension and precise wheel alignment are fundamental to your motorcycle’s safety, handling, and mechanical longevity. If the chain is too loose, it can whip violently, wear out the sprockets prematurely, or even derail entirely. A derailed chain can instantly wrap around the rear sprocket, locking up the rear wheel and causing a severe loss of control.
Conversely, an over-tightened chain places immense stress on the transmission output shaft bearing, the rear wheel bearings, and the chain itself. This excessive tension can lead to premature bearing failure, cracked engine casings, or a snapped chain under heavy suspension compression. When the rear suspension compresses over bumps, the swingarm moves in an arc that naturally tightens the chain, making a baseline level of slack absolutely necessary.
Products mentioned in this guide
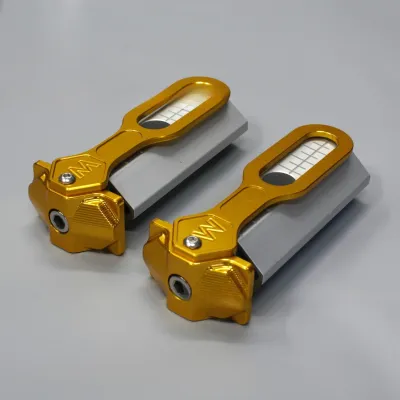
29 Lazada user ratings
🔨Durability:it can last long 🔌Compatibility:conpatible for snioer 155 user
Ayos na ayos ganda sa sniper ko thnks seller
pormado pero titignan pa kung matibay
Product is good quality
good quality
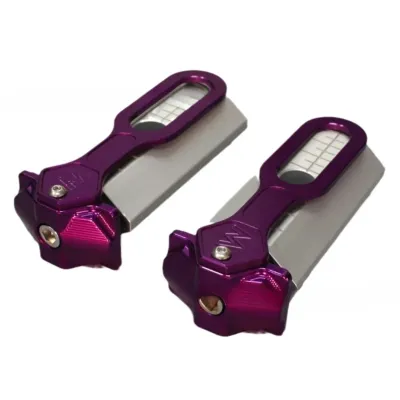
12 Lazada user ratings
🔨Durability:10 🔌Compatibility:10 💰Price:affordable price legit design goods na goods sa look angas! thanks seller
Chain tension control, Lightweight construction, Swingarm tuning,
🔨Durability:10 🔌Compatibility:10
High-quality material,
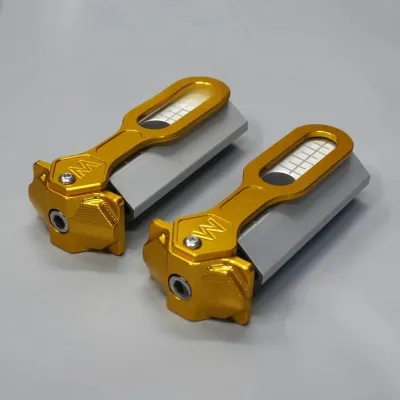
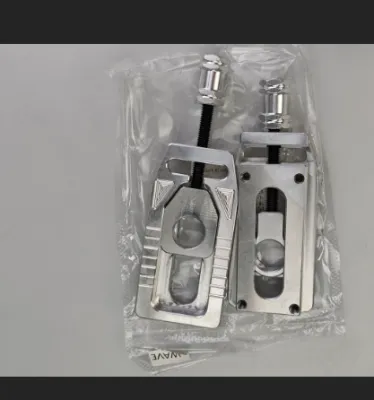
2 Lazada user ratings
Quality: good Appearance: good
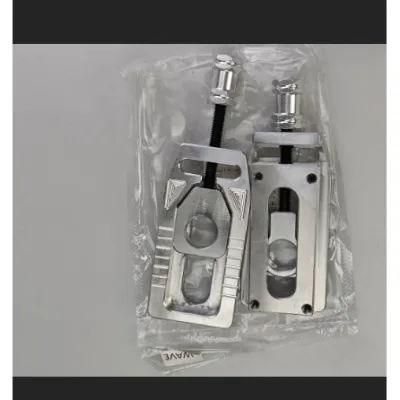
4 Lazada user ratings
Precise chain adjustment, , Sturdy metal construction, Perfect for chain alignment, Easy to insta
Color Family: Gold Durability:Good Design:👍
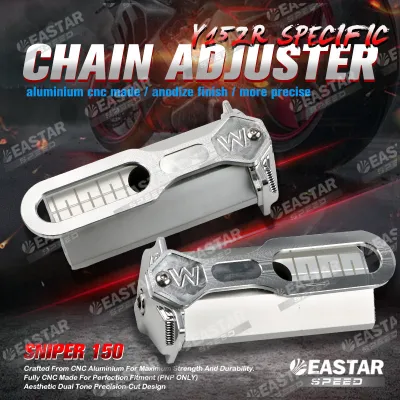
13 Lazada user ratings
🔌Compatibility:5 🔨Durability:5 🛠️Ease of Installation:5
High quality material, Reliable performance,
Good seller service, Chain tension adjuster,
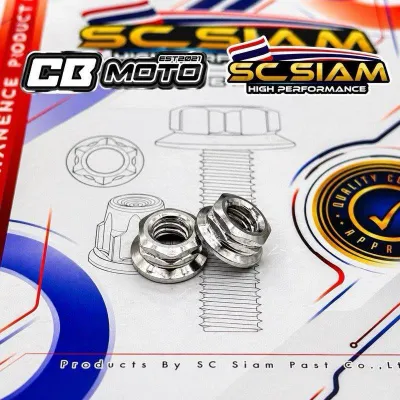
111 Lazada user ratings
Durability:10/10 Visibility:cnc The SC CNC color is unique., very impressive seller highly recommend to my friends using Cnc bolts and nuts …Read full reviewShow less
Durability:10/10 Visibility:cnc The SC CNC color is unique., very impressive seller highly recommend to my friends using Cnc bolts and nuts delivery on time thanks seller and the delivery rider us well
Great addition to my Sniper 150!, The white color complements my bike., High-quality nuts for my Sniper 150., I'm impressed with the gold co…Read full reviewShow less
Great addition to my Sniper 150!, The white color complements my bike., High-quality nuts for my Sniper 150., I'm impressed with the gold color.,
Durability:good Visibility:good Fitment:good NC products tumpak Thanks The blue color looks amazing., Great addition to my Sniper 150!,
Love the CNC titanium finish., High-quality nuts for my Sniper 150. goods goods goods goods goods goods
Lagi akong nakuha dito, bukod sa mabilis ang shipping legit pa ang item, thank you seller.
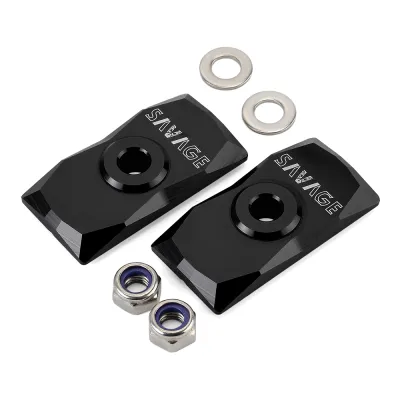
21 Lazada user ratings
Fits the Kawasaki motorcycle well, well-packaged, professional appearance, durable aluminum material, durable aluminum material, fast delive…Read full reviewShow less
Fits the Kawasaki motorcycle well, well-packaged, professional appearance, durable aluminum material, durable aluminum material, fast delivery, fast delivery, excellent customer service.
🔨Durability: 🔌Compatibility: 👌Ease of Use:this is a very nice product. i would love to order another one once i fully consumed this amzing p…Read full reviewShow less
🔨Durability: 🔌Compatibility: 👌Ease of Use:this is a very nice product. i would love to order another one once i fully consumed this amzing product that i really love to use.
Fit with Kawasaki Z250SL. Should fit with Z250 or equivalent as well. Feels heavy and sturdy.
Mukhang matibay at match sa motor ko. Akma ang kulay na black. Satisfied ako sa item na ito.
The product is good and of high quality.
Prices are valid at publication and may change. Please refer to the product page for the latest price.
Beyond tension, the rear wheel must sit straight within the swingarm to prevent rapid, uneven wear on both the chain and the sprocket teeth. If the wheel is misaligned, the sprockets will run at an angle, forcing the chain links to bind laterally against the sprocket teeth. This constant friction generates excessive heat, accelerates wear on the chain’s O-rings, and compromises handling stability, causing unpredictable cornering and uneven tire tread wear.
What Tools and Safety Precautions Do You Need Before Adjusting the Chain?
Before starting, you must gather the correct hand tools and establish a stable, level workspace to prevent the motorcycle from tipping over during the adjustment. You will need a torque wrench calibrated to your bike’s rear axle specification, the correct size sockets or wrenches for the axle nut and adjuster bolts, a precise measuring tool like a ruler or caliper, and your owner’s manual. Having these tools ready ensures you can complete the job without damaging the fasteners or guessing the torque values.

Because adjusting the chain involves working near moving parts and loosening critical structural fasteners, you must shut off the engine and ensure the bike is completely stable. Never attempt to adjust or lubricate a chain with the engine running or the transmission in gear, as this poses an extreme risk of severe finger injury. Always perform maintenance on a cool engine and exhaust to avoid accidental burns.
Place the motorcycle on a flat, solid surface. Using a paddock stand or a center stand to lift the rear wheel off the ground is highly recommended, as it allows you to rotate the wheel freely to inspect the chain and make adjustments. Always consult your motorcycle’s owner’s manual before loosening any bolts to verify the exact specifications for your specific model and year, including the exact chain slack measurement range and the critical torque specification for the rear axle nut.
How Do You Measure the Current Chain Slack Accurately?
To measure chain slack accurately, you must find the tightest spot on the chain and measure its vertical movement at the midpoint of the lower chain run. Because drive chains stretch unevenly as they wear, measuring at only one random spot can lead to an over-tightened setup that damages your drivetrain. Identifying the tightest spot ensures that the chain will never become dangerously tight at any point during its rotation.
With the motorcycle safely supported, manually rotate the rear wheel in neutral. As you spin the wheel, gently push the lower run of the chain up and down at several points along its rotation to identify where the chain has the least amount of play. Mark this tightest section or position it midway between the front and rear sprockets for your measurement.
Place a ruler or measuring tape against the swingarm, directly behind the midpoint of the lower chain run, or at the specific measurement point designated by your manufacturer. Push the chain down firmly and note the reference point on your ruler, then push the chain straight up toward the swingarm and note the new measurement. The difference between these two points is your current chain slack. Compare this calculated deflection against the range listed in your owner’s manual or on the swingarm safety decal.
How Do You Use the Swing Arm Adjuster to Set the Correct Tension?
You use the swing arm adjuster by first loosening the rear axle nut and then turning the adjuster bolts or screws in small, equal increments to slide the rear axle forward or backward. This controlled movement alters the distance between the engine sprocket and the rear wheel sprocket, directly changing the chain tension.
Begin by loosening the rear axle nut just enough to allow the axle to slide within the swingarm slots. You do not need to remove the nut entirely; loosening it by two or three full turns is usually sufficient to break the clamping force while keeping the assembly stable. If your motorcycle has a safety pin or cotter pin through the axle nut, remove it carefully before attempting to loosen the nut.
Locate the adjuster bolts or locknuts at the very rear of the swingarm. If your motorcycle uses a push-style adjuster with locknuts, loosen the locknuts first to free the adjuster bolt. To tighten a loose chain, turn the adjuster bolts clockwise (or counterclockwise, depending on the design) to push the axle backward; to loosen a tight chain, turn the bolts in the opposite direction and gently tap the rear tire forward to slide the axle closer to the engine.
Always turn the adjuster bolts on both the left and right sides in tiny, matching increments—such as a quarter-turn or half-turn at a time. Making large, uneven adjustments can quickly twist the wheel out of alignment and make it difficult to find the correct tension. Keep track of the number of turns you apply to each side to maintain a balanced adjustment.
After each minor turn of the adjusters, re-measure the chain slack at the tightest spot. Keep in mind that when you eventually tighten the axle nut, the chain will naturally tighten slightly, so aim for the looser end of the manufacturer’s recommended range during this adjustment phase. Once the desired slack is achieved, gently tighten the adjuster locknuts to prevent them from vibrating loose.
How Can You Ensure the Rear Wheel Remains Perfectly Aligned During Adjustment?
You can ensure correct rear wheel alignment by matching the alignment marks on both sides of the swingarm and visually verifying the straightness of the chain path. Even a tiny discrepancy between the left and right adjusters will cause the rear wheel to sit crookedly, leading to handling issues and accelerated wear.
Examine the stamped alignment notches, lines, or dots on the swingarm near the axle slot, and compare them to the reference mark on the adjuster block or washer. If the left side is aligned with the third notch from the front, the right side must be adjusted to align precisely with the exact same third notch. Use a bright light to ensure you are reading the marks from a straight-on angle to avoid parallax errors.
While swingarm alignment marks are a helpful guide, they are not always perfectly accurate due to manufacturing tolerances. For a more precise check, you can use a dedicated chain alignment tool that clamps to the rear sprocket and projects a straight rod along the chain, allowing you to see if the chain runs parallel to the sprockets. Alternatively, you can measure the distance from the center of the swingarm pivot bolt to the center of the rear axle on both sides using a tape measure or alignment caliper.
Stand directly behind the motorcycle and look along the top of the chain toward the front sprocket. The chain should run in a straight, unbroken line without bending or rubbing hard against the sides of the sprocket teeth; any lateral binding indicates that the rear wheel is misaligned and requires immediate correction.
How Do You Secure the Axle and Verify the Adjustment on a Test Ride?
To secure the axle, you must tighten the rear axle nut to the exact torque specification using a calibrated torque wrench, then perform a final slack measurement before taking a low-speed test ride. Tightening the axle nut applies massive clamping force that can slightly alter your adjustments, making a post-tightening check absolutely essential.
Set your torque wrench to the value specified in your owner’s manual. While holding the axle bolt steady on one side with a wrench, tighten the axle nut on the other side until the torque wrench clicks. If your axle uses a cotter pin or safety clip, always reinstall a new or undamaged pin to prevent the nut from backing off while riding. Never ride a motorcycle without the proper axle safety hardware installed.
Measure the chain slack one last time at the tightest spot with the axle fully torqued. If the tightening process pulled the wheel forward or backward and threw the slack out of specification, you must loosen the axle nut and readjust the bolts to compensate. It is common to have to repeat this process once or twice to get the final torqued slack exactly right.
Conduct a brief, low-speed test ride in a safe, quiet area to evaluate the adjustment. Listen closely for any unusual whining, grinding, or slapping noises from the drivetrain, and pay attention to how the motorcycle tracks and handles. If you notice persistent drivetrain noises, if the chain binds, or if the motorcycle pulls to one side, stop riding immediately and consult a qualified motorcycle mechanic.

Community discussion
Share your experience or ask a question. Comments are reviewed before publication.