
Installing a crash guard on your motorcycle is a practical upgrade to protect engine cases, fairings, and radiators from expensive damage during a tip-over. However, an improper installation can turn this protective accessory into a liability, transferring impact forces directly to your motorcycle’s frame or warping the chassis during mounting. To properly install a crash guard without damaging the frame, you must ensure precise alignment, hand-thread all fasteners to prevent cross-threading, leave all bolts loose until every mounting point is engaged, and use a calibrated torque wrench to tighten fasteners to the exact manufacturer specifications. Forcing misaligned brackets or over-tightening bolts can easily strip threads, crush thin-walled frame tubes, or crack cast aluminum mounting tabs.
Because a crash guard attaches directly to critical structural points of your motorcycle—often sharing mounting bolts with the engine itself—the installation carries a strict safety boundary. Modifying or replacing structural fasteners can alter the motorcycle’s handling dynamics, vibration dampening, and overall safety. Always consult your motorcycle’s original service manual alongside the crash guard manufacturer’s instructions before beginning. If the installation requires supporting the engine, removing critical chassis bolts, or if you lack the specific tools required, always seek the assistance of a qualified professional mechanic.
In tropical environments like the Philippines, where high humidity, heavy monsoon rains, and coastal salt air accelerate corrosion, taking extra care during installation is vital. Moisture trapped between poorly fitted brackets and the frame can lead to hidden rust, which weakens the metal over time. By following a methodical, step-by-step approach, you can ensure your crash guard provides maximum protection without compromising the structural integrity of your motorcycle.
Products mentioned in this guide
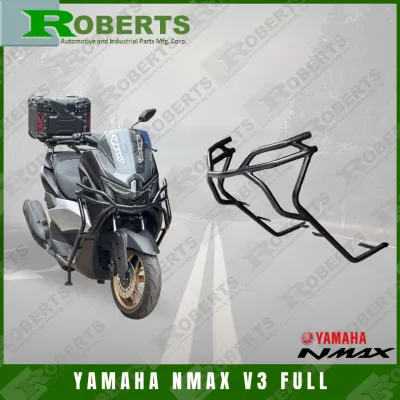
1 Lazada user ratings
Satisfied with the purchase! Ganda ng crash guard. Solid ung quality and fitment sa NMAX V3. Easy to install and look sturdy.sakto din Yun d…Read full reviewShow less
Satisfied with the purchase! Ganda ng crash guard. Solid ung quality and fitment sa NMAX V3. Easy to install and look sturdy.sakto din Yun design and Hindi awkward sa motor . Fast delivery and maayos Ang packaging. Thanks seller! Recommend!
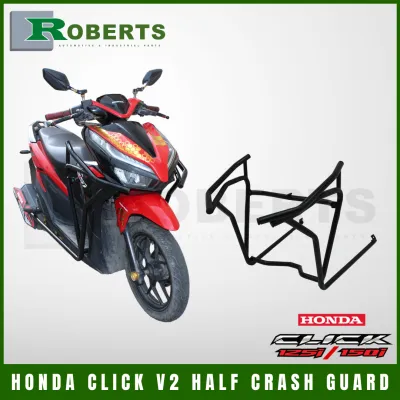
1,936 Lazada user ratings
dumating na order ko. kala ko sa petsa 7 pa .subrang aga dumating . subrang ganda nang crashguard matibay pa fit na fit sa click v3 ko.. ang…Read full reviewShow less
dumating na order ko. kala ko sa petsa 7 pa .subrang aga dumating . subrang ganda nang crashguard matibay pa fit na fit sa click v3 ko.. ang maganda pa kasi naka karton tas walang gas2 . dagdag pogi sa motor ko.kahit medyo tabingi sa unahan goods parin. salamat at god bless🙏🏼 sa store nyo.😊😊😊
Feels sturdy and durable, Fits perfectly on my Honda Click 125i, 🔧Ease of Installation:yes 🔌Compatibility:fit to my click 123 v3 🛠️Durability…Read full reviewShow less
Feels sturdy and durable, Fits perfectly on my Honda Click 125i, 🔧Ease of Installation:yes 🔌Compatibility:fit to my click 123 v3 🛠️Durability:matibay
Provides excellent safety while riding, Great protection for my motorcycle, Salamat.
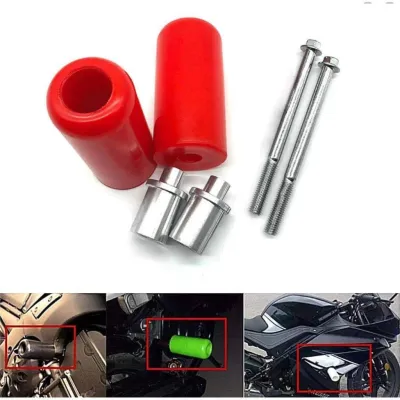
87 Lazada user ratings
Durable crash guard,Provides excellent protection,
Easy to install and remove,
Great value for the price,
Quality:good quality
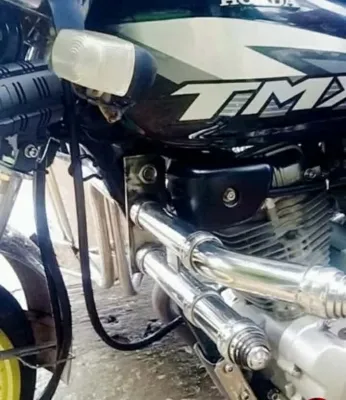
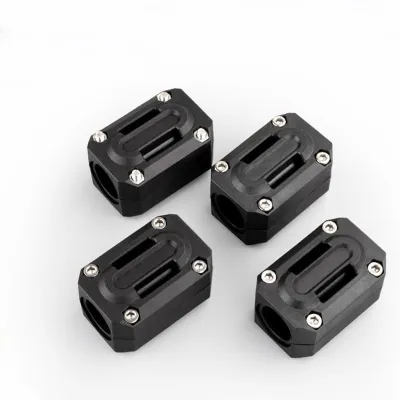
9 Lazada user ratings
Good day! The item is well packed. It arrived earlier than expected. Complete and correct as ordered. Made from good quality materials. Fits…Read full reviewShow less
Good day! The item is well packed. It arrived earlier than expected. Complete and correct as ordered. Made from good quality materials. Fits snugly on Honda Click 160 crush guard. Adds protection and aesthetics. Hope it'll last. Thank you. Stay safe.
Di masyado fit sa OD ng bakal na giamit sa crashguard na mabibili pang Honda Click v4, pero kaya naman gawan paraan para mailagay. Good qual…Read full reviewShow less
Di masyado fit sa OD ng bakal na giamit sa crashguard na mabibili pang Honda Click v4, pero kaya naman gawan paraan para mailagay. Good quality material ng slider pieces, stainless bolts and nuts, satisfied sa purchase
Great addition to my crash bar. Good quality and match the color of my bike.
Ganda nakakaangas sa crashguard ng Honda XR 150
Prices are valid at publication and may change. Please refer to the product page for the latest price.
Tools and Materials Needed for a Safe Installation
To complete this installation safely and avoid damaging your motorcycle’s frame, you must use the correct tools. Relying on improvised tools, such as adjustable wrenches or pliers, increases the risk of slipping, rounding off bolt heads, and applying uneven pressure to the frame. Gather a complete metric socket set, a set of high-quality Allen (hex) keys, and a calibrated torque wrench that reads in Newton-meters (Nm) or foot-pounds (ft-lbs). A torque wrench is non-negotiable for this job; guessing the tightness of engine mount bolts can easily lead to stripped threads in soft aluminum engine cases or cracked frame tabs.
The hardware used to mount the crash guard is just as important as the tools. Always use the high-tensile bolts, washers, and spacers provided by the crash guard manufacturer. These fasteners are engineered to handle specific shear and tensile loads. Substituting them with cheap, unrated bolts from a local hardware store is highly dangerous, as sub-grade bolts can snap under the stress of daily riding or during a minor fall. If you must replace any hardware, verify that the replacement bolts match the exact thread pitch, length, and strength grade (such as Class 8.8 or 10.9) specified by the manufacturer.
The use of thread-locking compounds or anti-seize lubricants should be strictly conditional. Apply a medium-strength thread locker (commonly blue) only if explicitly recommended by the crash guard or motorcycle service manual. Thread locker prevents bolts from backing out due to engine vibrations, which is especially common on single-cylinder or twin-cylinder motorcycles. Conversely, if you are threading steel bolts into aluminum engine cases, the manual may call for a light application of anti-seize compound to prevent galvanic corrosion. Never use these compounds interchangeably, and always follow the manufacturer’s specific instructions regarding thread preparation.
Pre-Installation Checks and Fitment Verification
Before you turn a single bolt, you must verify that the crash guard is fully compatible with your specific motorcycle. Frame designs, engine mounting points, and fairing shapes can change slightly between model years, even on the same motorcycle model. Check the manufacturer’s part number against your motorcycle’s exact make, model, and production year. Attempting to force a crash guard designed for a different model year onto your frame will introduce severe structural tension, leading to frame damage or weld failures over time.

Next, thoroughly inspect the motorcycle’s frame mounting points. Clean the area with a mild cleaner to remove road grime, mud, and chain fling, which are common in dusty or wet riding conditions. Inspect the frame tabs, engine brackets, and existing threads for any signs of pre-existing damage, such as hairline cracks, rust, paint bubbling, or stripped threads. If you discover any structural defects or compromised threads on the frame, stop immediately and have the motorcycle inspected by a professional welder or mechanic before proceeding with the installation.
Once the mounting points are clean and verified, perform a dry-fit of the crash guard. Hold the guard up to the motorcycle frame by hand, without inserting any bolts. This allows you to observe how the brackets align with the mounting holes. The brackets should sit flush against the frame or engine mounts without requiring you to pull, push, or bend the guard. If there is a significant gap or if the holes are completely misaligned, it indicates either an incorrect part number, a bent crash guard, or a previously damaged motorcycle frame.
Step-by-Step Mounting and Alignment Process
Begin the physical installation by preparing your workspace. Park the motorcycle on a level, solid surface, preferably using a center stand or a paddock stand to keep the bike perfectly upright and stable. If the installation instructions require you to remove body panels, fairings, or footpegs to access the frame bolts, do so carefully. Keep track of all plastic clips, shoulder washers, and screws by organizing them in a magnetic tray or labeled containers to ensure they are reinstalled correctly.
When you are ready to mount the guard, always start by hand-threading every bolt. Insert the bolt and turn it clockwise with your fingers for at least three to four full rotations. This ensures that the threads are properly engaged and aligned. Never use a socket wrench, T-handle, or impact driver to start a bolt. If you feel any resistance within the first few turns, back the bolt out, clean the threads, and try again. Forcing a cross-threaded bolt into a frame mount will destroy the threads, requiring expensive repairs such as thread inserts or frame replacement.
As you insert the bolts, leave them completely loose. They should be threaded in far enough to support the weight of the crash guard, but loose enough to allow the guard to move and wiggle slightly. Keeping the hardware loose allows the crash guard to self-align and settle into its natural position as you install the remaining fasteners. If you tighten the first bolt completely, the guard will lock into place, pulling the remaining mounting brackets out of alignment and making it nearly impossible to insert the other bolts without cross-threading them.
Never use excessive force, pry bars, clamps, or hammers to force a misaligned crash guard bracket into place. Forcing a bracket to line up with a frame hole introduces a massive amount of “pre-load” stress to the motorcycle’s chassis. When the motorcycle is in motion, engine vibrations and road impacts will combine with this constant pre-load tension, eventually causing the frame tabs to crack, the mounting bolts to shear, or the crash guard welds to fail. If a bracket does not line up naturally even with all other bolts loose, remove the guard and inspect it for manufacturing defects.
Applying Correct Torque and Tightening Sequences
Once all bolts are hand-threaded and the crash guard is resting naturally against the mounting points, you can begin the tightening process. To prevent uneven stress on the frame, you must locate the correct torque specifications. Refer to the crash guard installation manual for the accessory’s torque values, and cross-reference them with your motorcycle’s official service manual, especially if you are tightening engine mounting bolts. If the torque specifications in the crash guard manual conflict with the motorcycle manufacturer’s specifications for critical frame bolts, stop and consult a professional mechanic or the manufacturer to clarify the safe torque limit.
To distribute the clamping force evenly across the motorcycle frame, use a progressive cross-tightening or star-pattern sequence. Do not tighten any single bolt to its full torque specification all at once. Instead, tighten each bolt to roughly 30% of its target torque, moving from one side of the motorcycle to the other. Repeat the process to reach 60% torque, and then perform the final pass to 100% of the specified torque. This incremental method ensures that the crash guard seats evenly against the frame without warping or creating localized stress points.
During the final tightening pass, use your calibrated torque wrench with a smooth, steady pulling motion until the wrench clicks or signals that the target torque has been reached. Be extremely cautious when tightening bolts on aluminum frames or thin-walled steel tubing, which are common on lightweight commuter motorcycles and scooters. Over-tightening fasteners in these materials can easily strip the soft internal threads or crush the hollow frame tubes, leading to catastrophic structural failure. Never use an impact wrench for the final torque pass, as it cannot measure torque accurately and can easily over-torque fasteners in a fraction of a second.
Post-Installation Verification and Clearance Checks
With the crash guard fully torqued, you must perform a thorough clearance check before riding. Sit on the motorcycle and turn the handlebars slowly from lock to lock, checking for any interference. Ensure that the front wheel, forks, brake lines, clutch cables, and wiring harnesses do not contact the crash guard at any point in their range of motion. Additionally, check the clearance between the guard and other hot or moving components, such as the exhaust pipe, radiator, engine covers, and front suspension under full compression. There should be adequate space to prevent rubbing, which can wear through cables or damage components over time.
After confirming clearance, take the motorcycle for a short, gentle test ride of about 10 to 15 kilometers on smooth roads. This initial ride allows the crash guard and its mounting hardware to settle under real-world riding vibrations and chassis flex. Once you return and the engine has cooled down completely, park the motorcycle and use your torque wrench to re-check the torque on every mounting bolt. It is common for fasteners to settle slightly during the first ride, and re-torquing them ensures they remain secure.
Finally, conduct a close visual inspection of the mounting areas. Look for any signs of paint cracking, flaking, or metal deformation around the frame tabs and brackets. In highly humid or coastal regions of the Philippines, any cracked paint or exposed metal must be touched up immediately with a rust-preventative paint to prevent moisture from causing localized corrosion. Regularly inspect your crash guard and its mounting hardware during your routine motorcycle maintenance to ensure the bolts remain tight and the frame remains undamaged.
Frequently Asked Questions (FAQ)
Can I install a crash guard myself, or do I need a professional mechanic?
You can install a crash guard yourself if you possess basic mechanical skills, a proper set of hand tools, and a calibrated torque wrench. However, if the installation requires supporting the engine with a jack, removing critical structural engine mount bolts, or if you discover pre-existing damage to your frame, you should have the installation performed by a qualified professional mechanic. Attempting to remove critical engine bolts without properly supporting the engine can cause the engine to sag, misaligning the frame holes and making reassembly extremely difficult and dangerous.
What should I do if the crash guard holes do not align with the frame?
If the mounting holes do not align, first ensure that all other bolts on the crash guard are completely loose, which allows the guard to shift and align naturally. If the holes still do not line up, do not attempt to drill new holes, file or elongate the bracket holes, or bend the guard using heavy tools, as this compromises the structural integrity of the accessory and voids its warranty. Double-check that you have the correct part number for your specific motorcycle model year, and contact the manufacturer or retailer for assistance, as the guard may be defective or designed for a different model.
Community discussion
Share your experience or ask a question. Comments are reviewed before publication.