
Properly installing caliper bolts during a brake pad replacement requires meticulous cleaning, careful inspection, hand-threading to prevent cross-threading, and tightening to the vehicle manufacturer’s exact torque specifications using a calibrated torque wrench. In the Philippines, where stop-and-go traffic in intense city heat or heavy rains during the monsoon season put immense stress on braking systems, ensuring these fasteners are secured correctly is paramount. Caliper bolts, including both caliper guide pins and caliper bracket mounting bolts, hold the entire stopping mechanism in place against extreme rotational forces. A single loose or over-tightened bolt can lead to uneven pad wear, severe brake noise, caliper binding, or even a catastrophic loss of braking control on the road. By following a systematic approach that prioritizes cleanliness, precise torque application, and strict adherence to your vehicle’s factory service manual, you can complete this critical maintenance task safely and effectively.
Preparation and Safety Boundaries Before Starting
Brake systems are the most critical safety component on any vehicle, and any maintenance performed on them carries inherent risks. Before you begin loosening any fasteners, you must understand that improper installation of caliper bolts can lead to immediate brake failure, wheel lockup, or severe accidents. Because of these high stakes, you must establish clear safety boundaries and know exactly when to stop the DIY process and seek professional assistance.
If you do not have access to the specific factory service manual for your vehicle’s exact make, model, and year, you should not attempt this job. Generic torque values are often inaccurate and can lead to stripped threads or loose components, as different vehicles use vastly different materials, from cast iron to aluminum knuckles. Always refer to the original-vehicle instructions for exact specifications and mounting positions.
Products mentioned in this guide
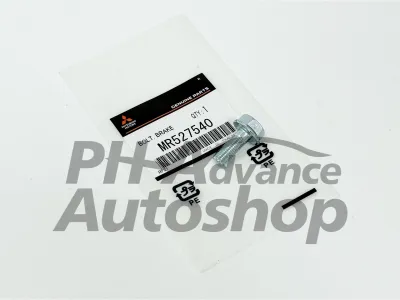
Prices are valid at publication and may change. Please refer to the product page for the latest price.
Another immediate stop condition is encountering stripped threads, heavily corroded bolt holes, or seized guide pins that do not slide smoothly even after cleaning. Attempting to force a damaged bolt into a compromised threaded hole will ruin the caliper bracket or steering knuckle. In the Philippines, replacing a stripped steering knuckle can easily cost upwards of ₱8,000 in parts and labor at a local shop, making a cautious approach financially sensible.
Furthermore, if you do not own or have access to a calibrated torque wrench capable of measuring the specific torque range required for your vehicle, do not proceed. Estimating tightness by feel, often referred to as “hand-tightening” or “guessing,” is highly dangerous for critical brake fasteners. If you feel unsure about any step of the process, or if you discover unexpected wear on other brake components during disassembly, always consult a qualified, certified mechanic to complete the work.
Tools and Materials Required for the Job
Gathering all necessary tools and materials before you lift the vehicle prevents unnecessary delays and ensures you do not take dangerous shortcuts. To perform this job safely, you will need standard hand tools, including a high-quality socket set, a matching ratchet, and a breaker bar to assist with stubborn, high-torque bracket bolts. Never use impact wrenches for the final installation of caliper bolts, as they can easily strip threads or over-stretch the metal.

Safety gear is non-negotiable when working under a vehicle. You must use heavy-duty jack stands, wheel chocks to secure the wheels remaining on the ground, and safety glasses to protect your eyes from falling rust and brake dust. The absolute centerpiece of your tool kit for this task is a calibrated torque wrench that matches the torque specifications of your vehicle. Depending on your vehicle’s design, you may need a click-type torque wrench that reads in Newton-meters (Nm) or foot-pounds (ft-lbs).
For cleaning, prepare a dedicated aerosol brake cleaner and a set of wire brushes, including small bottle-style wire brushes to clean internal threads. Consumables such as high-temperature silicone brake grease, threadlocking compound, or anti-seize should only be used if explicitly dictated by your vehicle’s manufacturer. Keep clean, lint-free shop towels nearby to wipe away old grease and debris, ensuring no contaminants end up on the new brake pads or rotor surfaces.
Step-by-Step Caliper Bolt Installation Process
Installing caliper bolts is a methodical process that requires patience, cleanliness, and precision at every stage. This workflow begins the moment you prepare to remove the old fasteners and continues through inspection, cleaning, and final torque verification. It is important to distinguish between the two main types of bolts you will encounter: the smaller caliper guide pin bolts (which allow the caliper to slide) and the larger caliper bracket mounting bolts (which secure the bracket to the steering knuckle). Each type of bolt serves a distinct structural purpose, requires different handling, and must be torqued to its own unique specification.
Removing and Inspecting the Old Bolts
To begin, safely loosen the caliper bolts using a hand ratchet or breaker bar, ensuring the socket is fully seated on the bolt head to prevent rounding the corners. Apply steady, linear pressure rather than sudden jerks, which can snap corroded bolts or damage the surrounding suspension components. Once removed, lay the bolts on a clean surface and perform a thorough visual and physical inspection of each fastener.
Examine the threads closely for any signs of stretching, flattening, or cross-threading, which indicate the bolt has been over-torqued in the past. Look for heavy corrosion, pitting, or deep rust that has eaten away at the metal shank, as this significantly reduces the bolt’s structural integrity. In the tropical climate of the Philippines, where high humidity and coastal salt air can accelerate rust, inspecting these fasteners for corrosion is especially critical.
To check for thread stretching, you can hold two identical bolts thread-to-thread; if the threads do not interlock perfectly along the entire length, one of the bolts has stretched and must be discarded. Alternatively, using a thread pitch gauge can help you verify if the thread spacing remains within factory tolerances. Roll the bolt on a flat surface to check if it is bent; any wobble indicates the bolt must be discarded immediately.
Pay close attention to whether your vehicle uses torque-to-yield (TTY) bolts, which are designed to stretch permanently when tightened to their final specification. If your vehicle’s service manual indicates that the caliper bracket or guide pin bolts are TTY fasteners, they are strictly one-time-use items and must be replaced with brand-new OEM bolts every time they are removed. Reusing a stretched TTY bolt can cause it to snap under the high heat and vibration of daily driving, leading to sudden brake failure.
Cleaning and Preparing the Threads
Proper thread preparation is essential because dirt, old threadlocker, and rust inside the threaded holes will create artificial friction during installation. This artificial friction, known as parasitic torque, can trick your torque wrench into clicking before the bolt has actually applied the necessary clamping force. Use a wire brush to scrub the threads of reusable bolts until they are completely free of old adhesive, rust, and road grime.
For the internal threads inside the caliper bracket or steering knuckle, use a small wire bottle brush sprayed with brake cleaner to clean out the holes thoroughly. Be extremely careful when spraying brake cleaner; only use it on metal threads as authorized by the product label. Avoid getting it on rubber dust boots, guide pin sleeves, or piston seals, as harsh chemicals can degrade these rubber components and cause premature failure.
When cleaning the internal threads of the steering knuckle, debris can easily accumulate at the bottom of blind holes. If this debris is not cleared, the bolt can bottom out prematurely, giving a false torque reading while leaving the caliper bracket loose. Use a small pick or compressed air with safety glasses to ensure the bottom of the hole is completely clear.
Once the threads are clean, dry them completely using compressed air or a clean, lint-free cloth. The application of threadlocker or anti-seize is a highly debated topic, but the rule is simple: follow your vehicle manufacturer’s instructions exactly. If the manual calls for a specific strength of threadlocker, apply a small drop to the leading threads of the bolt; if it specifies dry installation, do not apply any lubricants or adhesives. Never apply standard anti-seize to caliper bolts unless explicitly instructed, as it acts as a lubricant and can cause the bolts to back out under vibration.
Reinstalling and Torquing the Bolts
When you are ready to reinstall the caliper, always start threading the bolts by hand for at least three to four full turns. This ensures the threads are properly aligned and completely eliminates the risk of cross-threading, which can ruin expensive suspension knuckles. If you feel any resistance while turning the bolt by hand, stop immediately, back the bolt out, and inspect the threads again for debris or misalignment.
Once all bolts are threaded hand-tight, use a hand ratchet to snug them down evenly, working in an alternating pattern if you are securing a bracket with multiple bolts. Next, set your calibrated torque wrench to the exact specification listed in your vehicle’s service manual. Tighten each bolt in a smooth, continuous motion until the torque wrench clicks or signals that the target value has been reached.
It is also vital to recognize that caliper guide pins and caliper bracket bolts have vastly different torque requirements. Guide pins, which thread into sliding sleeves, typically require much lower torque values, whereas the heavy-duty bracket bolts that secure the caliper assembly to the steering knuckle require significantly higher torque to withstand braking forces. Mixing up these specifications can easily lead to snapped guide pins or loose brackets.
Avoid jerky movements or bouncing on the torque wrench, as this can cause over-tightening and stretch the bolt beyond its elastic limit. Never use pneumatic or electric impact wrenches for this step, as they lack the precision required for critical safety fasteners and can easily strip the threads. Under-torquing caliper bolts can allow them to vibrate loose over time, while over-torquing can strip the threads in aluminum components or cause the bolt to snap under thermal stress.
Post-Installation Verification and Brake Testing
Before lowering your vehicle and driving, you must perform a series of rigorous post-installation checks to verify the integrity of your work. Begin with a thorough visual inspection of the entire brake assembly, ensuring the caliper is perfectly aligned with the rotor and the brake pads are seated correctly in their clips. Check that the brake hoses are not twisted, kinked, or stretched, and verify that the caliper bolts are fully seated against their mounting surfaces.
Once the visual checks are complete, enter the vehicle and pump the brake pedal several times before starting the engine. This action is critical because compressing the caliper pistons during pad replacement pushes them back; pumping the pedal restores hydraulic pressure and pushes the pads back against the rotors. The brake pedal should feel firm and solid; if it feels spongy or sinks to the floor, stop immediately and check for leaks or air in the system.
After confirming a firm pedal, start the vehicle and perform a low-speed test in a safe, controlled environment, such as a flat driveway or an empty parking lot. Drive forward slowly and apply the brakes gently to ensure the vehicle stops smoothly and straight without pulling to one side. Listen carefully for any abnormal noises, such as grinding, squealing, or clicking, which could indicate a loose bolt or misaligned pad. Once low-speed operation is verified, perform a series of gentle stops from moderate speeds to bed in the new brake pads according to the manufacturer’s instructions.
Frequently Asked Questions (FAQ)
Can I Reuse the Old Caliper Bolts?
Whether you can reuse old caliper bolts depends entirely on the type of bolt and its physical condition. Standard, non-torque-to-yield (TTY) bolts can generally be reused if they pass a strict physical inspection. Before reusing any bolt, check it thoroughly for stretched threads, corrosion, pitting, or bending. If the bolt shows any signs of wear, or if your vehicle’s service manual specifies that the bolts are TTY (one-time-use) fasteners, you must replace them with new OEM bolts to ensure safety.
Do Caliper Bolts Require Threadlocker?
The use of threadlocker on caliper bolts is determined solely by your vehicle manufacturer’s specifications. Some manufacturers require a medium-strength threadlocker to prevent the bolts from backing out due to road vibrations, while others specify dry installation or pre-applied adhesive patches on new bolts. Blindly applying threadlocker when it is not specified can alter the friction of the threads, leading to inaccurate torque readings and making future removal extremely difficult. Always consult your service manual to determine if threadlocker is required for your specific vehicle.
Community discussion
Share your experience or ask a question. Comments are reviewed before publication.