
Properly installing a spring for pipe connections during a motorcycle exhaust modification is essential for achieving a durable, gas-tight seal. Unlike rigid, bolted connections, a spring-retained slip-joint allows the exhaust system to flex naturally under engine vibrations and expand during intense heat cycles. This flexibility prevents the header pipes and cylinder head mounting studs from cracking over time. To achieve a secure fit, you must align the exhaust flange perfectly, anchor the spring to its fixed mount, and use a specialized spring puller tool to stretch the spring onto the receiving hook under controlled tension.
While the installation process is relatively straightforward, executing it with the incorrect technique can lead to physical injury, damaged components, or persistent exhaust leaks that degrade engine performance. Taking the time to prepare your workspace, gather the correct tools, and follow a systematic installation sequence ensures that your aftermarket exhaust system performs reliably on every ride.
Essential Tools and Safety Precautions Before Starting
Before beginning any work on your motorcycle’s exhaust system, you must establish a safe working environment. The absolute priority is ensuring that the engine and the entire exhaust tract are completely cold to the touch. Exhaust pipes can reach temperatures exceeding 500°C during operation, which can cause severe, deep-tissue burns on contact. Let the motorcycle cool down for at least two hours in a well-ventilated area before attempting to touch any metal components.
Products mentioned in this guide
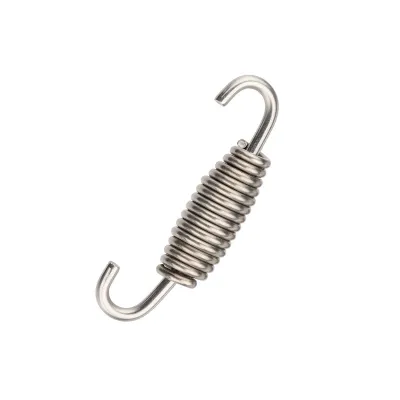
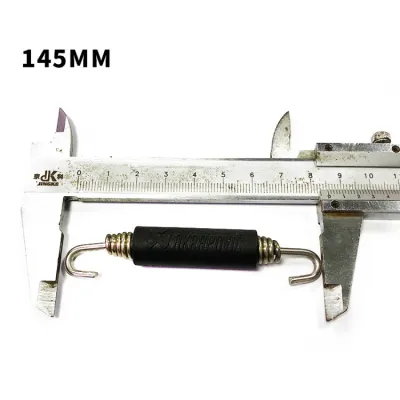
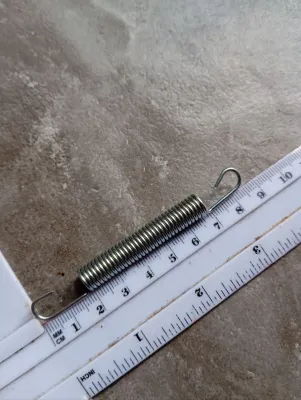
Prices are valid at publication and may change. Please refer to the product page for the latest price.
Additionally, you must verify your specific motorcycle model, year, interface dimensions, mounting position, and local road legality before purchasing or installing any aftermarket exhaust parts. Always consult your motorcycle’s original-vehicle service manual and the aftermarket manufacturer’s documentation to ensure compatibility. If you are unsure about your ability to perform these mechanical steps safely, consult a qualified professional motorcycle mechanic to handle the installation.
To complete the installation safely and efficiently, gather the following specialized tools:
- A dedicated exhaust spring puller tool (a T-handle tool with a heavy-duty hook)
- ANSI-approved safety glasses to protect your eyes from high-tension spring recoil
- Heavy-duty mechanic gloves to shield your hands from sharp metal edges and slippage
- A wire brush to remove rust and debris from the mounting loops
- Penetrating oil or a mild cleaning solvent to prep the surfaces
- High-temperature copper anti-seize or ceramic grease
Never attempt to install or remove exhaust springs using improvised tools such as standard flathead screwdrivers, needle-nose pliers, or vice grips. Because exhaust springs are engineered with high tension, improvised tools can easily slip during the stretching process. A slipping screwdriver can puncture your hand, cause severe lacerations, or strike the engine casing, resulting in deep, costly scratches on your crankcase or custom paint. Always wear safety glasses, as a spring that snaps or slips under tension stores enough potential energy to cause serious facial or eye injuries.
Preparing the Mating Surfaces and Aligning the Exhaust Flange
A successful exhaust installation relies heavily on the cleanliness and alignment of the mating surfaces before any tension is applied. Begin by thoroughly cleaning the cylinder head exhaust port and the header pipe flange. Use a wire brush to scrub away carbon soot, old gasket remnants, and surface rust. If you use a penetrating oil or cleaning solvent to help loosen stubborn debris, apply it strictly according to the manufacturer’s label instructions, taking care not to let it contact surrounding painted plastics, rubber hoses, or electrical sensors.

Once the surfaces are clean, inspect the exhaust gasket. Whether your motorcycle uses a copper crush washer, a fiber O-ring, or a multi-layer steel gasket, you must replace it with a fresh one during this modification. Exhaust gaskets are designed to deform and compress to fill microscopic imperfections between the cylinder head and the pipe. Once compressed, they lose their elasticity and cannot provide a reliable seal a second time. Reusing an old gasket is one of the most common causes of persistent exhaust leaks.
After inserting the new gasket, physically support the exhaust pipe in its final mounting position. Do not rely on the springs to pull a misaligned pipe into place. Use a mechanical jack, a padded stand, or have a helper support the weight of the muffler and header pipe. The spring mounting loops on the cylinder head and the matching hooks on the pipe flange must align naturally without forcing the pipe at an awkward angle. If the pipe is misaligned, the springs will experience uneven lateral stress, causing them to bind, wear out prematurely, or allow exhaust gases to escape.
Step-by-Step Guide to Installing the Exhaust Spring for Pipe Connections
With the exhaust pipe properly aligned and supported, you can proceed to the spring installation. To ensure a smooth process and prevent future issues, apply a small amount of high-temperature copper anti-seize or ceramic grease to the inner hooks of each spring. This lubrication allows the spring hooks to slide smoothly into the flange slots during installation, reducing metal-on-metal friction and preventing annoying squeaking noises caused by engine vibrations.
If your exhaust flange utilizes multiple springs, always install them in an alternating or crisscross pattern. Do not fully tension one spring before starting the next, as this can cock the flange to one side and compress the gasket unevenly. By tensioning the springs progressively and evenly, you ensure that the flange applies uniform pressure against the exhaust gasket, establishing a perfect seal.
Anchoring the Spring to the Fixed Mount
Begin the installation by hooking the closed or shorter end of the exhaust spring onto the fixed bracket or cylinder head loop first. It is essential to anchor this side first because the stationary mount provides a stable, unyielding point of contact.
Once the hook is in place, verify that it is fully seated in the center of the mounting loop. The hook must not rest on the edge or be twisted, as any misalignment here can cause the spring to slip off violently once you begin applying tension to the opposite end.
Stretching and Seating the Spring on the Pipe Flange
With the stationary end secure, grip the T-handle of your exhaust spring puller tool firmly with your dominant hand. Position your body in a stable stance, keeping your face and hands clear of the direct line of tension. Insert the hook of the puller tool through the open, longer hook of the exhaust spring.
Slowly and steadily pull the tool toward the receiving slot on the exhaust pipe flange. Avoid sudden, jerky movements, which can cause the tool to slip off the spring hook. Once the spring hook reaches the flange slot, guide it carefully into the slot while maintaining control of the tool. Slowly release the puller tool’s tension, ensuring the spring hook is fully seated in the slot before completely removing the tool.
Verifying the Exhaust Seal and Testing for Leaks
After installing all the springs, perform a thorough visual inspection of the joint. Verify that the exhaust pipe flange sits flush against the cylinder head or mating pipe. Ensure that the springs are straight, parallel, and not touching any surrounding components such as wiring harnesses, radiator hoses, or plastic fairings, which could melt from the heat or suffer wear from vibration.
Next, perform a cold-start test to verify the integrity of the seal. Move the motorcycle to a well-ventilated outdoor area and start the engine. Keep the engine at a steady idle and listen closely to the spring-retained joint. Any ticking, hissing, or popping sounds are clear indicators of escaping exhaust gases.
While the exhaust components are still relatively cool, perform a safe hand test. Hover your hand about two to three inches away from the joint, moving it slowly around the entire circumference. Do not touch the metal directly, as it heats up rapidly once the engine is running. If you feel a warm draft pulsing against your hand, you have an exhaust leak.
If you detect a leak, shut off the engine immediately and allow the system to cool down completely to prevent burns. Once cold, remove the springs using your puller tool, inspect the seating of the gasket, re-align the header pipe, and reinstall the springs. If the leak persists, verify that the springs are providing sufficient tension or check the flange for warping.
Maintaining Exhaust Springs in Tropical and Humid Conditions
Maintaining your motorcycle’s exhaust system in a tropical climate like the Philippines requires extra care due to environmental factors. High relative humidity, heavy seasonal monsoon rains, and salty coastal air accelerate the oxidation of steel components. Untreated or low-grade steel exhaust springs will rapidly develop surface rust when exposed to these conditions.
Over time, rust eats into the metal structure of the spring, causing micro-fractures and reducing its overall tension. This loss of tension eventually leads to sudden spring failure or persistent exhaust leaks. To protect your springs, apply a thin coat of high-temperature silicone spray or a specialized ceramic exhaust coating after installation. These products create a durable moisture barrier that can withstand the extreme operating temperatures of the exhaust system.
Additionally, make it a habit to inspect the exhaust springs during your regular motorcycle washing routine. Look for visible signs of surface pitting, flaking rust, or stretching, which is indicated by gaps between the spring coils when the engine is cold. Clean away any accumulated road grime, mud, or salt residue from the springs, as trapped moisture under dirt accelerates corrosion. Replacing worn or rusted springs promptly prevents unexpected failures during your daily commute or long rides.
Frequently Asked Questions (FAQ)
Can I reuse old exhaust springs when installing a new aftermarket pipe?
You should only reuse old exhaust springs if they are in pristine physical condition, showing no signs of surface rust, pitting, heat discoloration, or stretching. Additionally, they must match the exact length and tension specifications required by your new aftermarket exhaust system. Because aftermarket manufacturers design their systems with specific spring tolerances, it is highly recommended to use the new springs included in the kit to ensure an optimal seal and prevent premature wear.
What should I do if the exhaust spring hook breaks off the flange?
If a mounting hook breaks off the exhaust flange or header pipe, do not attempt to drill a makeshift hole or weld a crude replacement hook yourself. Improper welding can warp the thin-walled exhaust pipe, compromise its structural integrity, or create weak points that will crack under engine vibration. Instead, consult a qualified motorcycle mechanic or a professional welder who specializes in exhaust repairs to assess the damage. In many cases, replacing the damaged flange or pipe section is the safest and most reliable solution.
How can I tell if an exhaust spring has lost its tension?
You can identify a weak or fatigued exhaust spring through several visual and physical indicators. When the engine is cold, inspect the spring for visible gaps between its coils; a healthy spring should have tightly closed coils. If you can easily wiggle or rotate the spring by hand while it is installed, it has lost its tension. Other common signs include a metallic rattling noise from the exhaust joint during engine deceleration or a dark soot buildup around the joint, which indicates that the spring is no longer holding the flange tight enough to prevent exhaust leaks.
Community discussion
Share your experience or ask a question. Comments are reviewed before publication.