
Rebuilding a motorcycle carburetor using a dedicated repair kit is a highly effective way to restore proper fuel-air mixture delivery, eliminate rough idling, and cure engine hesitation. Over time, fuel varnish, dirt, and tropical humidity can clog the tiny passages inside the carburetor, while rubber gaskets and O-rings dry out and crack. By systematically disassembling the unit, thoroughly cleaning the metal body, and replacing worn internal components with fresh parts from a compatible kit, you can return your motorcycle to its original operating efficiency. This process requires patience, basic hand tools, and a clean, organized workspace to ensure every precision component is installed correctly.
Preparation and Safety Checks Before Disassembly
Before loosening a single screw, establishing a safe and organized workspace is critical. Gasoline vapors are highly volatile and can ignite from a simple spark, so choose a well-ventilated area, preferably outdoors or in an open garage, far from any pilot lights, household appliances, or smoking areas. Disconnect the motorcycle’s negative battery terminal first to eliminate any risk of accidental electrical sparks while working near open fuel lines. Keep a fire extinguisher rated for class B (flammable liquid) fires nearby as a standard safety precaution.
Verifying the compatibility of your carburetor repair kit is the next essential step. Do not assume a kit will fit based solely on the carburetor brand or general engine size; instead, cross-reference the kit’s part number with your motorcycle’s exact make, model, and production year. Consult your vehicle’s official service manual to confirm the factory carburetor specifications, as even minor model-year variations can feature different jet sizes or needle profiles. If you are unsure of compatibility or lack the proper tools, consult a qualified professional before proceeding.
Products mentioned in this guide
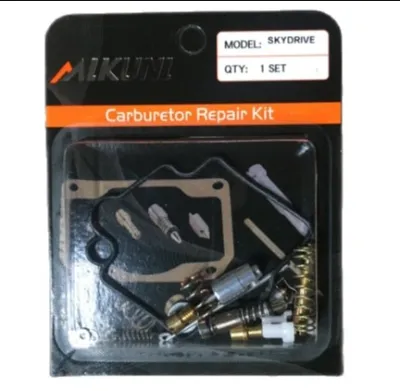
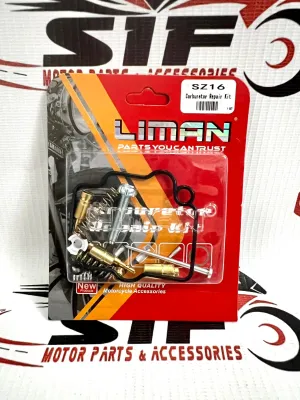
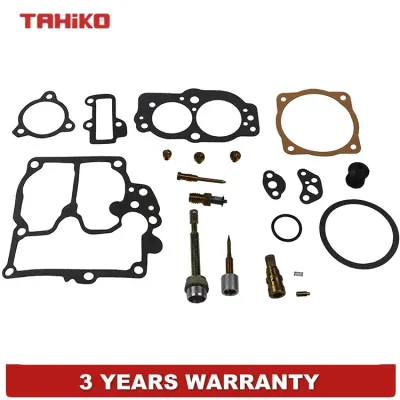
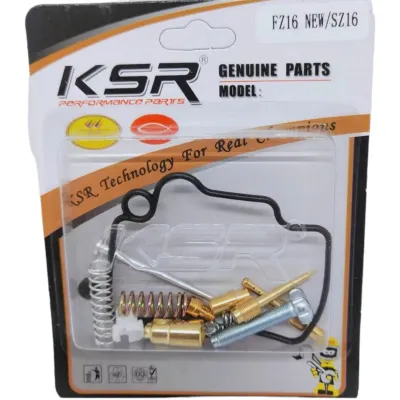
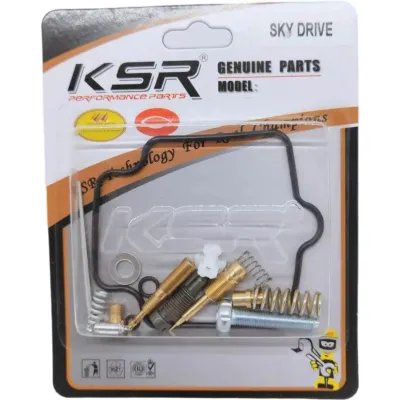
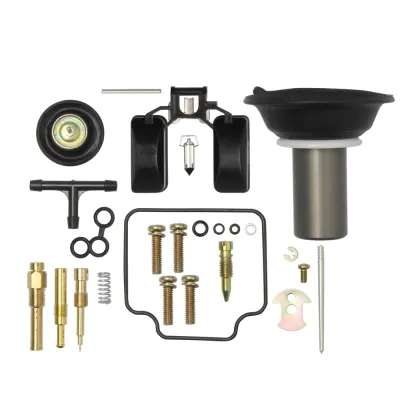
Prices are valid at publication and may change. Please refer to the product page for the latest price.
Gather all necessary tools and supplies before starting the teardown. You will need high-quality, properly sized screwdrivers (often Japanese Industrial Standard, or JIS, for many metric motorcycles) to avoid stripping soft brass jets and aluminum screws. Prepare several clean, lint-free microfiber cloths, a shallow metal or chemical-resistant tray to hold small parts, a can of label-authorized carburetor cleaning solvent, and safety glasses to protect your eyes from pressurized spray.
Removing and Disassembling the Carburetor
Begin the removal process by shutting off the fuel petcock completely to isolate the fuel tank. Locate the drain screw at the bottom of the carburetor float bowl and open it to drain any remaining fuel through a hose into an approved, fire-safe container. Once the bowl is empty, tighten the drain screw and carefully disconnect the main fuel line, vacuum lines, and any overflow hoses connected to the carburetor body.

Take clear, high-resolution photographs of the carburetor from multiple angles before disconnecting any linkages. These photos serve as an invaluable reference for routing the throttle cable, choke cable, and vacuum lines during reassembly. Carefully loosen the cable adjusters and slide the cables out of their brackets, taking care not to bend or kink the inner wire cores.
Loosen the hose clamps securing the carburetor to the rubber intake manifold boot and the airbox boot. Gently wiggle the carburetor body back and forth to break the seal with the rubber boots, then slide it out of the engine bay. Inspect the rubber boots immediately for dry rot, cracks, or hardening, as these defects allow unmetered air to enter the engine, causing a lean running condition that a rebuild alone cannot fix.
Place the carburetor on your clean tray and begin systematic disassembly. Remove the screws securing the float bowl to the main body, lifting the bowl straight off to avoid damaging the float mechanism. Slide out the float hinge pin to release the float and the attached fuel inlet needle. Next, use flathead screwdrivers that fit the slots perfectly to unscrew the main jet, pilot jet, and needle jet holder.
If you encounter seized screws or stubborn brass jets, stop immediately and do not force them. Applying excessive torque to soft brass or aluminum will strip the threads or snap the jet heads, turning a simple rebuild into an expensive replacement. Apply a high-quality penetrating oil directly to the stuck threads, let it sit for several hours, and try again with a tool that fits perfectly. If the component remains seized, consult a professional mechanic or machine shop.
Cleaning the Carburetor Body and Internal Parts
Thorough cleaning is the foundation of a successful carburetor rebuild. Submerge only the bare metal components—such as the aluminum body, float bowl, and brass jets—in a dedicated carburetor cleaning solvent. Always read and follow the solvent manufacturer’s label instructions regarding maximum soak times and material compatibility, as prolonged exposure to harsh chemicals can degrade specialized coatings or damage aluminum alloys. Never allow rubber diaphragms, O-rings, or plastic floats to come into contact with strong solvents, as they will swell, distort, or dissolve.
After soaking, use compressed air to blow through every internal passage, fuel circuit, and jet orifice. The high-pressure air forces out dissolved varnish and loosened debris from deep within the carburetor body. Avoid using hard wire, drill bits, or sewing needles to clear clogged jets, as these hard metal tools can easily scratch or enlarge the precision-drilled orifices, permanently altering the engine’s fuel-air calibration. If a jet remains clogged, use a soft nylon bristle or a specialized carburetor cleaning wire designed specifically for this purpose.
Inspect the carburetor body and internal slide bore closely under bright light. Look for deep scratches, scoring along the slide walls, or physical wear that could cause the throttle slide to stick during operation. Check all threaded holes for signs of stripping or cross-threading. If you discover structural cracks in the aluminum casting or severe wear in the slide bore, the carburetor body is compromised and must be replaced entirely.
Rinse all cleaned metal parts thoroughly with clean water or a compatible mild solvent to remove any remaining chemical residue. Dry every component completely using compressed air, paying close attention to blind threaded holes where moisture can trap and cause corrosion. Ensure the entire assembly is completely dry and free of lint before proceeding to the assembly stage.
Installing the Carburetor Repair Kit Components
Open your carburetor repair kit and lay out the new components systematically on a clean, dry surface. Compare each new part side-by-side with the old component you removed, checking the length, diameter, thread pitch, and needle taper. Even if a kit is labeled for your motorcycle, verifying these physical dimensions ensures you do not accidentally install an incorrect jet size or needle profile that could disrupt engine performance.
Begin reassembly by installing the new fuel inlet needle and its matching seat if the seat is removable. Ensure the small rubber tip of the new needle is pristine and free of debris, as even a microscopic speck of dirt can prevent the needle from sealing, leading to fuel overflow and engine flooding. If the seat uses a small O-ring, lubricate it lightly with a drop of clean engine oil to help it slide into place without pinching or tearing.
Carefully reinstall the cleaned or new brass jets into the carburetor body, tightening them until they are snug. Do not overtighten these components, as brass threads strip easily against the soft aluminum carburetor body. Install the new float bowl gasket into its groove, ensuring it sits completely flat without twisting. If your kit includes a new idle mixture screw, install the spring, washer, and new O-ring in the exact order specified by the manufacturer, gently seating the screw fully before backing it out to the factory baseline setting.
Measure and adjust the float height according to the precise specifications in your motorcycle’s service manual. Hold the carburetor body at an angle where the float tang just touches the spring-loaded pin of the inlet needle without compressing it. Use a vernier caliper or a specialized float level gauge to measure the distance from the gasket mating surface to the top of the float. If the measurement is outside the factory limits, carefully bend the small metal tang on the float arm to adjust it, ensuring both float pontoons remain perfectly level.
Reassembling and Reinstalling the Carburetor
With the internal components and float bowl secured, reassemble the top section of the carburetor. If your carburetor features a vacuum-operated slide with a rubber diaphragm, inspect the rubber carefully for pinholes or tears by holding it up to a light source. Align the diaphragm tab with the matching notch in the carburetor body, ensuring the rubber sits perfectly in its groove before installing the spring and top cap. Tighten the top cap screws evenly to prevent pinching the diaphragm edge, which would cause a vacuum leak and prevent the slide from lifting.
Position the rebuilt carburetor back into the motorcycle’s engine bay, sliding it carefully into the rubber intake manifold boot and the airbox boot. Ensure the carburetor is fully seated in both boots and aligned vertically. Tighten the hose clamps evenly until they are secure, but do not overtighten them to the point of cutting into the rubber. A secure, airtight seal at the intake manifold is critical to prevent unmetered air from entering the combustion chamber.
Reconnect the throttle and choke cables, verifying that they route smoothly without sharp bends. Rotate the motorcycle’s handlebars fully from left to right while twisting the throttle grip to ensure the cable does not bind and that the throttle slide snaps shut completely in all steering positions. Reconnect the main fuel line, vacuum lines, and any vent hoses, ensuring they are routed away from hot exhaust pipes and moving suspension components.
Double-check that all drain hoses and overflow tubes are routed downward, pointing toward the ground and away from the rear tire or hot engine parts. This routing ensures that if the carburetor ever overflows, the highly flammable fuel drains safely onto the ground rather than dripping onto hot metal or slicking your rear tire.
Post-Installation Testing and Basic Tuning
Before starting the engine, turn the fuel petcock to the “on” or “prime” position to allow fuel to fill the empty float bowl. Closely inspect the entire carburetor, including the float bowl seam, the drain screw, and all fuel line connections, for any signs of immediate fuel leaks. If you detect any dampness or dripping fuel, shut off the petcock immediately, drain the carburetor, and resolve the leak before proceeding.
Once you confirm there are no leaks, turn on the ignition, set the choke if the engine is cold, and start the motorcycle. Allow the engine to idle and warm up gradually until it reaches normal operating temperature, then fully disengage the choke. If the engine struggles to idle, use the idle speed screw to adjust the idle speed to the manufacturer’s recommended RPM range.
With the engine warm and idling, perform basic tuning of the idle mixture screw. Slowly turn the mixture screw inward or outward in small, quarter-turn increments, waiting a few seconds after each adjustment for the engine speed to stabilize. Find the position that yields the highest, smoothest idle speed, then readjust the idle speed screw to bring the engine back to its factory idle RPM.
Conduct a careful test ride in a safe, low-traffic area to evaluate the motorcycle’s performance under load. Accelerate gently through the gears, checking for any signs of hesitation, flat spots, bogging, or popping. If the motorcycle exhibits complex fueling issues, such as severe lean popping or rich bogging at wide-open throttle, seek professional assistance or dyno tuning to ensure the engine is calibrated safely across the entire RPM range.
Frequently Asked Questions (FAQ)
How often should a motorcycle carburetor be rebuilt?
There is no fixed mileage interval for rebuilding a motorcycle carburetor, as its condition depends heavily on fuel quality, storage habits, and environmental factors. In tropical climates with high humidity, fuel left sitting in a carburetor can quickly degrade, forming varnish and attracting moisture that corrodes internal brass components. You should plan a rebuild whenever you observe persistent symptoms like hard starting, a rough or erratic idle, fuel leaks, or engine hesitation under acceleration. To extend the time between rebuilds, use a high-quality fuel stabilizer during periods of inactivity and drain the float bowl if the motorcycle will sit unused for more than a few weeks.
Can I reuse the old jets if they look clean?
You can reuse the original brass jets only if they are thoroughly cleaned, completely free of internal deposits, and show no signs of physical wear or damage. Inspect the jets by holding them up to a bright light source to verify the internal orifice is perfectly round and unobstructed. However, if the jet’s screwdriver slot is stripped, if the orifice has been scratched by wire cleaning tools, or if the metal shows signs of corrosion, they must be replaced. When your carburetor repair kit includes verified, exact-match replacement jets from a reputable manufacturer, it is generally best practice to install the new parts to ensure optimal fuel metering.
What should I do if the engine still runs poorly after the rebuild?
If your motorcycle continues to run poorly after a thorough carburetor rebuild, begin troubleshooting by checking for external issues that mimic carburetor problems. Inspect the rubber intake manifold boot for vacuum leaks by spraying a small amount of soapy water around the boot while the engine idles; any change in engine RPM indicates an air leak. Verify that the inline fuel filter is clean and that fuel flows freely from the tank petcock. If the fuel system is functioning correctly, check other critical engine systems, such as spark plug condition, ignition timing, and valve clearances, or consult a qualified professional mechanic to diagnose deeper mechanical issues.
Community discussion
Share your experience or ask a question. Comments are reviewed before publication.