
Removing and reinstalling a motorcycle magneto is a precise mechanical task that requires a specialized magneto puller tool to safely separate the flywheel from the crankshaft taper. This procedure is commonly performed when replacing a failed stator, inspecting a leaking crankshaft oil seal, or servicing a sheared woodruff key. Attempting to pry, lever, or hammer the flywheel off can cause irreversible damage to the crankshaft threads, bend the crankshaft itself, or ruin the engine casings. This guide provides a comprehensive procedural framework for executing this repair safely, though you must always verify the exact torque values, thread specifications, and safety steps in your motorcycle’s official service manual before beginning.
Preparation and Safety Checks Before Starting
Before starting any work, position the motorcycle on a stable, level surface. Using a paddock stand, center stand, or a dedicated motorcycle lift is essential to prevent the bike from tipping over when you apply high torque to loosen tight fasteners. In tropical climates where humidity is high, ensure your workspace is dry and well-ventilated to prevent moisture from settling inside the exposed engine crankcase during the repair.
Disconnect the negative terminal of the motorcycle battery first. This simple step eliminates the risk of accidental short circuits, electrical arcing, or unintended engine cranking while your hands are near moving parts. Organize your workspace by laying out a clean parts tray, basic hand tools, and personal protective equipment, including safety glasses and heavy-duty gloves to protect your hands from sharp metal edges.
Products mentioned in this guide
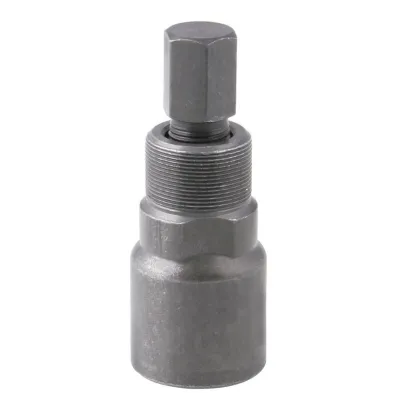
Prices are valid at publication and may change. Please refer to the product page for the latest price.
Consult your motorcycle’s official service manual to identify any preliminary disassembly steps. Depending on the model, you may need to remove the gear shifter lever, left-side fairings, footpegs, or sections of the exhaust system to gain unobstructed access to the magneto cover. Keep track of all removed bolts by placing them in labeled containers or threading them back into their original holes temporarily. If you are unsure of your mechanical skills or lack the proper tools, seek a qualified motorcycle technician to perform the service.
Selecting the Correct Magneto Puller Tool
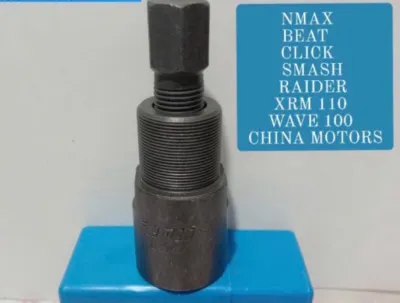
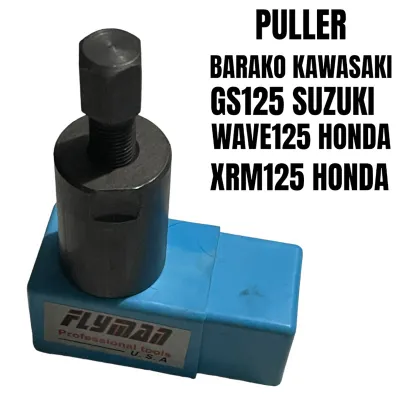
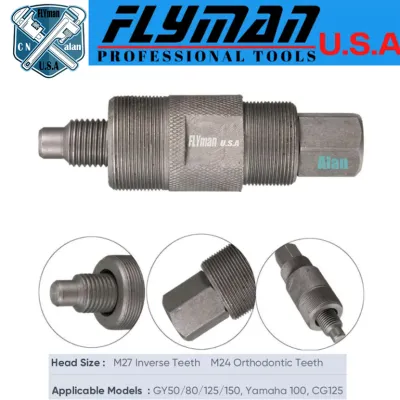
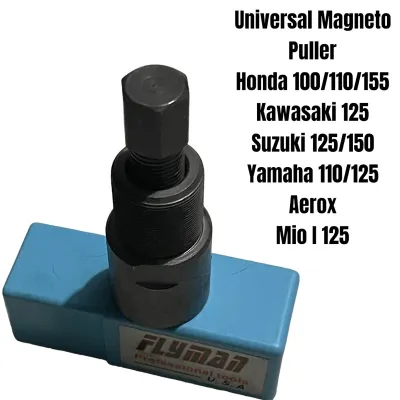
A magneto puller is a highly specialized tool designed to thread directly into or onto the flywheel hub, allowing a center bolt to push against the crankshaft end to break the tapered fit. You must identify whether your motorcycle requires a push-type or pull-type puller. This depends entirely on the crankshaft design; some engines feature an internally threaded crankshaft end, while others use an externally threaded shaft.

Never guess the thread pitch or diameter of your flywheel. Motorcycle manufacturers use a wide variety of thread sizes, such as M27x1.0 left-hand thread or M24x1.5 right-hand thread. Forcing an incorrect puller into the flywheel will instantly strip the delicate threads, turning a straightforward repair into an expensive machining disaster. Always verify the exact thread specifications in your service manual or use a thread pitch gauge to confirm the tool matches perfectly.
Avoid using universal jaw pullers, three-jaw gear pullers, or improvised slide hammers. These tools apply uneven lateral force to the outer edges of the flywheel, which can easily warp the rotor, crack the internal magnets, or bend the crankshaft snout. Inspect your magneto puller before use; ensure the threads on both the outer body and the center bolt are clean, sharp, and free of galling, wear, or metal shavings.
Step-by-Step Guide to Removing the Magneto
Begin by removing the bolts securing the magneto cover to the engine case. Carefully pull the cover straight off, keeping in mind that the magnetic pull of the flywheel may offer some resistance. Once the cover is removed, you will see the flywheel. To loosen the central crankshaft nut, you must secure the flywheel to prevent it from spinning. Use a dedicated flywheel holding tool or a heavy-duty strap wrench. Avoid using makeshift methods like wedging a screwdriver into the cooling fins or stator coils, as this can easily crack the components.
With the flywheel securely held, use a socket wrench to unscrew the central crankshaft nut. Note the exact orientation of the nut and any washers behind it, as they must be reinstalled in the same order. Once the nut is removed, inspect the exposed end of the crankshaft. If your puller kit includes a protective cap or pilot to place over the crankshaft threads, install it now to protect the shaft from being mushroomed by the puller’s center bolt.
Thread the outer body of the magneto puller into the flywheel hub by hand. It should spin in smoothly without resistance. If you encounter binding after only one or two turns, stop immediately; the threads may be dirty, damaged, or you may have the wrong thread pitch. Thread the tool in fully until it bottoms out, then back it off a quarter turn to ensure the load is distributed across all the threads.
Slowly tighten the center bolt of the puller using a wrench while holding the outer body of the puller stable. Apply steady, incremental torque. You will feel the tension build as the puller exerts force against the crankshaft taper. Often, a sudden “pop” indicates the flywheel has broken free from the taper. If the flywheel does not release, stop and reassess. Never strike the puller, flywheel, or crankshaft with a metal hammer, as the shockwaves can shatter the magnets or bend the crankshaft.
Inspecting the Magneto and Crankshaft Components
Once the flywheel is free, slide it off the crankshaft carefully, taking care not to lose the small woodruff key nested in the crankshaft keyway. Begin your inspection by examining the stator coils located inside the engine case or mounted to the cover. Look for signs of overheating, such as blackened or burnt copper windings, melted insulation, or frayed wiring harness leads. Check the connector pins for corrosion or physical damage.
Turn your attention to the removed flywheel. Inspect the internal magnets closely for any cracks, chips, or signs of epoxy failure. Loose or damaged magnets can detach at high engine speeds, causing catastrophic engine failure. Clean any accumulated metal debris or clutch material off the magnets using a clean, lint-free cloth.
Examine the mating surfaces of both the crankshaft taper and the inner hub of the flywheel. Both surfaces must be perfectly smooth, clean, and free of scoring, galling, or rust. Inspect the woodruff key and the keyway on the crankshaft; if the key shows signs of shearing, indentation, or wear, it must be replaced. Clean the crankshaft threads thoroughly, removing any old threadlocker residue or dirt using a wire brush and a label-authorized solvent.
Reinstalling the Magneto Safely and Correctly
To begin reinstallation, place the woodruff key back into its slot on the crankshaft. Ensure it sits level and secure. Align the keyway on the inner hub of the flywheel with the woodruff key on the crankshaft. Carefully slide the flywheel onto the shaft by hand. It should slide on smoothly until it seats firmly against the crankshaft taper. Never use the central nut to force a misaligned flywheel onto the shaft, as this will shear the woodruff key and damage the keyway.
Once the flywheel is fully seated, reinstall the washer and the central crankshaft nut. If your motorcycle’s service manual specifies the use of a threadlocking compound, apply a small drop of the recommended medium-strength threadlocker to the clean crankshaft threads. Secure the flywheel again using your holding tool or strap wrench.
Using a calibrated torque wrench, tighten the central crankshaft nut to the exact torque specification listed in your official service manual. Proper torque is critical; undertightening can allow the flywheel to slip and shear the woodruff key, while overtightening can stretch the crankshaft threads or crack the flywheel hub. Clean the engine case mating surface, install a new gasket, apply a thin layer of manufacturer-approved sealant if required, and reinstall the magneto cover, tightening the bolts in a cross-pattern sequence.
Post-Installation Testing and Final Verification
Reconnect the negative terminal of the battery. Before starting the engine, turn the crankshaft over slowly by hand (if possible) or bump the starter briefly to listen for any abnormal mechanical rubbing, scraping, or clicking sounds coming from inside the magneto cover. If everything sounds normal, start the engine and let it idle.
Connect a digital multimeter to the battery terminals to verify the charging system’s performance. Set the meter to DC voltage; with the engine running at a fast idle, the voltage should rise to the specification outlined in your manual (typically between 13.5 and 14.5 volts), confirming that the stator and regulator-rectifier are functioning correctly.
Inspect the perimeter of the magneto cover and any oil gallery plugs for signs of oil or coolant leaks as the engine warms up to operating temperature. Finally, conduct a short, controlled test ride in a safe area to monitor for any unusual engine vibrations, misfires, or electrical issues before returning the motorcycle to regular service.
Frequently Asked Questions (FAQ)
Can I use a standard automotive steering wheel puller or generic gear puller on a motorcycle magneto?
No, you should not use standard automotive steering wheel pullers or generic jaw pullers on a motorcycle magneto. These generic tools are designed for different load distributions and lack the precise thread pitch and reach required to interface safely with a motorcycle flywheel. Using a jaw puller applies bending forces to the outer edges of the flywheel, which can easily warp the rotor, crack the delicate internal magnets, or slip and damage the stator windings underneath. A dedicated magneto puller threads directly into the hub, ensuring that the pulling force is perfectly aligned with the centerline of the crankshaft, preventing uneven lateral loads and protecting the engine components from structural damage.
What should I do if the magneto puller gets stuck or the flywheel refuses to budge?
If the flywheel remains seized on the crankshaft taper even after applying significant torque to the puller bolt, do not force it further. Start by applying a high-quality penetrating oil directly to the interface between the crankshaft taper and the flywheel hub, allowing it to soak for several hours or overnight. If it still refuses to release, you can apply gentle, controlled heat to the center hub of the flywheel using a heat gun to expand the metal slightly. Avoid directing heat toward the magnets, stator coils, or crankshaft oil seals, as excessive heat will ruin them. If the puller bolt begins to stretch, the threads show signs of deformation, or the flywheel remains stuck after these steps, stop immediately and consult a professional machinist or an authorized dealership to avoid breaking the crankshaft.
Community discussion
Share your experience or ask a question. Comments are reviewed before publication.