
Replacing a motorcycle helmet visor is a straightforward maintenance task that ensures clear visibility and optimal safety on the road. In the tropical climate of the Philippines, where riders frequently encounter heavy downpours, intense sunlight, road dust, and high humidity, a clear and functional visor is indispensable. Over time, daily exposure to these harsh environmental factors can lead to scratches, degraded optical clarity, or a compromised seal against the helmet’s eye port gasket. Executing a helmet visor replacement correctly prevents damage to the delicate ratchet plates, side pods, and sealing gaskets, keeping your protective gear in peak condition.
Identify Your Helmet Visor Mechanism
Before attempting to remove your current visor, you must identify the specific attachment mechanism your helmet utilizes. Forcing a visor off without understanding its locking system can easily snap the plastic tabs or strip the internal gears, rendering the helmet unusable until you source replacement parts. Most modern helmets fall into one of three primary categories: quick-release systems, pivot ratchet systems, or screw-on configurations.
Quick-release systems are highly common in modern full-face and modular helmets. These designs feature integrated levers, buttons, or trigger mechanisms located on the side plates. Actuating these releases allows the visor to pop out of its track instantly without any tools.
Products mentioned in this guide
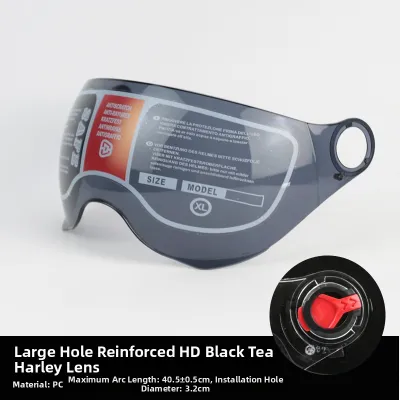
42 Lazada user ratings
hindi sya universal...di pwede sa lumang helmet ko..di aabot..dapat alam mo tlga sukat
hindi naman po universal type huhu, bitinnn🤦♂️😭
putik na Yan Hindi tugma Sabi universal.
UV protection,
bad quality
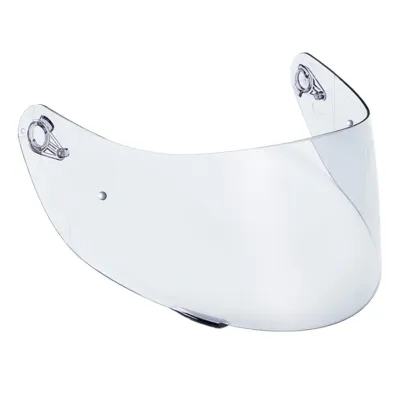
252 Lazada user ratings
sobrang tagal bago nadeliver. then film kng pala eto. my mistake Di ko gaano binasa yung details. pero misleading ang presentation ng item. …Read full reviewShow less
sobrang tagal bago nadeliver. then film kng pala eto. my mistake Di ko gaano binasa yung details. pero misleading ang presentation ng item. or nilagay man lng na film lng ito not visor
actually seems to work well. BIG NOTE! it goes on the inside of the visor. Thankyou seller for being so efficient in the fast delivery
Easy to install, works great, Rain or shine, perfect visibility, Transparent and effective lens patch, Keeps my helmet fog-free,
Rain or shine, perfect visibility, Easy to install, works great, Transparent and effective lens patch,
Keeps my helmet fog-free, Clear vision, no fogging, ......thank you....................
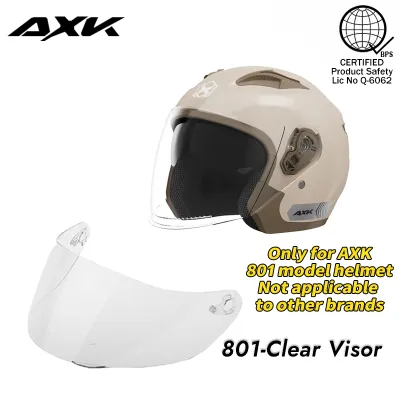
645 Lazada user ratings
actually got the correct lens. 😲🎉 yeaaaa don't wipe with anything other than a micro fibre cloth. your Teeshirt material will scratch it. tha…Read full reviewShow less
actually got the correct lens. 😲🎉 yeaaaa don't wipe with anything other than a micro fibre cloth. your Teeshirt material will scratch it. thankyou seller for being so efficient in delivery
actually got the correct lens. yeaaaa 🎉💓 don't wipe with anything other than a micro fibre cloth your Teeshirt material will scratch it. than…Read full reviewShow less
actually got the correct lens. yeaaaa 🎉💓 don't wipe with anything other than a micro fibre cloth your Teeshirt material will scratch it. thankyou seller for being so efficient in delivery
Mali yung dumating , Ang order ko ay tented visor pero Ang dumating ay clear visor . okey lang din pang replacement
🛠️Durability:nice 🔌Compatibility:Great value for money, 🎧Comfort:niceSmooth operation,
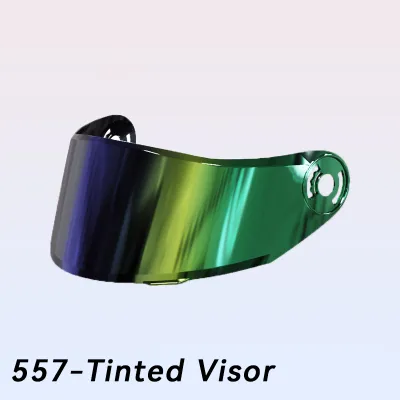
278 Lazada user ratings
Easy to install and remove, Perfect fit for my full face helmet, Provides excellent sun protection, Durable material, built to last, Clear v…Read full reviewShow less
Easy to install and remove, Perfect fit for my full face helmet, Provides excellent sun protection, Durable material, built to last, Clear visibility, great for day rides, Tinted visor adds style and protection, Excellent value for the price,
maling mali po yung narcv ko, ibang visor nman dumating, bilog yung lock ang dumating ang order ko is yung pinapasok lng.. sayang ng pera, m…Read full reviewShow less
maling mali po yung narcv ko, ibang visor nman dumating, bilog yung lock ang dumating ang order ko is yung pinapasok lng.. sayang ng pera, mali ang pinadala nyo. dapat ganyan picture pinadala nyo, yung sa video ko mali
Excellent value for the price, Perfect fit for my full face helmet, Perfect fit for my full face helmet, Clear visibility, great for day rid…Read full reviewShow less
Excellent value for the price, Perfect fit for my full face helmet, Perfect fit for my full face helmet, Clear visibility, great for day rides, Improved airflow, keeps me cool, Tinted visor adds style and protection,
Easy to install and remove, Perfect fit for my full face helmet, Clear visor doesn't distort vision, Tinted visor adds style and protection,…Read full reviewShow less
Easy to install and remove, Perfect fit for my full face helmet, Clear visor doesn't distort vision, Tinted visor adds style and protection, Enhances the look of my helmet, Excellent value for the price,
ayus fit na fit sa luma kung helmet yung bagung visor lens na na order ko thank you so much seller and delivery Rider God bless
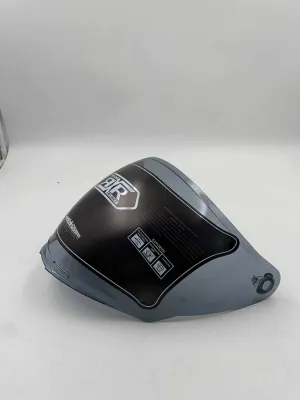
524 Lazada user ratings
New and genuine product, High-quality replacement lens, Great value for money, Clear vision, no distortion,
🛠️Durability: Scratch-resistant visor for durability, Quick change lens for convenience,
Quick change lens for convenience, may onting scratch pero goods nmn
Great value for money, High-quality replacement lens,
Prices are valid at publication and may change. Please refer to the product page for the latest price.
Pivot screw or ratchet systems often use a combination of plastic side covers (or side pods) and manual locking tabs. Some designs require you to pry off the decorative side pods gently using a plastic tool to expose the underlying ratchet plate, while others feature a manual dial that you rotate to unlock the shield.
Screw-on or bolt-fixed systems are typically found on dual-sport, adventure, retro, or open-face helmets. These mechanisms secure the visor—and sometimes an external peak visor—directly to the helmet shell using metal or plastic screws. They require specific hand tools, such as a flathead screwdriver, a Phillips screwdriver, or an Allen key, to loosen and secure the hardware.
Always consult your helmet’s user manual to verify the exact mechanism type and locate the correct replacement part numbers. If you no longer have the physical manual, check the manufacturer’s official website or contact an authorized dealer to ensure you purchase a compatible visor designed specifically for your helmet model and shell size.
Tools and Preparation for Visor Replacement
Proper preparation prevents accidental scratches on both your helmet shell and the new visor. Start by setting up a clean, well-lit workspace on a flat surface, such as a sturdy table or workbench. Lay down a soft, clean towel or a microfiber mat to cushion the helmet and prevent it from rolling or getting scratched while you work.

Gather the necessary tools based on your identified mechanism. For quick-release systems, you generally do not need any tools, but having a clean microfiber cloth handy is useful for wiping down the exposed tracks. For screw-on systems, select the exact size of screwdriver or hex key required; using an ill-fitting tool can easily strip the plastic or aluminum screw heads. A plastic trim removal tool or a non-marring plastic wedge can also be helpful if your helmet has pop-off side pods.
Handling precautions are critical when preparing your new visor. Many replacement shields come with a delicate anti-fog coating on the inner surface and a scratch-resistant coating on the exterior. Avoid touching the inner surface with your bare fingers, as skin oils can degrade the anti-fog treatment. Keep the protective plastic film on the new visor until the installation is fully complete, or handle the visor strictly by its top and bottom edges.
Step-by-Step Visor Removal Process
Removing Quick-Release and Pivot Visors
To remove a quick-release visor, start by placing the helmet on your prepared soft surface. Open the visor completely to its highest position; most quick-release mechanisms are designed to disengage only when the shield is fully raised. Locate the release levers or buttons on the side plates of the helmet.
Depending on the brand, you may need to pull a lever downward, push a button inward, or slide a trigger backward. Actuate the release mechanism on one side while gently pulling the visor outward and upward away from the helmet. The pivot pins on the visor should pop out of the ratchet track with a distinct click. Repeat this exact process on the opposite side.
If your helmet uses a pivot system with side pods, you must first remove the pods. Gently insert a plastic pry tool under the edge of the pod as directed by the manufacturer, taking care not to scratch the helmet’s paint. Once the pod is detached, locate the locking tab or dial, release it, and lift the visor free. Always stop immediately if you feel excessive resistance; forcing the visor can snap the delicate plastic alignment pins on the shield or damage the internal gears of the ratchet plate.
Removing Screw-On and Bolt-Fixed Visors
For helmets with screw-on visors, begin by opening the visor to the position recommended in your manual—often fully open or fully closed, depending on how the tension springs are aligned. Hold the helmet securely with one hand, or place it between your knees on a soft towel to keep it stable.
Insert the correct screwdriver or hex key into the screw head. Apply firm downward pressure to prevent the tool from slipping, and turn it counterclockwise to loosen the screw. If the screws are made of plastic, which is common to prevent over-tightening, exercise extreme caution to avoid stripping the threads or slot.
As you remove the final screw on each side, support the visor with your free hand to prevent it from falling and scratching the helmet shell. Carefully lift the visor, along with any external peak or side plates, away from the helmet. Place all removed hardware, including washers, spacers, and screws, into a magnetic tray or a small container to ensure no small components are lost during the process.
Step-by-Step Visor Installation Process
Before installing the new visor, take a moment to inspect the helmet’s eye port gasket and the ratchet tracks. Wipe away any accumulated dust, sweat, or road grime using a damp microfiber cloth. If the manufacturer recommends it, apply a tiny drop of silicone lubricant to the rubber gasket to keep it supple and ensure a tight seal.
To install a quick-release visor, align the pivot pins on the new shield with the corresponding slots on the helmet’s ratchet mechanism. Ensure the visor is in the fully open position, matching the angle used during removal. Push the visor pivot firmly into the track until you hear a solid click, indicating that the locking mechanism has engaged. Repeat this on the other side, then gently pull on the visor to verify that both sides are securely locked in place.
For screw-on visors, position the new shield over the mounting holes, ensuring any washers or spacers are placed in their correct order and orientation. Hand-thread the screws clockwise for the first few turns to avoid cross-threading. Once the threads are engaged, use your tool to tighten the screws until they are snug. Avoid overtightening, especially with plastic hardware, as this can crack the visor, strip the threads, or bind the pivot mechanism, preventing the visor from opening smoothly.
Finally, close the visor completely and inspect the fit. The visor must sit flush against the rubber eye port gasket around the entire perimeter. If you notice any visible gaps, uneven spacing, or if the visor binds when moving, open it back up, release the mechanism, and re-align the components before securing them again.
Post-Installation Testing and Common Mistakes
Once the new visor is installed, perform a thorough operational check before riding. Slowly open and close the visor several times, letting it click through each detent position. The movement should feel smooth and consistent, without any grinding noises, excessive friction, or resistance.
Next, test the seal of the visor against the helmet’s gasket. Close the visor completely and lock it if your helmet has a shield lock. Visually inspect the rubber seal from the outside; there should be no gaps where wind or rainwater could penetrate. In the Philippines, a poor seal can lead to distracting wind noise at highway speeds and water leaking inside during sudden tropical downpours, which directly compromises your visibility and comfort.
A common mistake during helmet visor replacement is forcing a misaligned visor into the ratchet plates. If the alignment pins are not perfectly seated, forcing the visor down can break the plastic tabs, requiring a complete replacement of the ratchet assembly. Another frequent error is losing internal spacers or washers during disassembly, which leads to a loose, rattling visor that fails to seal properly. Additionally, avoid using harsh household chemicals, glass cleaners containing ammonia, or abrasive paper towels on your new visor, as these can permanently ruin anti-fog coatings and scratch the outer surface.
If you encounter stripped screws, cracked plastic parts, broken ratchet teeth, or persistent gaps that you cannot resolve, stop immediately. Do not ride with a compromised or improperly secured visor. Consult the helmet manufacturer’s customer service or visit a qualified professional at an authorized motorcycle accessory shop to have the mechanism inspected and repaired safely.
Frequently Asked Questions (FAQ)
Can I use a visor from a different helmet brand or model?
No, helmet visors are not universally interchangeable. Pivot mechanisms, ratchet teeth configurations, side pod attachments, and the physical curvature of the eye port are highly model-specific. Even within the same brand, a visor designed for one model will rarely fit another unless explicitly stated by the manufacturer. Attempting to force an incompatible visor onto your helmet can damage the mounting plates, compromise the structural integrity of the shield, and prevent a proper seal against wind and rain. Always refer to the manufacturer’s approved accessory list or consult an authorized dealer to find the exact replacement part number for your specific helmet model and shell size.
How do I clean the new visor without damaging the anti-fog coating?
To clean your new visor safely, use warm water and a clean, high-quality microfiber cloth. Gently drape a wet, warm microfiber cloth over the exterior of the visor for a few minutes to soften dried bugs, dust, and road grime, then wipe them away without applying heavy pressure. For the delicate inner surface, which often features an anti-fog coating, avoid rubbing vigorously. Instead, rinse it gently with clean water or use a specialized visor cleaner approved by the manufacturer, and let it air dry or pat it very gently with a dry microfiber cloth. Never use ammonia-based glass cleaners, dish soaps with harsh degreasers, paper towels, or abrasive sponges, as these will strip the protective coatings and leave permanent micro-scratches.
Community discussion
Share your experience or ask a question. Comments are reviewed before publication.