
Replacing the engine and cabin air filters on your Mitsubishi Montero is a straightforward DIY task that takes about 15 to 30 minutes. It saves you money on dealership labor, improves your engine’s efficiency, and keeps the cabin air clean in dusty or humid Philippine road conditions.
Your Montero relies on two distinct filtration systems: the engine air filter, which prevents abrasive dirt from entering the combustion chamber, and the cabin air filter, which cleans the air blowing through your air conditioning vents. Over time, both filters accumulate soot, dust, and moisture, which restricts airflow and reduces overall performance. Regularly replacing these components ensures your engine breathes cleanly to maintain fuel efficiency, while keeping your cabin air conditioning system smelling fresh and blowing at full strength.
Preparation and Safety Checks Before You Start
Before handling any components, proper preparation is essential. Park your Montero on a flat, level surface, engage the parking brake, and switch the ignition off. If you have recently driven the vehicle, let it sit for at least 30 minutes to allow the engine bay to cool down completely, preventing accidental burns.
Products mentioned in this guide
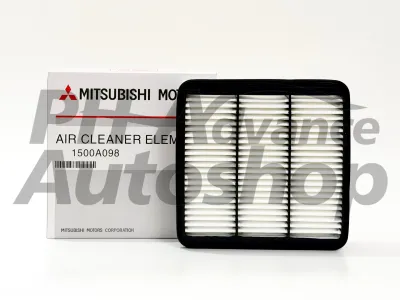
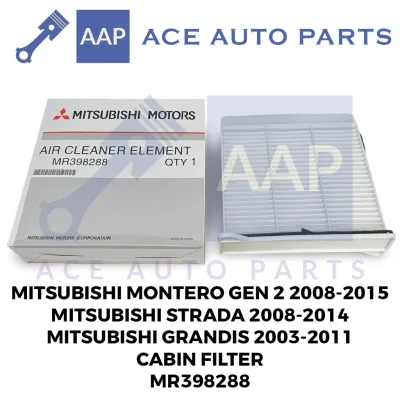
Prices are valid at publication and may change. Please refer to the product page for the latest price.
You will only need a minimal selection of basic tools. Keep a medium-sized Phillips-head screwdriver, a flat-head screwdriver, and a clean microfiber cloth nearby. While some Montero model years utilize retaining screws on the air box or glove box dampener, others rely entirely on tool-free plastic clips. Wearing lightweight mechanic’s gloves is recommended to protect your hands from sharp plastic edges.
Verifying your replacement parts before opening any packaging is a critical step. Mitsubishi Montero models span multiple generations in the Philippines—most notably the second-generation (2008–2015) powered by the 2.5-liter 4D56 engine, and the third-generation (2015–present) featuring the 2.4-liter 4N15 MIVEC engine. These generations use different filter shapes and dimensions. Always check the owner’s manual or read the part number directly off your old filters to ensure the replacements match your specific Montero model and year. Avoid guessing part numbers based solely on the vehicle badge.
How to Replace the Engine Air Filter
The engine air filter is housed in a heavy-duty plastic box designed to seal out moisture and debris while channeling clean air directly into the intake manifold.

Locating the Housing
Open your Montero’s hood and secure it safely. Look toward the front corner of the engine bay, typically on the passenger side for most common Montero diesel variants. You will see a large, black plastic rectangular housing connected to a thick, ribbed rubber intake hose. This black box is the engine air filter housing, positioned to draw fresh air from the front grille area while keeping road debris away from the intake.
Opening the Housing
Depending on your Montero’s model year, the air filter cover is secured by metal spring clips or a combination of clips and screws. For third-generation models, you will generally find two or three metal spring clips along the sides of the plastic housing. Pop these clips open by pressing them outward. If your model features retaining screws, use your Phillips-head screwdriver to loosen them completely; these are usually captive screws that stay attached to the cover. Once the fasteners are released, gently wiggle and lift the upper plastic cover upward to expose the filter. Do not pull too hard, as it is still connected to the flexible rubber intake duct and mass airflow sensor wiring.
Removal and Inspection
With the cover lifted slightly, grasp the edge of the old engine air filter and lift it straight out of the lower housing. Note how the filter is oriented, paying close attention to which way the rubber seal faces and how any angled corners align with the housing. Inspect the filter’s condition; if the paper pleats are dark grey, clogged with heavy dust, or filled with trapped leaves and road grime, it is time for a replacement. If you notice any signs of moisture, mold, or tears in the filter media, replace it immediately to prevent abrasive dust from entering the engine.
Cleaning the Housing
Before placing the new filter into the housing, take a moment to clean the lower air box. Road dust, sand, and dried leaves can accumulate at the bottom of the housing over time. Use a slightly damp microfiber cloth to wipe out the interior of the lower box, removing all loose dirt. It is absolutely critical during this step to prevent any debris or dust from falling into the open intake tube leading to the engine. If necessary, cover the open intake tube with a clean cloth while you wipe down the housing, and remember to remove it before installing the new filter.
Installing the New Filter
Remove your new engine air filter from its packaging, making sure not to bend or damage the delicate paper pleats. Align the filter exactly as the old one was positioned, ensuring that the rubber gasket around the perimeter of the filter sits perfectly flush within the recessed groove of the lower housing. The rubber seal acts as the primary barrier against unfiltered air; if it is pinched, twisted, or seated incorrectly, dirty air will bypass the filter. Gently press down along the edges of the filter frame to confirm that it is seated evenly.
Securing the Cover
Lower the upper housing cover back down over the new filter. Ensure that the plastic tabs or hinges on the rear of the cover slide correctly into their corresponding slots on the lower housing before pressing the cover down. Once the cover is aligned and sitting flush against the rubber filter gasket, snap the metal spring clips back into place. If your Montero uses screws, tighten them in an alternating pattern to ensure even pressure across the seal. Do not over-tighten the screws, as the plastic threads can easily strip. Give the cover a gentle tug to verify that it is locked tight and that there are no visible gaps.
How to Replace the Cabin Air Filter
The cabin air filter plays a vital role in maintaining the air quality inside your Montero, trapping dust, exhaust soot, and allergens before they enter the cabin through the air conditioning system. In the humid Philippine climate, a clean cabin filter also prevents mold spores from taking root in the AC ducting, which can cause unpleasant, musty odors.
Accessing the Glove Box
The cabin air filter is located behind the glove compartment on the passenger side of the cabin. Start by completely emptying the contents of your glove box to prevent items from spilling. Open the glove box fully. Look at the outer right-hand side of the glove box frame, where you will find a small plastic dampener arm. Gently slide the dampener arm off its mounting pin; you may need to squeeze the retaining tab slightly or use a flat-head screwdriver to pop it free. Next, gently squeeze both sides of the glove box inward to release the stop pins from the dashboard frame, allowing the entire glove box assembly to swing downward toward the floorboards.
Locating the Filter Compartment
With the glove box lowered out of the way, look directly into the exposed dashboard cavity. You will see a white or black plastic blower motor assembly. Near the top of this assembly is a narrow, horizontal rectangular cover, which is the access door for the cabin air filter. This plastic cover is typically secured by small squeeze-tabs on one or both ends.
Removing the Old Filter
Locate the plastic release tabs on the sides of the cabin filter cover. Squeeze the tabs inward and pull the cover straight off, setting it aside safely. Reach inside the slot, grasp the edge of the old cabin air filter, and slide it straight out of the housing. Keep the filter level as you pull it out to prevent any loose leaves or dust trapped on top of the filter from spilling into the blower motor fan below.
Checking Airflow Direction
Before discarding the old filter, look closely at its side frame for an arrow indicating the direction of airflow. On the Mitsubishi Montero, the air conditioning system draws air from the cowl area outside and blows it downward through the cabin filter and into the blower fan. Consequently, the airflow arrow on your filter must point downward. Look at your new cabin air filter and locate its airflow marking. Ensure that you orient the new filter so that the arrow points in the exact same downward direction as the original. Installing the filter upside down can restrict airflow, reduce AC cooling efficiency, and cause the filter material to buckle or collapse under pressure.
Reassembly
Slide the new cabin air filter smoothly into the rectangular slot, making sure it does not catch or bend on the edges of the housing. Once the filter is fully inserted, line up the plastic cover and press it back into place until you hear the tabs snap securely shut. Lift the glove box assembly back up into position. Squeeze the sides of the glove box slightly so the stop pins slide back past the dashboard frame. Finally, align the dampener arm with its plastic mounting pin on the right side and press it on until it clicks into place. Open and close the glove box a few times to ensure it operates smoothly and latches securely.
Post-Installation Testing and Mistakes to Avoid
Once both filters are installed, performing a quick post-installation check is highly recommended to confirm that everything is sealed and functioning correctly before you head out on the road.
Engine Air Filter Verification
To verify the engine air filter installation, ensure the engine bay is clear of all tools, then start your Montero’s engine. Let it idle for a minute, then gently rev the engine while listening closely near the front passenger side of the engine bay. You should hear a smooth, quiet engine idle. If you hear any unusual hissing or sucking noises, it indicates that the air box cover is not sealed correctly or the filter gasket is pinched. Turn off the engine immediately, open the hood, and re-check the alignment of the filter and the tightness of the clips or screws. A poor seal allows unfiltered, abrasive air to enter the engine, which can damage internal components and potentially trigger a check engine light due to incorrect readings from the mass airflow sensor.
Cabin Air Filter Verification
To test the cabin air filter, turn on your vehicle’s ignition and switch on the air conditioning system. Set the fan speed to its maximum setting and cycle through the different vent modes. Feel the airflow coming out of the dashboard vents; it should feel strong, consistent, and free of any whistling or rattling noises. If you notice a sudden drop in air volume or hear a fluttering sound, the cabin filter may be misaligned, installed backward, or the access cover may not be fully snapped shut. Additionally, check that the glove box opens and closes with its original dampened motion, confirming that the arm was reattached correctly.
Common Mistakes to Avoid
- Forcing a Misaligned Filter: Never force either filter into its housing. If you have to push hard to get a filter to fit, it is likely the wrong part number, oriented incorrectly, or not aligned with the internal tracks. Forcing it can crush the pleats or crack the plastic housing.
- Letting Debris Fall into the Intake or Blower: When removing old filters, always clean the surrounding area first. Dropping leaves, twigs, or dirt into the engine intake can damage the engine, while dropping debris into the cabin blower motor can cause loud vibrating noises and require expensive disassembly to clean out.
- Forgetting the Glove Box Dampener: Failing to reconnect the plastic dampener arm will cause the glove box to drop heavily when opened, which can eventually crack the plastic hinges or break the glove box door.
- Leaving Air Box Clips Unsecured: Forgetting to snap the engine air box clips shut allows dirty air to bypass the filter entirely, risking severe engine wear and causing sensor errors that lead to poor fuel economy.
Frequently Asked Questions (FAQ)
How often should I replace the air filters on my Montero?
For a Mitsubishi Montero driven under normal conditions, the engine air filter should generally be replaced every 20,000 to 40,000 kilometers, while the cabin air filter is typically replaced every 10,000 to 15,000 kilometers, or once a year. However, driving conditions in the Philippines often demand shorter intervals. If you frequently drive through dusty provincial roads, heavy Metro Manila traffic, or highly humid coastal areas, both filters will accumulate dirt much faster. It is highly recommended to visually inspect your engine air filter during every routine oil change (typically every 5,000 to 10,000 kilometers) and replace it early if it appears visibly grey or clogged. Similarly, if your air conditioning starts to smell musty or the airflow weakens, inspect and replace the cabin air filter immediately.
Can I clean and reuse my engine air filter instead of replacing it?
Standard OEM-style engine air filters for the Mitsubishi Montero are made of specialized pleated paper or synthetic fiber media designed for single-use filtration. These standard filters cannot be washed, blown clean with high-pressure compressed air, or reused. Attempting to wash a paper filter will destroy the structural integrity of the fibers, rendering it useless and potentially allowing water and paper pulp to enter your engine. Using high-pressure air to blow out a paper filter might make it look cleaner, but it actually tears the microscopic filtration fibers, allowing harmful dust particles to pass through. The only filters that can be cleaned and reused are specific aftermarket performance filters (such as cotton-gauze types). These require a dedicated cleaning solution and a specific re-oiling process according to the manufacturer’s instructions; otherwise, excess oil can coat and damage your mass airflow sensor.
Why is my AC airflow weak after changing the cabin filter?
If you notice that your Montero’s air conditioning airflow is significantly weaker immediately after installing a new cabin air filter, the most common cause is installing the filter backward. Cabin air filters are designed with a specific structural side and pleat orientation to allow air to flow efficiently in one direction. If installed against the airflow arrow (which should point downward toward the blower fan), the filter media will restrict air passage and may even bow or collapse under the pressure of the fan. Another possibility is that the replacement filter you purchased is too thick or dense compared to OEM specifications, or that loose debris fell into the blower fan during the swap, partially blocking the intake. To resolve this, open the cabin filter compartment, verify that the airflow arrow points downward, ensure the filter is not crushed, and confirm that the blower area is clear of debris.
Community discussion
Share your experience or ask a question. Comments are reviewed before publication.