
Replacing worn motorcycle valve seals is a precise but highly rewarding engine repair that restores combustion efficiency and stops oil consumption. The process involves systematically disassembling the top end of your engine, aligning the timing marks, removing the cylinder head, and compressing the valve springs to access the seals. By carefully extracting the old, hardened rubber seals and pressing new, pliable ones onto the valve guides, you prevent engine oil from seeping into the combustion chamber. This guide walks you through the entire diagnostic, disassembly, and installation process to ensure a successful DIY repair.
In tropical climates like the Philippines, where high ambient temperatures and heavy traffic put extra thermal stress on motorcycle engines, rubber components like valve seals degrade faster. Over time, the constant heat cycling hardens the rubber, causing it to lose its flexibility and fail to seal the valve stem. When this happens, engine oil from the cylinder head leaks down the valve guide and burns in the combustion chamber, leading to performance loss and spark plug fouling.
Diagnosing Worn Valve Seals Before Teardown
Before committing to a major engine teardown, you must confirm that the valve seals are indeed the root cause of your engine’s symptoms. The most classic indicator of worn valve seals is a puff of blue or light gray smoke from the exhaust immediately upon a cold start. This occurs because oil slowly seeps past the degraded seals while the motorcycle is parked, pooling on top of the valves or inside the combustion chamber, and then burns off rapidly when the engine fires up.
Products mentioned in this guide
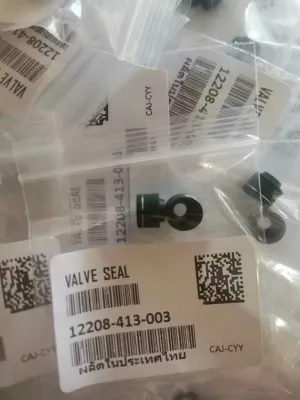
102 Lazada user ratings
receive item no damage complete item receive thank you seller at kay kuya rider..
Easy to install, High-quality materials used,
High-quality materials used,
slamat legit po siya👍👍
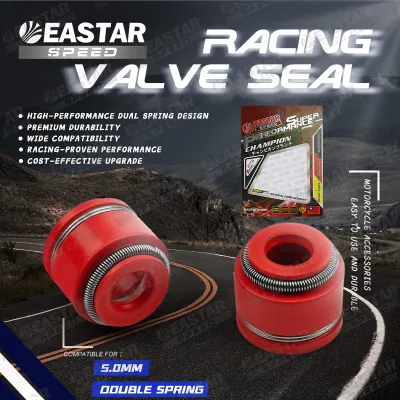
42 Lazada user ratings
Hindi ito pang r150..masyado sya maluwag hindi sya standard size....hindi ko ito magagamit ...chck nyo product nyo.... kung tama ba.... saya…Read full reviewShow less
Hindi ito pang r150..masyado sya maluwag hindi sya standard size....hindi ko ito magagamit ...chck nyo product nyo.... kung tama ba.... sayang pera at paghihintay..hindi nako magrerefund dahil sayang lang panahon at oras ko...
e di pa nagamit pero mukang ok naman sana magtagal salamat po mabilis nadeliver, hopefully ito n tlga yung problema ng motor. mag order ulit…Read full reviewShow less
e di pa nagamit pero mukang ok naman sana magtagal salamat po mabilis nadeliver, hopefully ito n tlga yung problema ng motor. mag order ulit kami salamat seller bilis nadeliver smooth transaction
Racing-proven performance, maganda at mukhang tatagal, pang daily use lang nmn ang gamit, hindi pa napapakabit kompletuhin muna ang pyesa!
perfect fit
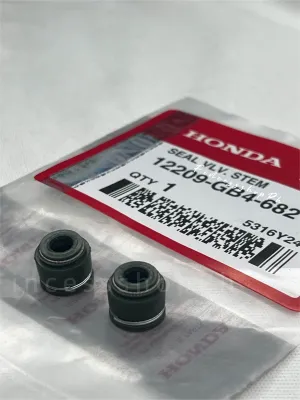
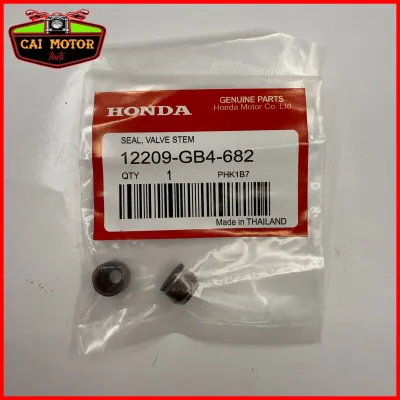
15 Lazada user ratings
Perfect fit for Honda, Perfect fit for Honda, Fast shipping, Durable and long-lasting, Good seller service,
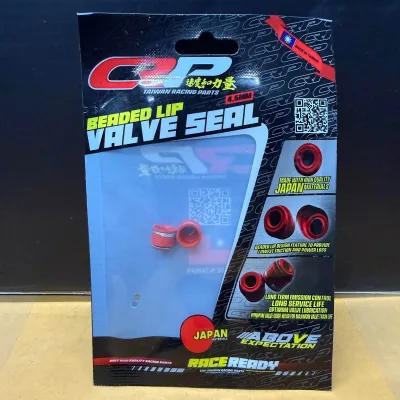
Excellent packaging, Valve seal for Wave125, Reliable brand, High performance, Good seller service,
9 Lazada user ratings
Perfect for plumbing, Good sealing performance, Great for repairs, Sturdy stainless steel,
High quality material,
Prices are valid at publication and may change. Please refer to the product page for the latest price.
Another common symptom is blue smoke during deceleration or immediately after prolonged idling. When you close the throttle at high engine speeds, it creates a high vacuum in the intake tract, which pulls oil through any gaps in the intake valve seals. If you notice continuous thick smoke while riding under acceleration, the issue is more likely related to worn piston rings or cylinder wall damage rather than the valve seals alone.
To differentiate between valve seal wear and piston ring failure, perform a compression test followed by a wet compression test. If the compression readings are low but jump significantly after adding a teaspoon of clean engine oil to the spark plug hole, your piston rings are likely worn. If the compression remains consistent but you still experience high oil consumption and cold-start smoke, the valve seals or worn valve guides are the primary suspects. If you suspect deep internal bottom-end damage or if the cylinder head shows signs of warping, stop the diagnosis and consult a professional mechanic.
Safety Boundaries and Service Manual Requirements
Working on a motorcycle engine’s top end carries significant safety and mechanical risks. You must obtain the official factory service manual for your specific motorcycle model and year before loosening a single bolt. The manual provides critical specifications that you cannot guess, including exact cylinder head bolt torque sequences, valve clearance measurements, and timing alignment marks.

Because even microscopic debris can cause catastrophic engine damage, you must prepare a clean, wind-protected workspace. Dust, sand, or metal shavings entering the open crankcase or cylinder head can score the camshaft journals, ruin the cylinder wall, or clog oil passages. Clean the entire exterior of the motorcycle, especially around the engine and cylinder head, before starting the disassembly process to prevent dirt from falling inside.
Always establish clear stop conditions before beginning this project. If you do not have a calibrated torque wrench, a proper valve spring compressor, or if you feel uncomfortable setting the engine’s timing, halt the project immediately. A mistake in timing alignment can cause the valves to strike the piston upon startup, resulting in bent valves, a ruined piston, and expensive engine failure that requires a professional rebuild.
Essential Tools and Materials for the Job
To complete this repair safely and efficiently, you need a selection of specialized automotive tools. A dedicated motorcycle valve spring compressor is essential for compressing the valve springs without slipping and damaging the valve stems or cylinder head casting. You will also need magnetic collet tweezers or a small telescoping magnet to safely retrieve the tiny valve keepers once the spring is compressed.
For the installation phase, a valve seal installation tool or a matching deep-well socket is necessary to press the new seals squarely onto the valve guides. You must also prepare fresh consumables, including a high-quality top-end gasket kit, a set of OEM or equivalent valve seals, clean engine oil, and assembly lubricant. The assembly lube provides critical initial lubrication to the moving parts during the first startup before the oil pump builds full pressure.
Before starting, verify all part numbers and material compatibility against your service manual. Ensure the replacement seals are designed specifically for your engine model, as even minor dimensional differences can lead to immediate oil leaks or premature seal failure. Avoid generic seals that do not explicitly list compatibility with your motorcycle’s valve stem diameter.
Step-by-Step Valve Seal Replacement Process
The valve seal replacement process follows a strict logical sequence of disassembly, inspection, installation, and reassembly. Keeping your workspace organized is paramount; use labeled containers or a clean parts tray to store every bolt, shim, bucket, and spring in the exact order and orientation they were removed. This systematic approach prevents confusion and ensures that worn-in components return to their original positions.
Engine Disassembly and Timing Alignment
Begin by draining the engine oil and coolant, if your motorcycle is liquid-cooled, into appropriate containers. Remove any bodywork, the fuel tank, the exhaust system, and the intake manifold or carburetor to gain clear access to the cylinder head cover. Clean the area once more to ensure no loose dirt remains near the sealing surfaces.
Rotate the crankshaft manually using a socket wrench on the flywheel nut until the engine is at Top Dead Center on the compression stroke. Verify this by aligning the timing marks on the flywheel and camshaft sprockets according to the service manual instructions. Secure the timing chain or belt tensioner and remove it carefully, ensuring you do not drop the timing chain down into the crankcase.
Loosen the cylinder head bolts in the reverse order of the tightening sequence specified in the manual to prevent warping the head. Carefully lift the cylinder head off the engine block and place it on a clean, padded workbench. Inspect the cylinder head mating surface for warping using a precision straightedge and feeler gauge, and check the valves for excessive carbon buildup or physical damage.
Removing Old Seals and Preparing Valve Stems
Position the valve spring compressor over the first valve spring retainer and compress the spring until the valve keepers are exposed. Use your magnetic tweezers to carefully lift the keepers out of their seats, then slowly release the compressor tension. Remove the retainer, the inner and outer springs, and the spring seat, keeping them organized by valve.
Gently slide the valve stem out of the guide from the combustion chamber side, taking care not to force it if there is carbon buildup on the tip. Use a dedicated valve seal removal tool or a pair of long-nose pliers to grip the old valve seal and pull it off the valve guide with a straight, twisting motion. Avoid scratching the outer surface of the valve guide or the inner bore where the valve slides.
Inspect the valve stem thoroughly for any deep grooves, pitting, or burrs that could tear the delicate inner lip of the new seal during installation. Clean the valve guide bore and the valve stem with a mild solvent, then dry them completely. If the valve guide shows excessive lateral play when the valve is inserted, the guide itself is worn and must be replaced by a machine shop before you install new seals.
Installing New Valve Seals
Before installing the new valve seal, lubricate the inner sealing lip and the valve guide outer surface with clean engine oil or assembly lube. If your seal kit includes plastic installation sleeves, slide one over the tip of the valve stem to protect the seal from being cut by the sharp keeper grooves. Slide the new seal over the valve stem or directly onto the guide, depending on the tool setup.
Place your valve seal installation tool or a matching deep socket over the metal body of the seal. Press the seal downward with firm, even hand pressure until you feel or hear it click into place on the valve guide shoulder. Never hammer the seal onto the guide, as this can distort the metal shell, tear the rubber sealing lip, or crack the guide itself.
Visually inspect the installed seal to verify that it sits perfectly square and fully seated at the correct depth. Ensure the tiny garter spring around the top of the seal lip is intact and has not popped off during installation. Once verified, lubricate the valve stem with assembly lube and carefully slide it back into the guide, rotating it gently to avoid damaging the new seal lip.
Reassembly and Post-Repair Verification
With the new seals in place, reinstall the valve springs, retainers, and keepers using the valve spring compressor. Ensure the keepers are fully seated in the valve stem grooves by gently tapping the tip of the valve stem with a plastic mallet after removing the compressor. Reinstall the cylinder head onto the engine block using a new head gasket, and tighten the head bolts in the exact sequence and torque stages specified in your service manual.
Set the valve clearances to the precise specifications using a feeler gauge, adjusting the shims or rocker screws as required. Realign the timing marks perfectly, reinstall the timing chain tensioner, and rotate the engine manually through several full revolutions to ensure there is no mechanical interference. Reassemble the intake, exhaust, and external components, then refill the engine with fresh oil and coolant.
Before starting the engine, prime the oil system if possible or crank the engine with the spark plug removed to build oil pressure. Start the motorcycle and let it idle, observing the cylinder head area closely for any external oil or coolant leaks. Monitor the exhaust; while some initial smoke is normal as assembly lube burns off, it should clear up quickly. Perform a gradual break-in test ride, avoiding high engine speeds initially, to confirm that the blue smoke has stopped and the engine runs smoothly.
Frequently Asked Questions (FAQ)
Can I replace valve seals without removing the cylinder head?
While it is theoretically possible to replace valve seals with the cylinder head still on the engine by pressurizing the cylinder with compressed air or stuffing nylon rope through the spark plug hole to hold the valves up, this method carries high risks. If the air pressure drops or the rope shifts, the valve can drop directly into the cylinder, requiring a complete engine teardown to retrieve it. Additionally, replacing the seals with the head on prevents you from thoroughly inspecting the valve guides, valve seats, and combustion chamber for wear or carbon buildup, which is why a full teardown is highly recommended for a reliable, long-term repair.
How long do motorcycle valve seals typically last?
Motorcycle valve seals typically last between 30,000 to 50,000 kilometers under normal riding conditions, though this lifespan can vary significantly based on maintenance and environmental factors. In hot, humid climates like the Philippines, prolonged engine idling in traffic and high operating temperatures accelerate the hardening and cracking of the rubber seals. Regular oil changes using the manufacturer-recommended oil viscosity help keep the seals lubricated and pliable, while long periods of storage without running the engine can cause the seals to dry out and fail prematurely.
Community discussion
Share your experience or ask a question. Comments are reviewed before publication.