
Replacing the engine air filter on your Toyota Hiace is one of the most straightforward and essential maintenance tasks you can perform at home. A clean filter ensures your engine receives a steady stream of clean air, which is vital for optimal combustion, fuel efficiency, and long-term durability. In the Philippines, where vehicles frequently encounter dusty provincial roads, heavy stop-and-go city traffic, and high humidity, keeping this component in top shape is crucial. If you have noticed a drop in fuel economy, sluggish acceleration, or a rough idle, a dirty engine air filter might be the culprit.
By taking charge of this simple DIY task, you not only save on labor costs at a local service center but also gain a deeper understanding of your vehicle’s maintenance needs. The Toyota Hiace is a legendary workhorse in the Philippines, serving as a family van, a tourist shuttle, and a commuter utility vehicle. Because these vans are often subjected to long hours of operation and harsh environmental conditions, regular air filter maintenance is key to preventing premature engine wear and ensuring your vehicle remains reliable for years to come.
Why and When to Replace Your Air Filter Toyota Hiace
The engine air filter acts as the primary line of defense for your vehicle’s internal components. For combustion to occur, your engine requires a massive volume of air mixed with fuel. The air filter’s job is to trap abrasive particles—such as sand, road dust, soot, and organic debris—before they can enter the intake manifold and cylinders. If these contaminants bypass the filter, they can act like an abrasive paste inside the engine, rapidly wearing down piston rings, cylinder walls, and valves, leading to costly internal damage.
Products mentioned in this guide
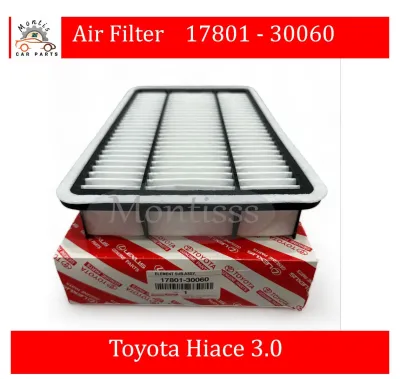
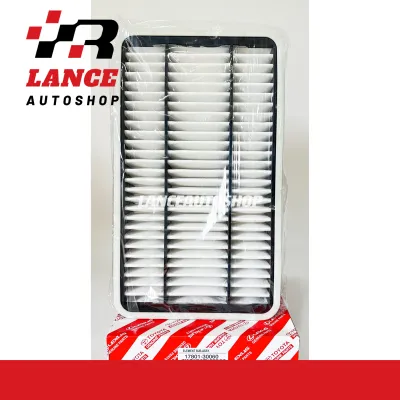
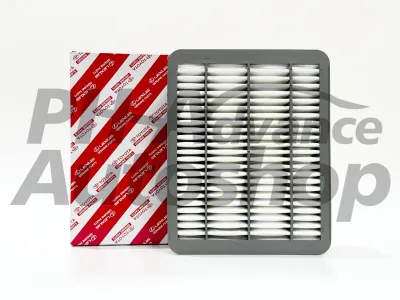
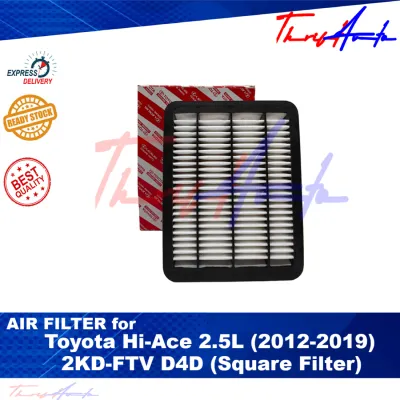
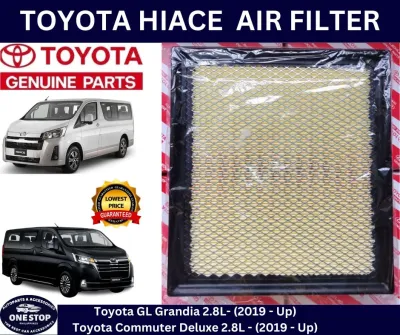
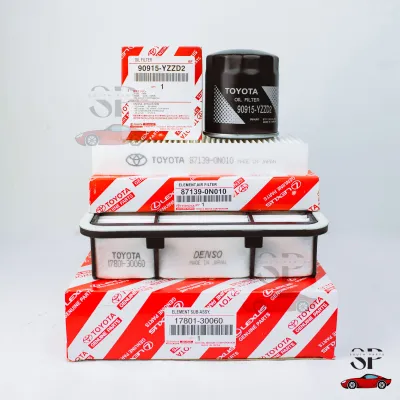
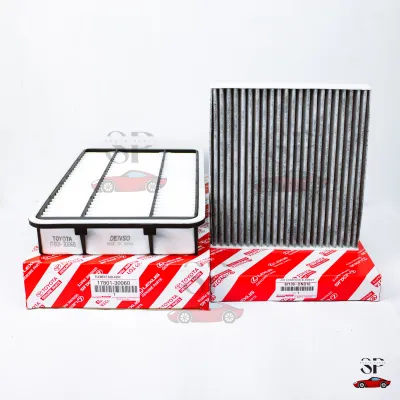
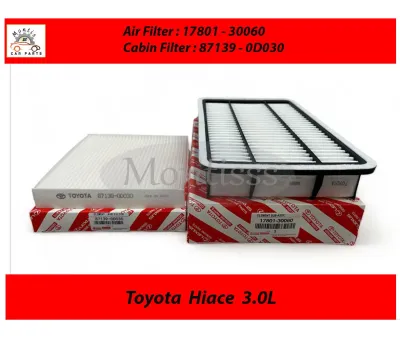
Prices are valid at publication and may change. Please refer to the product page for the latest price.
Over time, the filtration media becomes saturated with trapped particles, restricting the airflow into the engine. When this happens, your engine has to work harder to draw in air, resulting in several noticeable symptoms. You may experience reduced acceleration, sluggish throttle response, a drop in fuel economy, or a rough idle. In diesel engine variants common in the Philippines, a severely clogged filter can also lead to excessive black smoke from the exhaust or an illuminated check engine light on your dashboard.
Under standard driving conditions, manufacturer schedules generally recommend replacing the air filter every 15,000 to 30,000 kilometers. However, the unique environmental factors in the Philippines often classify local driving as “severe.” Navigating heavily congested urban highways like EDSA, traversing unpaved rural roads in the provinces, or driving through areas with high levels of construction dust and volcanic ash will significantly shorten the lifespan of your filter. Under these conditions, it is highly recommended to inspect the filter every 5,000 kilometers and replace it every 10,000 to 15,000 kilometers.
Because the Toyota Hiace has been produced in multiple generations with different engine options, you must consult your specific vehicle owner’s manual to verify the exact maintenance schedule. For instance, the fifth-generation Hiace (H200), which often features the 2.5-liter 2KD-FTV or 3.0-liter 1KD-FTV diesel engines, may have different service intervals and housing configurations compared to the sixth-generation Hiace (H300) equipped with the 2.8-liter 1GD-FTV engine. Knowing your specific engine variant is the first step to successful maintenance.
Tools and Parts Required for the Job
Before you begin the replacement process, it is important to gather all the necessary tools and replacement parts. Having everything ready beforehand ensures a smooth, uninterrupted workflow and prevents your vehicle from being immobilized mid-job.

- New Engine Air Filter: You must secure a high-quality replacement filter that matches the exact specifications of your Hiace's engine model and year. Air filters are not universal; a filter designed for an older H200 Commuter will not fit a newer H300 Super Grandia. You can verify the correct part number by checking your owner's manual, looking at the part number stamped on your current filter, or consulting a reputable auto parts dealer with your vehicle's chassis number.
- Basic Hand Tools: Depending on your Hiace's generation and engine type, the air filter housing may be secured by simple metal spring clips or hex-head screws. While many models require no tools at all because they use quick-release clips, some variants may require a Phillips-head screwdriver or a basic socket set (usually 8mm or 10mm) to loosen the housing cover.
- Cleaning Supplies: A clean, dry microfiber cloth is essential for wiping away loose dust and grime from the inside of the filter box. A small hand vacuum cleaner can also be incredibly useful for extracting leaves, sand, or insects that have settled at the bottom of the housing.
- Safety Gear: To protect yourself during the process, it is highly recommended to wear lightweight mechanic gloves to prevent scrapes from sharp engine components and safety glasses to guard your eyes against falling dust and debris.
Before performing any work under the hood or seats, ensure the vehicle is parked on a flat, stable surface with the parking brake fully engaged. The engine must be turned off and allowed to cool down completely to prevent accidental burns from hot engine components or coolant lines.
Step-by-Step Guide to Replacing the Air Filter
Replacing the air filter on your Toyota Hiace is a straightforward, low-risk maintenance task that requires no specialized mechanical expertise. By following these clear, sequential steps, you can complete the job in under 20 minutes, ensuring your engine remains protected and performs at its best.
Step 1: Prepare the Vehicle and Locate the Housing
Begin by parking your Toyota Hiace on a flat, level surface. Engage the parking brake firmly, turn off the engine, remove the keys from the ignition, and allow the engine bay to cool down completely. Once the vehicle is safe to work on, you will need to locate the air filter housing. The location of the housing depends heavily on the generation of your Hiace.
For the Toyota Hiace H200 (2005–2019), this generation features a cab-over-engine design, meaning the engine is located directly beneath the front seats. To access the engine compartment, you must release the metal latches securing the front passenger seat (and sometimes the center console), tilt the seat assembly backward, and secure it firmly using the built-in safety strap. Once the seat is secured, locate the black plastic air filter housing, which is typically positioned on the passenger side of the engine bay.
For the Toyota Hiace H300 (2019–Present), this generation features a semi-bonneted design with a traditional front hood. Pull the hood release lever located under the driver-side dashboard, open the hood, and secure it safely with the prop rod. The air filter housing is a prominent, rectangular black plastic box located on the side of the engine bay, connected to a thick, ribbed air intake tube.
Once you have located the housing, take a moment to examine how the cover is secured. Identify whether it uses metal spring clips, plastic tabs, or threaded screws so you can prepare the appropriate tool or method to open it.
Step 2: Remove and Inspect the Old Filter
Carefully unfasten the securing mechanisms on the housing cover. If your Hiace uses metal spring clips, gently pry them open using your fingers or a flathead screwdriver. If your model uses screws or bolts, use the correct screwdriver or socket to loosen them. Be sure to keep a firm grip on any loose hardware or screws to prevent them from dropping into the deep recesses of the engine bay, where they can be extremely difficult to retrieve.
With the fasteners released, gently lift or slide the housing cover to expose the filter element. Carefully pull the old air filter straight out of the housing, taking care not to shake loose any heavy dirt or leaves into the clean side of the intake duct.
Before discarding the old filter, hold it up to a bright light source, such as the sun or a work light. If the paper pleats are dark gray, filled with thick layers of dust, or if the light is completely blocked, the filter is saturated and must be replaced. Also, check for any signs of oil or moisture on the filter media, which could indicate other underlying engine issues.
As you remove the old filter, pay close attention to its physical orientation and seating position. Note which direction the pleats are facing and how the rubber seal aligns with the housing, as you will need to replicate this exact positioning with the new filter.
Step 3: Clean the Housing and Install the New Filter
With the old filter removed, the empty air filter housing is fully exposed. You will likely find a collection of road dust, sand, dry leaves, or insects at the bottom of the box. Use a clean, dry microfiber cloth to wipe the interior of the housing thoroughly, removing all loose particles. A small hand vacuum can also be used to extract debris from the deep corners of the box.
Never use compressed air to blow out the empty housing while it is connected to the engine intake. Doing so can force abrasive dust and dirt deep into the intake tube, bypassing the filtration system entirely and entering the engine cylinders, which can cause severe internal damage.
Once the housing is clean, take your new replacement filter and align it to match the orientation of the old one. Lower the filter gently into the housing, ensuring that the rubber seal around the perimeter of the filter sits perfectly flush within the designated grooves of the plastic box.
Check the entire perimeter of the rubber seal with your fingers. It must sit flat without any twists, folds, or gaps. A properly seated seal is critical; even a tiny gap will allow dirty, unfiltered air to bypass the filter and enter your engine, rendering the new filter ineffective.
Step 4: Secure the Housing and Verify the Installation
Carefully lower the housing cover back onto the box, ensuring that it aligns perfectly with the lower half. Press down gently, making sure that the cover does not pinch or displace the rubber seal of the new filter.
Re-engage the metal spring clips or tighten the screws evenly. If your housing uses screws, tighten them in an alternating pattern to ensure even pressure across the seal. Be careful not to overtighten the screws, as the plastic housing can easily crack under excessive force.
Once secured, give the housing cover a gentle tug to verify that it is locked tightly in place and does not wiggle or vibrate.
If you are working on an H200 model, carefully lower the passenger seat back into its original position and secure the latches firmly. For H300 models, carefully lower the hood and press down until it latches securely.
Finally, start the engine and let it idle. Stand near the engine compartment and listen closely for any unusual whistling, hissing, or deep sucking sounds. These noises typically indicate an air leak caused by an improperly sealed housing or a misaligned filter. If you hear any abnormal sounds, shut off the engine immediately, re-open the housing, and verify that the filter is seated correctly.
Common Mistakes to Avoid During Replacement
While replacing the air filter is a simple DIY task, making a small mistake can lead to poor engine performance or even severe engine damage. Being aware of these common pitfalls will help you complete the job successfully.
- Forcing the Filter: If the new filter does not slide easily into the housing, do not force or bend it to make it fit. Bending the filter can tear the delicate paper filtration media or warp the rubber seal, allowing dirty air to bypass the filter. If you encounter resistance, double-check that you have the correct part number and that the filter is oriented correctly.
- Dropping Debris into the Intake: When the housing is open and the filter is removed, the engine's intake tract is completely exposed. Keep all tools, loose screws, and dirty rags away from this opening. Dropping a small screw or piece of hard debris down the intake tube can cause catastrophic engine damage when the engine is started.
- Using the Wrong Part: The Toyota Hiace has a long production history with various engine configurations. A filter designed for a 2.5-liter diesel engine may look similar to one for a 3.0-liter diesel or a 2.7-liter gasoline engine, but minor differences in dimensions or sealing lips can prevent a proper seal. Always verify compatibility using your vehicle's specific chassis number or engine code.
- Leaving Clips Unfastened: It is easy to overlook one of the spring clips, especially those located at the back or bottom of the housing. Unsecured clips can allow the housing to vibrate loose during operation, creating a gap that draws in unfiltered, dusty air directly into the engine.
- Ignoring the Seal: Simply dropping the filter into the box is not enough. The rubber perimeter seal must sit perfectly in its channel. Even a tiny gap can allow a significant amount of dust to bypass the filter over time, leading to gradual engine wear.
Engine Air Filter vs. Cabin Air Filter: What’s the Difference?
Many vehicle owners confuse the engine air filter with the cabin air filter, but they serve entirely different systems.
Engine Air Filter: This filter is located in the engine compartment (under the passenger seat in the H200 or under the hood in the H300). Its sole purpose is to clean the air entering the engine’s combustion chambers. It protects internal engine components from wear and directly impacts engine performance, fuel efficiency, and emissions.
Cabin Air Filter: This filter is typically located behind the glove compartment or under the passenger-side dashboard. It cleans the air that enters the vehicle’s interior through the heating, ventilation, and air conditioning (HVAC) system. It removes dust, pollen, soot, and odors, ensuring that the driver and passengers breathe clean air.
While this guide focuses on the engine air filter, maintaining both is essential. In the humid and tropical climate of the Philippines, a neglected cabin air filter can quickly become a breeding ground for mold and mildew, leading to musty odors and reduced air conditioning performance.
Frequently Asked Questions (FAQ)
Here is a quick reference addressing common questions about maintaining the air filtration system on your Toyota Hiace.
How often should I change the air filter on my Toyota Hiace?
Under standard driving conditions, Toyota generally recommends replacing the engine air filter every 15,000 to 30,000 kilometers. However, if you frequently drive in severe conditions—such as heavy stop-and-go traffic in cities like Manila, unpaved provincial roads, or highly dusty construction areas—you should inspect the filter every 5,000 kilometers and replace it every 10,000 to 15,000 kilometers. Always refer to your vehicle’s owner’s manual for the exact service intervals tailored to your specific model year and engine type.
Can I clean and reuse a dirty paper air filter?
Standard paper or synthetic engine air filters are designed strictly for single-use and should not be washed, blown out, or reused. Tapping the filter or using compressed air may remove large surface debris, but it cannot clear the microscopic particles embedded deep within the fibers. Furthermore, high-pressure compressed air can tear or stretch the delicate filtration media, creating micro-holes that allow harmful dust to pass directly into your engine. Only specialized aftermarket performance filters explicitly labeled as washable and reusable by the manufacturer should be cleaned and re-oiled according to their specific instructions.
Community discussion
Share your experience or ask a question. Comments are reviewed before publication.