
Maintaining a comfortable cabin environment in your Mitsubishi Mirage G4 starts with ensuring the air you breathe is clean and free from outdoor pollutants. The cabin air filter is your vehicle’s primary line of defense against road dust, pollen, soot, and debris. Over time, this filter naturally becomes clogged, which reduces the efficiency of your air conditioning system and degrades the air quality inside the cabin. Fortunately, replacing the cabin air filter on a Mitsubishi Mirage G4 is a simple, tool-free task that you can easily complete at home in less than 15 minutes, saving you both time and service fees.
Signs Your Mirage G4 Needs a New Cabin Air Filter
When the cabin air filter in your Mirage G4 is dirty, the air conditioning system has to work significantly harder to cool the vehicle. One of the most obvious signs of a clogged filter is a noticeable drop in airflow from the dashboard vents. Even when you turn the fan speed to its highest setting, the breeze may feel weak and inadequate. This is particularly problematic during hot, sunny days when rapid cooling is essential for passenger comfort.
Another common indicator is a persistent musty, sour, or dirty odor that fills the cabin whenever you turn on the AC. This unpleasant smell is often caused by moisture, dust, and organic matter trapped within the filter media, creating a breeding ground for mold and bacteria in high-humidity environments. You might also notice fine dust particles blowing out of the vents when the fan starts, or find that your windows fog up much faster during heavy monsoon downpours because the restricted airflow cannot effectively clear the humidity inside the car.
Products mentioned in this guide
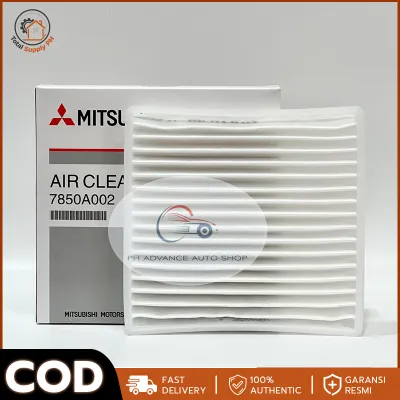
Prices are valid at publication and may change. Please refer to the product page for the latest price.
While general guidelines suggest inspecting or replacing the filter every 10,000 to 15,000 kilometers, driving on unpaved provincial roads, idling in heavy metropolitan traffic, or operating in highly polluted areas will dramatically shorten this lifespan. High concentrations of airborne dust and soot on busy highways mean your filter will accumulate debris much faster than average. Always refer to your Mitsubishi Mirage G4 owner’s manual to verify the recommended maintenance schedule and inspection intervals for your specific model year and driving conditions.
Tools and Parts Required for the DIY Replacement
Gathering the necessary items beforehand ensures a smooth, uninterrupted replacement process. The most critical component is a brand-new, compatible cabin air filter. When purchasing a replacement, verify the exact model year of your Mirage G4, as minor design updates can sometimes affect parts compatibility. You can easily find suitable replacement filters ranging from ₱200 for basic particulate paper filters to ₱800 or more for premium options featuring activated carbon or PM2.5 filtration at local automotive supply shops or online marketplaces.

Along with the new filter, keep a clean, dry microfiber cloth nearby to wipe down the filter housing. A bright flashlight or a fully charged smartphone light is highly recommended to help you see clearly into the dark recess behind the glove box. While the replacement process is completely tool-less, having a flathead screwdriver or a plastic trim removal tool on standby can be helpful if you encounter a stubborn plastic clip or a stiff housing cover tab that requires gentle prying.
Step-by-Step Guide to Replacing the Cabin Air Filter
Before starting any work, ensure your vehicle is parked on a flat, level surface, the engine is turned off, and the handbrake is fully engaged. This keeps the vehicle secure and ensures the electrical components of the HVAC system are powered down while you access the internal housing.
Accessing the Filter Housing via the Glove Box
Open the front passenger door to access the glove box, which serves as the entry portal to the cabin air filter housing. Empty all items from the glove box, including vehicle documents, chargers, and personal belongings, to prevent them from spilling onto the floor during disassembly.
Look at the outer right side of the glove box frame to see if your specific model year is equipped with a plastic damper arm or stopper. If present, gently slide or unclip the damper arm from its mounting pin, taking extra care not to apply excessive force, as plastic components can become brittle over time due to cabin heat.
Next, open the glove box halfway and place your hands on the outer left and right side walls. Firmly squeeze both sides inward toward the center of the glove box to allow the plastic retaining stops to clear the dashboard frame. Once the stops are cleared, lower the glove box fully toward the floorboard, exposing the black plastic HVAC housing directly behind it.
Removing the Old Filter and Cleaning the Housing
With the glove box lowered, you will see a horizontal, rectangular cover on the front of the filter housing. Locate the locking tabs on the sides or center of this plastic cover, squeeze them gently, and pull the cover straight off to expose the edge of the old cabin air filter.
Slowly slide the old filter out of the housing, keeping it as level as possible to prevent accumulated leaves, dust, insects, and loose debris from spilling into the blower motor fan below or onto your vehicle’s carpet. Once the filter is removed, inspect its condition; a heavily discolored, dark gray, or debris-filled filter confirms that a replacement was overdue.
Take your flashlight and shine it inside the empty housing chamber to check for any remaining loose dirt or leaves. Use your clean microfiber cloth to carefully wipe out the interior of the housing, ensuring you do not push debris further down into the blower fan or spray any liquid cleaners directly into the chamber, which could damage the electrical components of the blower motor.
Installing the New Filter and Reassembling the Dash
Before sliding the new filter into place, locate the airflow direction arrow printed on the side of the filter frame. In the Mitsubishi Mirage G4, the cabin air conditioning system pulls air downward from the cowl intake into the blower motor, meaning the airflow arrow on your new filter must point vertically downward.
Align the new filter correctly and slide it smoothly into the housing slot, making sure it sits completely flat without bending, crumpling, or folding the outer edges, which would create gaps and allow unfiltered air to bypass the media. Once the filter is securely seated, align the plastic housing cover and press it back into position until you hear a clear click from the locking tabs.
To reassemble the dashboard, lift the glove box back up and gently squeeze the side walls inward so the retaining stops can slide past the dashboard frame. Reattach the damper arm or stopper to its mounting pin on the right side, ensuring it clicks into place, and then close the glove box completely to verify that it latches and opens smoothly.
Post-Installation Checks and Maintenance Tips
With the installation complete, start the engine of your Mirage G4 and turn on the air conditioning system to verify that everything is working perfectly. Cycle through the different fan speeds from low to high, listening closely for any unusual whistling, rattling, or vibrating noises that might suggest the filter is not seated correctly or the housing cover is loose. Feel the airflow coming from the dashboard vents to ensure it is strong, consistent, and completely free of musty odors.
To maximize the lifespan of your new cabin air filter, try to avoid parking your vehicle directly under trees that shed heavy leaves, twigs, or sap, as these can accumulate in the exterior cowl vents and find their way into the HVAC system. Keeping your windows fully closed when driving through heavy city traffic or dusty areas will also reduce the volume of airborne pollutants entering the filter. Finally, make it a habit to perform a quick visual inspection of your cabin air filter during regular oil change intervals to ensure your air conditioning system remains efficient and your cabin air stays clean.
Frequently Asked Questions (FAQ)
Can I just clean and reuse my old cabin air filter?
Standard cabin air filters used in the Mitsubishi Mirage G4 are made of paper or non-woven synthetic fibers designed for single-use disposal and cannot be washed or reused. Attempting to wash a standard filter with water will destroy the delicate microscopic structure of the filtration media, wash away any electrostatic charge, and trap moisture deep within the fibers, which promotes rapid mold and bacterial growth once reinstalled in your car’s dark HVAC system.
Similarly, using high-pressure compressed air to blow out dust might remove large surface debris, but it often tears the fine filtration layers and forces microscopic particles deeper into the media, severely reducing its efficiency. While some specialized, high-performance aftermarket filters are specifically designed to be washed and re-oiled, standard OEM-style replacements must always be discarded and replaced with a new unit when they become dirty.
What happens if the airflow arrow is pointing the wrong way?
Installing a cabin air filter upside down directly compromises the performance of your vehicle’s air conditioning system and can lead to mechanical strain. Cabin air filters are engineered with a specific structural gradient, featuring a coarser, open-weave side to capture large debris first, and a progressively finer side supported by structural mesh or ribs to handle the air pressure.
If the filter is installed with the airflow arrow pointing upward instead of downward, the air will hit the fine, supported side first, causing the filter media to clog much faster and potentially collapse under the suction of the blower motor. This structural collapse restricts the overall airflow into the cabin, forcing the blower motor to work harder against high resistance, which can lead to premature motor wear or electrical failure. Additionally, a collapsed or deformed filter allows unfiltered air and dust to bypass the edges, settling directly onto your AC evaporator core and reducing cooling efficiency over time.
Community discussion
Share your experience or ask a question. Comments are reviewed before publication.