
Replacing the engine air filter on your 2016 Kia Picanto is one of the most straightforward and cost-effective maintenance tasks you can complete at home. This simple do-it-yourself (DIY) job requires no specialized mechanical training, takes less than fifteen minutes, and ensures your engine receives the clean air required for optimal combustion. By learning to change the ‘kia picanto 2016 air filter’ yourself, you can keep your vehicle running efficiently, protect vital internal components, and save on dealership service fees.
The primary role of the engine air filter is to act as the engine’s lungs, trapping airborne contaminants such as dust, dirt, pollen, and road debris before they can enter the combustion chambers. Inside the engine, pistons move at high speeds, and even tiny abrasive particles can score the cylinder walls or damage the piston rings over time. A clean filter ensures a balanced air-fuel ratio, which directly impacts fuel economy, throttle response, and overall engine longevity.
In the Philippines, local driving conditions make regular air filter maintenance especially critical. The combination of intense tropical heat, high humidity, and heavy urban traffic in metropolitan areas like Manila or Cebu subjects vehicles to severe operating conditions. Furthermore, driving on unpaved provincial roads or navigating areas with ongoing road construction exposes your engine to high concentrations of airborne dust. These factors cause the filter to clog much faster than the standard intervals recommended in temperate climates, often requiring a replacement every 10,000 kilometers.
Products mentioned in this guide
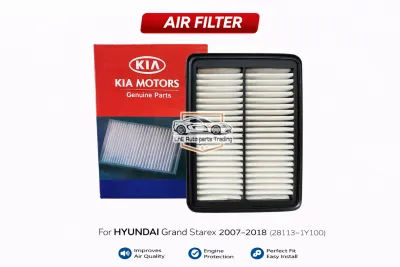
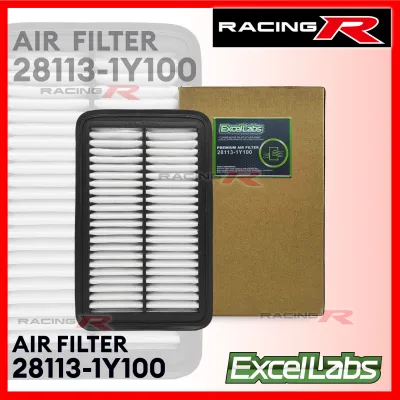
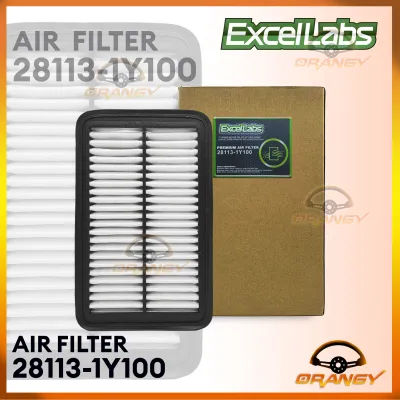
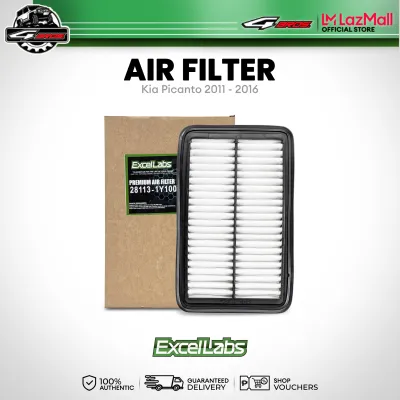
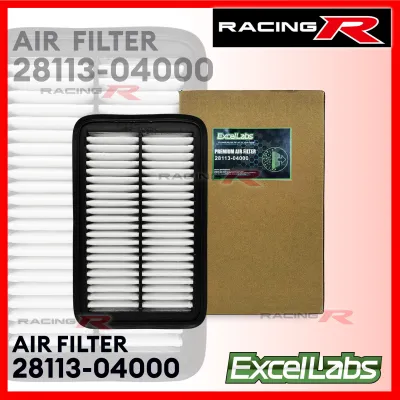
Prices are valid at publication and may change. Please refer to the product page for the latest price.
Performing a regular visual inspection is the most reliable way to determine if your air filter needs to be replaced before it causes performance issues. To do this, remove the filter and hold it up to a bright flashlight or direct sunlight. If the light passes clearly through the paper pleats, the filter is still functional. However, if the paper media looks dark gray, is clogged with insects, leaves, or soot, or if the light is completely blocked, the filter has reached the end of its service life and must be replaced.
It is also important to distinguish between the engine air filter and the cabin air filter to avoid purchasing the wrong part. The engine air filter is located under the hood inside a black plastic housing and cleans the air going into the engine. The cabin air filter is located inside the vehicle, typically behind the glove compartment, and cleans the air circulating through your air conditioning system. This guide focuses exclusively on replacing the engine air filter under the hood.
Why and When to Change Your Kia Picanto 2016 Air Filter
Regularly replacing your ‘kia picanto 2016 air filter’ is essential for maintaining the vehicle’s fuel efficiency and preventing long-term engine wear. Over time, the accumulation of dust and debris restricts the volume of air entering the intake manifold. When the engine is starved of air, the onboard computer compensates by injecting more fuel, leading to an overly rich air-fuel mixture that wastes gasoline and decreases throttle responsiveness.
In tropical environments like the Philippines, high humidity can cause airborne dust to stick to the filter media, accelerating the clogging process. During the rainy season, damp air can also weaken the structural integrity of a heavily soiled paper filter, reducing its filtration efficiency. Inspecting the filter at every scheduled oil change ensures that you catch a clogged filter before it impacts your daily commute.
To perform a visual check, find a well-lit area or use a strong work light. A clean filter will display white or light cream-colored paper pleats. As the filter traps dirt, these pleats turn yellow, then brown, and finally a dark charcoal gray. If you notice oily patches, mold, or a heavy layer of grit settled deep within the pleats, the filter is no longer capable of protecting your engine and must be replaced immediately.
Remember that the engine air filter and the cabin air filter serve entirely different systems. Working on the engine air filter requires opening the hood and accessing the main intake tract, while the cabin air filter is part of the ventilation system. Ensure you are purchasing an engine air filter rather than an air conditioning cabin filter when sourcing your replacement parts.
Tools and Parts You Will Need
One of the best aspects of this DIY task is that it requires almost no tools. The air filter housing on a 2016 Kia Picanto is designed for quick tool-free access using manual tension clips. However, having a flathead screwdriver nearby can be helpful for gently prying open tight metal or plastic clips without straining your fingers.

In addition to the replacement filter, you should have a clean microfiber cloth or a low-suction handheld vacuum ready. These items are used to clean out the bottom of the air filter housing before installing the new filter. Wiping away accumulated dust and debris ensures that no loose dirt is accidentally sucked into the engine intake when you start the car.
Before purchasing a replacement, you must verify the correct part number for your specific vehicle configuration. The 2016 Kia Picanto was distributed in the Philippines with two distinct engine displacements: the 1.0-liter 3-cylinder Kappa engine and the 1.25-liter 4-cylinder Kappa engine. Because these engines have different layouts, their air filter housings and the filters themselves differ in physical dimensions and shape. Do not rely solely on the vehicle year; check your owner’s manual or look at the part number printed on the plastic frame of your current filter to guarantee a perfect fit. Replacement filters are widely available at local auto parts stores, with prices typically ranging from ₱300 to ₱800 depending on whether you choose an OEM or a reputable aftermarket brand.
Step-by-Step Guide to Replacing the Engine Air Filter
Step 1: Locate and Open the Air Filter Housing
To begin, park your 2016 Kia Picanto on a flat, level surface, engage the handbrake fully, and turn off the engine. Remove the key from the ignition to prevent any accidental starts. Allow the engine to cool down completely for at least 20 to 30 minutes, as components in the engine bay can become extremely hot during operation. Once the engine is cool, pull the hood release lever located under the dashboard, walk to the front of the car, release the safety latch, and prop the hood open securely.
Look into the engine bay to locate the air filter housing, which is a prominent black plastic box. On the 1.0-liter Picanto model, this box is positioned on the right side of the engine bay (passenger side) near the battery. On the 1.25-liter model, the housing is situated closer to the front-left side. The box is easily identifiable as it connects directly to a thick, ribbed plastic air intake tube leading toward the engine block.
Examine the sides of the plastic housing to locate the securing clips. The 2016 Picanto typically uses two or four metal or plastic tension clips to hold the upper lid of the housing to the lower box. Push down or pull outward on these clips to release them; you should hear a distinct click as they snap open. Once all clips are disengaged, gently lift the upper housing cover upward to expose the filter inside, taking care not to pull too hard on the attached rubber intake hose.
Step 2: Remove the Old Filter and Clean the Housing
Carefully grasp the plastic frame of the old air filter and lift it straight out of the housing box. As you remove it, pay close attention to its physical orientation. Note which way the paper pleats are facing and how the rubber sealing gasket sits around the perimeter. Taking a quick photo with your smartphone at this stage is an excellent way to ensure you install the new filter in the exact same direction.
Once the filter is removed, you will see the open intake duct at the bottom or side of the housing. This duct leads directly into your engine’s intake manifold, meaning any dirt or objects falling inside could cause severe internal engine damage. To prevent this, place a clean, lint-free microfiber cloth over the open duct to block any debris from falling in while you clean the housing.
Take your microfiber cloth or a low-suction vacuum and thoroughly clean the inside of the lower housing box. Remove any accumulated road dust, sand, dried leaves, or insects that have settled at the bottom. Ensure the sealing surfaces where the filter’s rubber gasket rests are completely clean and free of grit, as even small particles can prevent a proper seal. Once clean, carefully remove the protective cloth from the intake duct.
Step 3: Install the New Air Filter
Remove your new air filter from its packaging and place it side-by-side with the old filter. Carefully compare their dimensions, checking that the length, width, and height are identical. Verify that the rubber sealing gasket around the edge of the new filter matches the shape and thickness of the old one, ensuring it will sit correctly in the housing.
Lower the new filter into the bottom half of the housing box, aligning it in the exact orientation as the original filter. The filter should slide into place smoothly without requiring any force. Ensure that the rubber sealing rim sits completely flush within the designated groove around the perimeter of the housing box.
Do not force the filter into the box or bend the paper pleats to make it fit. If the filter does not sit flat, or if you have to press down hard to get it into the tray, double-check that you have the correct part number or that the filter is not rotated incorrectly. A forced or bent filter will warp the rubber gasket, creating gaps that allow dirty air to bypass the filter entirely and enter the engine.
Step 4: Secure the Housing and Final Check
Carefully lower the upper housing cover back onto the lower box, making sure it aligns perfectly with the base. As you lower the cover, check that no electrical wires, vacuum lines, or hoses are pinched between the two halves of the housing. The cover should sit flat and flush against the lower box without any visible gaps.
Re-engage the tension clips by pulling them up and snapping them over the ridges on the housing cover. They should snap into place with a firm, solid click. If a clip feels extremely difficult to close, do not force it; the cover is likely misaligned or the filter is not seated flush. Re-align the cover and try again until all clips secure easily.
Perform a final visual inspection around the housing to confirm that the lid is sealed tightly along the entire perimeter. Remove any tools or cleaning cloths from the engine bay, then close the hood securely. Start the engine and let it idle for a minute. Listen closely for any unusual whistling, hissing, or deep sucking noises from the engine bay, which would indicate an air leak caused by an improper seal.
Common Mistakes to Avoid During Installation
While replacing an air filter is a simple task, several common mistakes can compromise your engine’s health if overlooked. One frequent error is attempting to clean and reuse a disposable paper filter using high-pressure compressed air. While this might blow away visible surface dust, the high-pressure stream actually tears the microscopic cellulose fibers within the paper media. This ruins the filter’s ability to trap fine particles, allowing abrasive dust to pass directly into your engine.
Another critical mistake is failing to secure the housing cover properly. If the clips are left loose or if the cover is misaligned, unfiltered air will enter the engine. In the Philippines, where heavy downpours and flooded streets are common during the rainy season, an improperly sealed air box also increases the risk of water ingress. If water is sucked into the engine intake, it can cause hydrolock, a catastrophic failure that destroys pistons and connecting rods.
Ignoring the orientation of the rubber gasket is also a common pitfall. The gasket is designed to create an airtight seal between the clean and dirty sides of the housing. If the gasket is twisted, pinched, or installed upside down, air will bypass the filter media completely. Always verify that the rubber rim is seated perfectly flat in its channel before locking the cover.
Finally, never ignore physical damage to the housing or the intake ducting. If you notice that the plastic housing is cracked, or if the rubber intake tube has splits or dry rot, do not attempt to patch it with tape. Tape can degrade quickly under engine bay heat and fail. In these situations, or if the metal retaining clips are broken, stop the installation and consult a professional mechanic or visit an authorized service center to replace the damaged components.
Frequently Asked Questions (FAQ)
Can I wash and reuse my 2016 Kia Picanto's paper air filter?
No, standard original equipment manufacturer (OEM) and typical aftermarket paper air filters are strictly disposable and cannot be washed. These filters are made from specialized paper and cellulose fibers that swell and lose their structural integrity when exposed to water or liquid cleaning chemicals. Attempting to wash a paper filter will dissolve the filtration media, causing it to restrict airflow or disintegrate entirely when reinstalled, which can severely damage your engine.
If you have installed a specialized high-performance aftermarket filter made of cotton gauze or synthetic mesh, these may be washable and reusable. However, they require proprietary cleaning solvents and specific re-oiling procedures to restore their filtering capability. Always check the manufacturer’s instructions for your specific filter type before attempting any maintenance, and stick to replacing standard paper filters with new ones.
Will changing the air filter myself void my car's warranty?
Performing routine maintenance tasks like replacing your engine air filter will not void your vehicle’s warranty, provided you use high-quality parts that meet or exceed OEM specifications and complete the installation correctly without causing damage. Under standard consumer protection principles, vehicle manufacturers cannot void a warranty simply because maintenance was performed outside of an authorized dealership.
Because the 2016 Kia Picanto is well past its original manufacturer warranty period, warranty voidance is generally no longer a concern. However, keeping a detailed log of your DIY maintenance, along with receipts for the parts you purchase, is still highly recommended. Maintaining a complete service history helps preserve the resale value of your vehicle and provides valuable records for future troubleshooting.
Community discussion
Share your experience or ask a question. Comments are reviewed before publication.