
Replacing the engine air filter on a Toyota Vios at home is one of the simplest, most cost-effective maintenance tasks you can perform. It requires no specialized mechanical training, takes less than 15 minutes, and saves you from paying dealership or service center labor fees that typically range from several hundred to over a thousand Philippine Pesos (₱). A fresh vios air filter ensures your engine receives clean, unrestricted air, which is vital for maintaining optimal fuel economy and smooth acceleration under local driving conditions.
Why and When to Replace Your Vios Air Filter
The engine air filter acts as the protective barrier for your vehicle’s engine. It captures airborne contaminants like road dust, soot, pollen, and debris before they can enter the combustion chamber. If these particles bypass the filter, they can cause abrasive wear to internal engine components, including the cylinders, pistons, and valves, leading to premature engine wear and costly repairs.
In a tropical country like the Philippines, cars are subjected to unique environmental stresses that accelerate filter clogging. Stop-and-go traffic in congested urban areas like Metro Manila exposes your engine to high levels of airborne soot and exhaust particulates. Meanwhile, driving on unpaved provincial roads during the dry season kicks up massive amounts of fine dust. Even during the monsoon season, high humidity can cause damp debris and organic matter to stick to the filter media, rapidly restricting airflow.
Products mentioned in this guide
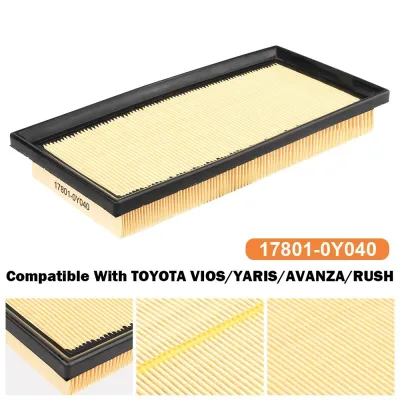
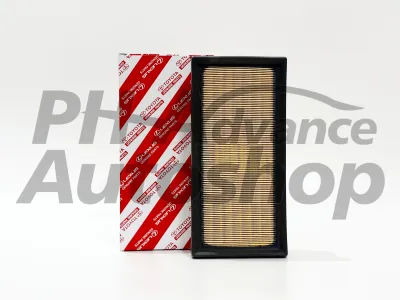
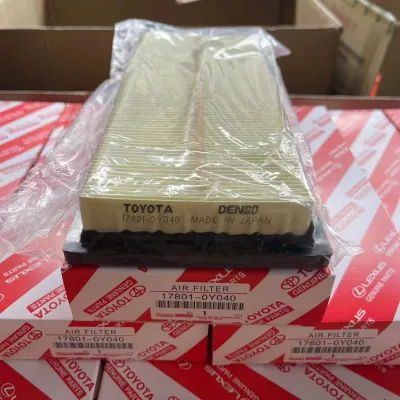

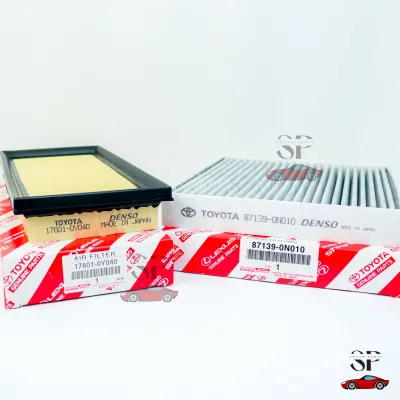
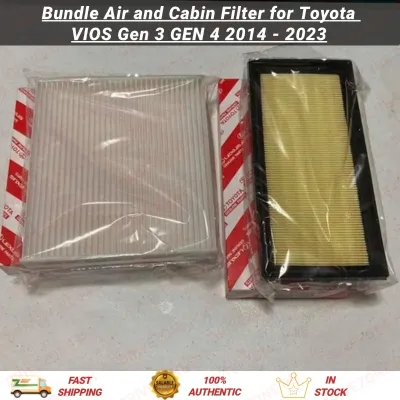
Prices are valid at publication and may change. Please refer to the product page for the latest price.
When an air filter becomes heavily clogged, the engine has to work harder to draw in air. This imbalance in the air-fuel mixture leads to reduced acceleration, sluggish throttle response, and a noticeable drop in fuel efficiency. Since the Toyota Vios is highly favored for its fuel economy, keeping the air filter clean is essential to maintaining its low operating costs.
To determine the right time for a replacement, consult your specific Toyota Vios Owner’s Manual for the manufacturer’s baseline schedule. Generally, the standard recommendation is to replace the filter every 20,000 to 40,000 kilometers. However, if you frequently drive in dusty areas, heavy traffic, or coastal environments, you should inspect the filter every 10,000 kilometers and replace it sooner if necessary.
You can easily perform a visual inspection to check the filter’s condition. Remove the filter and hold it up to a bright light source, such as a flashlight or the sun. If light passes clearly through the paper pleats, the filter is still functional. If the pleats are dark, heavily discolored, or clogged with a thick layer of gray soot and debris that blocks the light, it is time for a replacement.
Tools and Parts You Will Need
Having the correct items ready before you begin will ensure a smooth, uninterrupted DIY process. Gather the following tools and parts:

- New Engine Air Filter: You must verify your exact Vios generation, model year, and engine displacement (1.3L or 1.5L) to ensure the correct part number and physical fitment. The Toyota Vios has spanned multiple generations in the local market, including the first-generation (XP40) with 2NZ-FE/1NZ-FE engines, the second-generation (XP90), the highly popular third-generation (XP150) which transitioned to Dual VVT-i engines (1NR-FE/2NR-FE) after 2016, and the fourth-generation (AC100). Because the physical dimensions of the vios air filter vary significantly between these generations and engine types, check your vehicle documentation or consult a reputable parts dealer to match the OEM specifications.
- Basic Hand Tools: Most Vios models feature a tool-less airbox design secured by metal or plastic tension clips. However, some older models, specific trims, or aftermarket intake setups may require a Phillips-head screwdriver or a 10mm socket wrench to loosen hose clamps or mounting brackets.
- Cleaning Supplies: A clean, dry microfiber cloth or a small handheld vacuum is highly recommended to clean out any loose dirt, leaves, or insects accumulated inside the airbox housing.
- Safety Gear: Wear a pair of basic mechanic gloves to keep your hands clean and protect your skin from sharp metal edges, battery terminals, or hot components within the engine bay.
Step-by-Step Guide to Replacing the Engine Air Filter
Before touching any components under the hood, you must establish a safe and stable working environment. Park your Toyota Vios on a flat, level surface and engage the parking brake firmly to prevent the vehicle from rolling.
Turn off the ignition completely, remove the key from the ignition switch, and allow the engine to cool down for at least 30 minutes. The air filter housing sits close to the engine block and radiator hoses, which can reach extremely high temperatures during operation and cause severe burns if touched.
Once the engine is cool, pull the hood release latch located under the driver’s side dashboard. Open the hood of your Vios and secure it firmly using the integrated prop rod, ensuring the rod is fully seated in its designated slot to prevent the hood from falling while you work.
Step 1: Locate and Open the Air Filter Housing
Stand in front of the engine bay and locate the air filter housing. On most Toyota Vios models, the housing is a prominent, matte-black plastic box positioned on the right side of the engine bay (which is your left side as you face the car) or directly on top of the engine block. It is easily identifiable by the thick, corrugated rubber air intake hose connected to it, which channels filtered air toward the throttle body.
To open the housing, locate the retaining clips securing the upper cover to the lower box. Most Vios models use two metal tension clips on the sides or rear of the airbox. Press down or pull outward on these clips with your fingers until they snap open. They should release easily without requiring excessive force. If your specific model year or trim uses screws instead of clips, use a properly sized Phillips-head screwdriver to remove them carefully.
Warning: If your airbox is secured with screws, place them immediately into a secure magnetic tray, a small cup, or your pocket. Dropping a screw into the deep recesses of the Vios engine bay can be difficult to retrieve and may require removing the lower engine splash guard.
Gently lift the upper housing cover. Do not pull the cover away forcefully or attempt to remove it completely from the engine bay. The cover remains attached to the thick rubber intake hose and delicate electrical wiring harnesses, such as the Mass Air Flow (MAF) sensor connector. Tilting the cover up by a few inches is sufficient to provide enough clearance to access the filter inside without straining or damaging these connections.
Step 2: Remove the Old Air Filter and Clean the Housing
Carefully slide your fingers under the edge of the old air filter and lift it out of the lower housing. As you extract the filter, pay close attention to its physical orientation. Note which side faces upward (typically the pleated paper side with the rubber gasket border) and look for any flat, rounded, or angled corners on the filter frame. The Vios airbox is designed with an asymmetrical shape so that the filter can only seat properly in one specific direction.
Critical Safety Boundary: Once the old filter is removed, the lower portion of the airbox is empty, leaving the intake duct that leads directly to the engine’s throttle body and cylinders completely exposed. Before performing any cleaning, cover this open intake passage with a clean, dry microfiber cloth. This prevents loose dirt, dry leaves, insects, or dropped tools from falling into the engine intake manifold, which could cause catastrophic internal engine damage when the car is started.
With the intake passage safely covered, inspect the bottom and sides of the plastic housing. The lower airbox frequently accumulates sand, leaves, and fine road dust. Use a handheld vacuum or a damp microfiber cloth to thoroughly wipe out the interior of the lower housing. Avoid using compressed air inside the engine bay, as this can blow dust and debris directly into the open intake tube or onto sensitive nearby electrical sensors.
Once the housing is completely clean and dry, carefully remove the protective microfiber cloth from the intake passage. Ensure that no trapped dirt falls into the open duct as you lift the cloth away.
Step 3: Install the New Air Filter and Secure the Housing
Remove your new air filter from its packaging. Inspect the rubber or foam sealing gasket running along the outer perimeter of the filter frame. Ensure there are no tears, splits, or manufacturing deformities that could prevent a tight, airtight seal once installed.
Align the new filter with the shape of the lower housing, matching the angled corner of the filter frame to the corresponding corner of the airbox. Drop the filter into the housing. It should sit perfectly flat and flush within the molded plastic grooves of the lower housing. If the filter is sitting unevenly, tilted, or raised, do not force it down. Remove it, double-check the orientation, and try again. Forcing an improperly aligned filter will warp the frame and allow dirty, unfiltered air to bypass the filter media.
Carefully lower the upper housing cover back over the filter. Most Vios airboxes feature plastic alignment tabs or hinges on one side that must slide into corresponding slots on the lower housing before the cover can lie flat. Ensure these tabs are fully engaged before lowering the front of the cover.
Secure the housing by snapping the metal tension clips back into place. They should close with a firm, audible click. If you are struggling to close the clips, the cover is likely misaligned or the filter is not seated flat. Do not force the clips, as this can crack the plastic housing. If your model uses screws, tighten them hand-tight in an alternating pattern. Avoid overtightening, as plastic threads strip easily. Verify that the lid is flush with the lower housing and that there are no visible gaps around the rubber seal.
Post-Installation Checks and Common Mistakes to Avoid
Once the housing is secured, perform a final visual check of the engine bay to ensure no tools, cloths, or packaging materials are left behind. Close the hood securely and ensure it latches completely. Get into the driver’s seat, start the engine, and let it idle.
Step out of the vehicle and listen closely to the air filter housing area. The engine should idle smoothly and quietly. If you hear a distinct hissing, sucking, or whistling noise, it indicates an improper seal, meaning air is leaking past the filter gasket. If this occurs, immediately turn off the engine, open the hood, and re-inspect the housing alignment, ensuring the filter is seated flat and the cover is fully latched.
Check the instrument cluster to ensure no warning lights, such as the Check Engine Light (CEL), have illuminated. An illuminated CEL after an air filter change usually indicates that the Mass Air Flow (MAF) sensor connector was accidentally bumped, loosened, or unplugged during the process. Ensure the sensor plug is securely clicked into place.
To ensure a successful DIY job, keep these common mistakes in mind and actively avoid them:
- Installing the filter upside down: This restricts airflow and prevents proper filtration, as the structural support of the filter is designed to handle airflow in one specific direction.
- Neglecting to clean the airbox: Leaving dirt and leaves in the housing means they will immediately clog your brand-new filter, reducing its lifespan.
- Pinching the rubber seal: If the rubber gasket around the filter is pinched or folded when clamping the lid shut, it creates an air gap. This allows raw, unfiltered road dust to enter the engine, accelerating piston ring and cylinder wall wear.
- Buying the wrong filter variant: Assuming all Toyota Vios filters are identical. Always match the filter to your specific model year and engine displacement (1.3L vs 1.5L, NZ vs NR series).
Frequently Asked Questions (FAQ)
Can I clean and reuse my Toyota Vios engine air filter?
The standard factory-installed paper air filters in the Toyota Vios are strictly single-use consumables. They rely on microscopic paper fibers that trap fine particles deep within the media. Attempting to clean them by blowing them out with compressed air or washing them with water will tear these delicate fibers, enlarging the microscopic holes and rendering the filter useless.
If you have upgraded your vehicle with a specialized high-performance aftermarket filter (such as a washable cotton gauze or synthetic foam filter), these are designed to be cleaned and reused. However, you must strictly follow the specific manufacturer’s cleaning instructions and use their authorized cleaning and oiling kits. Applying too much oil can damage the Vios’s sensitive Mass Air Flow sensor.
Will changing the air filter myself void my Toyota warranty?
Performing basic, routine maintenance tasks like replacing your engine air filter on your own does not void your vehicle’s warranty. Under consumer protection guidelines, manufacturers cannot void a warranty simply because routine consumables were replaced outside of an authorized dealership, provided the correct specification parts were used and installed properly.
To protect yourself, always purchase high-quality filters that meet or exceed OEM specifications. Keep the physical or digital receipts of the purchase, and write down the date and current odometer reading in your car’s service booklet or a personal maintenance log. This provides clear documentation that the vehicle was serviced according to the manufacturer’s recommended intervals.
Community discussion
Share your experience or ask a question. Comments are reviewed before publication.