
Replacing the engine air filter and cabin air filter on a Toyota Fortuner is one of the most straightforward and cost-effective maintenance tasks you can perform at home. This simple DIY process takes less than thirty minutes, requires no specialized mechanical tools, and immediately restores optimal airflow to both your engine and your passenger cabin.
In the tropical climate of the Philippines, where vehicles frequently encounter heavy urban soot, dusty provincial roads, and high humidity, keeping these filters clean is essential. A fresh engine air filter ensures your diesel or gasoline engine breathes clean air, protecting internal components from abrasive wear and maintaining fuel efficiency. Meanwhile, a clean cabin air filter prevents dust, pollen, and mold spores from entering the air conditioning system, ensuring a healthy and odor-free environment inside the vehicle.
Preparation and Safety Checks
Before purchasing replacement parts, verify the exact specifications for your specific Toyota Fortuner model year and engine variant. The Fortuner has been produced across multiple generations with various engines, including the 2.4L 2GD-FTV and 2.8L 1GD-FTV turbodiesel engines, as well as the 2.7L 2TR-FE gasoline engine. Check your owner’s manual or consult an authorized dealer to match the OEM part numbers, as filter dimensions and housing shapes differ between model generations.
Products mentioned in this guide
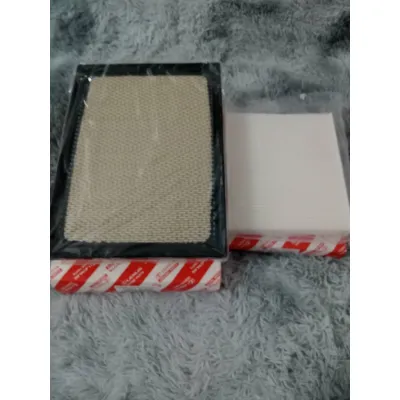
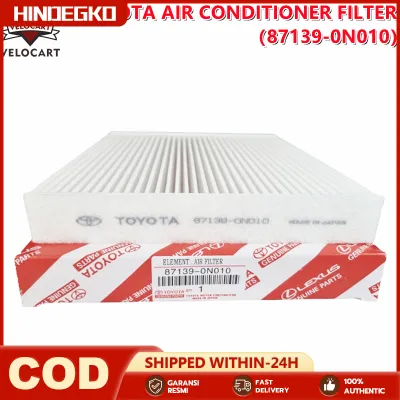
![[Fast Delivery] Toyota Aircon Cabin Filter (87139-0N010) Vios Innova Fortuner Altis Camry Yaris Rav-4 Hi-lux](https://img.lazcdn.com/g/p/97d737ee673769d5043b2151ae5ec256.jpg_400x400q80.jpg_.webp)

Prices are valid at publication and may change. Please refer to the product page for the latest price.
Safety is paramount when working inside the engine bay. Park your vehicle on a flat, level surface, engage the parking brake fully, and switch off the ignition. If the vehicle has been running, allow the engine to cool down completely for at least thirty minutes to prevent accidental burns from hot engine components, radiator hoses, or the exhaust manifold.
Gather the basic tools and materials needed for the job before you begin. You will only need a clean microfiber cloth, a pair of protective work gloves, and your new replacement filters. While most Fortuner models feature tool-free filter housings, having a flathead screwdriver nearby can help if any plastic clips or fasteners are stiff.
Inspect your new filters immediately after unboxing them to ensure they are free from manufacturing defects. Check that the rubber gaskets are intact and that the paper or synthetic pleats are not torn or warped. Keep your owner’s manual handy to reference any specific safety warnings or unique clip configurations for your model year.
Step-by-Step Guide to Replacing the Engine Air Filter
Open the hood of your Fortuner and locate the engine air filter housing, which is a prominent black plastic box situated on the passenger side of the engine bay. This housing is connected to the main air intake duct leading directly to the engine’s turbocharger or throttle body.

Identify the fastening mechanism securing the housing lid. On most modern Fortuner models, the lid is held in place by two or more metal tension clips that can be easily flipped open by hand. Carefully unclamp these clips without forcing them, and gently lift the housing cover. Be mindful of any attached sensor wiring, such as the Mass Air Flow (MAF) sensor harness, and avoid pulling or straining these electrical connections.
Carefully lift the old engine air filter out of the housing tray. Take note of its orientation, particularly which way the pleats face and how the rubber gasket seats along the perimeter of the box.
Before inserting the new filter, inspect the interior of the lower filter housing. It is common to find accumulated road dust, dried leaves, insects, or moisture trapped at the bottom. Use a clean, dry microfiber cloth to wipe the inside of the housing clean, taking care not to push debris down into the clean-air intake duct that leads toward the engine.
Align the new engine air filter with the housing. The filter is designed with a specific shape—often with one angled corner—to ensure it can only be installed in the correct orientation. Lower it into the housing, ensuring the rubber seal sits completely flush along the entire mounting edge to prevent unfiltered air from bypassing the filter.
Lower the housing cover back into position, making sure the rear locating tabs slide securely into their respective slots. Press down gently on the cover and snap the metal tension clips back into their locked positions. Double-check that the cover is tightly sealed and does not wiggle, as an improper seal can trigger a check engine light or allow damaging particulates into the engine.
Step-by-Step Guide to Replacing the Cabin Air Filter
Move to the front passenger side of the cabin to access the cabin air filter, which is positioned directly behind the glove compartment. Open the glove box and completely empty its contents to prevent items from spilling onto the floorboard during the removal process.
Locate the dampener arm attached to the outer right side of the glove box assembly. Gently slide the dampener arm off its mounting peg; this arm controls the smooth, slow-opening motion of the glove box and must be disconnected to allow the box to drop down fully.
Apply gentle inward pressure to both the left and right outer walls of the glove box. This squeezing action releases the limiting stops or rubber bumpers from the dashboard frame, allowing the glove box to swing downward on its bottom hinges.
Look into the exposed dashboard cavity to locate the rectangular plastic cabin filter cover. Squeeze the release tabs on the sides of this cover—usually on the right end—and pull the cover straight off to reveal the filter tray.
Slide the old cabin air filter out of its slot. Before discarding it, observe the “UP” or “AIR FLOW” arrow printed on the side of the filter frame to determine the correct orientation. In most Toyota Fortuner models, the air flows downward from the cowl intake toward the blower motor, meaning the airflow arrow on the filter should point downward, while an “UP” arrow (if marked on an OEM filter) should point upward.
Slide the new cabin air filter into the slot, ensuring it is oriented correctly according to the manufacturer’s markings. The filter should slide in smoothly without buckling, bending, or leaving gaps at the edges.
Reinstall the plastic filter cover by clicking the locking tabs back into place. Swing the glove box upward, squeeze the sides slightly to re-engage the limiting stops, and slide the dampener arm back onto its mounting peg until it clicks securely. Open and close the glove box a few times to verify that it operates smoothly, latches tightly, and does not rattle.
Post-Installation Verification and Maintenance
Once both filters are securely installed, start the engine and let it idle. Listen closely to the engine bay for any unusual whistling, sucking, or rushing air sounds, which could indicate an improperly sealed engine air filter housing.
Turn on the vehicle’s air conditioning system and test it across all fan speed settings. Verify that the airflow from the dashboard vents is strong, consistent, and free of any whistling noises or rattling sounds from the glove box area. Ensure there are no lingering musty odors, which should be immediately resolved by the fresh cabin filter.
Establish a regular inspection and replacement schedule tailored to your driving environment. While standard guidelines suggest replacing both filters every 10,000 to 15,000 kilometers, driving in highly dusty provincial areas, heavy urban traffic, or humid tropical climates in the Philippines may require more frequent checks—potentially every 5,000 kilometers.
Keep a detailed maintenance log to track your service intervals. Write the replacement date and current odometer mileage on a small sticker placed inside the glove box door, or record it in your digital vehicle maintenance application to ensure you never miss a scheduled filter change.
Frequently Asked Questions (FAQ)
Can I clean and reuse my Fortuner's air filters instead of replacing them?
Standard factory-installed (OEM) engine and cabin air filters for the Toyota Fortuner are made of disposable paper or non-woven fiber media. These filters cannot be washed, blown clean with high-pressure compressed air, or reused, as doing so can damage the delicate microscopic fibers and compromise their filtration efficiency. If you have installed specialized aftermarket performance filters designed to be washable, you must use the manufacturer’s approved cleaning kits, wash them gently, allow them to air-dry completely, and apply the recommended re-oiling treatment before reinstallation.
What happens if I install the cabin air filter backward?
Installing a cabin air filter backward restricts the overall volume of air entering the cabin and places unnecessary strain on the HVAC blower motor. The structural pleats and support mesh of the filter are engineered to capture debris from a specific direction; reversing this direction can cause the filter to buckle or collapse under air pressure. This collapse allows unfiltered dust, pollen, and mold spores to bypass the filter entirely, dirtying the air conditioning evaporator core and leading to reduced cooling performance and unpleasant odors.
Do I need to reset any sensors after changing the engine air filter?
Replacing the engine air filter on a Toyota Fortuner is a purely mechanical procedure and does not require any electronic sensor resets, ECU adaptations, or diagnostic scan tools. The Mass Air Flow (MAF) sensor will automatically adjust its readings to accommodate the improved, clean airflow. However, if your specific Fortuner model features a customizable maintenance reminder system on the multi-information display (MID) on the dashboard, you can manually clear or reset the service interval reminder through the steering wheel controls.

Community discussion
Share your experience or ask a question. Comments are reviewed before publication.