
Replacing the air filters on your Toyota Innova is one of the simplest and most cost-effective maintenance tasks you can perform at home. The Innova, a staple family vehicle and workhorse on roads in the Philippines, relies on a steady supply of clean air to keep its engine running efficiently and its cabin comfortable. Over time, dust, soot, and tropical humidity clog these filters, forcing the engine to work harder and reducing the air quality inside the cabin. By taking a few minutes to replace both the engine air filter and the cabin air filter yourself, you can restore performance, improve fuel economy, and save anywhere from ₱500 to ₱1,500 in dealership labor fees.
Signs Your Innova Needs a New Air Filter
Operating a vehicle in a tropical climate presents unique challenges for filtration systems. During the dry season, dusty roads and urban soot quickly accumulate on the filter media. During the wet season, high humidity can cause trapped organic debris to mold or clump, severely restricting airflow.
A visual inspection is the most reliable way to determine if your engine air filter needs replacing. Open the airbox and look closely at the pleats of the filter. If the original white or bright colored material has turned dark gray or black, or if you notice accumulated leaves, insects, or oily spots, it is time for a replacement.
Products mentioned in this guide
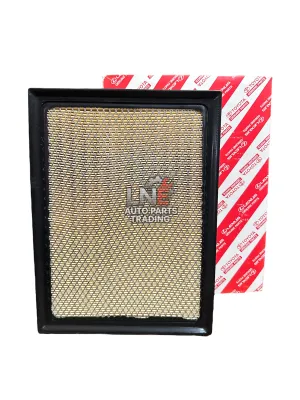
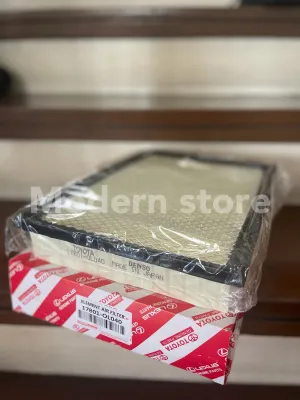
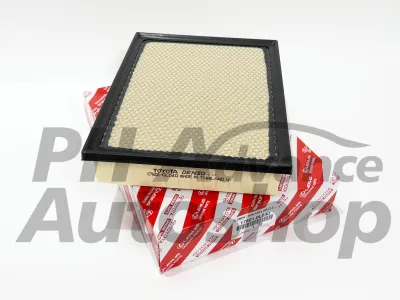
![Toyota Air Filter for Innova | Fortuner | Hilux Year 2016 - up [17801-0L040]](https://img.lazcdn.com/g/p/c8ded15cf94fb9666f338b5a0300eba0.png_400x400q80.png_.webp)

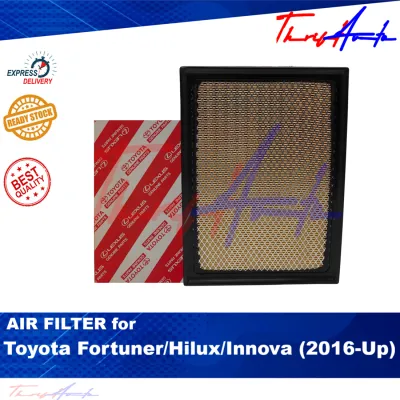
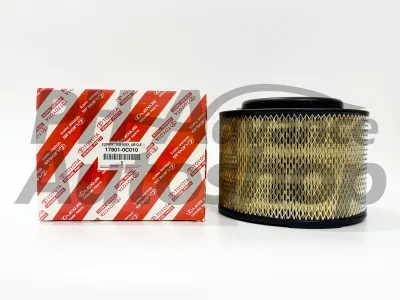
Prices are valid at publication and may change. Please refer to the product page for the latest price.
You may also notice physical performance indicators while driving. A clogged engine filter restricts oxygen flow, which can manifest as sluggish acceleration, a hesitant throttle response, or unusual engine vibrations at idle. You might also observe a gradual drop in your fuel efficiency, as the engine management system struggles to maintain the correct air-fuel ratio.
For the cabin air filter, the signs are more immediate to your senses. A weak breeze from your air conditioning vents, even when the fan speed is set to high, often points to a blocked cabin filter. If you notice a musty, damp, or dusty odor inside the vehicle when you turn on the AC, the filter has likely reached the end of its service life. Always cross-reference these signs with the maintenance schedule in your Toyota owner’s manual, keeping in mind that heavy traffic and dusty provincial roads require more frequent replacements.
Tools and Materials Required
Before starting the replacement process, you must gather the correct parts and basic tools. The Toyota Innova has been produced across multiple generations with different engine options, including the popular 2.5-liter 2KD-FTV diesel, the newer 2.8-liter 1GD-FTV diesel, and the 2.0-liter 1TR-FE petrol engine. Because the airbox dimensions and filter shapes differ significantly between these engines and model years, you must verify your vehicle’s exact model year, engine code, and chassis number before purchasing a replacement innova air filter.

For most model years, the engine air filter housing is secured by simple metal tension clips, meaning you will not need any specialized tools to open it. However, some variants or aftermarket modifications may use screws or plastic fasteners. It is wise to inspect your airbox beforehand to see if you need a standard Phillips screwdriver or a 10mm socket wrench.
In addition to the replacement filters, keep a clean microfiber cloth and a small hand vacuum or soft brush nearby. These tools are essential for cleaning out the housing before installing the new filter. Avoid using high-pressure compressed air inside the engine bay, as this can accidentally blow dirt deeper into the intake tract or damage sensitive electronic sensors.
Step-by-Step Guide to Replacing the Engine Air Filter
Replacing the engine air filter is a straightforward process that takes less than fifteen minutes. To ensure your safety, park the vehicle on a flat, level surface, engage the handbrake, and turn off the ignition. Allow the engine to cool completely before opening the hood to avoid contact with hot engine components or radiator hoses.
Locating and Opening the Air Filter Housing
Open the hood of your Innova and locate the engine air filter housing. This is typically a large, black plastic box positioned on the passenger side of the engine bay for diesel models, or near the center-rear for petrol variants. You will see a thick rubber intake hose connected to one side of the box, along with an electrical connector for the Mass Air Flow (MAF) sensor.
Identify the fasteners securing the airbox lid. On most common Innova models, you will find two to four metal tension clips around the perimeter of the housing. Carefully pry these clips outward using your fingers; they should snap open with moderate pressure. If your specific model uses screws, use the appropriate screwdriver to loosen them, taking care not to drop the screws into the lower engine bay.
Gently lift the housing lid just enough to clear the filter. Do not pull or yank the lid forcefully, as this can strain the attached intake hose, crack the plastic fittings, or damage the delicate wiring harness connected to the MAF sensor. If you feel resistance, double-check that all clips are fully disengaged. If any fasteners are seized, stripped, or unfamiliar, stop and consult a qualified mechanic to avoid damaging the housing.
Removing the Old Filter and Cleaning the Housing
With the lid lifted, take note of how the old filter is oriented inside the housing. Pay close attention to which side faces upward and how the rubber seal aligns with the edges of the box. Carefully lift the old filter straight up and out of the housing.
Hold the filter flat as you remove it to prevent loose leaves, sand, or insects from falling into the clean side of the airbox. Once the filter is out, inspect the bottom of the housing. It is common to find accumulated road dust, dried leaves, and insects trapped at the bottom of the airbox.
Use a slightly damp microfiber cloth to wipe the interior of the housing clean. If there is a significant amount of loose debris, use a small vacuum to suck it out. Never spray water, liquid cleaners, or harsh chemical solvents directly into the airbox, as any residual moisture or chemicals can be drawn into the engine and damage internal components or sensors.
Installing the New Innova Air Filter
Unpack your new engine air filter and compare it side-by-side with the old one to ensure the dimensions, shape, and rubber sealing borders match perfectly. Align the new filter in the exact same orientation as the original. The rubber gasket around the edge of the filter must sit flush within the groove of the lower housing.
Gently press down along the edges of the filter frame to ensure there are no gaps. A proper seal is critical; if the filter is misaligned or bent, unfiltered air will bypass the element, carrying abrasive dust directly into your engine cylinders. Never force the filter into place if it does not seem to fit.
Lower the housing lid back over the filter, ensuring it aligns correctly with the lower box. Hold the lid down firmly with one hand while re-engaging the metal tension clips or tightening the screws with the other. The clips should snap back into place with a firm, positive click, indicating a tight, airtight seal.
Checking and Replacing the Cabin Air Filter
While the engine air filter protects your vehicle’s mechanical components, the cabin air filter is responsible for cleaning the air you breathe inside the passenger cabin. It traps dust, pollen, soot, and mold spores before they can enter through the air conditioning vents. In highly congested urban areas or dusty provincial routes, this filter can quickly become choked with debris.
To access the cabin air filter on a Toyota Innova, open the front passenger door and locate the glovebox. The filter housing is situated directly behind the glove compartment. Empty the contents of the glovebox to prevent items from spilling out during the process.
To remove the glovebox, open it halfway. Look at the outer right side of the glovebox frame to locate the dampener arm, if equipped. Gently slide the dampener arm off its mounting pin. Next, press inward on both the left and right sides of the glovebox bin to disengage the stop tabs from the dashboard frame. Once the tabs clear the frame, lower the glovebox downward and lift it off its bottom hinges, setting it aside safely.
With the glovebox removed, you will see a rectangular plastic cover on the blower motor assembly. This cover is the cabin filter access door. Squeeze the release tabs on the sides of the cover and pull it straight off to reveal the cabin air filter tray.
Slide the old cabin filter out of the slot. Note the “AIR FLOW” arrow printed on the side of the filter frame, which indicates the direction of the air moving through the system. In most Innova models, the air flows downward from the intake cowl toward the blower motor, meaning the arrow on the new filter should point downward.
Slide the new cabin filter into the tray, ensuring the pleats are straight and the filter is not bunched up. Reattach the plastic cover, pressing it until you hear the tabs click into place. Reinstall the glovebox by aligning the bottom hinges, swinging the box upward past the stop tabs, and reattaching the dampener arm.
Post-Installation Checks and Maintenance Tips
Once both filters are securely installed, it is important to perform a quick post-installation check to verify that everything is sealed and functioning correctly. Start your Innova’s engine and let it idle. Walk to the front of the vehicle and listen closely to the engine bay near the airbox.
Listen for any unusual hissing, whistling, or sucking sounds. These noises typically indicate that the airbox lid is not seated correctly or that a clip is loose, allowing unfiltered air to bypass the filter. If you hear these sounds, turn off the engine, let it cool, and re-adjust the housing lid and clips.
Next, sit in the driver’s seat and check the instrument cluster. Ensure there are no warning lights, such as the Check Engine light, illuminated on the dashboard. If a warning light appears, double-check that you did not accidentally unplug the MAF sensor connector or damage its wiring harness during the installation.
Finally, turn on the air conditioning system and test the fan speeds. Verify that air flows freely from all vents and that there are no unusual rattling noises, which could indicate that loose debris fell into the blower motor during the cabin filter swap.
To keep your Innova running at its best, record the date and your vehicle’s current mileage in a maintenance log or on a small sticker placed inside the glovebox. This simple step ensures you can accurately track when the filters were last serviced, helping you plan your next routine maintenance interval before performance begins to degrade.
Frequently Asked Questions (FAQ)
Can I clean and reuse my Innova's paper air filter?
Standard paper air filters are designed as single-use consumables and should be replaced rather than cleaned. Attempting to wash a paper filter will ruin the delicate fiber structure, while blowing it out with high-pressure compressed air can create microscopic tears in the media. These tears allow fine dust particles to pass directly into your engine, causing premature wear. If you have installed a specialized aftermarket reusable filter, you may clean and re-oil it, but you must strictly follow the manufacturer’s specific cleaning kit instructions to avoid damaging your engine’s sensors.
Will changing the air filter myself void my car's warranty?
Performing basic maintenance tasks like replacing your engine or cabin air filter will not void your vehicle’s manufacturer warranty, provided you use parts that meet or exceed the original equipment manufacturer (OEM) specifications. To protect your warranty coverage, always purchase high-quality filters from reputable auto parts stores or authorized distributors. Keep all purchase receipts and document the date and mileage of the replacement in your service records. If you are ever unsure about specific warranty terms, consult your vehicle’s official warranty booklet for detailed guidelines.
Community discussion
Share your experience or ask a question. Comments are reviewed before publication.