
Reviving a dead car battery at home is a highly practical skill that can save you from the hassle of unexpected breakdowns. While jump-starting offers a quick emergency fix, using a dedicated car battery charger is the most effective way to fully restore a battery’s state of charge and maintain its long-term health. In the tropical climate of the Philippines, high ambient temperatures and humidity can accelerate internal battery degradation and self-discharge rates, making regular battery maintenance even more critical for vehicle reliability.
Working with automotive electrical systems carries inherent risks, including electrical shock, short circuits, and exposure to corrosive sulfuric acid or explosive hydrogen gas. Always prioritize safety by wearing protective eyewear and heavy-duty gloves, adhering strictly to your vehicle manufacturer’s instructions, and seeking the assistance of a qualified automotive technician if you are unsure about any part of the process. Before purchasing a charger or attempting to service your vehicle, always consult your specific vehicle owner’s manual to verify the battery location, mounting configuration, and electrical system requirements.
Pre-Charging Safety Checks and Preparation
Establishing a safe workspace is the first and most crucial step before handling any automotive battery. Choose a flat, dry surface in a well-ventilated area, such as an open carport or a garage with active airflow, to prevent the buildup of highly flammable hydrogen gas emitted during the charging process. Because water and electricity pose a severe hazard, ensure the workspace is completely shielded from rain or dampness, which is especially important during the humid monsoon season. Keep all potential ignition sources, including open flames, lit cigarettes, and power tools that can generate sparks, far away from the vehicle.
Products mentioned in this guide
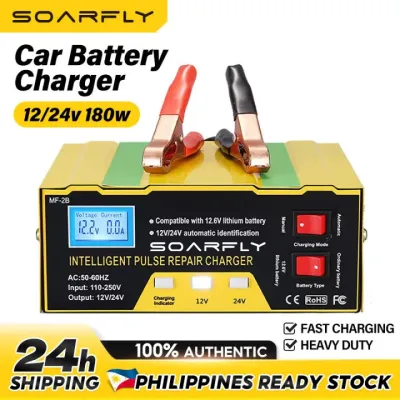
75 Lazada user ratings
The quality and appearance of this RJ Tianye 12V Intelligent Pulse Repair Charger from Japan is outstanding to say the least 👍 This product …Read full reviewShow less
The quality and appearance of this RJ Tianye 12V Intelligent Pulse Repair Charger from Japan is outstanding to say the least 👍 This product was recommended to me by our local garage mechanic 🧰. The unit works wonders and is extremely great value for your money 💰🤑👌 Other considerations are: High-quality product from Japan, Quickly charges my battery, Fast charging for my car!, Saves time and hassle, what more could l ask for? Thanks to the supplier for your service which is appreciated indee
rcvd the unit in good order and tester for functionality. Conflrmed working in proper condition.
nice product and fast delivery 👍

98 Lazada user ratings
🔨Durability:good 👜Portability:good 🔌Compatibility:good
thank you seller. all goods lahat tska gana ang item.
🔨Durability:10

142 Lazada user ratings
salamt seler dumating na parcel ko... tupad pero ndnko pa na susubukan. kong gumagana...
magaan... sana gumana...
have not used yet
good na good
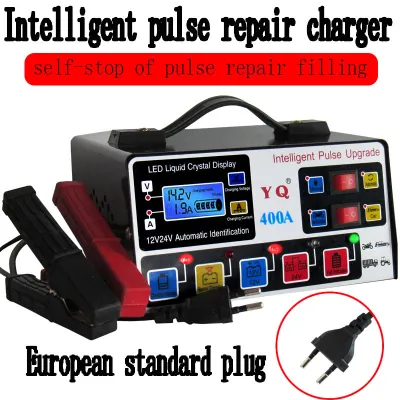
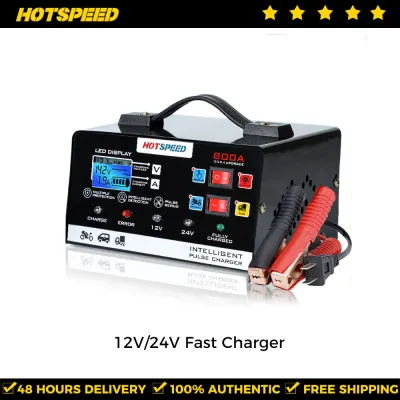
3,272 Lazada user ratings
Automatic voltage adjustment is convenient., High-quality materials used., Efficient power-saving technology., Great for motorcycles and car…Read full reviewShow less
Automatic voltage adjustment is convenient., High-quality materials used., Efficient power-saving technology., Great for motorcycles and cars., Powerful charger for heavy-duty batteries., Intelligent pulse repair feature is impressive., Easy to use and operate.,
🔨Durability:slightly with dent panel. But manageable. 🔌Compatibility:Fast charging, saves time!, Automatic voltage adjustment is convenient.…Read full reviewShow less
🔨Durability:slightly with dent panel. But manageable. 🔌Compatibility:Fast charging, saves time!, Automatic voltage adjustment is convenient., perfect for my battery. 👜Portability:with hand carrier. Perfect for long ride
for testing, I'll update the review once tested. mabilis yung delivery pero iniwan na lang sa entrance porke non COD
its working as it should, nice & thank you !!
the items is good but Hindi pa na testing
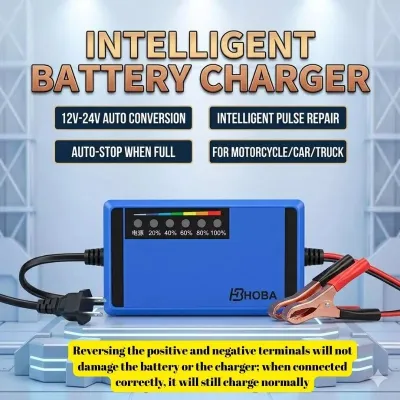
1,529 Lazada user ratings
Compact and portable, Suitable for all vehicles, Suitable for all vehicles, Smart charging technology, Protects battery life,
paki refund po hindi nman nagchacharged tong unit nio nakailaw lng po steady lng ung ikaw Nia,pano malaman kung ok na🤥🤥🤥
maliit lang pla at magaan lang..hindi kopa nasubukan mag-charge pero gumagana naman..ok narin sa presyo nya
Compact and portable, Smart charging technology, 12V compatible voltage, 🔨Durability:hsbsbsbnsnanannanok
426 Lazada user ratings
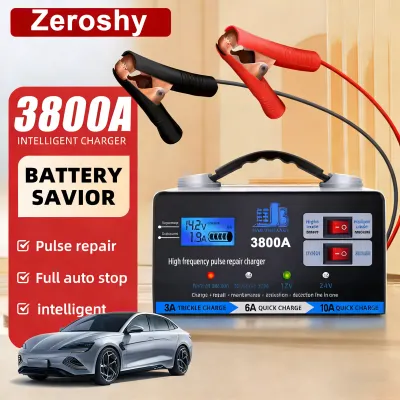
dumating ng maayos yung parcel mali nman ang pinadala binayaran ko 4800A at ang pinadala nnyo ay 3800A lang nandiyan sa pic.yung 3800A nagba…Read full reviewShow less
dumating ng maayos yung parcel mali nman ang pinadala binayaran ko 4800A at ang pinadala nnyo ay 3800A lang nandiyan sa pic.yung 3800A nagbayad ako para sa item na yun pero pinadala nnyo iba paano ko marerefund yung sobra sa binayad ko
legit and relliable seller . maganda ang packing at sealed ng maayos brand new din ang bigay ni seller kaya recommended talaga ang store. ma…Read full reviewShow less
legit and relliable seller . maganda ang packing at sealed ng maayos brand new din ang bigay ni seller kaya recommended talaga ang store. mabilis din magkarga at nag pa function ng maayos .
Maganda ito kc nkkita voltage capacity (battery charge status) at mi light indicator while charging. Nkkita p s LCD screen ang Ampere ng cur…Read full reviewShow less
Maganda ito kc nkkita voltage capacity (battery charge status) at mi light indicator while charging. Nkkita p s LCD screen ang Ampere ng current n pumapasok.
🔌Compatibility:good 👜Portability:good 🔨Durability:good mukha naman siya matibay. . sana magtagal. salamat po sa seller.
Automatic voltage saving, High power output, Fast charging, 🔌Compatibility:good 👜Portability:good 🔨Durability:good

519 Lazada user ratings
🔌Compatibility:Supports 12V and 24V charging, Suitable for lead-acid, AGM, and GEL batteries, LCD display for real-time monitoring, Pulse re…Read full reviewShow less
🔌Compatibility:Supports 12V and 24V charging, Suitable for lead-acid, AGM, and GEL batteries, LCD display for real-time monitoring, Pulse repair mode included, No need to disconnect battery terminals, Extends battery life significantly, Compact and portable design, Fast and efficient charging,
Extends battery life significantly, Supports 12V and 24V charging, Suitable for lead-acid, AGM, and GEL batteries, Fast and efficient chargi…Read full reviewShow less
Extends battery life significantly, Supports 12V and 24V charging, Suitable for lead-acid, AGM, and GEL batteries, Fast and efficient charging, LCD display for real-time monitoring, Pulse repair mode included,
Extends battery life significantly, Fast and efficient charging, Built-in safety protections, Supports 12V and 24V charging,
Prices are valid at publication and may change. Please refer to the product page for the latest price.
Perform a thorough visual inspection of the battery before connecting any equipment. Look closely at the plastic casing for any signs of physical damage, such as hairline cracks, wet patches that indicate leaking acid, or a distinct bulging of the battery walls. A bulging battery casing is a clear sign of severe overheating or internal cell failure; if you observe this, do not attempt to charge the battery, as doing so could lead to a dangerous thermal runaway event. Additionally, check the battery terminals for white, blue, or green powdery corrosion, which can restrict electrical flow and prevent a successful charge.
If you notice corrosion on the battery terminals, clean them using only authorized battery terminal cleaning sprays or a mild mixture of baking soda and water applied with a wire brush. Avoid letting any cleaning solution come into contact with the vehicle’s painted surfaces, plastic sensor housings, or rubber seals, as these substances can cause permanent material degradation. Once the terminals are clean and dry, identify your battery type—such as standard flooded lead-acid, Enhanced Flooded Battery (EFB), or Absorbent Glass Mat (AGM)—by reading the manufacturer’s label. You must verify that your car battery charger is fully compatible with this specific battery chemistry before proceeding.
Step-by-Step Guide to Connecting the Battery Charger
To prevent electrical arcs and potential damage to your vehicle’s sensitive electronics, you must connect the charger clamps in a precise, logical sequence. Begin by ensuring that the car battery charger is completely unplugged from the AC wall outlet and that the charger power switch, if equipped, is turned off. Locate the positive and negative terminals on your battery; the positive terminal is typically marked with a plus sign (+), a red protective cover, or the letters “POS,” while the negative terminal is marked with a minus sign (-), a black cover, or the letters “NEG.”

Attach the positive clamp of the charger—which is almost always color-coded red—directly to the positive terminal of the battery. Ensure the clamp teeth bite firmly into the metal of the terminal to establish a secure, low-resistance connection. A loose connection can cause localized heating and may trigger the charger’s safety sensors to abort the charging cycle.
Next, connect the negative clamp—typically color-coded black—to a solid, unpainted metal part of the vehicle’s chassis or engine block, away from the battery itself. This grounding point serves as a safe path for the electrical current and keeps any minor spark that might occur during connection far away from the battery’s vent caps, where flammable gases can linger. If your vehicle manufacturer’s manual explicitly instructs you to connect directly to the negative battery terminal instead, follow those specific guidelines carefully. Route all charger cables neatly, ensuring they are positioned well away from moving engine parts, such as radiator fans or drive belts, and hot exhaust components.
Setting the Charger and Monitoring the Charging Process
With the clamps securely attached to the vehicle, you can now configure the charger settings to match your battery’s specifications. Most passenger cars and light SUVs operate on a 12-volt electrical system, so ensure the charger’s voltage selector is set to 12V. Next, select the appropriate charging rate, measured in amperes (A). For a deeply discharged battery, a low amperage setting—often referred to as a trickle charge (typically 2A to 4A)—is highly recommended because it safely and gradually restores the battery chemistry without generating excessive heat. Higher amperage settings (such as 10A or more) can charge the battery faster but place more thermal stress on the internal plates.
Once the settings are correctly configured, plug the charger’s power cord into a grounded AC wall outlet. If you are using an extension cord, ensure it is heavy-duty, rated for outdoor or automotive use, and free of any cuts or frayed wires. Turn on the charger and observe the initial readings on the digital display or the behavior of the LED indicator lights to confirm that the unit has successfully initiated the charging cycle.
Do not leave the charging process completely unattended for extended periods. Periodically check on the battery and charger to monitor progress and ensure everything is operating within normal parameters. Carefully feel the side of the battery casing with a gloved hand; it should feel warm to the touch, but it should never feel hot. If you detect a strong sulfur or “rotten egg” smell, hear loud bubbling or hissing sounds from inside the battery, or notice the casing becoming hot, immediately unplug the charger from the wall outlet to stop the flow of electricity.
Disconnecting and Verifying the Battery Status
Once the charger’s digital display indicates that the battery is fully charged, or the green “ready” indicator light illuminates, you can safely begin the disconnection process. Just as with the connection phase, disconnecting the equipment requires a strict sequence to eliminate the risk of electrical sparks. First, unplug the charger’s power cord from the AC wall outlet to cut off all electrical current to the clamps. Never remove the clamps from the battery while the charger is still plugged in and active.
With the power disconnected, remove the black (negative) clamp from the vehicle’s chassis grounding point or the negative terminal. After securing the negative clamp, remove the red (positive) clamp from the positive battery terminal. Clean up your workspace by wiping down any tools, replacing any protective plastic covers over the battery terminals, and storing the charger in a cool, dry place protected from tropical humidity and dust.
To verify that the charging process was successful, let the battery rest for at least ten to fifteen minutes to allow any temporary surface charge to dissipate. If you have a digital multimeter, you can check the resting voltage across the terminals; a healthy, fully charged 12-volt battery should read approximately 12.6V to 12.8V. Finally, attempt to start the vehicle. The engine should crank quickly and start smoothly without hesitation. Once the engine is running, check the dashboard instrument cluster to ensure that the battery warning light turns off, indicating that the vehicle’s alternator has taken over the duty of powering the electrical system.
Troubleshooting Common Charging Issues
If your battery charger displays an error code, flashes a fault light, or refuses to start the charging cycle, the issue is often related to a poor connection or an extremely low battery voltage. Unplug the charger and verify that the clamps are biting into clean, bare metal on the terminals and grounding point, as dirt, grease, or residual corrosion can easily disrupt the electrical circuit. Additionally, many modern smart chargers feature safety mechanisms that prevent them from activating if they detect a battery voltage below a certain threshold, such as 2V to 4V, as a safeguard against charging a severely damaged or shorted battery.
There are several critical conditions where you must immediately stop the charging process and seek professional assistance. If the battery begins to emit a strong sulfur odor, produces visible vapor, or becomes hot to the touch, unplug the charger immediately. These symptoms point to internal cell damage, short circuits, or thermal runaway, which cannot be resolved by home charging and present a significant safety hazard.
If the battery successfully completes a full charge cycle but fails to start the vehicle the next day, or if the voltage drops rapidly after the charger is disconnected, the battery is likely unable to hold a charge due to advanced sulfation or internal degradation. In these instances, the battery has reached the end of its functional service life. You should take the vehicle or the battery to a professional automotive service center or a local battery specialist for a comprehensive load test to determine if a complete battery replacement is necessary.
Frequently Asked Questions (FAQ)
Can I charge a car battery without disconnecting it from the vehicle?
Yes, you can safely charge a car battery while it remains installed in the vehicle’s engine bay, provided you use a modern smart charger and follow the correct grounding procedures. Connecting the negative clamp to a clean, unpainted metal part of the vehicle’s chassis—rather than directly to the negative battery terminal—helps protect the vehicle’s sensitive onboard computers from potential electrical surges. However, you must always consult your vehicle owner’s manual first, as some manufacturers specify unique charging points or recommend disconnecting the negative battery cable entirely to safeguard complex electrical systems.
How long does it take to fully charge a dead car battery?
There is no single time frame for charging a dead battery, as the duration depends on several variables, including the battery’s overall capacity, its depth of discharge, and the output rate of your charger. For example, using a low-current trickle charge setting of 2A to restore a deeply discharged standard passenger car battery can easily take twelve hours or more, whereas a higher setting of 10A might complete the process in three to five hours. To avoid overcharging and damaging the internal plates, refer to the estimation charts and indicator behaviors detailed in your specific charger’s instruction manual.
Community discussion
Share your experience or ask a question. Comments are reviewed before publication.