
Removing stubborn adhesive residue from car paint requires a careful balance of chemical softening and gentle physical lifting to protect the delicate clear coat. Whether dealing with leftover glue from a local parking permit, an old dealership decal, or temporary reflective tape, rushing the process with harsh tools can lead to permanent scratches and costly paint correction. By using a dedicated automotive adhesive remover, preparing the surface correctly, and applying patient, single-direction wiping techniques, you can safely dissolve the bond without compromising your vehicle’s factory finish.
Assess the Residue and Gather Safe Materials
Before applying any solvent to your vehicle’s exterior, it is essential to identify the type of adhesive you are dealing with and gather the correct clear-coat-safe tools. Adhesives behave differently depending on their age, composition, and exposure to the elements.
Fresh tape residue from recently removed temporary decals is typically soft and highly responsive to mild solvents. In contrast, aged sticker glue and hardened decal adhesive that have baked under the intense tropical sun in the Philippines become brittle, deeply bonded, and highly resistant to basic washing.
Products mentioned in this guide
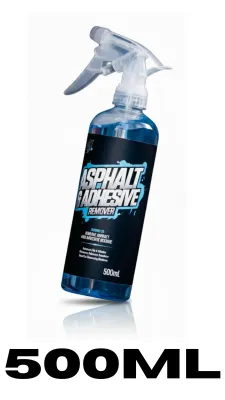
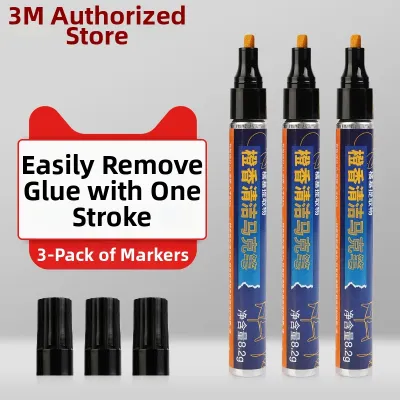
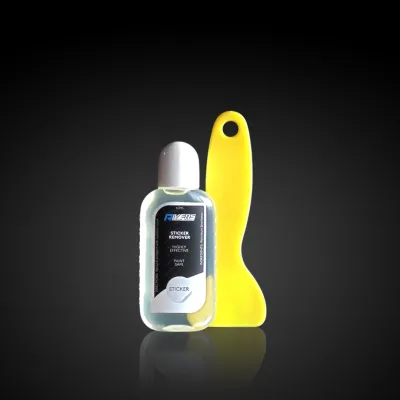
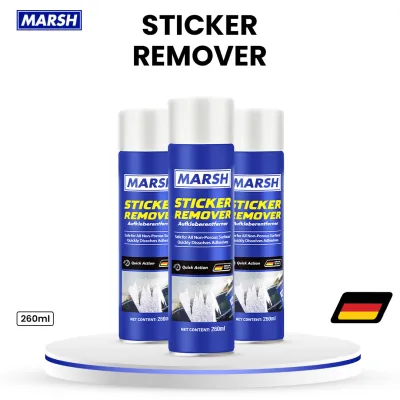
Prices are valid at publication and may change. Please refer to the product page for the latest price.
To tackle these varying levels of bonding, you must select tools that will not abrade the clear coat. Your primary tool should always be a clean, high-gsm microfiber towel, which lifts and traps dissolved glue particles within its fibers rather than dragging them across the paint.
For thicker, stubborn layers of adhesive, a dedicated plastic automotive scraper or a plastic razor blade can be used to gently lift the edges. Never use metal razor blades, kitchen scrubbers, or abrasive pads, as these will instantly cut through the clear coat and damage the underlying base coat.
When choosing a solvent, prioritize a dedicated automotive adhesive remover. These products are specifically formulated to break down polymer bonds while remaining safe for automotive clear coats, factory paint, and cured aftermarket finishes.
Always read the product label to verify compatibility with your specific paint type and to check for any warnings regarding plastic trim or rubber seals. Avoid unverified household solvents, industrial paint thinners, or strong degreasers, as they can quickly dull, soften, or strip the clear coat, leading to permanent paint damage.
Step-by-Step Adhesive Removal Process
Safely lifting adhesive from your car’s paint requires a systematic, multi-stage workflow. This process ensures that you do not rub abrasive dirt into the clear coat or allow active chemicals to damage surrounding trim. Always perform this work in a shaded, well-ventilated area, and ensure the vehicle’s panels are cool to the touch before beginning.

Surface Preparation and Initial Softening
The first step in any detailing task is to eliminate loose contaminants that could cause physical damage during the removal process. Thoroughly wash the target panel with a dedicated car shampoo and clean water to remove road grime, dust, and grit.
If you attempt to wipe adhesive on a dirty car, the loose dirt will act like sandpaper under your microfiber towel, leaving a web of fine scratches and swirl marks in your clear coat. Once the area is clean, dry it completely with a clean microfiber drying towel.
After cleaning, you can make the removal process significantly easier by pre-softening the adhesive. In tropical climates, hardened glue can be incredibly stubborn, but applying gentle heat helps re-liquefy the adhesive polymers.
You can use warm water poured over a clean microfiber towel draped across the residue, or a household hair dryer set to a low heat setting. If using a heat source, keep it at least 15 to 20 centimeters away from the paint, move it constantly, and monitor the temperature by touching the panel with your bare hand.
The paint should feel warm, never hot, as excessive heat can cause the clear coat to expand, bubble, or peel away from the base coat.
Applying the Adhesive Remover and Dwell Time
With the surface clean and the adhesive pre-softened, you can now apply your chosen automotive adhesive remover. To prevent the solvent from running onto sensitive areas, apply a small amount of the product directly onto a clean microfiber towel, or spray it sparingly onto the adhesive patch if the product instructions allow.
Be extremely careful to avoid overspray or runoff onto unpainted plastic trim, rubber window seals, or headlight lenses. Some chemical solvents can cause these materials to cloud, swell, or degrade permanently.
Once applied, allow the adhesive remover to dwell on the residue according to the manufacturer’s exact label instructions. This dwell time is crucial because it allows the solvent to penetrate and dissolve the chemical bonds of the glue, turning it into a soft, wipeable gel.
Do not leave the product on the paint longer than recommended, and never allow it to dry completely on the surface. If you are working in a warm or breezy environment where the solvent evaporates quickly, reapply a small amount to keep the adhesive wet and active.
Safe Wiping and Residue Lifting Techniques
When the adhesive has softened, use a clean microfiber towel to gently lift the residue from the paint. Wipe in a single direction using very light pressure, rather than rubbing in circular motions.
Circular scrubbing tends to grind remaining adhesive particles back into the clear coat, creating unsightly swirl marks. Fold your microfiber towel frequently to expose a fresh, clean section for each pass, ensuring that you are lifting the dissolved glue off the car rather than spreading it around.
For thick, stubborn patches of adhesive that do not dissolve completely with a towel, you can use a plastic automotive scraper. Hold the scraper at a very shallow angle—almost flat against the paint—and slide it forward with minimal pressure to shave off the softened layers.
Stop immediately if you feel any resistance, if the scraper catches on the paint, or if you notice any paint color transferring onto your tool or towel. This transfer indicates that the clear coat has been compromised or that you are working on a single-stage paint system, requiring immediate professional intervention.
Post-Cleaning Care and Clear Coat Protection
Once the adhesive residue is completely gone, you must address the chemical footprint left behind by the solvent. Adhesive removers are designed to strip away sticky substances, which means they will also completely strip away any wax, paint sealant, or ceramic coating protecting your clear coat.
Leaving the paint bare exposes it to harsh environmental factors, including intense ultraviolet rays, acid rain, and bird droppings, which can cause rapid oxidation and fading.
Begin the restoration process by washing the treated area once more with a pH-neutral car shampoo. This step neutralizes and washes away any residual solvent film that might remain on the paint or in the panel gaps.
Rinse the area thoroughly with clean water and dry it with a soft microfiber towel. Inspect the dry paint closely under good lighting to check for any remaining residue, hazing, or minor marring.
With the surface clean and bare, reapply your preferred paint protection to restore the clear coat’s defensive barrier. Apply a high-quality car wax, synthetic paint sealant, or ceramic spray coating to the treated panel, following the product’s specific application instructions.
This restores the hydrophobic properties of the paint, protects it from environmental damage, and ensures that the treated panel matches the gloss and shine of the rest of your vehicle.
What to Avoid: Common Mistakes and Stop Conditions
DIY adhesive removal is highly effective when done patiently, but using the wrong methods can result in permanent damage that requires expensive professional repainting. One of the most common mistakes is using harsh household chemicals such as acetone, nail polish remover, gasoline, or industrial degreasers.
While these chemicals will dissolve glue, they can also dissolve or permanently soften your car’s clear coat, leading to clouding, peeling, or complete paint failure.
Additionally, avoid using excessive physical force. If an adhesive patch does not budge after a safe application of adhesive remover, do not scrub harder or resort to abrasive kitchen sponges, steel wool, or clay bars used dry.
Excessive friction will quickly scratch through the thin clear coat layer. You must also establish clear stop conditions: if you observe any paint color transferring onto your microfiber towel, if the clear coat feels rough or textured, or if the adhesive remains completely hard after multiple controlled attempts, stop immediately.
In these scenarios, or when dealing with large-scale commercial fleet wraps, deeply baked-on decals that have been exposed to the sun for years, or vehicles with failing aftermarket paint, DIY methods are no longer safe.
Consult a professional automotive detailer or a reputable body shop. These professionals have specialized tools, such as rotary eraser wheels and paint depth gauges, to safely remove stubborn adhesives without risking the structural integrity of your vehicle’s finish.
Frequently Asked Questions (FAQ)
Can I use rubbing alcohol or household oils to remove car sticker residue?
While rubbing alcohol (isopropyl alcohol) and household oils (such as coconut or mineral oil) are popular DIY suggestions, they should be used with caution. Rubbing alcohol can dry out the clear coat if left to dwell too long, and it is often ineffective against heavy, weathered adhesives. Household oils can help soften light glue, but they leave behind a greasy film that is difficult to wash off completely, which can prevent new wax or paint sealants from bonding to the surface. For the safest and most efficient results, it is highly recommended to use a dedicated automotive adhesive remover that has been specifically formulated and tested for clear-coat safety.
Will removing adhesive residue void my car's paint warranty?
Using approved, clear-coat-safe automotive detailing products according to their manufacturer instructions generally does not void your vehicle’s paint warranty. However, using unapproved household chemicals, abrasive tools, or causing physical damage through improper scraping can void the warranty on the affected panels. If your vehicle is still under a factory paint warranty, always review your owner’s manual and warranty documentation, or consult your authorized dealership service center before applying any chemical solvents to the paintwork.
Community discussion
Share your experience or ask a question. Comments are reviewed before publication.