
Using a spring compressor tool safely is one of the most critical skills an aspiring home mechanic can learn. Vehicle suspension systems rely on heavy-duty coil springs that support the entire weight of the car while absorbing road impacts. Because these springs are installed under significant pre-load, they store an immense amount of potential energy even when the vehicle is stationary. Attempting to service a strut assembly or replace a worn shock absorber without respecting this stored energy can lead to catastrophic tool failure, severe physical injury, or permanent damage to your vehicle. To execute this repair safely, you must understand the mechanical forces at play, select the correct specialized equipment, and follow a disciplined, step-by-step compression and decompression procedure.
Recognizing the Risks and Setting Safety Boundaries
The physics behind automotive coil springs is straightforward but unforgiving. A typical passenger vehicle spring has a high spring rate, requiring hundreds of kilograms of force to compress it by a single inch. When you compress this spring to service a MacPherson strut, you create a highly volatile mechanical energy cell. If a low-quality or damaged spring compressor slips, or if the spring bows outward and escapes the tool’s grip, that stored kinetic energy is released in a fraction of a second. The resulting force is easily capable of fracturing bones, throwing heavy metal tools across a garage, or causing fatal impact injuries.
Because of these extreme risks, every home mechanic must establish a clear safety boundary before beginning any suspension work. If you inspect your vehicle and find heavily corroded components, severely bent strut shafts, or modified aftermarket suspension parts that do not fit standard tool configurations, you should immediately halt the project. Taking the removed strut assembly to a professional automotive shop with a wall-mounted hydraulic spring compressor is a highly sensible and affordable alternative to risking your safety at home. Always consult your vehicle’s specific factory service manual to understand the exact disassembly steps, and thoroughly read the instructions provided by the tool manufacturer before attempting to compress any spring.
Products mentioned in this guide
1 Lazada user ratings
salamat po pati sa reader ang ganda
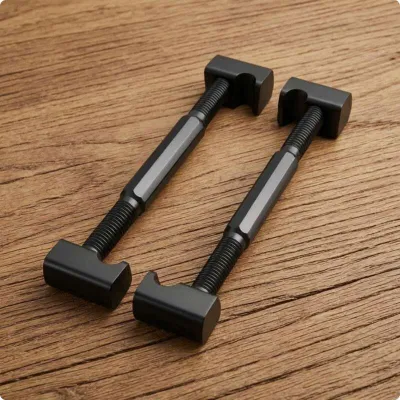
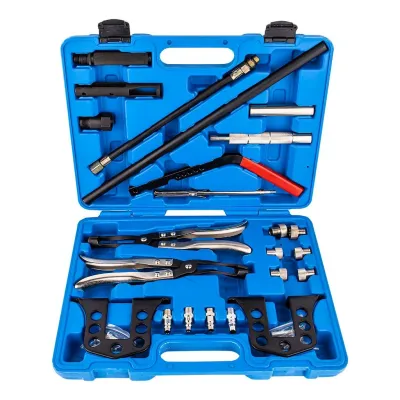
Prices are valid at publication and may change. Please refer to the product page for the latest price.
Selecting and Inspecting Your Spring Compressor Tool
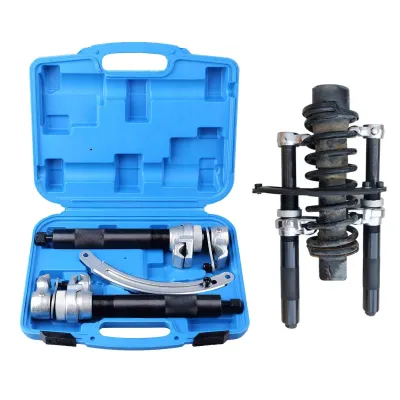
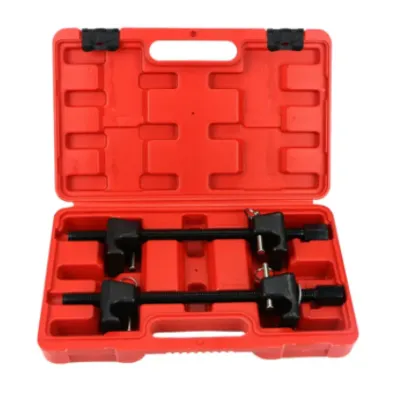
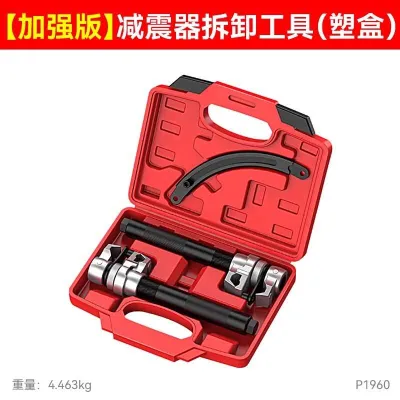
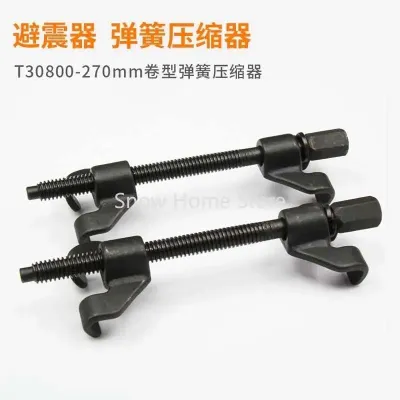
Choosing the correct type of spring compressor is the first line of defense against mechanical failure. For most modern passenger cars and crossover SUVs, a MacPherson strut compressor is the standard tool required. These typically consist of a pair of heavy-duty threaded rods equipped with safety hooks or jaws designed to clamp onto the outer diameter of the coil spring. For older vehicles or those with double-wishbone suspensions, an internal coil spring compressor is often necessary. This tool features a single threaded rod that passes through the center of the spring, utilizing specialized plates to compress the coil from the inside. Never attempt to use a tool designed for one suspension type on another, as the load capacities and gripping mechanisms are not interchangeable.

Before the tool ever touches a suspension coil, you must perform a meticulous pre-use inspection. Begin by cleaning the threaded rods with a wire brush to remove any dirt, old grease, or metal shavings. Carefully examine the threads along the entire length of the rod for signs of flattening, stripping, or cross-threading. Inspect the cast jaws or hooks for hairline cracks, bent safety pins, or signs of metal fatigue. If you observe any structural defects, no matter how minor they may seem, discard the tool immediately and obtain a high-quality replacement. Under the immense load of a compressed spring, any microscopic crack or worn thread can rapidly escalate into a complete structural failure.
Securing the Vehicle and Preparing Your Workspace
A safe suspension repair begins with a stable, well-prepared physical environment. Always park the vehicle on a flat, level concrete surface that can support the concentrated weight of jack stands. Never attempt suspension work on dirt, gravel, or sloped driveways, as the shifting forces of disassembly can cause the vehicle to fall. Raise the vehicle using a high-quality hydraulic floor jack and immediately lower it onto properly rated jack stands positioned at the manufacturer’s designated lift points. Shake the vehicle gently to verify its stability before removing the wheels; never rely solely on a hydraulic jack to support the vehicle while you work underneath it.
Personal protective equipment (PPE) is non-negotiable when handling high-tension springs. Wear impact-resistant safety glasses to protect your eyes from flying debris, rust scale, or sudden mechanical failures. Heavy-duty mechanic gloves are essential to protect your hands from pinch points, sharp metal edges, and the high torque required to turn the compressor bolts. In tropical climates like the Philippines, high humidity and heat can cause sweat to accumulate quickly, which can impair your grip or obscure your vision. Keep a clean towel nearby to dry your hands and face, and ensure your workspace is brightly lit so you can clearly monitor the alignment of the tool throughout the entire procedure. Keep bystanders, children, and pets far away from the work area to eliminate any risk of accidental injury.
Executing the Spring Compression Process Safely
To begin the compression process, position the compressor rods on opposite sides of the coil spring, exactly 180 degrees apart. This symmetrical placement is critical because it ensures the compression force is distributed evenly, preventing the spring from bowing or slipping sideways. Position the jaws as far apart on the coils as possible to maximize the compression range, but ensure they do not contact the weak, tapered pigtail ends of the spring. The hooks must fully cradle the spring wire, and any safety pins or locking latches must be securely engaged to prevent the tool from sliding along the coil.
Once the tool is correctly positioned, apply a generous amount of clean engine oil or anti-seize lubricant to the threaded rods. This lubrication reduces friction, prevents thread galling, and minimizes the heat generated during compression, which can weaken the metal threads. Begin tightening the compressor bolts using hand tools, such as a socket wrench or a ratcheting box wrench. Avoid using pneumatic or electric impact wrenches unless the tool manufacturer explicitly permits it, as the rapid, uncontrolled torque of power tools can easily strip threads, cause the jaws to slip, or lead to uneven compression.
Tighten the bolts using a strict alternating method. Turn the bolt on the first rod three to four full rotations, then move to the opposite rod and turn it an equal amount. This incremental approach keeps the spring centered and prevents dangerous lateral stress on the threaded rods. As you turn the bolts, pause frequently to step back and visually inspect the assembly. Check that the jaws remain firmly seated on the coils and that the spring is compressing straight down without bowing. Compress the spring only as much as necessary to relieve the tension on the upper strut mount; once the top mount can rotate freely or has a slight amount of play, stop compressing immediately to avoid putting unnecessary stress on the tool.
Releasing Tension and Verifying the Reassembly
After you have successfully replaced the shock absorber, strut cartridge, or upper mount, you must reverse the process to release the stored energy safely. Begin by ensuring the new components are correctly aligned and that the spring ends are perfectly seated in the rubber isolators and metal perches of the strut assembly. Releasing the tension requires the same disciplined, slow, and alternating approach used during compression. Turn each threaded rod counterclockwise in small, equal increments, switching back and forth between the two sides to maintain a balanced release of energy.
Never back off one side completely while the other remains under tension, as this will cause the spring to twist violently, potentially damaging the new strut or causing the tool to slip off. As the spring expands, guide it carefully to ensure it seats perfectly into the designated grooves of the upper and lower spring seats. Once the spring is fully decompressed and the tool is loose, carefully remove the compressor jaws from the coils.
Before reinstalling the strut assembly onto the vehicle, perform a thorough visual and physical inspection. Double-check that the spring is fully seated and that all rubber isolators are properly aligned to prevent noise and premature wear. When mounting the assembly back onto the vehicle, use a calibrated torque wrench to tighten all suspension fasteners—including the upper strut tower nuts, lower mounting bolts, and stabilizer bar links—to the exact torque specifications listed in your vehicle’s factory service manual. Proper torquing is essential to prevent components from loosening under the vibration of daily driving.
Identifying Red Flags: When to Stop and Call a Professional
During any suspension repair, you must remain highly vigilant and prepared to abort the process if conditions become unsafe. Immediate stop indicators include any visible sliding or shifting of the compressor jaws along the spring coils, any noticeable bending or flexing of the threaded rods, or unusual popping, cracking, or creaking noises coming from the spring or tool. If you observe any of these warning signs, do not attempt to force the tool further or continue the disassembly.
If you must back out of a compromised compression, do so with extreme caution. Slowly and evenly back off the tension on the bolts, keeping your body positioned away from the direct path of the spring’s potential release. If the tool is jammed or the spring is dangerously deformed and cannot be safely decompressed, do not attempt to hammer or pry the components. Instead, carefully transport the entire locked assembly to a professional automotive repair shop where technicians can use specialized heavy-duty equipment to safely extract the spring. Remember that forcing a seized strut mount or working with heavily corroded suspension components is a high-risk endeavor that quickly exceeds the boundaries of safe DIY repair.
Frequently Asked Questions (FAQ)
Can I use a standard C-clamp instead of a dedicated spring compressor tool?
No, you must never use a standard C-clamp or any other improvised clamping device to compress a vehicle’s coil spring. Standard C-clamps lack the curved, form-fitting jaw geometry required to securely grip the round wire of a suspension spring. Furthermore, C-clamps are designed for static clamping forces and are not rated to withstand the immense lateral and kinetic forces exerted by a compressed automotive spring. Attempting to use a C-clamp will almost certainly result in the clamp slipping off the coil under load, releasing the spring’s stored energy instantly and causing catastrophic tool failure, severe injury, or property damage. Always use a dedicated, properly rated spring compressor tool designed specifically for automotive suspension work.
Do I need to compress the spring if I am only replacing the shock absorber?
Whether you need to compress the spring depends entirely on your vehicle’s suspension design. On vehicles equipped with MacPherson struts, the coil spring and the shock absorber (or strut cartridge) are integrated into a single, co-axial assembly. In this configuration, the spring is held under constant tension by the upper strut mount, meaning you must compress the spring to safely disassemble the unit and replace the shock absorber. Conversely, on vehicles with independent double-wishbone or multi-link suspensions, the coil spring and the shock absorber are often mounted separately. In these setups, you can typically unbolt and replace the shock absorber directly without disturbing or compressing the coil spring, provided the suspension arm is properly supported. Always consult your vehicle’s service manual to identify your specific suspension configuration before starting.
Community discussion
Share your experience or ask a question. Comments are reviewed before publication.