
To safely wire a 12V power inverter directly to your car battery, you must establish a dedicated, fused circuit using heavy-gauge copper cables that can handle the inverter’s maximum current draw. This process bypasses the vehicle’s delicate interior wiring, preventing blown fuses and melted sockets while delivering clean, stable power to your high-wattage electronics. By placing an inline fuse close to the positive battery terminal, routing cables away from heat and moving parts, and securing a solid ground, you protect your vehicle’s electrical system from short circuits and potential fire hazards.
In tropical environments like the Philippines, where high humidity, intense engine bay heat, and salty coastal air accelerate corrosion and stress electrical systems, taking these precautions is even more critical. A poorly executed installation can lead to voltage drops, premature battery failure, or electrical fires. Following a systematic approach ensures your mobile power setup remains reliable, whether you are running tools at a remote work site, powering camping gear, or setting up an emergency backup system during a power outage.
Assess Your Power Requirements and Vehicle Limits
Before purchasing cables or mounting your 12V power inverter, you must evaluate whether your vehicle’s electrical system can support the additional load. Every inverter has two primary power ratings: continuous wattage and peak (or surge) wattage. Continuous wattage is the amount of power the inverter can deliver indefinitely under normal conditions, while peak wattage is the short burst of power required to start motorized appliances, such as small refrigerators or power tools. You must calculate the total wattage of all devices you plan to run simultaneously and ensure this total does not exceed the inverter’s continuous rating.
Products mentioned in this guide
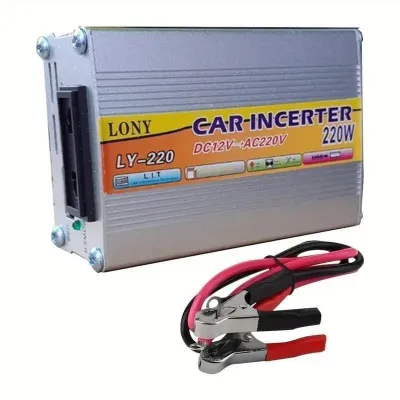
10 Lazada user ratings
👌Ease of Use:10/10 🔌Compatibility:Good 👍
ok liget na liget
👌Ease of Use:good
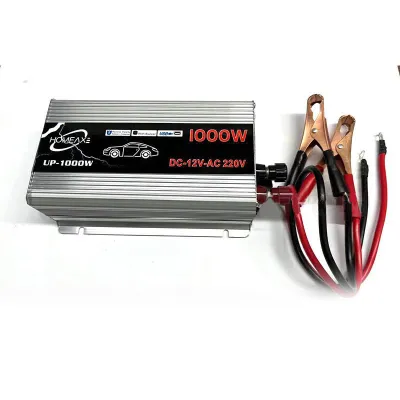
18 Lazada user ratings
what you see, what you get. Mas worth it pa siya sa eneexpect ko dumating siyang safe at walang sira highly highly recommend this item and s…Read full reviewShow less
what you see, what you get. Mas worth it pa siya sa eneexpect ko dumating siyang safe at walang sira highly highly recommend this item and shop! THANKYOU SELLER!
thank you seller, what I ordered is what I received
Thanks Rider, lazada and most of all seller.
I did try yet but I think it well work ...
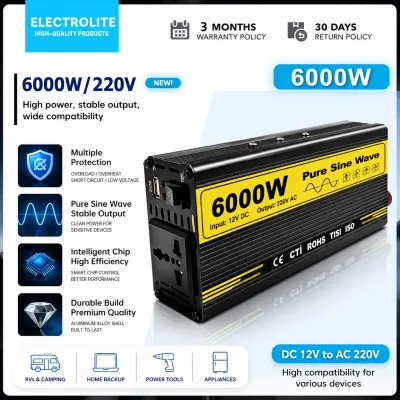
60 Lazada user ratings
Natanggap ko ang aking order mula sa nagbebenta nang maayos at mabilis. Ang produkto ay may magandang kalidad at walang mga problema. Salama…Read full reviewShow less
Natanggap ko ang aking order mula sa nagbebenta nang maayos at mabilis. Ang produkto ay may magandang kalidad at walang mga problema. Salamat sa seller at sa delivery person.
maingay sunog yung mga terminal lines kc maliliit yung wires, i think not efficiently converted. but ok nman maingay ang fan stuck yung full…Read full reviewShow less
maingay sunog yung mga terminal lines kc maliliit yung wires, i think not efficiently converted. but ok nman maingay ang fan stuck yung full volume nung fan
very nice at talagang gumaganaaa, tagal rin malowbat ang sobrang Ganda ng quality n'ya,worth the price di sayang ang binayad!!
my ratings is late because I'm busy but I used it and its operating well i hope it will last good product
Excellent Quality po..naka second order na po ako.... thank you po seller
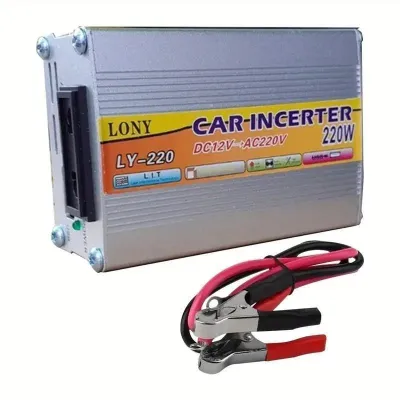
7 Lazada user ratings
Great for outdoor activities, Efficient power conversion, Reliable emergency equipment, Versatile for car and fishing trips
👌Ease of Use:kaya ang electric fan ko yamaha amplifier napagana nya ok sya worth the price ok na ok
🔌Compatibility:not yet tested for used for hours ,hope will last long.
my 3rd order
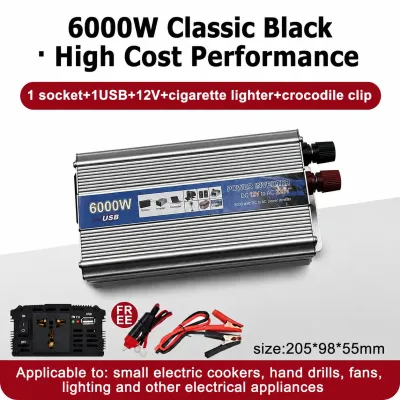
37 Lazada user ratings
Durable aluminium alloy construction., Reliable and efficient performance., High-quality pure sine wave output., Easy to install and operate…Read full reviewShow less
Durable aluminium alloy construction., Reliable and efficient performance., High-quality pure sine wave output., Easy to install and operate., Excellent power output for its size., Efficiently converts DC power to AC power., Perfect for outdoor and emergency power needs.
The product quality is very good, the seller's service attitude is very good, the performance is very good, it is Pure Sine Wave 12000w, it …Read full reviewShow less
The product quality is very good, the seller's service attitude is very good, the performance is very good, it is Pure Sine Wave 12000w, it is working and running normally, I recommend everyone to buy it, I really like it.
Hello sa seller Dumating na yung order ko... Ang masasabi ko lang ay napaka bilis dumating ng item ko kudos kay seller.. Ang ganda ng qualit…Read full reviewShow less
Hello sa seller Dumating na yung order ko... Ang masasabi ko lang ay napaka bilis dumating ng item ko kudos kay seller.. Ang ganda ng quality. Dto na kayo bumili sa seller.
maganda ang solar , malakas ang ilaw nya sana tumagal ang battery mabilis dumating ng item maganda ang packaging
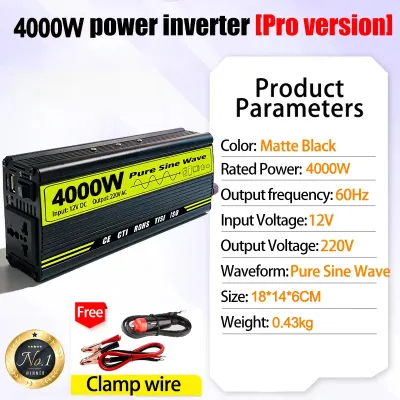
15 Lazada user ratings
This product supports both 24V and 220V voltage, so you can cook with a 220V outlet. Excellent value for money! I hope it lasts a long time!…Read full reviewShow less
This product supports both 24V and 220V voltage, so you can cook with a 220V outlet. Excellent value for money! I hope it lasts a long time! That's why I recommend this inventor; it's worth the money. I can even use it to cook rice in a rice cooker in my truck. So you should buy it too; you definitely won't regret it, and it's 100% genuine!
The packaging was excellent, with foam and a cardboard box. I received it the day after ordering. After testing, everything is normal, the c…Read full reviewShow less
The packaging was excellent, with foam and a cardboard box. I received it the day after ordering. After testing, everything is normal, the current is stable, and it's a 100% pure sine wave. Thank you! ❤️
Excellent, hope to continue using it. The packaging was very secure, but to be honest, we didn't expect it to suit me so well. Recommend the…Read full reviewShow less
Excellent, hope to continue using it. The packaging was very secure, but to be honest, we didn't expect it to suit me so well. Recommend the shop.
Okay, it's fine, no damage, and it looks great, especially in a place like ours where power outages are frequent. Thank you, seller.
I've received the package. The quality is excellent, and it works well. I hope it lasts a long time.
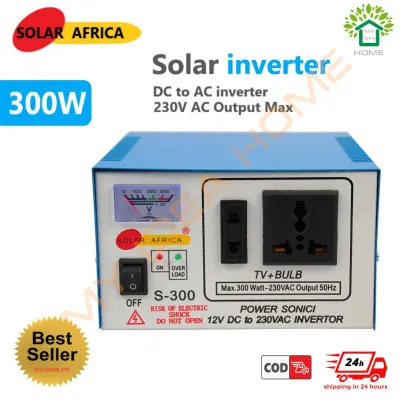
72 Lazada user ratings
Easy installation and setup, Safe overload and temperature protection, ang Ganda pa at mura...Hindi cia gaya nong una Kong bili... thank you…Read full reviewShow less
Easy installation and setup, Safe overload and temperature protection, ang Ganda pa at mura...Hindi cia gaya nong una Kong bili... thank you lazada
nabuksan kn item pero hand kp nasubukan ! I test ko pa ,bigay k review pg n test kn ! tnxz seller at Lazada pati n s rider n ng deliver ,,
thank you po. nag order na po ako ulit.
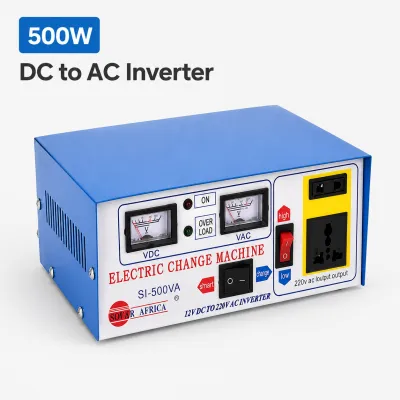
1 Lazada user ratings
goods saktong sakto sa tagulan, timing ang dating ng order ko magagamit ko na agad. thanks po
Prices are valid at publication and may change. Please refer to the product page for the latest price.
Once you know your power requirements, you must determine if your vehicle’s alternator and battery can supply the necessary current. To find the approximate current draw in amperes, divide the continuous wattage of your inverter by the system voltage (12 volts) and account for an efficiency loss of roughly 10 to 15 percent. For example, a 1000-watt inverter running at full capacity will draw approximately 83 amps under ideal conditions, but when accounting for efficiency losses, the actual draw from the battery is closer to 95 to 100 amps.
Most standard passenger vehicles are equipped with alternators rated between 70 and 120 amps. A significant portion of this output is already dedicated to running essential vehicle systems, such as the fuel pump, engine management computers, headlights, and the air conditioning system—which runs almost constantly in warm climates. If your inverter draws more current than your alternator can supply, the system will pull the remaining power directly from the battery, gradually draining it even while the engine is running. Consult your vehicle’s owner’s manual to find the alternator’s rated output and check for any manufacturer-specific warnings regarding aftermarket electrical accessories.
Select the Correct Wire Gauge and Fuses
Selecting the appropriate wire gauge is one of the most critical safety decisions in the installation process. High-current 12V systems are highly sensitive to resistance; if the wire is too thin for the current or the length of the run, it will drop voltage and generate excessive heat, creating a severe fire hazard. You must match the wire gauge to the inverter’s maximum current draw and the total length of the cable run, using the manufacturer’s sizing chart as your primary guide.

For high-wattage installations, always use high-quality, multi-strand copper wire. Pure oxygen-free copper (OFC) is highly recommended over copper-clad aluminum (CCA) because copper has significantly lower electrical resistance and superior heat tolerance. In humid, tropical climates, CCA wire is also highly susceptible to galvanic corrosion if moisture penetrates the insulation, which can cause the wire to degrade rapidly and fail. As a general rule of thumb, a 1000-watt inverter with a cable run of under 10 feet typically requires at least 4 AWG (American Wire Gauge) or 2 AWG copper wire to prevent dangerous voltage drops.
Overcurrent protection is non-negotiable when wiring directly to a battery. You must install an inline fuse or a manual-reset circuit breaker on the positive cable. The fuse must be rated slightly above the inverter’s maximum continuous current draw to prevent nuisance blows, but it must remain strictly below the maximum current-carrying capacity (ampacity) of the wire you have selected. For instance, if your wire is rated to safely carry 150 amps and your inverter draws a maximum of 100 amps, a 110-amp or 120-amp fuse is an appropriate choice. This ensures the fuse will blow and cut power long before the wire itself reaches its thermal limit.
Additionally, ensure that all terminals, lugs, and connectors are sized precisely for both the wire gauge and the connection posts. Loose or poorly crimped connections introduce high resistance, which generates localized heat that can melt plastic housings or ignite nearby materials. Use heavy-duty copper ring terminals, crimp them using a dedicated hydraulic or heavy-duty mechanical crimping tool, and seal the connection with adhesive-lined heat-shrink tubing to lock out moisture and prevent oxidation.
Step-by-Step Battery Wiring Process
Executing the physical installation requires a methodical, step-by-step approach to ensure safety and longevity. Before beginning, park the vehicle on a level surface, engage the parking brake, and turn off the ignition. Disconnect the negative battery terminal first to eliminate the risk of accidental short circuits if your tools touch the metal chassis while working on the positive connections. Wear protective eyewear and gloves throughout the process to shield yourself from battery acid and sharp metal edges.
Route and Secure the Cables
Begin by planning the physical path the positive and negative cables will take from the engine bay to the inverter’s mounting location. The mounting spot should be clean, dry, well-ventilated, and away from direct sunlight or passenger footwells. When routing the cables through the engine compartment, keep them far away from extreme heat sources such as the exhaust manifold, turbocharger, and radiator, as well as moving parts like steering shafts, suspension components, and engine belts.
If you must pass the cables from the engine bay through the firewall into the passenger cabin, look for an existing rubber boot or grommet used by the factory wiring harness. If you must drill a new hole, ensure there are no components on the other side of the firewall before drilling. Always install a high-quality, tight-fitting rubber or synthetic grommet in the hole to protect the cable insulation from rubbing against the sharp metal edge of the firewall. Over time, engine vibrations can cause bare metal to slice through wire insulation, resulting in a catastrophic short circuit.
Once the cables are routed, secure them along their entire length using heavy-duty, UV-resistant nylon zip ties or insulated metal P-clamps. Secure the cables to stable, non-moving parts of the vehicle frame or body. Avoid securing cables to fuel lines, brake lines, or moving suspension parts. Proper securing prevents the wires from sagging, vibrating, or chafing against adjacent surfaces during daily driving over rough roads.
Install the Fuse and Connect to the Battery
The inline fuse holder must be mounted as close to the positive battery terminal as possible, ideally within 12 inches (30 centimeters). This placement is critical because the section of cable between the battery terminal and the fuse holder remains unprotected; if a short circuit occurs in this short segment, the fuse cannot protect it. Mounting the fuse holder close to the battery ensures that almost the entire length of the positive cable run is protected by the fuse.
Prepare the positive battery terminal by cleaning it thoroughly with a wire brush to remove any dirt, grease, or corrosion. Attach the ring terminal of the short positive cable (running from the battery to the fuse holder) to the battery’s positive accessory bolt or terminal clamp, ensuring a flush, metal-to-metal connection. Tighten the nut securely using a wrench, but avoid over-tightening, which can strip the threads or damage the battery post.
Do not place the fuse into the holder at this stage. Leaving the fuse holder empty ensures that the positive cable running into the cabin remains completely de-energized while you complete the rest of the installation. This safety step eliminates the risk of accidental short circuits or sparks if the loose end of the positive cable touches the vehicle chassis during the grounding process.
Establish a Solid Ground Connection
To complete the electrical circuit, you must establish a reliable ground connection for the negative cable. If the inverter is mounted in the engine bay or very close to the battery, you can connect the negative cable directly to the battery’s negative terminal. However, if the inverter is mounted inside the vehicle cabin or trunk, running a long negative cable back to the engine bay can introduce unnecessary resistance and voltage drop.
In cabin or trunk installations, you can ground the negative cable directly to a solid, structural metal point on the vehicle’s chassis. Select a thick metal section of the body frame, seat bolt, or dedicated factory grounding point. Use a wire brush, sandpaper, or a grinding tool to scrape away all paint, primer, rust, and dirt from the grounding area until you expose clean, shiny bare metal. A poor ground connection is one of the most common causes of inverter malfunction, voltage drops, and overheating.
Attach the negative cable’s ring terminal to the prepared bare metal chassis point using a high-strength bolt and a star washer, which helps bite into the metal and resist loosening from vehicle vibrations. If you are grounding to the chassis, verify that the vehicle’s main battery ground strap (the cable connecting the battery’s negative terminal to the chassis) is in good condition and of sufficient gauge to handle the new electrical load. Once the connection is tight, apply a thin layer of dielectric grease or anti-corrosion spray over the connection to seal out moisture and prevent rust.
Test the System and Verify Safe Operation
With all connections secure and the ground established, you are ready to energize and test the system. Double-check all wiring paths, connections, and polarities one final time to ensure there are no loose strands or exposed copper. Once you are confident in the installation, insert the correct fuse into the inline fuse holder near the battery and secure the fuse holder cover.
Turn on the vehicle’s engine and let it idle. This ensures the alternator is actively charging the battery and maintaining a stable system voltage. Turn on the power inverter using its power switch. Observe the inverter’s diagnostic lights; a solid green light typically indicates normal operation, while a red or flashing light indicates a fault, such as low voltage or a short circuit. Listen for the internal cooling fan to ensure it spins freely and is not blocked by debris or mounting brackets.
Using a digital multimeter set to DC voltage, measure the voltage directly at the inverter’s input terminals. With the engine idling, the multimeter should read between 13.8V and 14.4V. Next, plug in a low-wattage test device, such as a small lamp or a phone charger, to verify that the inverter is outputting clean AC power. If the device operates normally, gradually increase the load by connecting the actual appliances you plan to use, keeping the total draw well within the inverter’s continuous rating.
While the system is running under load, monitor the installation closely. Feel the positive and negative cables, the inline fuse holder, and the battery terminals; they should remain cool or only slightly warm to the touch. If any component feels hot, turn off the system immediately and inspect the connections for high resistance. Use your multimeter to check the voltage at the inverter terminals while under load; a drop below 11.5V indicates that either your wire gauge is too thin, a connection is loose, or your vehicle’s alternator and battery are struggling to keep up with the demand.
Recognize Warning Signs and When to Stop
Working with high-current automotive electrical systems carries inherent risks, and you must know when to halt the installation or seek professional assistance. Stop immediately if you detect any burning smells, see wisps of smoke, or notice melting plastic insulation on any wires or the fuse holder. These are clear indicators of an electrical short, an extreme overload, or high-resistance connections that can rapidly escalate into a vehicle fire. Disconnect the fuse immediately to cut power before troubleshooting.
If your vehicle is equipped with a modern smart alternator or a complex Battery Management System (BMS)—which often features a sensor clamped directly to the negative battery terminal—wiring an accessory incorrectly can bypass this sensor. This prevents the vehicle’s computer from accurately tracking battery drain, leading to charging system errors, warning lights on the dashboard, or a dead battery. If your vehicle has a BMS, consult a qualified automotive electrician or your vehicle’s dealership to identify the approved auxiliary power tap points.
Never attempt to bypass the inline fuse, use undersized household wiring, or rely on temporary connections like electrical tape twists for a permanent installation. If you are uncomfortable drilling through the vehicle’s firewall, crimping heavy-gauge terminals, or working around the battery, do not hesitate to take your vehicle to a certified car audio installer or automotive electrician. Paying for professional installation is a small price to ensure the safety of your vehicle and its occupants.
Frequently Asked Questions (FAQ)
Will a 12V power inverter drain my car battery if the engine is off?
Yes, any power drawn by the inverter when the engine is off comes directly from the battery’s reserve capacity. Because starting batteries are designed to deliver high current for short periods rather than sustained deep discharges, running an inverter with the engine off can quickly drain the battery to the point where the vehicle will not start. To prevent this, only run low-wattage devices for short periods when the engine is off, and check your vehicle’s manual for accessory power limits. Many modern inverters feature a built-in low-voltage alarm or automatic shutoff to protect the battery, but it is best practice to run the engine periodically to allow the alternator to recharge the battery.
Can I connect the inverter to the cigarette lighter socket instead?
You can only connect very low-wattage inverters (typically under 150 watts) to a cigarette lighter or auxiliary 12V power socket. These factory sockets are wired with thin-gauge wire and are typically protected by a 10-amp or 15-amp fuse in the vehicle’s interior fuse box. Attempting to run a high-wattage inverter through these sockets will instantly blow the vehicle’s fuse or, in worst-case scenarios, overheat the thin factory wiring behind the dashboard. For any inverter rated above 150 watts, you must wire it directly to the car battery using appropriate heavy-gauge cables and an inline fuse to ensure safe and reliable operation.

Community discussion
Share your experience or ask a question. Comments are reviewed before publication.