
Stripping a thread on an engine block, oil pan, or suspension bracket is a challenging moment for any vehicle owner. A helicoil thread repair kit provides a reliable solution by restoring stripped threads back to their original bolt size using a Screw Thread Insert (STI). This process relies on a precision-engineered coil of wire that mimics the original thread pitch on its interior while anchoring into a newly tapped thread on its exterior.
While the concept is straightforward, executing it successfully requires precise tool configuration. Using a power drill simplifies the repair, but incorrect speed or torque settings can permanently ruin the workpiece, break the specialized tap, or leave you with a misaligned thread. Before beginning, always consult both your vehicle’s service manual and the specific thread repair kit’s instructions to verify compatibility, thread pitch, and material requirements.
Essential Accessories and Bits for Your Power Drill Setup
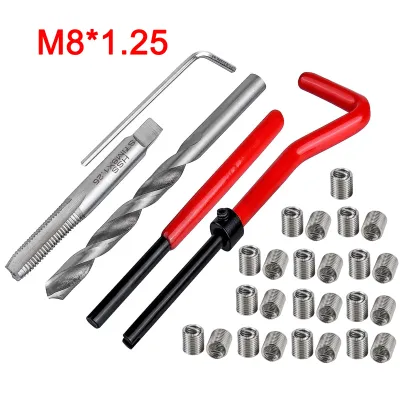
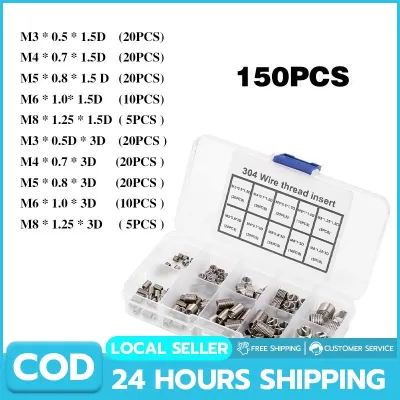
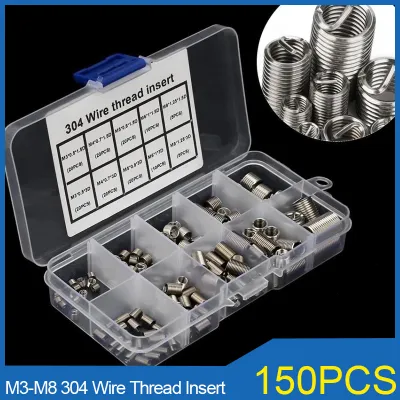
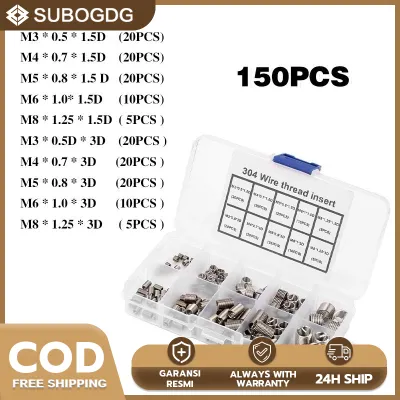
To complete this repair cleanly, you cannot rely on standard hardware store drill bits or taps. The helicoil thread repair kit contains specialized tools designed to work as a system. Preparing these accessories and understanding how they interface with your power drill is the first step toward a successful repair.
Products mentioned in this guide

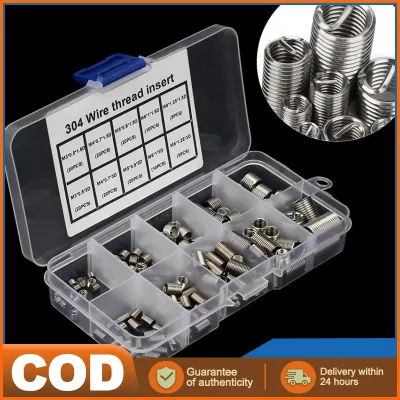

Prices are valid at publication and may change. Please refer to the product page for the latest price.
Selecting the Correct STI Drill Bit and Guide
An STI drill bit is not sized to the original bolt diameter; instead, it is precisely oversized to match the outer diameter of the helicoil insert. Using a standard drill bit will make the hole either too loose or too tight, preventing the insert from seating correctly.
Because maintaining a perfect 90-degree angle is critical in automotive applications to prevent cross-threading, you should never attempt to drill freehand if possible. Use a drill guide, jig, or alignment bushing pressed firmly against the workpiece. This ensures the drill bit enters perfectly perpendicular to the mating surface, which is vital for components like cylinder heads or manifold flanges where even a minor tilt prevents the bolt from sealing properly.
Choosing the Right STI Tap for the Hole Type
Once the hole is drilled, you must cut new threads using an STI tap. These taps feature a unique thread profile and pitch that do not match standard metric or imperial taps. The type of hole dictates the style of tap you should select.
For blind holes—where the hole does not go all the way through the metal, such as an engine block bolt hole—a straight flute tap is generally preferred when paired with careful manual clearing, or a spiral flute tap designed to pull chips upward and out of the hole. For through holes, where the bottom is completely open, a spiral point tap is ideal because it pushes the metal shavings forward and out of the exit.
Installation and Tang Break-Off Tools
The final phase requires two distinct tools. The installation tool features a slotted mandrel that catches the “tang”—the small metal crossbar at the bottom of the helicoil insert—allowing you to drive the coil into the newly tapped threads. While this tool can be chucked into a variable-speed power drill for controlled insertion, the final seating is best managed with fine hand adjustments.
Once the insert is perfectly positioned, you must remove the drive tang so the bolt can pass through completely. This is done using a specialized tang break-off punch tool. This punch is placed against the tang and struck sharply with a hammer to snap the pre-notched metal cleanly without distorting the surrounding coils.
Configuring Power Drill Speed and Torque for Each Stage
Operating a power drill for thread repair requires shifting away from high-speed drilling habits. Each stage of the helicoil process demands a distinct combination of rotational speed, clutch torque, and physical pressure, heavily influenced by the metal you are working on.

Drilling Out the Damaged Thread
When drilling out the old threads, set your power drill to its low-speed gear range (typically Gear 1 on most modern cordless drills) and maintain a moderate, steady speed. The ideal speed depends on the base material. For example, soft aluminum engine casings common in local underbone motorcycles and compact cars require a moderate speed to prevent the metal from tearing or melting, while tough carbon steel brackets require slow speeds to prevent overheating the drill bit.
Always apply a suitable cutting lubricant to reduce heat and friction. Before pulling the trigger, use a center punch to create a physical dimple in the exact center of the damaged hole. This prevents the drill bit from wandering across the workpiece and creating an oval, unusable hole.
Tapping the New STI Thread
Tapping is the most delicate stage of the repair. If you choose to use a power drill for this step, you must configure it to its absolute lowest speed setting and adjust the torque-limiting clutch to a very light resistance level. This ensures that if the tap encounters resistance or binds against a metal shaving, the drill’s clutch will slip immediately rather than snapping the brittle steel tap inside the workpiece.
If your power drill lacks a highly sensitive, adjustable mechanical clutch, do not risk using it; switch immediately to a manual T-handle tap wrench. When power tapping, use the “cut and reverse” technique: drive the tap forward a turn or two, then reverse the drill direction to break and clear the metal chips. Apply liberal amounts of cutting oil to keep the cutting edges cool and lubricated.
Installing the Helicoil Insert
To drive the insert with a power drill, secure the installation tool’s shaft into the drill chuck. Set the drill’s mechanical clutch to its lowest possible torque setting and select the slowest speed. The goal is to gently guide the helicoil into the hole without stretching or cross-threading the wire coil.
Apply light downward pressure and let the thread pitch pull the insert in. You must stop the power drill before the insert is fully seated. Leaving the final turn to a manual hand tool ensures you do not over-drive the insert. The top of the helicoil should sit exactly 1/4 to 1/2 turn below the top surface of the workpiece to ensure the bolt can engage without pulling the insert back out.
Step-by-Step Execution and Critical Safety Boundaries
To achieve a professional-grade repair, execute the process in a clean, systematic sequence while respecting clear safety limits.
- Preparation: Clean the area around the damaged hole. Use a center punch to mark the exact starting point. Secure the workpiece firmly in a vise if it has been removed from the vehicle.
- Drilling: Position your drill guide. Apply cutting oil. Drill straight down at a moderate speed, pulling the bit out frequently to clear accumulated metal shavings.
- Tapping: Apply cutting oil to the STI tap. Align the tap perfectly with the hole. Slowly tap the threads, reversing frequently to clear chips.
- Cleaning: This is a critical step, especially for automotive assemblies. Use an authorized aerosol brake cleaner to wash away all cutting oils and metal shavings from the hole. Wear safety glasses and ensure adequate ventilation. If any metal debris remains, it can prevent the helicoil from seating or migrate into the engine, causing catastrophic mechanical wear. Dry the hole thoroughly with compressed air or a clean, lint-free cloth.
- Driving: Thread the helicoil onto the installation tool. Slowly drive it into the hole until it is just below the surface, finishing the final fraction of a turn by hand.
- Tang Removal: Insert the tang break-off tool into the center of the coil until it rests on the tang. Give it a sharp, straight tap with a small hammer. Use a magnet or needle-nose pliers to retrieve the broken tang from the hole.
Safety Boundaries and Stop Conditions
While a helicoil thread repair kit is highly effective, you must know when to stop and seek a professional automotive machine shop. If the specialized tap snaps inside the hole, do not attempt to drill it out with standard bits, as tap steel is extremely hard and you will ruin the workpiece. If the drilled hole becomes oversized, out of round, or misaligned, stop immediately.
Furthermore, critical safety components such as brake caliper mounts, steering knuckles, seat belt anchors, and suspension mounting points demand extreme caution. If you are repairing threads on these systems, verify local road safety regulations and consult a certified technician, as improper repairs on structural components can lead to catastrophic component failure under driving conditions.
Verifying the Thread Repair and Troubleshooting Common Issues
Once the insert is installed and the tang is removed, verify the quality of the repair before reassembling the vehicle.
Verification
Begin by visually inspecting the insert. It should appear uniform, with no overlapping coils or gaps. Next, use a thread pitch gauge to confirm the internal threads match your bolt’s specifications. Finally, take the original bolt and thread it into the repaired hole entirely by hand. The bolt should spin smoothly without binding, catching, or requiring excessive force. If you feel resistance, do not force the bolt with a wrench, as this can cross-thread the new insert.
Troubleshooting
If the tang does not break off cleanly, do not attempt to pry or twist it with pliers, as this can pull the bottom coils out of alignment. Ensure you are using the correct punch tool that matches the insert’s inner diameter, and deliver a single, sharp hammer blow.
If the helicoil backs out of the hole when you reverse the installation tool, it usually means the insert was not driven deep enough or the newly tapped threads were cut too loosely. In this scenario, you must carefully wind the damaged insert out, clean the hole, and install a new insert, ensuring it is driven 1/4 to 1/2 turn past the top surface.
Frequently Asked Questions (FAQ)
Can I use a standard drill bit and tap instead of the STI tools in the kit?
No. Standard drill bits and taps are designed for standard bolt dimensions and will not cut the specific, oversized thread profile required to accommodate the outer diameter of a helicoil insert. Using standard tools will leave you with a hole that is either too small for the insert or too loose to hold the bolt securely, ruining the workpiece. Always use the specialized STI tools provided in your helicoil thread repair kit.
Is it safe to use a power drill for tapping, or should I use a hand tap wrench?
While you can use a power drill equipped with a highly sensitive, adjustable mechanical clutch on its lowest speed setting, using a hand tap wrench is always the safest option. A hand wrench provides immediate tactile feedback, allowing you to feel when the tap is binding or loading up with metal shavings. If you choose to use a power drill, proceed with extreme caution, use plenty of cutting oil, and immediately stop if you feel any resistance to avoid snapping the tap.
Community discussion
Share your experience or ask a question. Comments are reviewed before publication.