
Upgrading or maintaining your motorcycle’s braking system is one of the most critical safety tasks you can perform. When moving to a larger rotor or installing an aftermarket caliper, a 220mm caliper bracket is the vital link that holds your stopping power together. Ensuring this component is safe for daily riding requires more than just checking if the bolt holes line up.
To tell if a 220mm caliper bracket is safe and reliable, you must verify its material integrity, manufacturing precision, structural thickness, mounting alignment, and high-tensile hardware compatibility. A reliable bracket must withstand intense torsional forces during emergency stops on unpredictable roads without flexing, cracking, or shifting.
Why Caliper Bracket Quality Matters for Braking Safety
Under braking, the caliper clamps down on the spinning rotor, generating immense kinetic resistance. This resistance is transferred directly through the brake pads to the caliper, which then exerts a massive twisting force—or torsional torque—on the caliper bracket. The bracket must absorb and transfer this energy directly to the motorcycle’s front fork or rear swingarm without flexing, shifting, or cracking.
Products mentioned in this guide
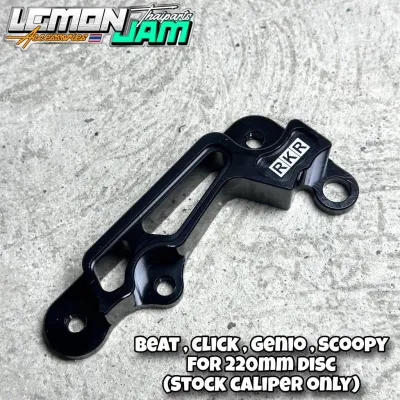
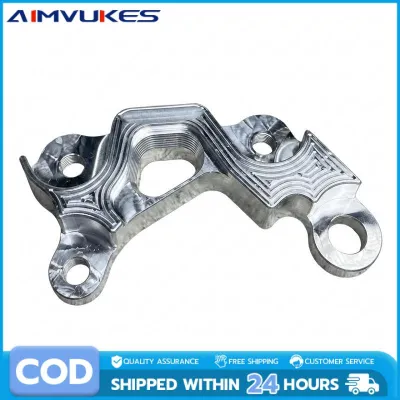
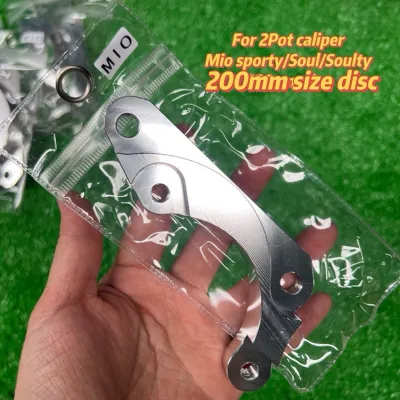
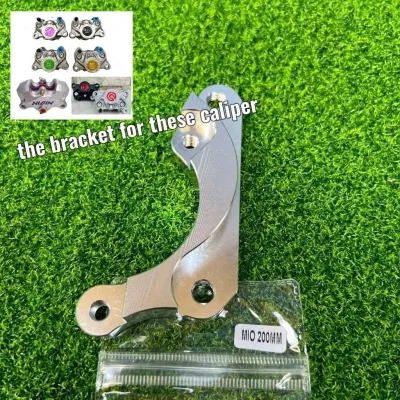
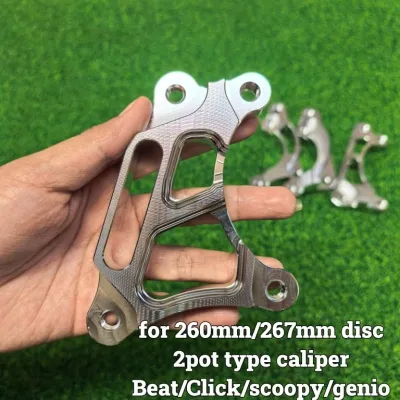
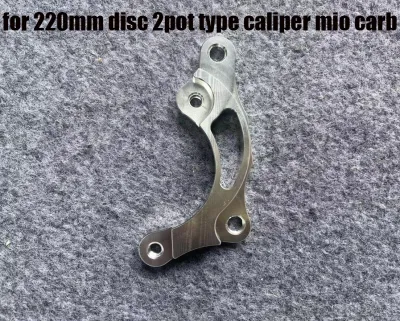
![[Fast Delivery] For Caliper 2 Pot Type220mm 260mm Disc Bracket Mio Sporty Soul Soulty Click Beat Scoopy Genio 2Pot](https://img.lazcdn.com/g/p/676a402a9b6c9994915adabcbb96f4a0.jpg_400x400q80.jpg_.webp)
Prices are valid at publication and may change. Please refer to the product page for the latest price.
In the Philippines, daily riding exposes your motorcycle to harsh environmental demands. Navigating through heavy traffic, managing sudden stops on rain-slicked roads during the monsoon season, and hitting unexpected potholes all place extreme stress on your braking assembly. A low-quality or structurally compromised bracket can deform under sudden, heavy emergency braking. This deformation can cause the brake pads to misalign, lead to sudden pressure loss, shear the mounting bolts, or even lock up the wheel entirely, resulting in a catastrophic loss of control.
Key Visual and Physical Indicators of a Reliable Bracket
Assessing the reliability of a 220mm caliper bracket involves a thorough physical inspection before it is ever bolted onto your vehicle. While a bracket might look like a simple piece of metal, it is a highly engineered safety component that must meet strict dimensional tolerances. Relying on visual appeal alone is a common mistake; instead, you must examine specific structural features and manufacturing characteristics.

Material and Manufacturing Method
The structural integrity of a caliper bracket is heavily dictated by its base material and how it was formed. High-quality aftermarket brackets are typically machined from solid billets of aircraft-grade aluminum alloy, such as 6061-T6 or 7075-T6, or forged from high-strength steel. CNC (Computer Numerical Control) machining ensures that the bracket is carved from a single block of metal with uniform grain structure, eliminating internal voids and ensuring exact dimensional accuracy.
In contrast, cheap cast brackets are made by pouring molten metal into molds, a process that can introduce microscopic air bubbles, known as porosity, or impurities into the metal. These internal defects are invisible to the naked eye but act as stress concentrators that can fail under sudden loads. While cast iron or cast steel can be strong if manufactured to strict OEM standards, cheap aftermarket cast aluminum brackets should generally be avoided. Always review the manufacturer’s specification sheets, material certifications, and engineering documentation to verify the alloy grade rather than relying on visual guesses or online marketing claims.
Thickness, Design, and Finish Quality
A reliable 220mm caliper bracket must feature a robust, thick profile, particularly around the mounting eyes where stress is most concentrated. Inspect the bracket for uniform thickness across its entire body; sudden transitions from thick to thin sections can create weak points that are prone to cracking. The edges of the bracket should be smooth and chamfered, showing clean machining paths without sharp burrs, casting flash, or rough, uneven surfaces.
Surface treatments like anodizing or high-durability powder coating are not just cosmetic; they protect the underlying metal from corrosion caused by high humidity, road salt, and brake fluid. A poor, uneven finish with bubbling, flaking, or overspray can indicate hasty manufacturing and may even hide hairline cracks or structural defects. Pay close attention to the mounting holes: the threads must be cleanly cut, deep, and perfectly perpendicular to the mounting surface to ensure even load distribution when torqued down.
Hardware and Installation Safety Requirements
A high-quality bracket is only as reliable as the hardware securing it to your motorcycle. Never reuse old, worn, or low-grade bolts when installing a new 220mm caliper bracket. The mounting bolts must be high-tensile fasteners, typically matching or exceeding Class 8.8 or Class 10.9 steel specifications, to withstand the shear forces generated during heavy braking. Always verify the required bolt dimensions, thread pitch, and length in your vehicle’s service manual or the bracket manufacturer’s instructions.
Proper thread engagement is critical for safety. As a general rule of thumb for aluminum brackets, the bolt must engage with the threads to a depth of at least 1.5 times the bolt’s diameter to prevent the threads from stripping under load. Before finalizing the installation, apply a medium-strength thread-locking compound (such as blue threadlocker) to the bolt threads, if recommended by the manufacturer, to prevent them from backing out due to engine and road vibrations.
During installation, the bracket must sit completely flush against the mounting bosses on the fork leg or swingarm. If you have to force, bend, or shim the bracket to get the bolt holes to align, stop immediately. Any misalignment indicates that either the bracket is out of spec or it is incompatible with your specific motorcycle model and year. Always use a calibrated torque wrench to tighten all fasteners to the exact torque specifications provided by the manufacturer; under-tightening can lead to loose hardware, while over-tightening can strip the threads or stretch the bolts beyond their elastic limit.
Because braking modifications directly impact your safety and road legality, always consult your motorcycle’s original manufacturer guidelines. If you are unsure about clearances, interface dimensions, or mounting positions, have the component installed by a qualified motorcycle mechanic.
Warning Signs of Unsafe or Counterfeit Brackets
The market is flooded with unbranded, low-cost motorcycle accessories, many of which are sold on online marketplaces without any quality control or safety testing. One of the most obvious red flags is an extremely low price point. If a 220mm caliper bracket is priced significantly lower than established, reputable brands—such as costing only a few hundred Philippine Pesos—it is highly likely that corners were cut in material selection, heat treatment, or machining precision.
Inspect the component closely for physical warning signs. Uneven mounting surfaces, off-center or misaligned bolt holes, and visible tool marks or deep grooves from rushed machining are clear indicators of poor quality control. If the bracket is painted rather than anodized, be cautious; thick layers of paint are sometimes used to mask rough castings, cracks, or surface imperfections.
Another major safety warning is the complete absence of manufacturer branding, model-specific fitment data, load ratings, or installation instructions. Reputable manufacturers take pride in their engineering and will clearly mark their products and provide detailed technical specifications, including torque values and compatible caliper models. If a product arrives in a plain plastic bag with no documentation, safety warnings, or contact information, do not install it on your motorcycle.
When to Stop Riding and Seek Professional Inspection
Even if a bracket passes initial visual checks and is installed correctly, you must remain vigilant during your daily rides. If you hear unusual clicking, clunking, or grinding noises coming from the front or rear brake assembly, pull over safely and investigate. Feel for any unusual vibrations or pulsations in the brake lever or pedal that were not present before the bracket installation, as this can indicate a misaligned caliper or a warping bracket.
Regularly inspect your brakes during routine maintenance. Look closely for any signs of hairline cracks around the bolt holes, bending or warping of the bracket body, or any backing out of the mounting bolts. If you detect even the slightest structural anomaly or if any fastener has worked itself loose, stop riding the motorcycle immediately to prevent a catastrophic brake failure.
Under no circumstances should you attempt to repair, weld, drill, or structurally modify a damaged, cracked, or ill-fitting caliper bracket. Altering the structural geometry or heating the metal through welding destroys its heat treatment and drastically reduces its structural strength. If a bracket is compromised or does not fit perfectly out of the box, it must be replaced entirely with a verified, model-specific component, or inspected by a qualified professional mechanic.
Frequently Asked Questions (FAQ)
Can I use a 220mm caliper bracket designed for a different motorcycle model?
No, you should never attempt to adapt a caliper bracket designed for a different motorcycle model. Mounting point spacing, fork slider offset, bolt diameters, and wheel clearances vary significantly between different makes, models, and production years. Using an incompatible bracket can cause severe caliper misalignment, uneven brake pad wear, rotor damage, or sudden structural failure under braking pressure. Always verify that the bracket is explicitly certified for your exact motorcycle model and model year.
Do I need to replace the caliper bracket if I upgrade to a larger brake disc?
Yes, upgrading to a larger 220mm brake disc rotor almost always requires a matching caliper bracket. The original factory bracket is designed to position the caliper for the stock rotor diameter. A larger disc requires the caliper to be moved further outward radially to clear the outer edge of the disc while maintaining full pad-to-rotor contact. Ensure your new 220mm caliper bracket is specifically designed to match both the larger disc diameter and your specific caliper type.
Community discussion
Share your experience or ask a question. Comments are reviewed before publication.