
A failing brake caliper typically manifests as a dragging wheel, a spongy or rock-hard brake lever, fluid leaks around the wheel, or uneven brake pad wear. While many riders immediately suspect worn brake pads when stopping power drops, the caliper itself is a complex hydraulic component that can seize or leak over time. Distinguishing a caliper issue from simple pad wear or old brake fluid is crucial for both your safety and your wallet. Replacing parts blindly leads to unnecessary expenses, while ignoring a failing caliper can result in complete brake failure on the road.
In tropical climates like the Philippines, where motorcycles frequently encounter heavy rain, flooded streets, and high humidity, brake calipers are highly susceptible to road grime, rust, and seal degradation. Understanding how to diagnose this critical component ensures you make the right repair decision before heading back out into traffic.
Common Symptoms of a Failing Brake Caliper
One of the most immediate signs of a failing brake caliper is brake drag, which occurs when the caliper pistons fail to retract after you release the brake lever or pedal. This constant contact between the brake pads and the rotor generates immense friction, leading to rapid overheating. You might notice a distinct burning smell during your ride, or feel excessive heat radiating from the wheel assembly even after a short trip. This constant drag also robs your motorcycle of momentum, making it feel sluggish during acceleration. In severe cases, the heat generated can cause the brake fluid to boil, leading to a sudden and dangerous loss of braking pressure known as brake fade.
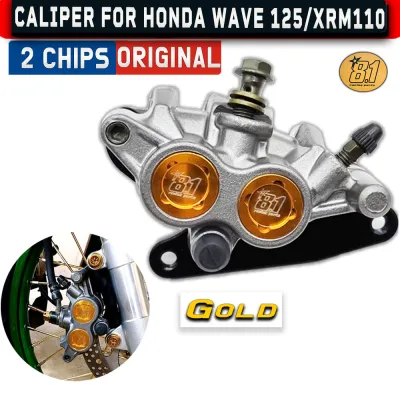
Products mentioned in this guide
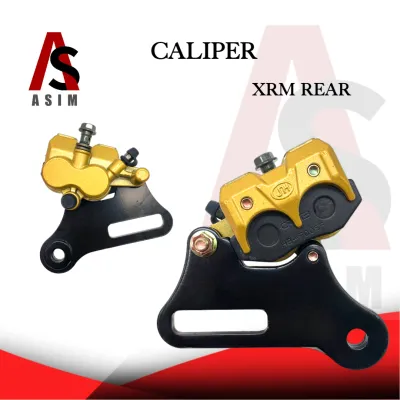
![[BRAKE] Front Caliper only For MIO/XRM/RAIDER/WAVE/SMASH/TRINITY For Motorcycle by IF MOTOR](https://img.lazcdn.com/g/p/432a7278fc518c33d2a99845e4feca21.jpg_400x400q80.jpg_.webp)
Prices are valid at publication and may change. Please refer to the product page for the latest price.
Another telling symptom is uneven braking force or a noticeable pull to one side when decelerating. On a motorcycle, a sticking front caliper can cause the handlebars to pull slightly or make the front suspension compress unevenly during braking. This instability compromises your control, especially on wet or slippery asphalt.
Visible brake fluid leaks around the caliper body are a clear indicator of internal seal failure. If you spot a wet, oily residue on the caliper, the brake pads, or the wheel rim, the piston seals have likely degraded. Because brake fluid is highly corrosive, these leaks can quickly ruin your motorcycle’s paint and contaminate the brake pads, rendering them useless.
A physically seized piston is the ultimate stage of caliper failure. When corrosion or dirt wedges itself between the piston and the caliper bore, the piston becomes locked in place. It will either refuse to extend, leaving you with virtually no stopping power, or refuse to retract, locking the wheel entirely and creating an immediate safety hazard.
Caliper Failure vs. Worn Brake Pads or Fluid Issues
To avoid spending money on unnecessary replacements, you must learn to isolate caliper issues from other common braking problems. For instance, a high-pitched squealing noise when you apply the brakes is usually the built-in wear indicator of the brake pads rubbing against the rotor, signaling that the friction material is thin. In contrast, a stuck caliper often produces a deeper, continuous grinding or scraping sound that persists even when you are not touching the brake lever.

The feel of your brake lever or pedal also provides vital diagnostic clues. A spongy, soft, or springy lever typically points to air bubbles trapped in the brake lines or moisture contamination within the brake fluid. This is a hydraulic maintenance issue solved by bleeding the system. On the other hand, a rock-hard lever that requires extreme physical effort to produce minimal stopping power often indicates a mechanically seized caliper piston or stuck slide pins.
Vibrations through the handlebars or footpegs during braking are frequently confused with caliper failure, but they usually stem from a warped brake rotor. When a rotor develops high and low spots due to thermal stress, it pushes back against the pads, causing a pulsating sensation. While a sticking caliper can cause the overheating that warps the rotor, the vibration itself is a symptom of the damaged disc, whereas caliper failure is characterized by constant dragging, pulling, or fluid loss.
Understanding these distinctions prevents misdiagnosis. If your pads have plenty of friction material left and your brake fluid is fresh, but you still experience dragging or a stiff lever, the caliper is almost certainly the culprit.
Step-by-Step Visual and Physical Inspection
Before attempting any physical diagnosis, prioritize safety by preparing your workspace. Ensure your motorcycle is parked on a flat, level surface and securely supported on a center stand or a paddock stand so the wheels can spin freely. Allow the entire braking system to cool down completely; brake components can reach extremely high temperatures during operation, posing a severe burn risk.
Begin with a thorough visual inspection of the caliper assembly. Use a bright flashlight to examine the rubber dust boots surrounding the pistons; any tears, cracks, or dry rot will allow dirt and moisture to enter, leading to internal corrosion. Look closely at the seams of the caliper body and around the bleed screw for any signs of weeping brake fluid or damp road grime buildup.
Next, inspect the slide pins on floating caliper designs. These pins must be clean, straight, and well-lubricated to allow the caliper to move laterally as the pads wear. If you observe heavy rust, pitting, or a complete lack of grease on these pins, the caliper will not slide properly, causing uneven pad wear and brake drag.
Transition to a physical check by examining the brake pads themselves. Remove the caliper from its mounting bracket if necessary, but do not disconnect the hydraulic hose. Compare the thickness of the inner and outer pads; if one pad is significantly more worn than the other, it indicates that either the caliper pistons are sticking or the slide pins are seized.
With the caliper still mounted, spin the wheel by hand. It should rotate smoothly with only a very light, whispery contact sound between the pads and the rotor. If the wheel stops immediately or feels heavy and difficult to turn, the caliper is dragging.
Establish clear stop conditions during your inspection. If you discover structural cracks in the caliper body, severe pitting on the piston walls, or a major fluid leak that you cannot resolve, stop immediately. Do not attempt to ride the motorcycle or perform makeshift repairs; instead, consult a qualified mechanic or prepare to replace the unit entirely.
When to Repair, Rebuild, or Replace the Caliper
Once you have completed your inspection, you must decide whether to clean, rebuild, or replace the caliper. Simple cleaning and lubrication are often sufficient if your only issue is minor dirt buildup or dry slide pins. Removing the caliper, cleaning the slide pins with dedicated brake cleaner, applying high-temperature silicone brake grease, and reassembling the unit can restore smooth operation if the piston seals are still intact.
A caliper rebuild is the most cost-effective solution when the main caliper body is structurally sound but the internal seals are leaking or aging. Rebuild kits, which typically include new rubber piston seals, dust boots, and sometimes fresh slide pin boots, are widely available and affordable. While a new caliper assembly might require a larger investment of several thousand pesos ₱, a basic rebuild kit is a highly economical alternative. This process requires dismantling the caliper, popping out the pistons, thoroughly cleaning the bores, and installing the new rubber components.
However, a rebuild is only viable if the pistons themselves are free of deep scratches, scoring, or rust pitting. If the chrome plating on the pistons has flaked off or if the internal walls of the caliper bore are corroded, new seals will fail almost immediately. In these scenarios, or if the caliper body itself is cracked or warped, a full replacement is non-negotiable for your safety.
When choosing between a rebuild and a full replacement, consider the labor and tool requirements. Rebuilding a caliper requires patience, specialized tools like piston pliers, and a clean workspace to avoid contaminating the hydraulic system. If you lack these tools or if the cost of a high-quality aftermarket or original equipment manufacturer (OEM) replacement caliper is close to the combined cost of a rebuild kit and professional labor, buying a new assembly is the safer and more reliable choice.
Always consult your motorcycle’s specific service manual to verify torque specifications for the caliper mounting bolts, banjo bolts, and slide pins. Because brakes are a critical safety system, any replacement parts must meet or exceed OEM standards, and all work should be verified by a professional if you are unsure of your mechanical skills.
Frequently Asked Questions (FAQ)
Can I ride my motorcycle with a sticking brake caliper?
No, you should strictly avoid riding your motorcycle if you suspect or confirm that a brake caliper is sticking. A dragging caliper generates extreme heat that can quickly warp your brake rotor, destroy your brake pads, and boil your brake fluid, leading to sudden and complete brake fade. In extreme cases, the intense friction can cause the brake pads to catch fire or lock the wheel entirely while you are moving, presenting an immediate crash hazard. Keep the motorcycle parked until a qualified technician can diagnose and resolve the issue.
How often should motorcycle brake calipers be serviced?
Motorcycle brake calipers do not have a universal service interval, as maintenance needs depend heavily on your riding environment. In tropical regions like the Philippines, where road conditions often involve heavy rain, standing water, and high humidity, you should visually inspect your calipers during every oil change or at least once every six months. A deeper service, including cleaning the slide pins and replacing the brake fluid, should be performed according to the schedule in your owner’s manual, typically every two years or as specified by your manufacturer, to prevent moisture buildup from corroding the internal components.
Community discussion
Share your experience or ask a question. Comments are reviewed before publication.