
Removing a stubborn car bearing without damaging the surrounding shaft or housing requires the right tool, patience, and a systematic approach. Using a dedicated bearing puller tool remover is the safest way to apply controlled, linear force to extract the bearing cleanly. Attempting to hammer or pry a bearing off can easily score the shaft, warp the housing, or cause personal injury. By choosing the correct puller configuration and following a step-by-step extraction process, you can complete this common automotive repair safely in your home garage or workshop.
Identifying the Right Bearing Puller and Safety Boundaries
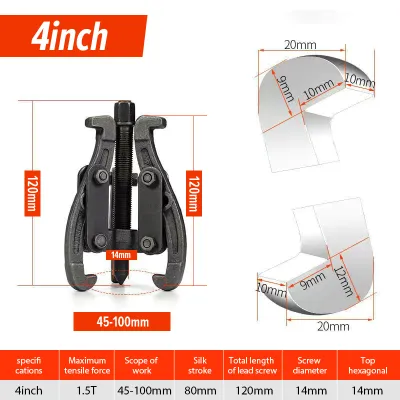
To begin, you must select the correct type of puller for your specific automotive component. Mechanical jaw-type pullers are the most common choice for DIY garage work, utilizing two or three adjustable arms to grip the outer or inner edges of the bearing. For heavy-duty applications or larger commercial vehicles, hydraulic bearing pullers use fluid pressure to generate significantly higher pulling force with less manual effort. Always verify your vehicle’s specific model, year, and component dimensions in your official service manual to determine the exact tool interface and mounting position required.
Before starting any work, consult your vehicle’s manufacturer documentation to check for specialized tool requirements or specific warnings related to your drivetrain or suspension assembly. Because automotive bearings are pressed on with high interference fits, the extraction process stores a massive amount of mechanical energy. Always wear high-quality safety glasses and heavy-duty work gloves to protect yourself against flying debris, metal shards, or sudden tool slippage under high tension.
Products mentioned in this guide
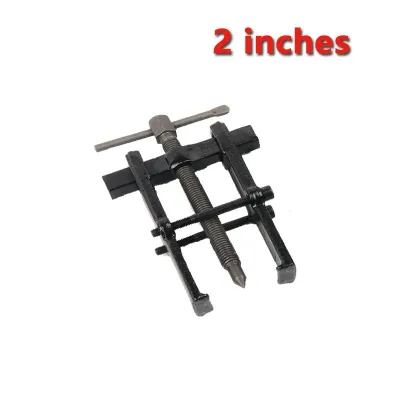
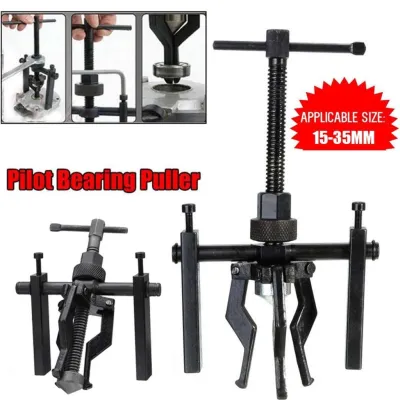
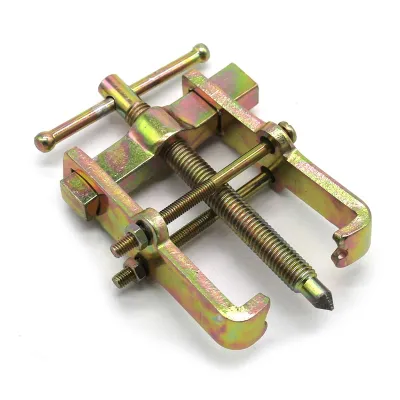
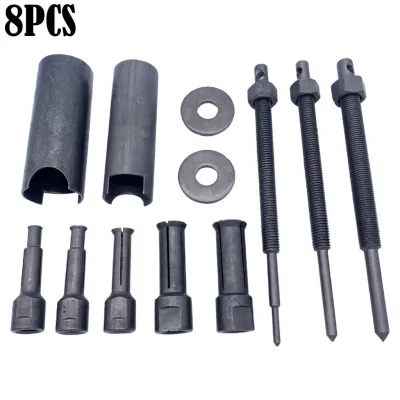
Prices are valid at publication and may change. Please refer to the product page for the latest price.
Establish a strict stop condition before you turn a single wrench. Never exceed the rated load capacity of your bearing puller tool remover, and do not apply excessive force if the tool begins to flex or slip. If the bearing does not budge under reasonable manual pressure, stop immediately to reassess the setup rather than forcing the tool to its breaking point. If you are unsure about the safety or complexity of the repair, seek qualified professional installation and assistance before proceeding.
Gathering Tools and Preparing the Workspace
A successful extraction relies on having all your equipment organized and ready before you begin. You will need an appropriately sized bearing puller tool remover, a matching socket set or heavy-duty wrenches to turn the forcing screw, a soft-faced mallet, and a high-quality penetrating oil. For bearings seated flush against a shoulder, a bearing separator plate is also essential to slide behind the inner race and provide a secure gripping surface for the puller jaws.

Keep cleaning supplies nearby, including a dedicated brake cleaner or automotive solvent and several clean, lint-free rags. These are crucial for removing old grease, road grime, and rust from the shaft, allowing the puller to seat securely. Ensure your workspace is well-lit, clean, and stable. If you are working on a component still attached to the vehicle, ensure the car is safely supported on jack stands or a professional lift. If the component is removed, secure it tightly in a bench vise with soft jaw protectors to prevent it from shifting during extraction.
Step-by-Step Procedure for Safe Bearing Extraction
Initial Preparation
Start by thoroughly cleaning the exposed shaft threads and the area surrounding the bearing using your automotive solvent or brake cleaner. In humid tropical climates like the Philippines, moisture can cause fine rust to build up along the shaft, which increases friction during removal. Apply a generous amount of high-quality penetrating oil directly to the bearing edges and the contact point where the inner race meets the shaft. Allow the fluid to dwell according to the manufacturer’s label instructions so it can fully penetrate the microscopic gaps and dissolve any corrosion.
Positioning the Puller
Carefully position the puller jaws behind the bearing’s inner race, which is the strongest part of the bearing assembly. If the bearing is flush against a housing shoulder, slide a bearing separator plate behind the bearing first, then bolt the puller arms directly to the separator. Align the forcing screw of the puller so that it sits perfectly centered on the end of the shaft. If the shaft has a hollow center or a delicate thread pattern, use a shaft protector or a matching bolt threaded into the end to prevent the forcing screw from flaring or damaging the shaft threads.
Applying Force
Hand-tighten the forcing screw until the tip makes firm contact with the center of the shaft or protector. Double-check that the puller arms are parallel and that the entire assembly is perfectly aligned along the shaft’s center axis. Using a manual wrench or socket, begin turning the forcing screw slowly and smoothly in a clockwise direction. Avoid using impact wrenches, as sudden vibrations can damage the puller threads or cause the jaws to slip violently. Maintain steady, gradual pressure, checking the alignment after every half-turn, and listen closely for a sharp “pop” sound, which indicates the initial press-fit bond has broken.
Extraction and Release
Once the bearing begins to slide, continue turning the forcing screw at a slow, steady pace. Keep your hand underneath the bearing or use a support strap to catch the component as it reaches the end of the shaft. This prevents the heavy bearing from dropping suddenly, which could nick the delicate shaft threads or damage the surrounding housing. Once fully removed, set the old bearing aside and carefully back off the forcing screw to release the tension on your bearing puller tool remover.
Troubleshooting Stuck Bearings Without Damaging the Shaft
Even with high-quality tools, some bearings can become severely seized due to years of road salt, moisture, and heat cycles. If your puller jaws keep slipping off the bearing, do not attempt to grind or modify the jaws. Instead, reposition the tool and ensure you are using a bearing separator plate, which distributes the pulling force evenly across 360 degrees of the inner race.
If the bearing remains completely locked in place, reapply a generous amount of penetrating oil and let it sit longer. You can use a soft-faced mallet to gently tap the end of the forcing screw or the side of the bearing separator to help the oil penetrate deeper through vibration. If the vehicle manufacturer’s service manual explicitly permits localized heating, you may use a controlled heat gun to warm the bearing inner race, causing it to expand slightly. Never use an open flame or apply heat to the shaft itself, as this can permanently alter the metal’s temper or damage nearby rubber seals and ABS sensors.
Watch the alignment of your tools constantly during a difficult extraction. If you notice the forcing screw beginning to bend, the puller arms deforming, or the jaws slipping out of alignment, stop turning immediately. Back off the tension, re-center the tool, and verify that there are no hidden retaining rings or snap rings still locking the bearing in place. If manual extraction efforts fail after multiple attempts, do not force the tool; instead, take the component to a professional automotive machine shop equipped with a heavy-duty hydraulic press.
Inspecting and Cleaning the Shaft After Removal
Once the bearing is successfully removed, you must prepare the shaft surface before attempting to install a replacement. Conduct a thorough visual and tactile inspection of the shaft, feeling for any deep scratches, scoring, galling, burrs, or leftover rust. Minor surface imperfections or light corrosion can be carefully polished away using a very fine emery cloth, working in a circular motion around the shaft rather than lengthwise.
Clean the entire shaft surface with a clean rag and a fast-evaporating solvent to remove all traces of emery dust, old grease, and penetrating oil. Ensure the surface is completely dry and free of debris before proceeding. Note that cleaners and solvents should only be used for label-authorized applications to avoid damaging nearby plastic or rubber components.
Finally, use a high-precision micrometer to measure the shaft diameter at multiple points along the bearing seat. Compare these measurements directly with the specifications and wear tolerances listed in your vehicle’s official service manual. If the shaft is worn below the manufacturer’s minimum limit, a new bearing will not seat tightly, which can lead to premature failure, vibration, or severe safety hazards on the road.
Frequently Asked Questions (FAQ)
Can I use a standard puller on a blind hole bearing?
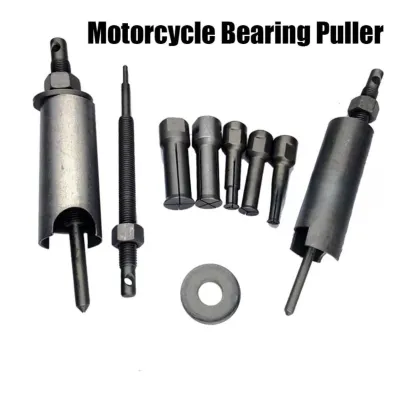
No, standard external jaw pullers cannot be used on blind hole bearings because there is no open space behind the bearing for the jaws to grip. For these applications, you must use a specialized blind hole bearing puller kit, which features expandable collets that insert into the inner bore of the bearing. Once expanded, the collet grips the inner race from the inside, allowing you to extract the bearing using a slide hammer or a bridge-type puller attachment.
Is it safe to apply heat to loosen a seized bearing?
Applying heat is only safe if it is explicitly permitted by your vehicle’s manufacturer service manual and performed under strict controls. If allowed, use a heat gun or an induction heater to target only the bearing’s inner race, avoiding any direct heat on the shaft or housing. Exceeding temperature limits or using an open flame carries a high risk of warping the metal, ruining the heat treatment of the shaft, or melting nearby rubber seals, wiring harnesses, and electronic sensors.

Community discussion
Share your experience or ask a question. Comments are reviewed before publication.