
Using a car terminal removal tool correctly is the key to servicing automotive wiring without causing permanent damage to fragile electrical connectors. The process requires identifying the specific locking mechanism inside the connector cavity, selecting a matching tool profile, and carefully disengaging the internal plastic or metal tab before sliding the terminal out. Forcing a wire or using the wrong tool can easily snap the delicate retention features, leading to loose connections, intermittent electrical faults, or the need for an expensive wiring harness replacement.
Automotive electrical systems rely on secure, weatherproof connections to transmit signals between sensors, control modules, and accessories. In tropical climates like the Philippines, where high humidity, heavy rainfall, and intense engine bay heat accelerate the aging of plastics, these connectors can become exceptionally brittle. Attempting to service them without the proper technique often results in shattered housings. By mastering the use of a dedicated terminal release kit, you can perform clean repairs, add accessories, or troubleshoot circuits while preserving the structural integrity of the original wiring harness.
Understanding Your Connectors and Tool Types
Before attempting to extract any metal pin or socket from a plastic connector housing, you must identify the specific locking mechanism holding it in place. Automotive connectors generally fall into two categories based on their locking design: housing-lance systems and terminal-lance systems. In a housing-lance system, a flexible plastic tab molded directly into the connector body drops into a recess on the metal terminal to lock it. In a terminal-lance system, a small metal barb or tang on the terminal itself flares outward and catches against a shoulder inside the plastic cavity.
Products mentioned in this guide

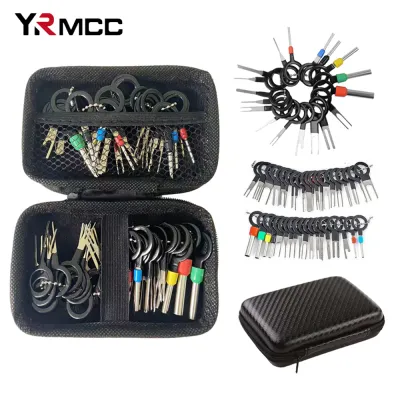
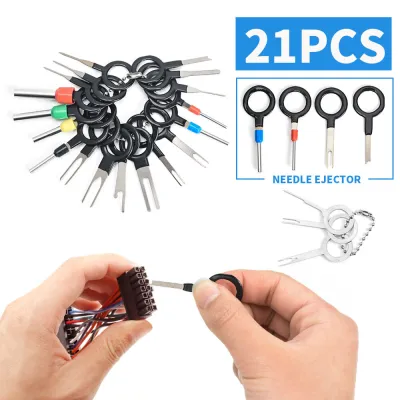

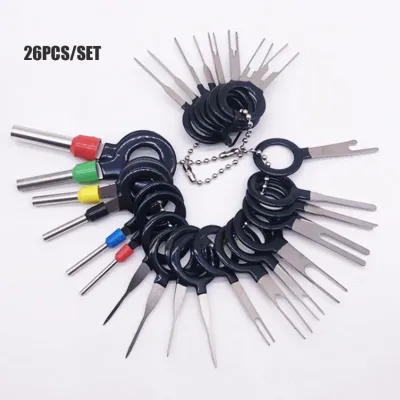
Prices are valid at publication and may change. Please refer to the product page for the latest price.
To determine which system you are dealing with, clean the face of the connector and look closely into the terminal cavity using a bright light. You will see either a tiny plastic arm resting against the metal pin or a small opening where a metal barb is wedged. Matching your terminal removal tool to this specific shape is critical. Terminal removal kits typically contain a variety of specialized tips, including single-prong flat blades, dual-prong forks, tubular sleeves, and square keys.
Using a tool with the wrong width, thickness, or profile will fail to depress the lock and will likely deform the plastic housing or bend the metal terminal. For example, a dual-prong tool slides along both sides of a terminal to compress twin locking tabs, while a single-prong tool lifts a single plastic finger. Always consult your vehicle’s service manual or connector documentation to confirm the exact release mechanism and tool requirements before applying force.
Preparation and Safety Checks Before Removal
Working on automotive electrical systems requires strict safety precautions to protect both yourself and the vehicle’s electronics. Before touching any wiring connector, disconnect the negative battery terminal and secure it away from the battery post. This eliminates the risk of accidental short circuits, which can ruin electronic control units (ECUs), blow critical fuses, or trigger accidental airbag deployment.

Once the electrical system is completely de-energized, prepare the workspace. Engine bays in tropical environments often accumulate a mixture of road grime, dust, and oily residue. Use a dry, soft-bristled brush or low-pressure compressed air to thoroughly clean the exterior of the connector housing before opening it. This prevents abrasive particles from falling into the delicate terminal cavities, where they could interfere with the tool or contaminate the electrical contact surfaces.
Adequate visibility is non-negotiable when performing precision terminal work. Because modern automotive wiring harnesses are highly dense and often tucked into dark, cramped spaces under the dashboard or deep within the engine bay, you should use a high-intensity work light or a headlamp. If you are working on multi-pin connectors with micro-terminals, a pair of magnifying work glasses or a magnifying inspection lamp will help you clearly see the tiny locking tabs and position your tool with absolute precision.
Step-by-Step Guide to Removing Terminals Safely
Extracting an automotive terminal is a delicate, two-phase operation that must never be rushed. The process consists of first disengaging the internal locking mechanism that secures the metal pin, and then physically sliding the terminal out of the rear of the plastic housing. Attempting to perform both phases simultaneously or applying force before the lock is fully released will damage the connector.
Depressing the Locking Tab
To begin, select the correct tool profile from your kit and align it carefully with the opening in the face of the connector. Gently insert the tool into the cavity, sliding it along the side of the terminal where the locking tab is located. As the tool reaches the correct depth, you should feel a slight resistance followed by a subtle, tactile click or a sudden release of tension, indicating that the tool has successfully depressed or lifted the locking tab.
It is vital to keep the tool perfectly straight during insertion. Avoid the temptation to twist, pry, or use the tool as a lever, as these lateral forces will easily snap the fragile plastic locking lance inside the housing or bend the tip of your removal tool. The tool should act solely as a wedge to hold the lock open. If you encounter hard resistance before the tool is fully inserted, stop immediately. Withdraw the tool, inspect the cavity again, and re-verify that you are using the correct tip shape and targeting the correct release point.
Extracting the Terminal
With the removal tool fully engaged and holding the locking tab in its released position, move your other hand to the back of the connector housing. Grasp the wire corresponding to the terminal you are removing, holding it close to the rubber wire seal or the back of the plastic housing. Apply a gentle, steady pulling force along the straight axis of the wire to slide the metal terminal out of the rear of the connector.
Never yank, twist, or bend the wire during extraction. Pulling at an angle or applying sudden force can easily strip the wire from its crimp, stretch the copper conductor, or tear the weather-sealing grommet. The terminal should slide out smoothly with minimal resistance. If the terminal sticks or refuses to move, do not pull harder. Release your grip on the wire, gently withdraw the removal tool, re-insert it to ensure the lock is fully depressed, and check if any secondary locking mechanisms are still holding the terminal in place.
Troubleshooting Common Removal Issues
One of the most common obstacles when removing automotive terminals is the presence of a secondary lock, often referred to as a Terminal Position Assurance (TPA) lock or a connector retainer. These are typically bright-colored plastic inserts (often red, yellow, or blue) built into the connector housing to prevent terminals from backing out under vibration. If a terminal refuses to budge despite your tool being correctly inserted, look for a plastic clip on the side or face of the connector that must be pried outward or completely removed before the primary locking tabs can be accessed.
In older vehicles or those exposed to high humidity and coastal salt air, terminals can become fused or corroded inside their plastic cavities. If a terminal is stuck due to corrosion or dirt buildup, do not force it. Spray a small amount of high-quality electrical contact cleaner directly into the connector cavity. Allow the cleaner to penetrate for a few minutes to dissolve any corrosion or grime, then gently work the terminal back and forth to break the bond before attempting the extraction process again.
Always establish a strict stop-condition to prevent irreversible damage to your vehicle’s wiring harness. If you notice the plastic connector housing beginning to deform, turn white from stress, or crack, or if you feel the wire insulation stretching, halt the process immediately. Continuing to apply force under these conditions will ruin the connector and may require splicing in a new harness section. If a terminal remains stuck after multiple careful attempts, consult a qualified professional auto electrician to resolve the issue safely.
Inspecting and Reconnecting the Terminals
Once you have successfully extracted the terminal, take the time to inspect both the metal pin and the plastic housing before proceeding with any repairs or reassembly. Examine the plastic locking lance inside the connector cavity using your light and magnification. Look closely for any signs of stress marks, micro-cracks, or permanent deformation; if the plastic tab has lost its spring tension or is partially torn, the housing will no longer hold the terminal securely and must be replaced.
Next, inspect the metal terminal itself. Check the locking barbs or tangs to ensure they have not been flattened or bent out of shape during the extraction process. If a metal barb is slightly compressed, you can sometimes use a precision pick or a sewing needle to gently pry it back to its original angle, but you must refer to the manufacturer’s guidelines to ensure this does not weaken the metal. Check the wire crimp area for any loose strands or signs of physical strain.
When you are ready to reinstall the terminal, align it correctly with the rear of the connector housing, ensuring it is oriented in the proper direction. Gently push the terminal forward into the cavity until you hear and feel a distinct, positive click, which indicates that the internal locking tab has re-engaged over the terminal shoulder. To confirm a secure connection, perform a gentle pull-test by lightly tugging on the wire from the back of the connector; if the terminal remains firmly in place, the lock is successfully engaged.
Frequently Asked Questions (FAQ)
Can I use a small flathead screwdriver instead of a dedicated terminal removal tool?
Using improvised tools like small flathead screwdrivers, sewing needles, or paperclips is highly discouraged for automotive electrical work. Improvised tools rarely match the precise dimensions of the connector cavities, making them highly likely to slip and gouge the plastic housing, bend the internal metal contacts, or permanently snap the delicate locking tabs. A dedicated terminal removal tool kit is designed with exact tolerances and blade thicknesses to slide smoothly into the connector, ensuring a safe, damage-free extraction.
What should I do if the plastic locking tab breaks off during removal?
If a plastic locking tab or housing lance breaks off during removal, the connector housing can no longer safely retain the terminal. Do not attempt to secure the loose wire or connector using temporary fixes like electrical tape, hot glue, or zip-ties, as these methods will quickly fail under the intense heat and constant vibration of an operating vehicle, leading to intermittent electrical failures or short circuits. The correct solution is to replace the damaged plastic connector housing entirely, or to cut the wires and install a high-quality automotive pigtail splice kit using proper crimping and heat-shrink techniques.
Community discussion
Share your experience or ask a question. Comments are reviewed before publication.