
Safely extracting electrical terminals from an automotive wiring harness requires a specialized connector pin remover to depress the internal locking tab without damaging the delicate plastic housing or the wire itself. Attempting this task with improvised tools often leads to broken connector housings, bent pins, or torn wires, which can cause intermittent electrical faults that are notoriously difficult to diagnose. By using the correct terminal release tool and applying steady, precise pressure, you can release the terminal cleanly and preserve the integrity of your vehicle’s electrical system.
In tropical environments like the Philippines, automotive plastics are subjected to intense engine heat and high humidity, making them exceptionally brittle over time. A single forced extraction can easily shatter a costly multi-pin connector, turning a simple sensor replacement into an expensive wiring nightmare. Understanding the mechanics of terminal retention and mastering the physical technique of pin removal is essential for any successful DIY electrical repair or accessory installation.
Preparing Your Workspace and Vehicle for Electrical Work
Before touching any electrical connector on your vehicle, you must establish a safe working environment to protect both yourself and the vehicle’s sensitive electronic control units (ECUs). Start by parking the vehicle on a level surface, engaging the parking brake, and turning the ignition completely off. Disconnect the negative battery terminal using a suitable wrench and isolate the cable end to prevent accidental contact. Wait at least 10 to 15 minutes before proceeding; this delay allows the capacitors inside various control modules to discharge fully, minimizing the risk of voltage spikes or accidental airbag deployment.
Products mentioned in this guide
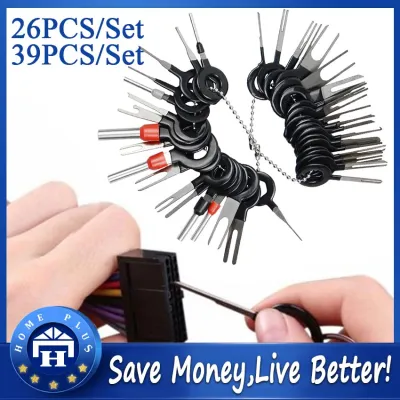
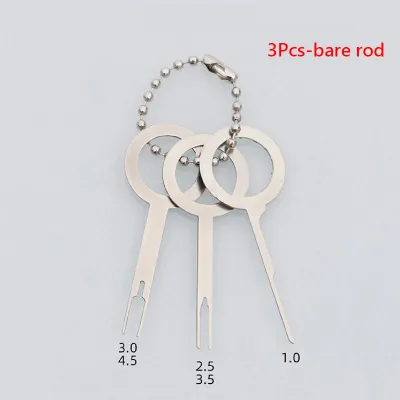
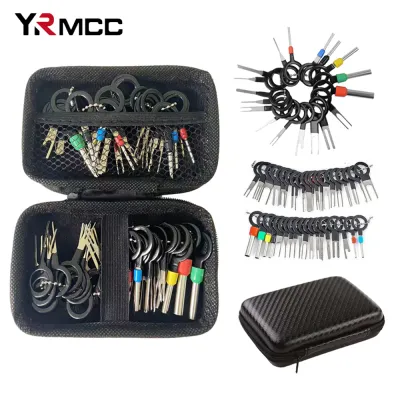

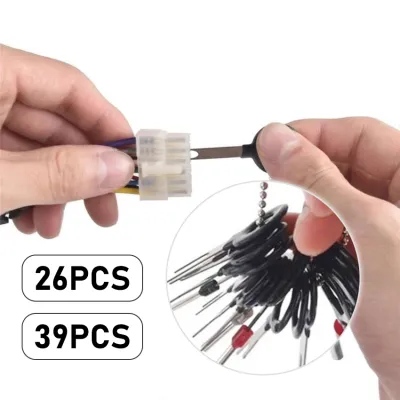
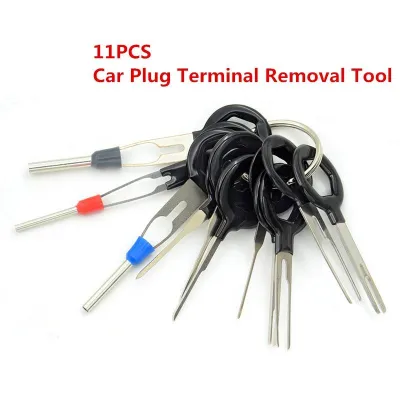
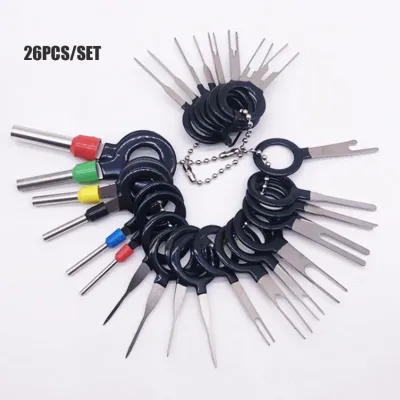
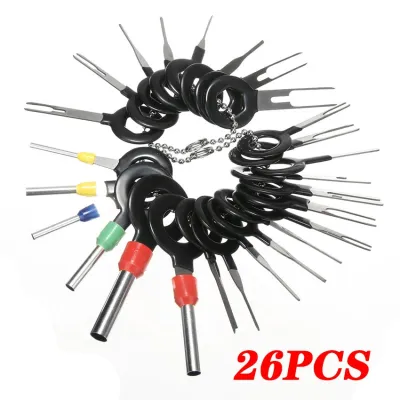
Prices are valid at publication and may change. Please refer to the product page for the latest price.
Safety boundaries are critical when working near supplemental restraint systems (SRS) or high-voltage circuits. Always identify airbag wiring harnesses, which are universally color-coded with bright yellow tubing or tape, and avoid tampering with them unless you are a qualified professional equipped with the manufacturer’s specific service instructions. Similarly, if you are working on a hybrid or electric vehicle, stay completely clear of orange high-voltage cables, which carry lethal currents and require specialized high-voltage safety gear and training.
To work effectively on miniature terminal pins, you need excellent visibility and a clean workspace. Position a bright, adjustable LED work light directly over the connector to illuminate the tiny cavities inside the plastic housing. Because terminal slots can be smaller than a millimeter across, using a magnifying glass or a wearable jeweler’s loupe is highly recommended to clearly see the locking tabs. Finally, spray the exterior of the connector with a dedicated electrical contact cleaner to remove accumulated road grime, dust, or moisture, ensuring that debris does not fall into the terminal cavities during disassembly.
Identifying Connector Locking Mechanisms
Automotive electrical connectors rely on multi-stage locking systems to maintain secure connections despite constant engine vibrations and rough road conditions. Before inserting any tool, closely inspect the connector housing to identify how it is secured. Most modern automotive connectors feature a primary external lock that holds the male and female halves together, alongside internal locking mechanisms that secure each individual metal pin inside its respective plastic cavity.

Many manufacturers also employ a secondary locking mechanism, often referred to as a Terminal Position Assurance (TPA) wedge or a slide-lock. These are typically brightly colored plastic inserts (often red, yellow, or blue) located on the front face or side of the connector. The secondary lock acts as a physical barrier that prevents any pin from backing out, even if the primary internal lock fails. You must gently pry up or completely slide out this secondary wedge using a non-marring pick before you can access or release the individual terminal pins.
Once the secondary lock is disengaged, peer into the front face of the connector to determine the terminal shape and the position of the internal locking tang. Terminals generally fall into two categories: round pin (bullet) terminals or flat blade (spade) terminals. The internal locking tang can be a tiny plastic flexible finger molded into the connector housing itself, or a small metal barb stamped directly onto the metal terminal pin. Consulting your vehicle’s factory service manual or wiring diagrams can provide specific illustrations of the connector’s internal architecture, saving you from guessing which release method to apply.
Step-by-Step Technique for Removing Connector Pins
To begin the extraction, select a tool from your connector pin remover set that matches the exact shape, width, and thickness of the terminal cavity. Using a tool that is too large will stretch or crack the plastic housing, while a tool that is too small may slip past the locking tang without depressing it. Most terminal release kits include dual-prong tools for blade terminals, single-prong needles for round terminals, and sheath-style tools for cylindrical pins.
Always insert the connector pin remover from the front mating face of the connector, never from the rear wire-entry side. Gently slide the tool tip into the designated release slot adjacent to the metal terminal. As you insert the tool, you should feel it glide along the terminal blade until it encounters the springy resistance of the internal locking tang. Push the tool straight in with light, steady pressure to flatten the metal barb or lift the plastic locking finger away from the terminal.
While maintaining constant forward pressure on the pin remover to keep the locking tang depressed, use your other hand to grasp the wire at the rear of the connector. Apply a gentle, straight pull on the wire. If the tool is positioned correctly and the lock is fully disengaged, the terminal pin will slide out of the back of the housing with virtually no resistance. Do not yank or jerk the wire, as this can tear the copper strands away from the crimp joint, leaving the metal terminal permanently stuck inside the plastic cavity.
Once the terminal is free, carefully slide the pin remover tool out of the front of the connector. Inspect the extracted metal pin to ensure the locking barb is not deformed or broken. If you are reusing the terminal, you may need to use a precision hobby knife or a fine pick to gently bend the metal locking barb back to its original outward angle so that it can lock securely when reinserted later.
Troubleshooting Stuck Pins and Preventing Harness Damage
If a terminal pin refuses to slide out with a gentle pull, stop immediately and re-evaluate the connector. The most common cause of a stuck pin is an overlooked secondary locking wedge or a slide-lock that has not been fully disengaged. Double-check the entire perimeter of the connector housing for any colored plastic clips that might still be locking the terminals in place. Additionally, verify that your pin remover tool is inserted to the correct depth and has not slipped off the locking tang.
Environmental factors can also complicate terminal removal, especially in humid or coastal regions where moisture accelerates corrosion. Inspect the connector cavity for green copper oxidation or white powdery residue, which can physically cement the terminal to the plastic walls. If corrosion is present, thoroughly flush the cavity with electrical contact cleaner and gently wiggle the wire to break the crust before attempting extraction again. In severe cases, high electrical resistance can generate localized heat, melting the plastic housing directly onto the metal terminal; if you observe deformed or discolored plastic, the connector is fused and must be replaced.
Establish a strict stop condition to prevent catastrophic damage to your vehicle’s wiring harness. If you notice the plastic housing turning white under stress, if the wire insulation begins to stretch or discolor, or if your tool repeatedly slips and gouges the plastic, cease all force immediately. Replacing a damaged engine wiring harness can be incredibly expensive, often costing upwards of ₱10,000 to ₱50,000 for parts and labor depending on the vehicle make and model. If a pin remains stuck after several careful attempts, seek professional diagnostic help from an experienced automotive electrician.
Reinserting Pins and Verifying the Repair
Before reinserting a terminal pin into the connector housing, ensure that the metal terminal is perfectly straight and that its locking tang is raised sufficiently to catch the internal plastic shelf. Align the terminal with the correct slot at the rear of the connector, paying close attention to its orientation. Most terminals are keyed and will only slide into the housing in one specific direction; forcing a misaligned pin will bend the delicate metal blades and ruin the terminal.
Push the wire and terminal straight into the cavity from the rear until you hear or feel a distinct, audible click. This click indicates that the internal locking tang has successfully sprung back into its retaining slot. Once the pin is seated, perform a gentle pull-test by lightly tugging on the wire from the back of the connector. The wire should remain firmly anchored in place without any play or backward movement.
After verifying that all pins are securely locked, re-engage any secondary locking wedges or TPAs by pushing them back into their fully locked positions. Visually inspect the front face of the connector to confirm that all terminal tips are aligned evenly and sit at the same depth. Reconnect the connector halves, ensure the main harness lock clicks shut, and then reconnect the vehicle’s negative battery terminal. Turn on the ignition and test the repaired circuit to verify proper electrical continuity and system operation.
Frequently Asked Questions (FAQ)
Can I use a small flathead screwdriver instead of a dedicated pin remover?
Using a small flathead screwdriver, safety pin, or paperclip is highly discouraged for automotive electrical work. Improvised tools lack the precise dimensions and flat profiles required to fit into miniature terminal cavities. Attempting to use them often results in permanently bending the internal locking tangs, scraping away protective tin or gold plating on the terminals, or cracking the delicate plastic walls of the connector housing. A dedicated connector pin remover set is specifically engineered to match the exact tolerances of various automotive terminal designs, ensuring a safe and clean extraction without damaging expensive harness components.
What should I do if the locking tab breaks during removal?
If an internal locking tab or an external connector latch breaks, you must assess the structural integrity of the connection. In high-vibration automotive environments, a broken lock will eventually allow the terminal to back out, leading to intermittent electrical failures, sensor errors, or short circuits. Never rely on electrical tape, zip ties, or standard household adhesives to hold a broken connector together. If the housing is damaged, the correct repair is to replace the plastic connector housing entirely, or cut the damaged section away and splice in a high-quality replacement pigtail harness using adhesive-lined heat-shrink butt connectors to seal out moisture.
Community discussion
Share your experience or ask a question. Comments are reviewed before publication.