
Safely removing car connector terminals requires identifying the connector’s locking mechanism, selecting the matching tool from your terminal ejector kit, releasing any secondary locks, and gently depressing the internal locking barb to slide the wire out. In tropical climates, automotive wiring harnesses are constantly exposed to high humidity, intense engine bay heat, and road vibrations. Over time, these environmental factors make plastic connector housings brittle and cause metal terminals to stick due to micro-corrosion. Forcing these connections apart with improvised tools like paperclips or sewing needles often leads to cracked plastic housings, torn wires, or loose pins that cause intermittent electrical faults. Utilizing a dedicated terminal ejector kit allows you to release the delicate metal pins cleanly, preserving the integrity of the vehicle’s electrical system and avoiding costly harness replacements.
Understanding Your Terminal Ejector Kit and Connector Types
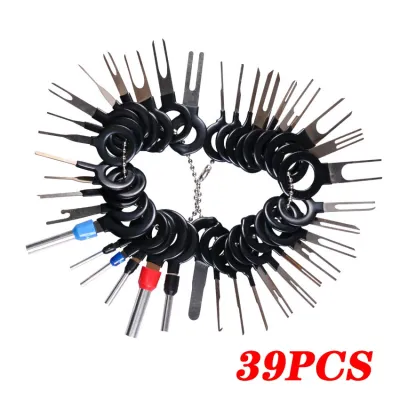
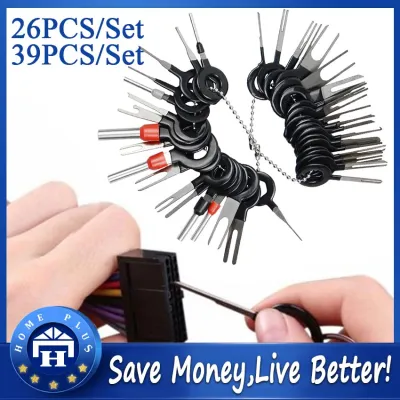
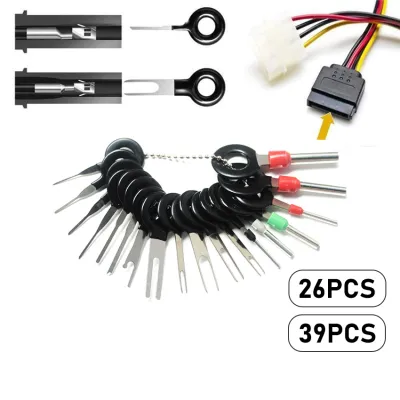
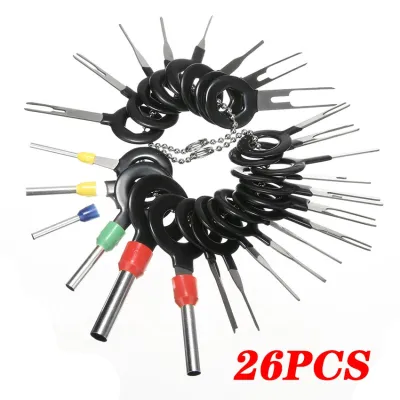
An automotive terminal ejector kit is a collection of specialized keys designed to interface with the diverse array of electrical connectors found in modern vehicles. These kits typically include single-pin keys, double-pin keys, and tubular sleeve tools of various diameters. Single-pin keys feature flat, narrow blades of varying thicknesses, which are engineered to slide into the release ports of standard spade or blade terminals. Double-pin keys, resembling tiny forks, are designed for dual-locking systems where two parallel locking tabs must be compressed simultaneously. Tubular or sleeve-style tools are used exclusively for round, cylindrical pin-and-socket connectors, sliding over the terminal body to compress circular locking fingers.
To use these tools effectively, you must first understand the locking mechanisms of the specific connector you are servicing. Automotive connectors generally employ primary and secondary locking structures to ensure pins do not back out under vibration. The primary lock is typically a small plastic tab molded inside the connector cavity or a flexible metal barb on the terminal itself. The secondary lock, often referred to as a Terminal Position Assurance (TPA) lock, is a brightly colored plastic insert that secures all pins across the entire connector block. Some high-vibration areas also utilize a Connector Position Assurance (CPA) lock on the outer housing to prevent the male and female plugs from separating. Always consult your vehicle’s official service manual or the connector manufacturer’s specifications to identify the exact locking configuration before attempting any disassembly.
Products mentioned in this guide
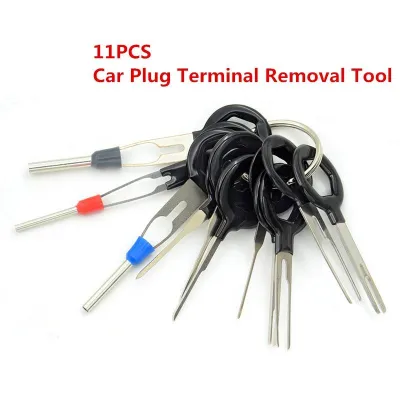
Prices are valid at publication and may change. Please refer to the product page for the latest price.
Preparation and Safety Precautions Before Removal
Working on automotive electrical systems requires strict adherence to safety protocols to prevent short circuits, blown fuses, or damage to sensitive electronic control units (ECUs). Before beginning any work on a wiring harness, always refer to your vehicle’s original manufacturer instructions for specific safety guidelines. The baseline safety measure for any electrical task is to disconnect the negative battery terminal. This simple step de-energizes the circuits you will be working on, eliminating the risk of accidental short circuits if a metal ejector tool contacts a live pin.

Once the battery is disconnected, prepare the workspace by cleaning the area around the connector housing. In tropical environments, road dust, grease, and moisture can accumulate inside and around electrical plugs. Use a dedicated electrical contact cleaner and a soft-bristled brush to clear away any debris from both the front mating face and the rear wire entry points. This prevents foreign particles from entering the connector cavity during disassembly, which could jam the locking mechanism or contaminate the electrical contacts. Ensure your workspace is well-lit, using a bright work light or headlamp to clearly see the tiny internal locking tabs. Wearing lightweight, insulated gloves is also recommended to protect your hands from sharp metal pins and provide a secure grip on the small ejector tools.
Step-by-Step Guide to Extracting Terminals Without Damage
To extract a terminal successfully, start by disengaging any secondary locking mechanisms. If the connector features a colored TPA insert, use a small precision pick or a flat blade from your ejector kit to gently pry it into the released position. Note that some TPAs are designed to slide out only a few millimeters rather than detaching completely; refer to the connector documentation to avoid breaking these delicate plastic parts.
Next, inspect the front mating face of the connector to locate the tool access port. This port is a small, dedicated opening situated directly above or below the terminal pin, separate from the main terminal opening itself. Select an ejector tool from your kit that matches the width and height of this access port. Carefully insert the tool tip straight into the port, keeping it parallel to the terminal. Slide the tool forward until you feel it make contact with the internal locking barb or plastic ramp.
Gently push the tool forward to depress the metal locking barb on the terminal or lift the plastic locking tab inside the housing. You should feel a slight, soft release as the lock disengages. It is crucial to maintain steady, forward pressure on the tool to keep the lock open. While holding the tool in this position, use your other hand to grasp the wire at the rear of the connector housing. Gently pull the wire straight back and out of the cavity. The terminal should slide out smoothly with minimal resistance.
If you encounter any significant resistance or if the wire does not slide out easily, stop immediately. Do not pull harder or attempt to yank the wire. Forcing the wire will tear the internal plastic ramps or pull the wire out of its crimp, leaving the metal terminal permanently stuck inside a ruined housing. If the terminal does not slide out, withdraw the tool, re-verify that all secondary locks are fully disengaged, check your tool alignment, and try again with a slightly different tool profile if necessary.
Inspecting and Reinserting Terminals After Extraction
After successfully extracting the terminal, conduct a thorough visual inspection of both the terminal and the wire. Examine the metal body of the terminal for any signs of bending, twisting, or deformation. If the locking barb was flattened during the extraction process, use a precision pick to gently pry it back to its original angle so it can lock securely upon reassembly. Check the wire crimp area to ensure there are no frayed copper strands or cracked insulation that could lead to a weak connection or a short circuit.
In humid climates, inspect the terminal surfaces for green or white corrosion. If corrosion is present, clean it thoroughly with electrical contact cleaner or replace the terminal entirely to prevent high electrical resistance. Once you are satisfied with the terminal’s condition, align it with the correct cavity orientation. Push the terminal straight into the rear of the connector housing until you hear or feel a distinct click, indicating that the primary locking tab has engaged.
Perform a gentle pull test by lightly tugging on the wire from the back of the connector to confirm it is locked securely in place. If the wire pulls out, the locking tab is either damaged or not fully seated, requiring you to re-evaluate the housing. Once all terminals are verified as secure, push the secondary lock or TPA back into its fully locked position to complete the assembly.
Common Mistakes to Avoid When Using Ejector Tools
One of the most common mistakes when using a terminal ejector kit is selecting an oversized or incorrect tool profile. Forcing a tool that is too wide or too thick into the access port will stretch, deform, or crack the plastic connector housing, rendering it unable to hold the terminal securely. Always start with a smaller tool size if you are unsure of the exact fit, and never force a tool into a port.
Another frequent error is pulling the wire before the locking barb is fully depressed. This premature pulling puts tension on the lock, jamming the barb tighter against the plastic ramp and making it impossible to release. To avoid this, apply slight forward pressure on the wire first to relieve tension on the lock, insert the ejector tool to disengage the barb, and only then pull the wire backward.
Lastly, never ignore secondary locks, outer housing clips, or wire dress covers. Many modern connectors feature protective backshells or wire dress covers that route the wires at a sharp angle. Attempting to pull a terminal out while these covers are still attached restricts wire movement and can damage the insulation. Always disassemble all outer protective housings before attempting terminal extraction.
Frequently Asked Questions (FAQ)
Can I use a small flathead screwdriver instead of a terminal ejector kit?
While a tiny precision flathead screwdriver or a sewing needle might seem like a quick substitute, they lack the exact dimensions required for automotive connectors. Improvised tools easily slip, which can gouge the plastic housing, permanently flatten the metal locking barbs, or even puncture your fingers. A dedicated terminal ejector kit provides the precise thickness, width, and shape needed to release the lock cleanly without damaging the surrounding components. Using the correct tool ensures a reliable, repeatable repair and prevents the need to replace expensive connector housings.
What should I do if the terminal gets stuck inside the connector housing?
If a terminal remains stuck despite your best efforts, do not use pliers to force it out. First, double-check for any hidden secondary locks or wire dress covers that you might have missed. Inspect the cavity for dirt, corrosion, or melted plastic caused by a previous electrical short circuit, which can fuse the terminal to the housing. If the internal locking mechanism is fractured or melted, the connector housing is compromised and must be replaced. For complex wiring harnesses or sensitive circuits like airbag systems (SRS), consult a qualified automotive technician to perform the repair safely.
Community discussion
Share your experience or ask a question. Comments are reviewed before publication.