
Upgrading your car’s audio system with a new head unit or high-fidelity speakers is a rewarding DIY project that instantly elevates your daily drive. However, the prospect of prying apart a pristine dashboard can be intimidating, especially when one wrong move can leave permanent gouges on your interior surfaces. To access the head unit cavity or door speakers safely, a dedicated plastic trim removal tool is an indispensable asset. These specialized tools allow you to apply even, controlled leverage to release hidden fasteners without scratching delicate plastics or snapping fragile mounting tabs.
Using the correct technique ensures that your vehicle’s interior remains rattle-free and looks factory-fresh after the installation is complete. By understanding how different clips release and how to distribute prying pressure, you can confidently navigate the disassembly process. This guide covers everything from workspace preparation to step-by-step panel removal techniques.
Preparing Your Vehicle and Workspace
Before picking up any tools, establishing a safe and organized workspace is essential for protecting both yourself and your vehicle’s electronics. Begin by disconnecting the negative terminal of your car battery. This simple step eliminates the risk of short-circuiting sensitive electrical components when unplugging factory wiring harnesses. More importantly, it prevents the accidental deployment of side-curtain or dashboard airbags, which can be triggered if a sensor wire is pinched or disturbed during disassembly. Always consult your vehicle’s owner’s manual to locate the battery and identify any specific safety procedures for your model year.
Products mentioned in this guide

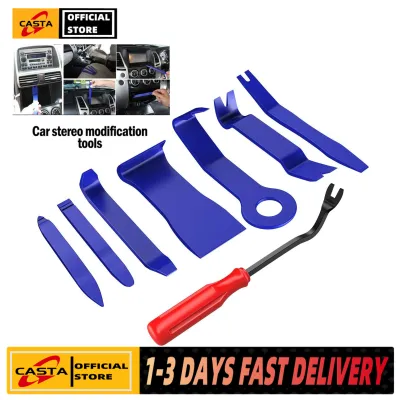

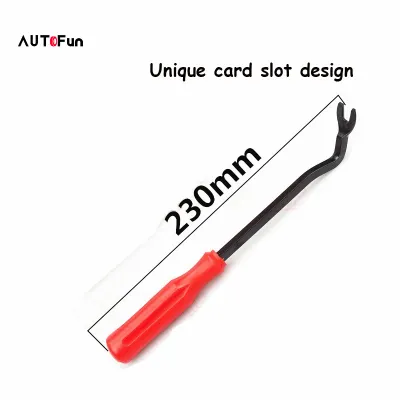
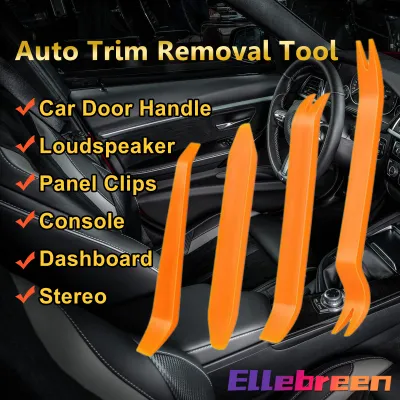
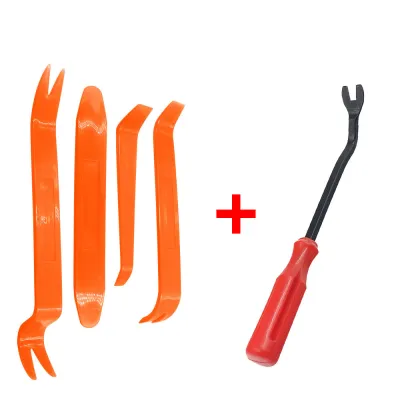
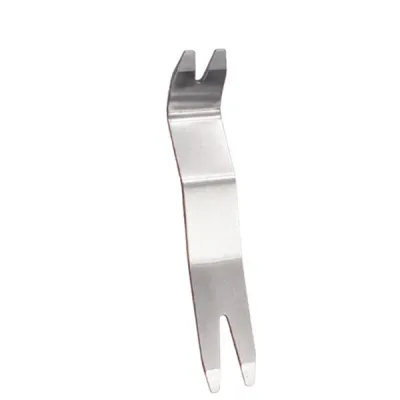

Prices are valid at publication and may change. Please refer to the product page for the latest price.
In tropical climates like the Philippines, cabin temperatures can soar when a car is parked outdoors. This intense heat makes plastic interior panels highly pliable but also prone to stretching, warping, or leaving permanent stress marks under pressure. Conversely, older vehicles exposed to years of intense sunlight will have extremely brittle plastics that snap at the slightest bend. To minimize these risks, work in a shaded, well-ventilated area, and allow the cabin to cool down to ambient temperature before attempting to pry any panels.
Gather a set of non-marring nylon trim tools rather than relying on makeshift metal implements. Additionally, keep a roll of high-quality masking tape or painter’s tape nearby. Applying tape to the edges of the dashboard surrounding the target panel creates a protective barrier, absorbing any accidental slips or pressure marks from the prying process.
Understanding Trim Removal Tools and Clip Types
A standard trim removal kit contains several distinct tool profiles, each engineered for specific prying or pulling applications. Wedge tools feature a thin, tapered edge designed to slide into the microscopic gaps between adjacent panels. Once inserted, they act as a ramp to gently separate the pieces. Fork-tipped tools are engineered specifically for pulling clip shafts; by sliding the fork around the neck of a push-pin or retainer, you can apply upward pressure directly beneath the head, minimizing the risk of shearing the fastener. Hook and angled tools are useful for reaching behind panels to release stubborn locking tabs or pulling trim pieces from recessed cavities where fingers cannot reach.

Automotive interiors are held together by a variety of fasteners, and recognizing them is key to damage-free removal. Metal spring clips are common on center consoles and radio bezels, requiring a firm, straight pull to release. Push-pin retainers, often found on door panels, require the center pin to be popped out first or the entire base to be pried up. Soft-touch dashboard materials, such as padded vinyl or leatherette, are highly susceptible to indentation. When working near these surfaces, use the widest, flattest tool available to distribute the prying force over a larger surface area.
If you are uncomfortable working around delicate electrical systems, integrated airbags, or complex dashboard assemblies, seek qualified professional installation. Standard vehicle documentation should always be your primary reference for component locations and specific disassembly steps.
Step-by-Step Guide to Removing Dashboard Panels
To remove the center console or radio bezel, start by locating the initial pry point. Examine the panel for natural seams or small, designated slots designed for service access. Insert the wedge tool at a shallow angle, roughly 15 to 30 degrees relative to the panel surface. Avoid inserting the tool too deeply initially, as you might damage internal wiring or climate control linkages.
To protect the dashboard from indentation, place a thick plastic card or a folded microfiber cloth under the tool’s pivot point. This distributes the downward force when you pry upward, preventing the tool from crushing the softer dashboard backing.
Apply steady, incremental pressure rather than sudden, jerky force. You should feel the panel gradually give way as the clips release. If a section resists, do not force it. Stop and inspect the area for hidden screws, which are often concealed behind small trim covers, inside the glove box, or under the climate control knobs.
Once all clips are released, do not yank the panel away. The factory wiring harnesses for the hazard lights, passenger airbag indicator, and climate controls are typically short and tightly routed. Reach behind the partially freed panel, locate the locking tabs on each electrical connector, press them firmly, and pull the plugs free. Never pull on the wires themselves, as this can pull the pins out of the connector housing.
Techniques for Door Panels and Speaker Access
Door cards are rarely held in place by clips alone, so a systematic approach is required to access door speakers. Look for hidden screws inside the door pull cup, behind the interior door handle release lever, and along the bottom edge of the door panel. Remove these screws using the correct screwdriver size to avoid stripping the heads.
Start the pry sequence at the bottom corner of the door panel. This area usually has a small gap where you can insert a wide wedge tool. Work your way along the bottom edge, popping the clips one by one, and then move up the sides. This bottom-up approach ensures the panel remains supported by the top window channel until all clips are free.
Once the perimeter clips are released, lift the door panel straight up to clear the window sill lip. Do not let the panel hang by its wires or cables. Have a helper support the panel, or use a temporary hook to hang it from the door frame while you disconnect the window switch harness and the mechanical door latch cables. Place the removed door card on a clean, soft surface, such as a cardboard box or a moving blanket, to prevent scratching the interior face.
Managing Clips and Avoiding Common Damage
When dealing with stubborn plastic push-pins that secure the door panel to the inner metal frame, standard prying tools can sometimes slip or tear the clip head. A dedicated metal panel clip plier with a rubberized coating is highly effective here. It slides under the clip head and pulls it straight out of the metal sheet, preserving the fastener’s structural integrity.
During disassembly, it is common for some plastic clips to remain lodged in the metal door frame instead of staying attached to the plastic door panel. Before reassembly, you must extract these stuck clips using your clip pliers and slide them back into their designated slots on the plastic panel. Attempting to snap the panel back on with clips still stuck in the frame will result in bent fasteners, misaligned panels, and persistent rattles.
Because plastic clips degrade over time—especially in hot, humid environments—some are bound to fatigue and snap during removal. Keeping a universal automotive clip assortment kit on hand is a wise investment. These kits, easily sourced from online marketplaces or local auto supply shops for a few hundred ₱, contain various sizes of push-pins, trim clips, and retainers that match most vehicle makes and models. Replacing damaged clips immediately ensures a tight, rattle-free fit when you put everything back together.
Reassembly and Final Verification
Before reinstalling any panels, take the time to organize and secure your new audio wiring. Use zip ties or automotive fabric tape to bundle the speaker wires and head unit harnesses. Route them clear of any moving parts, such as the steering column, glove box hinges, or climate control blend door linkages. Ensure no wires cross the paths of the mounting clips, which could pinch and short-circuit the wires during reassembly.
Hold the panel up to the dashboard or door frame and carefully align every single plastic clip with its corresponding mounting hole. Look through the gaps to verify alignment before applying pressure. Once aligned, use firm, even pressure with the palm of your hand to snap the clips back into place. You should hear a distinct clicking sound as each fastener seats. If a panel does not sit flush, do not force it; pull it back off and check for misaligned clips or pinched wires.
Before snapping the final trim pieces and securing the last screws, temporarily reconnect the negative battery terminal. Turn on the ignition and test all functions of your new head unit and speakers. Verify that all audio channels are balanced, steering wheel controls function correctly, and auxiliary features like backup cameras or USB ports are operational. Additionally, test original vehicle functions such as the hazard lights, climate control knobs, and power windows to ensure no factory wiring was disturbed. Once everything is verified, disconnect the battery again if further assembly is needed, or finalize the installation by securing the remaining screws and trim.
Frequently Asked Questions (FAQ)
Can I use a flathead screwdriver instead of a trim removal tool?
Using a metal flathead screwdriver carries a high risk of gouging soft plastics, tearing vinyl, and scratching paint. If absolutely necessary—such as for a deeply recessed metal spring clip—wrap the tip of the screwdriver in several layers of electrical tape or a thick microfiber cloth to act as a protective buffer.
What should I do if a plastic clip breaks during removal?
Retrieve any broken plastic pieces from inside the door cavity or dashboard frame to prevent annoying rattles while driving. Match the broken clip to a replacement from your universal kit, checking the stem diameter and head size. Do not use hot glue, double-sided tape, or household adhesives as a permanent fix, as they will fail under tropical cabin heat.
Community discussion
Share your experience or ask a question. Comments are reviewed before publication.