
An oil seal is a small but critical component that keeps vital lubricants inside your engine, transmission, or differential while sealing out dirt and moisture. During a rebuild or routine maintenance, installing this seal perfectly square and undamaged is the difference between a successful repair and a frustrating, costly leak. To achieve a leak-free seal, you must use a dedicated oil seal installer correctly.
This guide breaks down the precise techniques, tool selections, and step-by-step procedures required to seat a new seal flawlessly without compromising its delicate structure. Whether you are replacing a crankshaft seal, a wheel bearing seal, or an axle seal, using the right approach will save you time, money, and future headaches.
Understanding Oil Seal Installers and Their Purpose
An oil seal installer is a highly specialized automotive tool engineered to distribute force evenly across the rigid outer metal or plastic casing of a radial lip seal. When you press a seal into its bore, any uneven pressure can warp the casing, ruin the internal alignment, or slip and tear the delicate inner rubber sealing lip.
Products mentioned in this guide
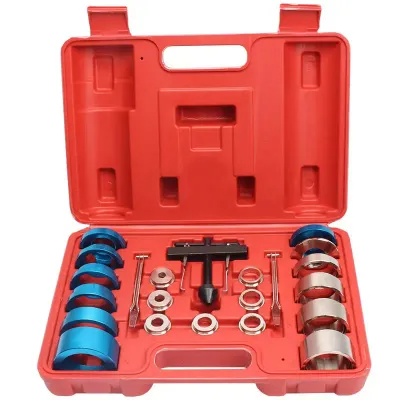
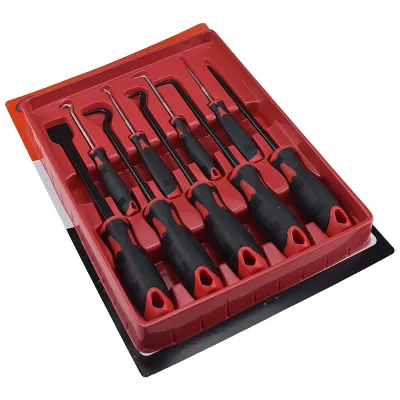
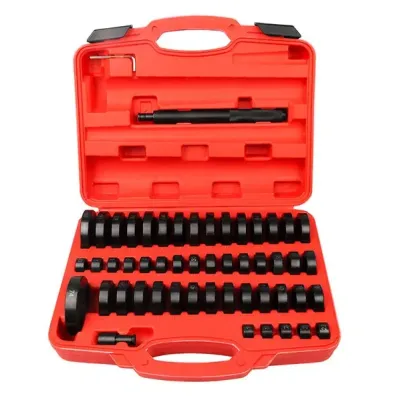
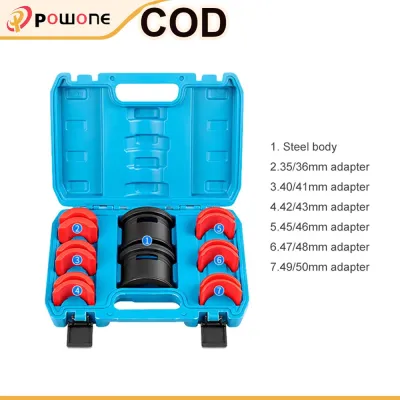
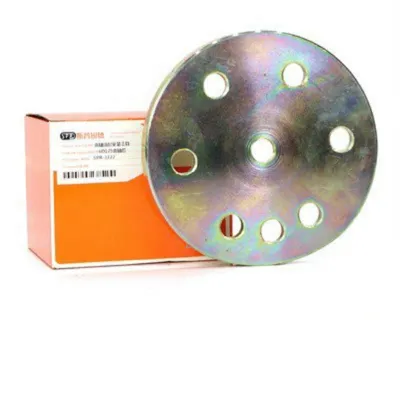
Prices are valid at publication and may change. Please refer to the product page for the latest price.
Many backyard mechanics and DIY enthusiasts attempt to drive seals using improvised tools, such as a standard hammer, block of wood, or mismatched scrap PVC pipes. While these methods might seem convenient, they almost always lead to disaster. A hammer striking a seal directly concentrates force on a single point, causing the seal to cock (tilt) in the bore. Once a seal is cocked, forcing it further will shave metal off the bore or permanently distort the seal’s outer shell, rendering it useless before the engine even runs.
Dedicated installer kits typically feature cup-style drivers, step-down aluminum adapters, or threaded press-screw assemblies. The critical design feature of these tools is their ability to contact only the outer metal rim of the seal. By matching the driver cup’s outer diameter precisely to the seal’s outer diameter, you ensure that no force is applied to the flexible inner rubber lip or the tiny garter spring nested inside it.
Tools and Workspace Preparation for Seal Replacement
Before beginning, gather your equipment to ensure a smooth workflow. You will need a comprehensive oil seal installer set, a dedicated hook-style or slide-hammer seal puller, clean lint-free microfiber towels, and standard hand tools to clear access to the housing.

Lubrication is vital for both installation and initial startup. You must select the correct lubricant specified in your vehicle’s factory service manual. This is typically clean engine oil, automatic transmission fluid (ATF), gear oil, or a specialized high-tack assembly lube. Never use general-purpose chassis grease or unauthorized chemical sprays, as they can degrade the rubber compound of the seal over time.
In tropical, high-humidity environments like the Philippines, airborne dust, grit, and moisture can quickly contaminate open mechanical assemblies. Even microscopic dirt particles trapped between the seal and the bore can create a microscopic gap, leading to premature leaks. Clean your entire workspace and wipe down all tools before opening the new seal packaging.
Always prioritize safety and manufacturer compliance. Consult your specific vehicle’s service manual for the exact removal procedures, torque specifications for surrounding components, and safety warnings. Disconnect the vehicle’s battery if working near electrical components, and ensure the vehicle is securely supported on jack stands on a level concrete surface.
Step-by-Step Guide to Installing an Oil Seal
Replacing an oil seal is a precise mechanical task that requires patience and a systematic approach. The entire procedure can be broken down into three distinct, manageable phases: extracting the old seal and preparing the bore, aligning and seating the new seal, and driving the seal to its final, specified depth.
Work methodically and never rush. If you encounter unexpected resistance at any point, or if the replacement seal looks slightly different from the one you removed, stop immediately. Compare the parts against your service manual to verify compatibility before proceeding.
Removing the Old Seal and Preparing the Bore
To remove the failed seal, position a dedicated seal puller tool so its hook securely engages the metal casing of the old seal. Apply steady, controlled leverage to pry the seal out of the housing. If the seal is stubborn, work from multiple sides to pull it out evenly.
Avoid using flathead screwdrivers, pry bars, or chisel tips to force the seal out. The housing bore is often made of soft aluminum or precision-machined steel. A single slip with a steel screwdriver can gouge or scratch the bore wall, creating a permanent channel for fluid to bypass the new seal, regardless of how well it is installed.
Once the old seal is out, clean the bore thoroughly using a lint-free microfiber cloth and an approved solvent, such as brake cleaner, ensuring no residue remains. Always verify that the cleaning agent is safe for the specific metal housing by checking the product label.
Run a clean, bare finger around the inner circumference of the bore to check for burrs, corrosion, sharp edges, or deep scoring. If you detect any physical damage, the housing must be professionally repaired, polished with fine emery cloth (if permitted by the manufacturer), or replaced entirely before you attempt to install a new seal.
Aligning and Seating the New Seal
Apply a thin coat of clean assembly lubricant or the specified system fluid to the outer metal edge of the new seal to help it slide smoothly into the bore. Next, apply a generous amount of the same lubricant to the inner rubber sealing lip. This inner lubrication is critical; it prevents dry-start friction and extreme heat from burning or tearing the rubber lip during the first few seconds of engine operation.
Double-check the orientation of the seal before placing it. The general rule of thumb is that the sealing lip (the sharp, flexible edge) and the internal garter spring must face toward the fluid or pressure being retained. Installing a seal backward is a common mistake that leads to immediate, severe leaks.
Position the lubricated seal onto the opening of the bore by hand. Use your fingers to gently press it in, ensuring it sits perfectly square and level. Do not tilt or cock the seal; it should be stable and aligned before you bring any installation tools into contact with it.
Driving the Seal to the Correct Depth
Select the driver cup or adapter from your oil seal installer kit that matches the outer diameter of your seal. The driver must rest squarely on the rigid outer metal shoulder of the seal casing, leaving a safe clearance around the delicate inner rubber lip and garter spring.
If using a threaded press-style installer, turn the forcing screw slowly and smoothly to press the seal into place. If using a hammer-driven driver cup, use a brass or dead-blow hammer to tap the driver gently. Alternate your taps in a star pattern or around the edges of the driver to ensure the seal goes down perfectly straight.
Continue driving the seal until it is seated exactly as specified by the manufacturer. This may mean pressing it until it bottoms out against an internal shoulder, or aligning it flush with the outer edge of the housing.
Never over-drive the seal. Pushing it too deep can block internal fluid return passages, oil galleries, or cause the seal to rub against rotating internal components. Conversely, leaving the seal protruding can cause it to bind against external pulleys, shafts, or dust shields.
Common Mistakes That Cause Seal Damage and Leaks
- Cocking the Seal: This occurs when the seal is driven into the bore at an angle. The uneven force distorts the metal casing, permanently warping the seal and preventing it from forming a tight, concentric barrier around the shaft.
- Wrong Tool Size: Using an installer cup that is too small can cause the tool to slip inward, crushing the delicate rubber lip or dislodging the internal garter spring. If the spring pops out of its groove, the seal will have no tension against the rotating shaft.
- Dry Installation: Skipping lubrication on the inner sealing lip causes dry-start friction. The intense heat generated during initial startup can melt, warp, or tear the rubber lip within the first few minutes of operation, leading to immediate failure.
- Ignoring the Bore Condition: Installing a pristine new seal into a dirty, rusty, or deeply scored bore guarantees a leak path. The outer diameter of the seal cannot conform to deep scratches or pitting in the housing wall, allowing fluid to weep around the outside of the seal.
Post-Installation Verification and Testing
Perform a thorough visual and tactile inspection of the installed seal. Check that the seal is seated evenly around its entire circumference and lies flush or at the exact depth specified in the service manual. Look closely for any signs of distortion, rubber tears, or a displaced garter spring.
Carefully reinstall the surrounding shafts and components. When sliding a shaft through the new seal, guide it straight and smoothly. Avoid forcing it at an angle, which can roll the rubber lip backward or tear it on sharp splines or keyways. If the shaft has sharp edges, cover them temporarily with thin plastic or electrical tape before sliding the seal over them.
Refill the system with the fresh, manufacturer-approved fluid to the correct level. Start the engine or machinery and allow it to reach normal operating temperature. Monitor the seal area closely for any signs of weeping, dampness, or active leaks. Perform a final inspection after a short test drive or operation cycle.
Frequently Asked Questions (FAQ)
Can I use a socket instead of a dedicated oil seal installer?
While a deep-well socket of the exact same outer diameter can occasionally work in an emergency, it is highly risky. Sockets often have tapered edges, lack a flat driving face, and can easily slip, applying uneven pressure that can crush the inner rubber lip or cock the seal. Using a dedicated oil seal installer is always recommended for a damage-free, professional-grade repair.
Which way does the oil seal lip face if there is fluid on both sides?
In standard automotive setups, the sealing lip faces the primary fluid chamber. In dual-fluid or separation applications—such as between engine oil and transmission fluid—the orientation is determined by which fluid operates under higher pressure or by specific manufacturer engineering designs. You must always consult the official factory service manual to verify the correct orientation for these specialized configurations.
Community discussion
Share your experience or ask a question. Comments are reviewed before publication.