
Applying EGR cleaner to a motorcycle engine is an effective way to remove stubborn carbon deposits, varnish, and gum that accumulate in the intake tract over time. Because most small-displacement motorcycles and automatic scooters do not actually feature an Exhaust Gas Recirculation (EGR) valve, riders typically use these specialized chemical cleaners to target the throttle body, intake valves, and combustion chamber. To perform this maintenance safely, you must verify your engine’s configuration, prepare a clean and well-ventilated workspace, and apply the cleaner according to the product label’s precise instructions. Taking a methodical approach ensures you restore smooth idle and throttle response without damaging sensitive electronic sensors, rubber seals, or internal engine components.
Verify Engine Configuration and Cleaner Compatibility
Before purchasing or applying any chemical cleaner, you must understand your motorcycle’s specific engine design. While automotive engines frequently use EGR valves to recirculate exhaust gases and reduce emissions, the vast majority of motorcycles and scooters—especially the underbone and automatic models common in tropical, high-traffic environments—rely on simpler emission control systems. Instead of an EGR valve, these bikes often use crankcase ventilation systems that route oily vapors back into the airbox, or secondary air injection systems that introduce fresh air into the exhaust port. Over time, these oily vapors combine with airborne dust to form a sticky carbon film inside your throttle body and on the intake valves, which restricts airflow and degrades engine performance.
To determine the correct cleaning targets, consult your motorcycle’s owner’s manual or official service documentation. This documentation will help you locate the throttle body or carburetor, identify the position of sensitive electronic sensors, and understand how the intake tract is assembled. Never assume that a cleaning procedure for one motorcycle model applies directly to another, as sensor placement and intake designs vary significantly between manufacturers and model years.
Products mentioned in this guide
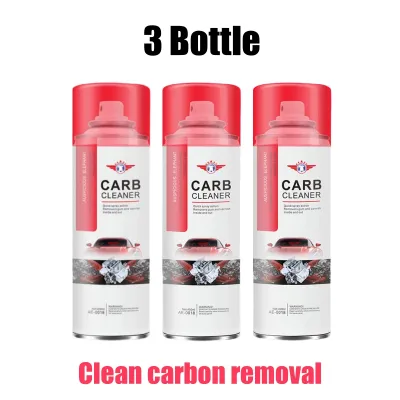
Prices are valid at publication and may change. Please refer to the product page for the latest price.
Once you have identified your engine’s layout, carefully read the product label of your chosen EGR cleaner to verify its compatibility. Because motorcycle engines utilize a high concentration of lightweight plastics, delicate rubber O-rings, and sensitive electronic sensors within their intake tracts, you must ensure the chemical formula is explicitly rated as safe for these materials. Some heavy-duty automotive cleaners contain highly aggressive solvents that can swell rubber seals, dissolve plastic components, or strip protective coatings from throttle shafts. If the product label does not explicitly state that it is safe for motorcycle intake systems or sensitive electronic sensors, do not use it; instead, select a dedicated throttle body or intake cleaner designed for motorcycle applications.
Prepare Tools and Establish Safety Boundaries
Working with pressurized chemical solvents requires a strict commitment to safety and proper preparation. Before beginning the application process, gather the necessary personal protective equipment (PPE), including chemical-resistant gloves and safety glasses. These solvents can cause severe skin irritation and eye damage upon contact, making physical protection essential. Additionally, ensure your workspace is highly ventilated. Performing this maintenance outdoors or in an open-air garage is highly recommended, particularly in warm, humid climates where chemical fumes can quickly concentrate in enclosed spaces.

The temperature of your engine is another critical safety factor. Consult the cleaner’s product label to determine the recommended engine temperature for application. Generally, the engine should be warm to the touch but never hot. Applying cold chemical solvents to an extremely hot engine block or cylinder head can cause rapid thermal contraction, potentially leading to warped components or cracked metal. Furthermore, spraying volatile chemicals onto hot exhaust pipes or engine surfaces presents a severe fire hazard.
Before spraying any chemicals, take active steps to protect your motorcycle’s exterior. Strong solvents can permanently stain, discolor, or dissolve painted fairings, ABS plastic bodywork, and rubber hoses. Cover the surrounding areas of the bike with clean, heavy-duty shop towels or plastic sheeting to catch any accidental overspray or drips. If you are uncomfortable working around sensitive electrical connectors, fuel lines, or intake components, or if your motorcycle is still under warranty, consider consulting a qualified professional mechanic before proceeding with any DIY chemical application.
Apply Direct Spray to the Intake and Throttle Body
To begin the direct cleaning process, refer to your motorcycle’s service manual to gain clear access to the intake tract. On most automatic scooters, this requires removing the under-seat utility box or side body panels to expose the engine bay. Once the engine is accessible, carefully disconnect the air intake duct or boot from the throttle body or carburetor inlet. This will expose the throttle plate, which is the primary target for removing sticky carbon and varnish buildup.
When applying the spray, strictly follow the product label’s instructions regarding spraying distance, angle, and engine state. Some manufacturers instruct you to spray the cleaner directly onto the throttle plate with the engine turned off, allowing the solvent to dissolve the deposits before wiping them away with a lint-free microfiber cloth. Other products require the engine to be idling at normal operating temperature, directing you to spray the cleaner in short, controlled bursts into the intake throat while manually modulating the throttle to prevent the engine from stalling.
You must exercise extreme caution to avoid spraying the chemical directly onto sensitive electronic sensors. Modern fuel-injected motorcycles utilize a variety of sensors, such as the Throttle Position Sensor (TPS), Manifold Absolute Pressure (MAP) sensor, and Intake Air Temperature (IAT) sensor, which are often mounted directly inside or adjacent to the throttle body. Unless the cleaner is explicitly certified as sensor-safe, direct contact with the solvent can strip internal lubricants, damage delicate diaphragms, or cause electrical short circuits. Always aim the spray straw past these sensors directly toward the throttle plate and intake valves.
After applying the spray, observe the exact dwell time specified on the product packaging. This waiting period allows the active chemical agents to penetrate and dissolve hardened carbon deposits. Do not exceed the recommended dwell time, as prolonged exposure to concentrated solvents can begin to degrade rubber seals or cause the dissolved carbon to re-harden in hard-to-reach passages.
Apply Fuel Tank Additive Method (If Directed by Label)
If your chosen product is formulated as a fuel system treatment rather than a direct spray, the application process moves from the intake tract to the fuel tank. This indirect cleaning method is highly convenient but requires precise execution to ensure safety and effectiveness. First, verify that the product label explicitly states the chemical is safe for fuel tank mixing and compatible with motorcycle fuel systems. Never pour a standard aerosol intake spray into your fuel tank unless the manufacturer specifically directs you to do so.
Because motorcycle fuel tanks are significantly smaller than automotive tanks—often holding only a few liters of fuel—you must calculate the correct fuel-to-cleaner ratio with extreme care. Pouring an entire bottle of concentrated cleaner designed for a large passenger car into a small motorcycle tank can create an overly concentrated mixture. This highly concentrated solvent can degrade fuel pump seals, soften rubber fuel lines, and cause fuel injectors to malfunction. Use a precise measuring cup to add only the exact volume of cleaner recommended for your specific fuel volume.
For optimal mixing, determine the correct fuel level specified by the product instructions. It is generally best to add the measured chemical additive to a nearly empty tank right before filling up at the gas station. The rushing fuel from the pump nozzle will thoroughly mix the additive with the gasoline, ensuring a consistent dilution throughout the tank. Keep in mind that while fuel additives are excellent for cleaning fuel injectors, carburetor jets, and the combustion chamber, they do not clean the throttle plate or the upstream side of the intake valves, as the fuel mixture is introduced downstream of these components.
Execute Post-Cleaning Engine Run and Verification
Once the cleaning application is complete and all intake ducting, clamps, and sensors are securely reassembled according to your service manual, it is time to start the engine. When you first turn the key and start the motorcycle, expect a temporary period of rough idling, hesitation, or minor misfires. It is also entirely normal to see white or grey smoke exiting the exhaust pipe for a few minutes. This smoke is the visual result of the engine burning off the dissolved carbon deposits, varnish, and residual solvent that accumulated in the combustion chamber during the cleaning process.
To safely clear these residues, follow the product label’s specific instructions for post-cleaning operation. Some products recommend letting the engine idle for several minutes until the exhaust smoke clears, while others advise taking the motorcycle for a gentle test ride or performing moderate engine revving to help expel the remaining chemical deposits. Avoid aggressive riding, high-speed acceleration, or redline revving during this initial warm-up cycle, as the engine needs time to stabilize its air-fuel mixture.
As the engine runs, closely monitor the instrument cluster for any warning indicators, such as a persistent check engine light or Malfunction Indicator Light (MIL). Listen carefully for abnormal engine noises, such as metallic knocking, pinging, or severe throttle hesitation. If any of these symptoms persist after the exhaust smoke has cleared, turn off the engine immediately. Do not attempt to ride the motorcycle; instead, transport the vehicle to a qualified professional service center or consult a certified mechanic to diagnose and resolve the issue.
Frequently Asked Questions (FAQ)
Can I use automotive EGR cleaner on my scooter?
Using automotive-grade EGR cleaners on a scooter poses significant compatibility risks. These heavy-duty automotive chemicals are formulated with highly concentrated, aggressive solvents designed to cut through massive carbon deposits in cast-iron or steel car engines. Scooter engines, by contrast, utilize much smaller, lighter components that rely heavily on plastic intake manifolds, delicate rubber O-rings, and sensitive electronic sensors. Applying a harsh automotive solvent can quickly degrade these softer materials, leading to air leaks, ruined seals, and costly sensor failures that can easily run into thousands of pesos ₱. Always verify that the product label explicitly states it is safe for motorcycles and scooters, or use a dedicated motorcycle-specific intake cleaner.
How often should I clean the motorcycle intake system?
There is no single, universal mileage interval for cleaning your motorcycle’s intake system. Instead, you should consult your motorcycle’s owner’s manual and follow the manufacturer’s scheduled maintenance chart for throttle body and intake inspections. Your actual cleaning frequency will depend heavily on your local riding conditions. If you frequently ride in highly congested urban areas with heavy stop-and-go traffic, or on dusty, unpaved rural roads, airborne contaminants and oily crankcase vapors will accumulate much faster. Under these demanding conditions, performing a visual inspection of the throttle plate every few thousand kilometers is a wise practice to determine if a chemical cleaning is necessary.
Community discussion
Share your experience or ask a question. Comments are reviewed before publication.