
To use oil seal removal tools without damaging the housing bore, you must apply controlled, perpendicular force directly to the seal’s metal casing while keeping the hardened steel tip of the puller completely away from the machined walls of the bore. The secret lies in using a dedicated puller, keeping the tool perfectly centered, and never using the soft edge of the housing as a leverage point.
DIY automotive maintenance in the Philippines often involves dealing with stubborn fluid leaks. The combination of intense tropical heat, high humidity, and seasonal flooding can accelerate the degradation of rubber seals on engines, transmissions, and axles. While replacing a worn seal is a common task, a single slip during the removal process can turn a simple repair into an expensive mechanical nightmare. Understanding how to handle your extraction tools safely is the key to preserving your vehicle’s components.
Why Careful Oil Seal Removal Matters for Your Engine
An oil seal is designed to form a tight, dynamic barrier that retains vital lubricants inside your engine or transmission while keeping road dirt, moisture, and debris out. To achieve this, the outer metal or rubber-clad casing of the seal relies on a perfectly smooth, round, and unmarred housing bore to create a static, leak-free press-fit. Even a microscopic gap between the seal and the bore will allow pressurized oil to escape.
Products mentioned in this guide
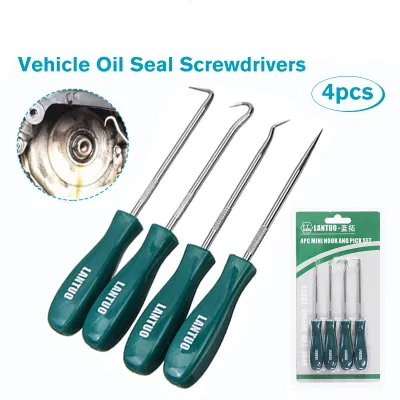
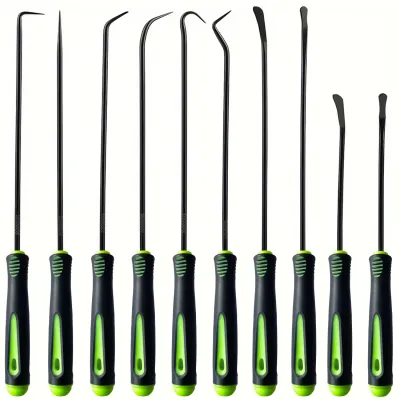
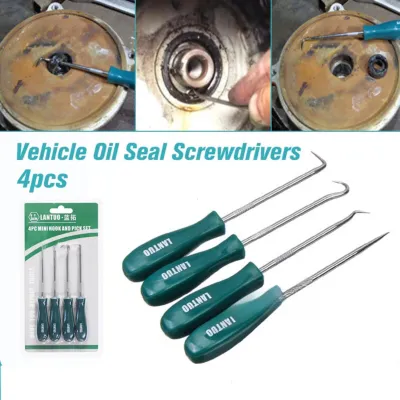
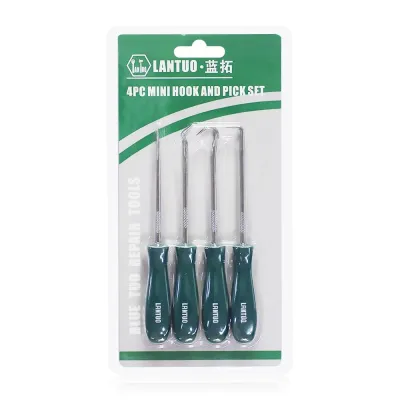
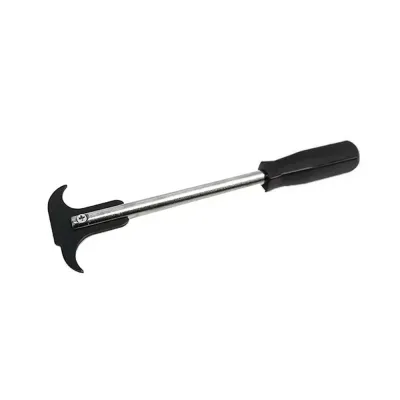
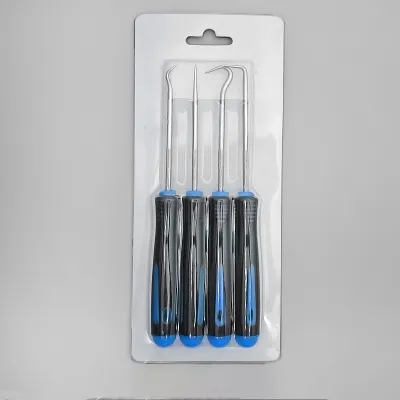
Prices are valid at publication and may change. Please refer to the product page for the latest price.
If you scratch, gouge, or nick the machined surface of the housing bore during the removal process, you create a direct path for fluids to bypass the new seal. This leads to persistent oil leaks that no new seal can fix. Over time, these leaks can cause a drop in system pressure, contaminate nearby components like timing belts or brake pads, and ultimately lead to severe mechanical failure.
In modern vehicles, many engine front covers, oil pump housings, and transmission casings are made of cast aluminum. Aluminum is a relatively soft metal that is easily damaged by the hardened steel typically used to manufacture automotive tools. A deep scratch in an aluminum bore cannot easily be filled or repaired. In many cases, a damaged housing means you must replace the entire component, costing you thousands of Philippine Pesos (₱) in replacement parts and extensive professional labor.
This guide focuses on standard automotive oil seals that are accessible during routine DIY maintenance, such as camshaft seals, crankshaft seals, and axle shaft seals. When working on these components, precision and patience are far more critical than brute force. Taking your time to set up and execute the extraction safely will save you from costly secondary repairs.
Essential Tools and Setup for Safe Seal Extraction
Using the correct tools is the first line of defense against housing damage. Improvised tools lack the design features necessary to isolate pulling forces from the delicate walls of the bore. Investing in or renting dedicated oil seal removal tools ensures that you can apply force safely and efficiently.

- Hook-Type Seal Pullers: These classic tools feature a t-handle and a dual-sided hook head. The hooks are specifically contoured to slip behind the inner metal rim of the seal, allowing you to pry it out using an external pivot point.
- Slide Hammer with a Seal Puller Attachment: This tool is highly effective for recessed seals where space allows a straight-line pulling motion. The slide hammer uses kinetic energy to pull the seal straight out, minimizing the risk of lateral scraping.
- Internal or External Jaw Pullers: For larger seals or seals pressed into deep shafts, jaw-style pullers grip the inner lip of the seal and use a center forcing screw to extract it evenly.
In addition to your primary extraction tools, you will need several supporting items to ensure a clean and safe job. Gather high-quality automotive brake cleaner or degreaser, lint-free shop towels, a bright work light, and safety glasses. A bright light is especially important, as it allows you to clearly see the tiny gap between the seal casing and the housing bore.
Before beginning, prepare a clean, well-organized workspace. In humid tropical climates, sweat and condensation can make tools slippery and obscure your vision, so ensure you have adequate ventilation and a clean cloth to dry your hands and tools. Ensure the vehicle is securely supported on jack stands on a flat, level concrete surface.
Always verify your vehicle’s specific model, year, interface dimensions, and mounting positions using the manufacturer’s official documentation before purchasing replacement seals or starting the job. Because working on seals often requires disassembling components linked to the timing system, steering, or drivetrain, consult your vehicle’s original service manual for safety boundaries and torque specifications. If you are uncomfortable with complex disassembly, seek qualified professional installation.
Step-by-Step Guide to Removing the Seal Without Scratching
Inspecting and Cleaning the Work Area
Begin by thoroughly cleaning the exterior of the seal and the surrounding housing. Spray the area with an authorized automotive brake cleaner or degreaser to dissolve caked-on road grime, grease, and dirt. Wipe the area completely dry with lint-free shop towels. Removing this debris prevents abrasive particles from falling into the engine or getting trapped between your tool and the housing bore.
Once the area is clean, inspect the seal lip and the surrounding bore interface under a bright light. Look for any existing damage, signs of corrosion, or previous repair attempts. If the outer metal ring of the seal is rusted or tightly bound to the housing, apply a small amount of penetrating oil specifically to the seam where the seal meets the bore. Let the oil sit for several minutes to break down rust and reduce friction before attempting extraction.
Positioning the Puller to Protect the Bore
Select the correct hook size on your seal puller that matches the gap between the shaft and the seal’s inner metal casing. Carefully slip the hook tip behind the inner metal rim of the seal. Ensure the hook grips the solid metal backing of the seal firmly, rather than just the soft rubber sealing lip, which will simply tear away under pressure.
Keep the tool’s shaft perfectly centered and perpendicular to the bore. If the tool is held at an angle, the pulling force will be uneven, which can cause the hook to slip or scrape against the bore wall.
Never let the hardened steel tip, hook, or jaws of your puller rest against or scrape the soft aluminum or machined steel of the housing bore. The housing metal is almost always softer than the tool, and even light pressure can leave a permanent gouge. If necessary, place a thin piece of brass, plastic, or a thick scrap of leather between the tool and the housing to act as a protective shield.
Extracting the Seal with Controlled, Even Force
If you are using a slide hammer tool, use smooth, consistent, and moderate taps rather than violent, heavy yanks. Violent pulling can cause the hook to slip out of the seal and slam directly into the delicate bore wall. The weight of the slide hammer should do the work through steady, repeated momentum.
For standard hook pullers, apply steady, controlled leverage. If you must leverage the tool against the engine block, place a small block of wood or a thick rag on a non-machined, structural part of the engine to act as a fulcrum. Never pry directly against the thin, machined edge of the housing bore. If you are using a screw-type jaw puller, turn the center screw slowly and evenly, checking frequently to ensure the seal is sliding out straight.
If the seal begins to tilt sideways, binds heavily, or if your tool slips even slightly, stop immediately. Relieve all tension, reposition the tool, and reassess the angle. Forcing a crooked seal will almost certainly damage the bore or the shaft. Take a moment to realign the tool and apply pressure to the opposite side of the seal to straighten it out.
Common DIY Mistakes and When to Stop
The most common mistake DIYers make is using improvised tools. Flathead screwdrivers, cold chisels, or standard pry bars should never be used to pry out oil seals. These tools have sharp, unguided edges that easily slip and gouge the soft metal housing, creating direct leak paths that a new seal cannot close.
Another frequent error is using the thin, machined edge of the housing bore as a direct fulcrum point for leverage. Prying against this edge can easily chip, warp, or crack the housing, especially if it is made of cast aluminum. Always distribute the load using a wider, non-machined surface or a protective block.
Knowing when to stop is a critical part of successful DIY maintenance. You should stop and consult a professional mechanic if you encounter any of the following situations:
- The seal is completely seized due to severe galvanic corrosion or old thread-locking compound, and will not budge under reasonable force.
- The removal tool repeatedly slips or cannot get a secure grip because the metal backing of the seal has completely degraded or rusted away.
- The housing already shows signs of deep, pre-existing scoring, cracking, or warping from a previous poor repair.
Forcing a heavily stuck seal with excessive force can crack brittle engine covers, warp critical mating surfaces, or damage adjacent bearings, leading to repairs that far exceed the cost of professional assistance.
Post-Removal Bore Inspection and Preparation
Once the old seal is successfully removed, run a clean, lint-free cloth or a bare finger carefully around the inside of the housing bore. Feel for any microscopic burrs, sharp ridges, or scratches that could damage the outer casing of the new seal during installation.
Clean the bore thoroughly one more time with an authorized brake cleaner to remove any old oil, residual sealant, dirt, or metal shavings. Ensure the cleaner is fully evaporated and the surface is completely dry.
If you find very minor surface imperfections or light corrosion, you can gently polish the area using a fine, non-metallic abrasive pad soaked in clean engine oil. Never use coarse sandpaper or steel files, which will remove too much metal and ruin the press-fit tolerance. If there are deep scratches or gouges that you can catch with a fingernail, the housing may require professional machining, a specialized repair sleeve, or complete replacement.
Before proceeding to install the new oil seal, perform a final verification. Ensure the bore is completely dry, smooth, clean, and free of any chemical or abrasive residue. Check the manufacturer’s instructions for your new seal to determine if it should be installed dry or with a light coat of clean engine oil or sealant before pressing it into place.
Community discussion
Share your experience or ask a question. Comments are reviewed before publication.