
Testing your brake fluid is one of the most critical yet frequently overlooked maintenance tasks for any vehicle owner. Over time, brake fluid naturally absorbs moisture from the atmosphere, which lowers its boiling point and compromises your stopping power. While many car owners rely on basic visual checks, using a high-precision digital refractometer like the Difluid Omni offers a modern, scientific approach to analyzing fluid concentration and quality.
Before performing any testing, always consult your vehicle’s owner’s manual to confirm the recommended fluid type and safety protocols. If you find any discrepancies between this guide and your vehicle manufacturer’s official documentation, always defer to the manufacturer’s instructions.
Tool Suitability and Critical Safety Boundaries
Understanding how your testing tools work is essential for maintaining a safe braking system. Digital refractometers like the Difluid Omni measure the refractive index of a liquid, which indicates how light bends as it passes through the substance. This measurement is highly accurate for determining concentration levels in specific solutions, such as sugar content (Brix) or water-to-coolant ratios.
Products mentioned in this guide
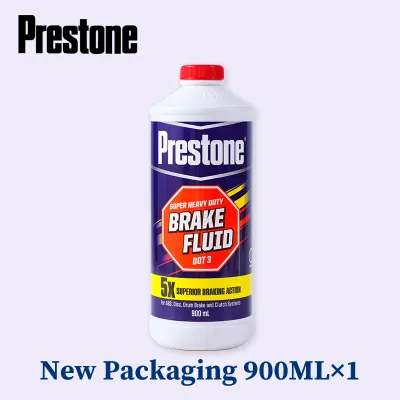
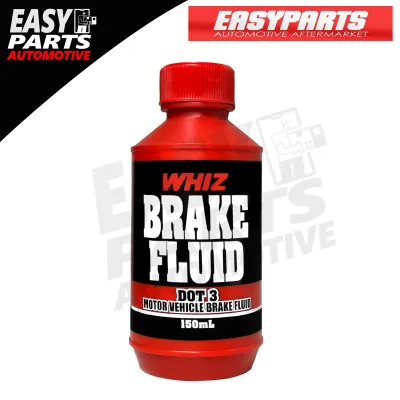
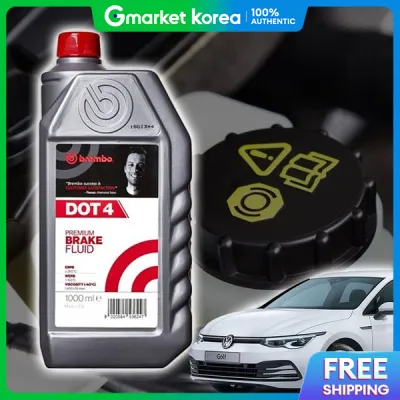
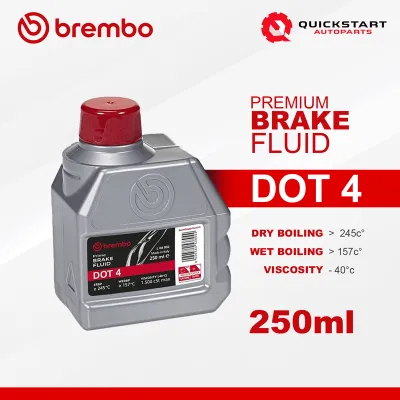
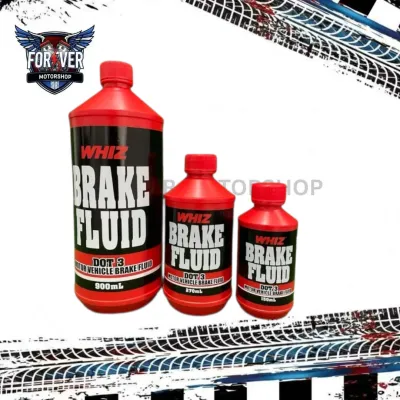
Prices are valid at publication and may change. Please refer to the product page for the latest price.
Standard brake fluid testing, however, typically relies on different physical properties. Traditional automotive workshops use electrical conductivity pens to estimate water content, or dedicated boiling point testers that heat the fluid to its actual boiling limit. Because brake fluid degradation is directly tied to its wet boiling point, conductivity and thermal testing remain the industry standards for safety-critical diagnostics.
To use the Difluid Omni safely for this task, you must first verify its compatibility. Check the manufacturer’s user manual or official software updates to confirm if the device features a dedicated “Brake Fluid” or moisture-testing mode. Relying on a generic Brix scale or an uncalibrated concentration profile to evaluate brake safety can produce misleading readings, putting your vehicle at risk.
Safety must be your top priority when handling these chemicals. Both DOT3 and DOT4 brake fluids are glycol-ether-based compounds that are highly toxic if swallowed and highly corrosive to automotive paint. Always wear protective eyewear and chemical-resistant nitrile gloves, and keep a clean, damp microfiber cloth nearby to instantly clean up any accidental spills on your vehicle’s bodywork.
Preparing Your Vehicle and the Difluid Omni
Accurate testing requires a clean environment and a stabilized vehicle. Park your car on a level surface in a well-ventilated area, away from direct wind that could blow dust into your open brake reservoir. Ensure that the engine has been turned off and the entire brake system is completely cool to the touch before opening any caps.

High humidity accelerates moisture absorption when the hydraulic system is exposed to the air. In tropical environments like the Philippines, where relative humidity levels frequently exceed 80 percent, you must work quickly to minimize the time the reservoir remains open. Excess ambient moisture entering the reservoir during a prolonged test can skew your future readings and accelerate fluid degradation.
Before drawing any fluid, thoroughly clean the reservoir cap and the surrounding engine bay. Use a clean rag to wipe away road grime, grease, and dust from the cap edges. This simple step prevents microscopic debris from falling into the reservoir, which could damage the sensitive internal seals of your master cylinder.
Next, prepare your testing equipment. Calibrate the Difluid Omni using pure distilled water at room temperature, following the manufacturer’s zero-calibration sequence. Gather all your necessary supplies beforehand: a clean plastic pipette or syringe, lint-free microfiber wipes, distilled water for cleaning, and your protective gear.
Step-by-Step Sampling and Testing Process
Follow this precise sequence to extract your fluid sample, perform the measurement, and clean your equipment without contaminating your vehicle’s braking system.
Step 1: Open the Reservoir Carefully unscrew the reservoir cap. Place a clean, dry shop towel or microfiber cloth directly underneath the reservoir neck to catch any stray drops of fluid that might drip during the extraction process.
Step 2: Extract the Sample Insert a clean, unused plastic pipette or syringe into the middle section of the reservoir. Avoid drawing fluid from the very bottom, where heavy sediments and microscopic metal wear particles often settle, as this can clog your pipette or scratch the refractometer’s prism.
Step 3: Apply Fluid to the Prism Place two to three drops of the extracted brake fluid directly onto the glass prism of the Difluid Omni. Ensure the fluid covers the entire surface of the prism uniformly, without creating any air bubbles, which can distort the light path and cause inaccurate readings.
Step 4: Take the Measurement Activate the measurement function on your device. Wait a few seconds for the reading to stabilize on the screen, and write down the resulting percentage or refractive index value for your records.
Step 5: Clean the Equipment Immediately after taking the reading, use a clean pipette to flush the prism with distilled water. Wipe the glass surface gently with a soft, lint-free microfiber cloth to remove all chemical residue, ensuring you do not scratch the optical coating.
Step 6: Reseal the System Replace the reservoir cap immediately and tighten it securely to prevent further moisture absorption. Wipe down the exterior neck of the reservoir with a damp cloth to ensure no corrosive residue remains on the plastic housing.
DOT3 vs. DOT4: Interpreting Moisture and Fluid Health
Interpreting your test results requires an understanding of the chemical differences between DOT3 and DOT4 fluids. Both types are hygroscopic, meaning they actively attract and absorb water from their surroundings. However, DOT4 fluid is formulated with borate esters, which allow it to maintain higher dry and wet boiling points than DOT3, making it better suited for heavier vehicles or demanding driving conditions.
As moisture content rises, the boiling point of the fluid drops dramatically. Under heavy braking—such as driving down steep mountain roads or navigating stop-and-go traffic in intense tropical heat—the heat generated can cause water-laden fluid to boil. This creates vapor pockets within the brake lines, leading to a spongy brake pedal and a dangerous loss of stopping power known as vapor lock.
When evaluating your digital readings, look for specific moisture thresholds if your device has a certified brake fluid testing mode. Industry standards generally indicate that brake fluid containing less than 2 percent water is in good condition. Readings between 2 percent and 3 percent serve as a warning that degradation is occurring, while any reading exceeding 3 percent to 4 percent indicates the fluid must be replaced immediately.
Digital readings should always be paired with a visual inspection. If the fluid in your reservoir appears dark brown, cloudy, or contains visible black particles, it has severely degraded and lost its corrosion inhibitors. In these cases, you must flush and replace the fluid immediately, regardless of what your digital tester displays.
Next Steps: When to Flush or Seek Professional Help
Regular preventive maintenance is the best way to ensure your vehicle remains safe on the road. Most automotive manufacturers recommend flushing your brake fluid completely every two years, regardless of your mileage. This interval helps protect your calipers, master cylinder, and anti-lock braking system (ABS) components from internal rust and corrosion.
If your test results indicate high moisture levels or the fluid fails a visual inspection, a complete system flush is required. This process involves pushing fresh fluid through the lines while bleeding out the old, contaminated fluid at each wheel caliper. Because air bubbles in the system can cause sudden brake failure, this procedure must be performed with extreme care.
There are several critical scenarios where you should stop your DIY efforts and seek professional assistance. If your reservoir is empty or exceptionally low, you likely have a hydraulic leak that requires immediate diagnosis by a certified mechanic. Additionally, if you do not have a testing device with a verified, manufacturer-approved brake fluid mode, do not guess the safety of your vehicle.
Taking your car to a professional service center ensures your brakes are evaluated using certified boiling point equipment. A professional technician can safely bleed your system, check for leaks, and dispose of the highly toxic old fluid in an environmentally responsible manner, keeping your vehicle safe and road-legal.
Frequently Asked Questions (FAQ)
Can a generic refractometer accurately measure brake fluid moisture?
No, a generic refractometer designed for sugar (Brix) or engine coolant (ethylene glycol) cannot reliably measure brake fluid moisture. These devices are calibrated for different chemical structures and refractive indices. Attempting to use a non-specialized mode to evaluate brake fluid can result in highly inaccurate readings, creating a false sense of security regarding your vehicle’s braking safety.
What is the standard replacement interval for DOT3 and DOT4 fluids?
Most vehicle manufacturers recommend replacing DOT3 or DOT4 brake fluid every two years, or roughly every 30,000 to 50,000 kilometers. Because glycol-ether fluids continuously absorb moisture through microscopic pores in the rubber hoses and seals, the fluid degrades over time even if the vehicle is not driven frequently. Always consult your vehicle’s specific owner’s manual to verify the correct interval for your model.
Community discussion
Share your experience or ask a question. Comments are reviewed before publication.