
Upgrading a motorcycle’s exhaust system is one of the most popular modifications for riders looking to customize their vehicle’s sound, weight, and aesthetic. However, selecting a universal pipe for motorcycle upgrades requires careful planning because the term “universal” does not mean a guaranteed, plug-and-play fit. A mismatch in dimensions can lead to exhaust leaks, poor engine performance, or expensive structural damage.
To ensure a successful installation, you must verify several key physical dimensions, check frame clearances, and understand the legal boundaries of your local riding environment. Taking precise measurements and evaluating your mechanical limits before making a purchase will save you time and prevent costly installation mistakes. This guide outlines the exact steps to verify compatibility and ensure your new exhaust operates safely and legally.
Measure Your Header to Fit a Universal Pipe for Motorcycle
Before browsing aftermarket options, you must understand how exhaust components connect. The connection relies on matching the outer diameter (OD) of your motorcycle’s existing header pipe with the inner diameter (ID) of the universal muffler’s inlet. The aftermarket slip-on pipe is designed to slide over the header, meaning the inlet ID of the new pipe must be slightly larger than, or a perfect slip-fit match to, the header’s OD.
Products mentioned in this guide
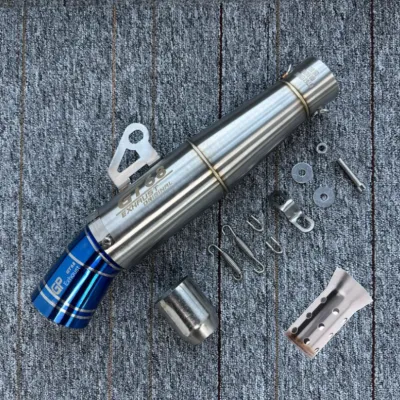
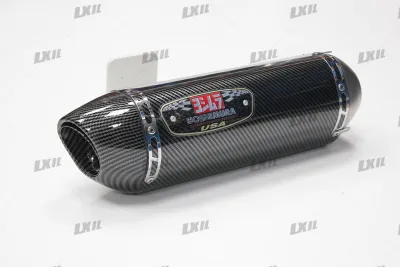
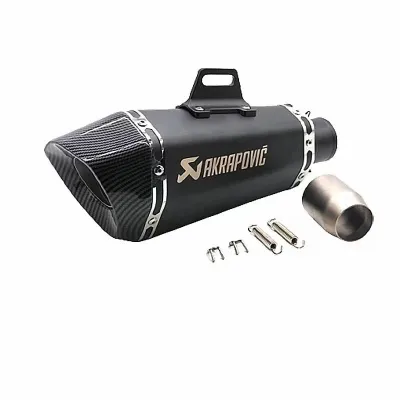
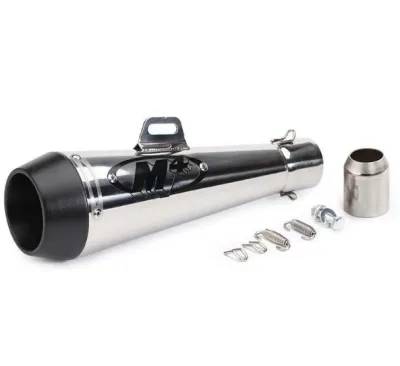
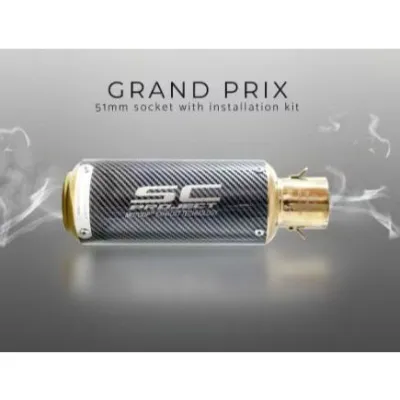
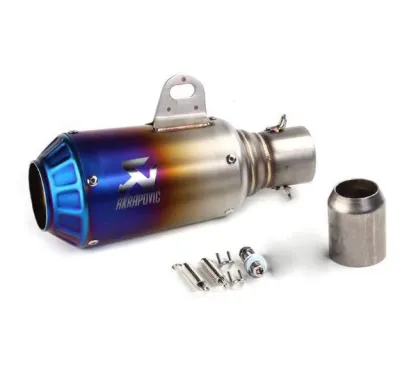
Prices are valid at publication and may change. Please refer to the product page for the latest price.
To obtain an accurate measurement, do not rely on a soft sewing tape or a standard ruler, as even a single millimeter of error can cause persistent exhaust leaks. Instead, use a digital or vernier caliper. Locate the exact junction where your stock muffler connects to the header pipe, loosen the mounting clamp, slide the muffler off, and measure the outermost edge of the bare header pipe.
Many universal mufflers are manufactured with standard inlet sizes, such as 51 millimeters or 38 millimeters. If your header pipe’s outer diameter does not match these standard sizes, you will need to use exhaust adapters, reducers, or metal expander rings to bridge the gap. Many universal kits include a stepped adapter, but you must verify that the adapter’s steps accommodate your specific header measurement.
Never guess your exhaust dimensions based on online forum posts or generic retail listings, as manufacturers often alter pipe specifications between model years. Always cross-reference your physical measurements with the specifications listed in your motorcycle’s official factory service manual. If the manual’s listed outer diameter matches your caliper reading, you can proceed with selecting a compatible inlet size.
Check Mounting Points and Frame Clearance Before Buying
An exhaust pipe must fit the physical envelope of your motorcycle’s chassis without contacting moving parts or bodywork. Begin by measuring the total length of the universal muffler you plan to buy, then project this length along your bike’s frame starting from the header connection point. Ensure the body of the new muffler does not extend past the rear tire or block the visibility of your rear turn signals.

Dynamic clearance is a critical safety factor that riders often overlook during static garage measurements. You must verify that the new pipe maintains adequate clearance from the rear swingarm, drive chain, rear brake caliper, and suspension components. Keep in mind that when you carry a passenger or hit a pothole, your rear suspension will compress fully, bringing these moving parts closer to the exhaust body.
Analyze how the universal pipe’s mounting bracket attaches to your motorcycle’s frame. Most universal mufflers utilize a sliding metal hanger strap lined with heat-resistant rubber, which allows some mounting flexibility along the body of the canister. You must locate an existing, secure frame tab—such as the passenger footpeg mount—to bolt this bracket to, or prepare to source a specialized aftermarket hanger bracket.
Avoid any installation plan that requires you to force, bend, or pull the exhaust header to align it with the new muffler’s mounting points. Forcing mismatched components together creates severe structural tension throughout the exhaust tract. Under the influence of engine vibrations and intense thermal cycles, this built-in stress will eventually cause header weld cracks, broken cylinder head studs, or dangerous exhaust gas leaks.
Understand Philippines Noise Limits and LTO Regulations
In the Philippines, modifying a motorcycle’s exhaust system is subject to strict regulatory oversight to control noise pollution. The Land Transportation Office (LTO) enforces specific administrative orders regarding modified mufflers, and various Local Government Units (LGUs) actively implement local ordinances against excessively loud motorcycles. Riding with an illegal or non-compliant exhaust can lead to heavy fines, roadside apprehension, and vehicle impoundment.
It is vital to understand that a “universal” fitment label only refers to physical mounting potential, not legal compliance. Many universal pipes are designed for closed-course racing or off-road use and lack the internal baffling required to meet street-legal noise limits. Before purchasing, check if the exhaust system includes a removable or integrated decibel-killer (dB-killer) or silencer baffle to help control the sound output.
When evaluating a universal pipe, look for manufacturer certifications or product documentation indicating compliance with international noise standards. While some high-quality aftermarket brands provide certified systems, budget universal pipes often require additional modification to remain quiet. If you are unsure about the legality of a specific exhaust profile, consult an LTO-accredited Motor Vehicle Inspection System (MVIS) center or a reputable local motorcycle association before riding on public roads.
Decide Between DIY Installation and a Professional Mechanic
A straightforward slip-on installation can be a rewarding do-it-yourself (DIY) project if certain conditions are met. If the universal pipe’s inlet matches your header perfectly, the mounting brackets align with your stock frame holes without modification, and the engine’s air-fuel delivery system does not require adjustment, you can complete the job with basic hand tools.
However, you should seek a professional mechanic or specialized exhaust fabricator if the installation requires cutting your stock one-piece exhaust system, welding custom mounting tabs, or adapting highly complex pipe angles. Professional assistance is also necessary if the new, free-flowing exhaust significantly alters engine backpressure, which requires carburetor rejetting or electronic fuel injection (EFI) remapping to prevent the engine from running dangerously lean.
Improperly installed exhaust systems carry severe safety risks that can compromise your motorcycle and your physical safety. A loose joint can leak odorless, toxic carbon monoxide directly toward your legs or face, while an unshielded pipe can melt nearby plastic fairings, brake lines, or electrical wiring harnesses. In worst-case scenarios, a structural bracket failure at highway speeds can cause the entire exhaust assembly to detach, endangering you and surrounding motorists.
If you choose to perform a DIY installation, always follow standard automotive assembly practices to ensure reliability. Use fresh, high-temperature exhaust gaskets or specialized sensor-safe exhaust sealant at all joint interfaces to prevent minor leaks. Apply a thin layer of copper anti-seize compound to the threads of all mounting bolts and header nuts, and use a torque wrench to tighten every fastener to the vehicle manufacturer’s exact torque specifications.
Perform Post-Installation Leak and Safety Checks
Once the universal exhaust is physically mounted, you must perform a series of safety checks before taking the motorcycle out for an extended ride. Start the engine in a well-ventilated outdoor area and let it idle. Do not rev the engine immediately; instead, listen closely near the connection joints for any high-pitched ticking, hissing, or puffing sounds that indicate an exhaust leak.
While the engine is idling, carefully pass your hand near the joints—without touching the hot metal surfaces—to feel for escaping exhaust pulses. Inspect the entire length of the exhaust pipe to confirm there is at least a finger’s width of clearance between the hot metal and any heat-sensitive components, such as plastic body panels, fuel lines, or wiring.
If the idling inspection is successful, perform a short, low-speed test ride in a controlled environment like a quiet neighborhood street. Listen for any unusual metallic rattling or vibrations, verify that the mounting bracket remains rigid, and monitor your motorcycle’s engine temperature gauge or dashboard warning lights for signs of overheating.
After completing the test ride, park the motorcycle and allow the engine to cool down completely. Thermal expansion and contraction during the first complete heat cycle can cause fresh metal components to seat and loosen slightly. Re-torque all mounting bolts, hanger clamps, and header nuts to ensure they remain fully secured and vibration-resistant.
Frequently Asked Questions (FAQ)
Will a universal exhaust change my motorcycle's fuel consumption and performance?
Yes, installing an aftermarket universal exhaust can alter both fuel consumption and engine performance. Most universal pipes feature a more open, less restrictive internal design than stock mufflers, which reduces backpressure and allows exhaust gases to escape more rapidly. While this can slightly improve high-RPM horsepower, it often leans out the engine’s air-fuel mixture.
If your engine runs too lean, it can suffer from hesitation, backfiring during deceleration, increased operating temperatures, and potential long-term valve damage. To maintain optimal performance, fuel efficiency, and engine safety, you may need to have a professional mechanic adjust your carburetor jets or remap your electronic fuel injection (EFI) system to match the increased airflow.
Do I need to wrap the universal exhaust pipe with heat tape?
Wrapping an exhaust pipe with heat-resistant tape is a personal preference that offers distinct trade-offs. Heat wraps help insulate the pipe, reducing the radiant heat directed toward your legs and nearby plastic fairings, which can make riding in slow-moving traffic more comfortable. However, in tropical climates with high humidity or frequent rain, heat wraps can trap moisture directly against the metal surface.
This trapped moisture accelerates rust and corrosion, particularly on non-stainless steel or thin-gauge universal pipes. Before applying heat wrap, consult the exhaust manufacturer’s guidelines, as wrapping the pipe can trap excessive heat within the metal, leading to premature structural failure and potentially voiding the product’s warranty.
Community discussion
Share your experience or ask a question. Comments are reviewed before publication.