
Finding the correct ignition coil for aerox v1 requires verifying the exact electrical resistance, physical mounting points, and connector pin configurations before finalizing your purchase. In the Philippines, where high humidity and heavy tropical rains put extra stress on your scooter’s electrical system, choosing the wrong component can lead to immediate ignition failure or long-term electrical damage. Simply relying on a product listing that claims to fit “all 155cc scooters” is a common mistake that often results in a mismatched part.
The Risks of Installing an Incompatible Ignition Coil
The ignition coil is a vital component of your Yamaha Aerox V1’s 12-volt electrical system. Its primary job is to act as a step-up transformer, taking the relatively low 12V current supplied by the battery and converting it into the high voltage necessary to bridge the gap of the spark plug. This high-voltage surge is what creates the strong, consistent spark required to ignite the fuel-air mixture in the combustion chamber under compression.
Installing an incompatible ignition coil poses immediate risks to your motorcycle’s performance. If the coil’s internal specifications do not match the factory requirements, you may experience weak sparks, frequent engine misfires, poor throttle response, or a complete failure to start. Over time, a mismatched coil can put excessive strain on your scooter’s electrical system, leading to the premature failure of adjacent ignition components.
Products mentioned in this guide
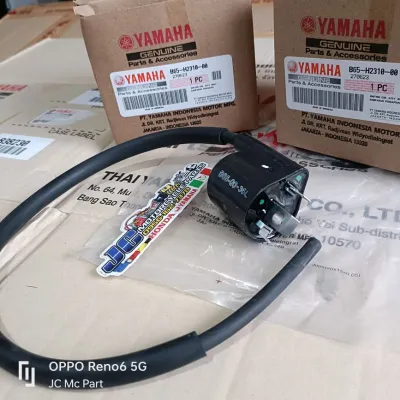
![[KV] Yamaha AEROX Genuine Ignition Coil Part # B65-H2310-02 from Indonesia](https://img.lazcdn.com/g/p/1888764f2650294d908ac5279cd089e1.jpg_400x400q80.jpg_.webp)
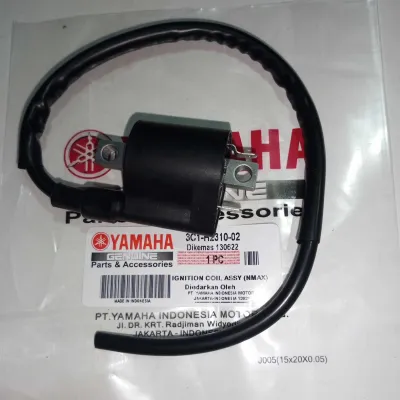
Prices are valid at publication and may change. Please refer to the product page for the latest price.
Most critically, an incorrect coil can cause severe, irreversible damage to the stock Capacitor Discharge Ignition (CDI) or Engine Control Unit (ECU) system. Because the CDI controls the timing and discharge of the electrical pulse to the coil, any mismatch in electrical resistance can cause back-voltage or excessive current draw. This can burn out the sensitive electronic circuits inside the CDI, leading to an expensive repair that far exceeds the cost of a proper ignition coil.
It is vital to understand that visual similarity does not guarantee electrical or physical compatibility. Many aftermarket ignition coils look nearly identical on the outside, featuring similar plastic housings and color schemes. However, their internal windings, resistance values, and pin configurations can differ drastically, making a thorough technical verification essential before installation.
Critical Specifications to Match With Your Aerox V1
To avoid buying a part that will not function safely, you must cross-reference the replacement coil’s technical specifications with the official Yamaha Aerox V1 service manual or reliable OEM documentation. Operating parameters must align perfectly with the factory baseline to ensure the scooter’s electrical system remains stable under various riding conditions.

Both electrical output and physical dimensions must match your stock setup. Modifying your scooter to accept a mismatched part often introduces points of failure, especially when riding through heavy rains or flooded streets common in the Philippines.
Electrical Parameters and Connector Pinout
The most critical factor in choosing an ignition coil for aerox v1 is the internal resistance of its primary and secondary windings. The primary resistance determines how much current the coil draws from the CDI system, while the secondary resistance dictates the strength of the spark sent to the spark plug. You must check the manufacturer’s technical sheet for these exact resistance ranges, as even a minor deviation can disrupt the ignition timing or overload the CDI.
Additionally, you must verify the connector type and pinout configuration. The Aerox V1 utilizes a specific plug interface that connects directly to the main wiring harness. You must ensure the replacement coil matches this connector design and utilizes the correct wire color coding. This allows for a direct, plug-and-play installation without the need for custom wiring adapters.
Never assume compatibility based solely on generic voltage ratings or marketing claims like “high-output” or “racing coil.” An ignition coil might be capable of producing high voltage, but if its primary resistance is too low, it will draw too much current and quickly overheat your wiring or damage the CDI.
Physical Mounting and High-Tension Lead
Beyond electrical specifications, the replacement coil must physically fit into the designated mounting space on the Aerox V1 frame. You should compare the mounting bracket design, bolt hole spacing, and overall dimensions of the aftermarket coil with your original OEM unit. A bracket that does not line up perfectly will prevent secure mounting, leaving the coil vulnerable to engine vibrations that can crack the housing or loosen electrical connections.
The high-tension (HT) lead, which carries the high-voltage current from the coil to the spark plug, is another critical component to inspect. Verify that the length of the HT lead on the replacement coil is sufficient to reach the spark plug without being stretched tight or routing near hot engine components. The spark plug cap interface must also match the terminal type of your spark plug to prevent moisture ingress and ensure a secure, weatherproof connection.
How to Verify Compatibility Before and After Purchase
Verifying compatibility is a two-stage process that begins during your online search and concludes with physical testing before the part is installed on your scooter.
Pre-Purchase Verification When browsing online marketplaces or local distributor catalogs, always start by looking for the OEM part number of the stock Yamaha Aerox V1 ignition coil. Cross-reference this number with the aftermarket product’s compatibility list. If the listing is vague, contact the seller directly and request clear, high-resolution photos of the electrical connector, the mounting bracket angles, and any printed model numbers on the coil body.
Visual Inspection Once the package arrives, do not immediately install it. Place the new ignition coil side-by-side with your old OEM unit on a clean workbench. Inspect the build quality of the plastic casing, ensuring there are no cracks, molding defects, or loose pins. Verify that the mounting bracket angles match exactly and that the connector pins are straight, clean, and positioned identically to the stock coil.
Multimeter Testing Before mounting the new coil or connecting it to your harness, use a digital multimeter to measure its electrical resistance. Set your multimeter to the low ohms scale to measure the primary resistance. Place the multimeter probes across the input connector pins and record the reading. Next, switch the multimeter to the high ohms scale to measure the secondary resistance by placing one probe on the input terminal and the other inside the spark plug cap or the HT lead terminal.
Compare these measured values directly against the acceptable ranges specified in your Yamaha Aerox V1 service manual. If the readings fall outside these limits, the coil is either defective or incompatible. Do not attempt to install it, as doing so could damage your scooter’s electrical system.
Electrical Safety Boundaries and Installation Rules
Working on your motorcycle’s ignition system requires strict adherence to safety protocols to prevent personal injury, electrical shocks, or damage to your vehicle’s sensitive electronics.
Before performing any work, always disconnect the negative battery terminal. This simple step eliminates the risk of accidental short circuits, sparks, or electrical surges that could damage the CDI or ECU while you are handling the ignition wiring.
Strictly avoid cutting, splicing, or modifying the main wiring harness or connector plugs to force an incompatible coil to fit your Aerox V1. Modifying the factory harness not only voids warranties but also introduces weak points that are highly susceptible to moisture intrusion, corrosion, and electrical fires.
If your multimeter measurements do not match the manufacturer’s specified ranges, or if the physical mounting requires excessive force, stop the installation immediately. Do not attempt to force the bracket into place or bend the mounting pins, as this can crack the internal insulation of the coil. Return the part to the seller and source a compliant replacement.
If you are unsure about interpreting the multimeter resistance values, diagnosing ignition issues, or handling the CDI connections, consult a qualified motorcycle mechanic. Professional installation ensures your scooter remains road-legal, safe, and reliable for your daily commute.
Frequently Asked Questions (FAQ)
This section provides quick answers to common compatibility and safety questions regarding the Yamaha Aerox V1 ignition system.
Can I use a universal ignition coil on my Aerox V1?
While some universal ignition coils are marketed as compatible with a wide range of motorcycles, they are generally not recommended for the Aerox V1. Universal coils often lack the precise primary and secondary resistance ratios required to match the stock CDI system, which can cause weak spark delivery or electrical strain. Additionally, they rarely feature the exact mounting bracket dimensions or connector plugs needed for a secure, plug-and-play fit on your scooter.
Will an incompatible ignition coil damage the CDI unit?
Yes, an incompatible ignition coil can permanently damage your CDI or ECU unit. If the replacement coil has a primary resistance that is too low, it will draw an excessive amount of current from the CDI, causing the internal electronic switches to overheat and burn out. Performing a quick pre-installation check with a digital multimeter is a simple, cost-effective way to protect your scooter’s expensive electronic control systems from damage.
Community discussion
Share your experience or ask a question. Comments are reviewed before publication.