
Upgrading your motorcycle horn is one of the most practical safety modifications you can make. A standard factory horn often lacks the volume needed to cut through ambient road noise, heavy rain, and the insulated cabins of modern cars. Installing a louder 12V motorcycle horn ensures you can alert other motorists instantly, but doing so requires a systematic approach to mounting and wiring to protect your bike’s electrical system. By understanding how to route power safely and when to use a relay, you can complete this installation successfully using basic hand tools.
Preparation and Safety Precautions
Before touching any wires, safety must be your primary focus. Working on a motorcycle’s electrical system carries a risk of short circuits, which can damage sensitive electronic control units (ECUs) or even cause electrical fires. Always start by turning off the ignition and disconnecting the negative terminal of the battery. This simple step breaks the electrical circuit, ensuring that any accidental contact between a live wire and the motorcycle frame will not cause a spark or short.
Next, consult your motorcycle’s service manual to verify the electrical capacity of your vehicle. Motorcycles have limited charging systems, powered by a stator that generates a specific amount of alternating current. You must ensure that your battery and stator can handle the current draw of the new horn, especially if you are upgrading to a high-draw dual-tone or air horn. If the new horn draws more current than your stock system can supply, you risk draining your battery during operation or damaging your charging system. If you are uncomfortable working with electrical wiring or modifying your vehicle’s harness, consult a qualified motorcycle technician before proceeding.
Products mentioned in this guide
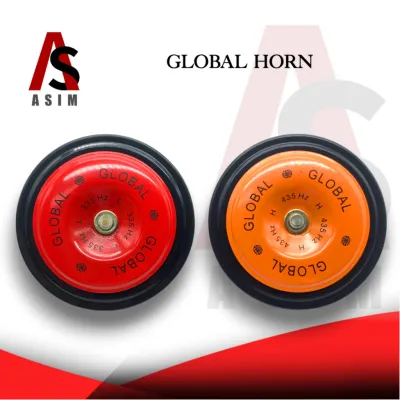
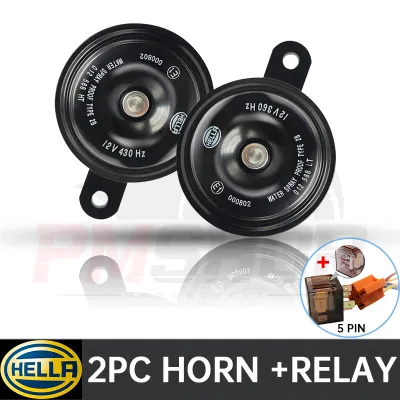
332 Lazada user ratings
High and low tone options, Perfect addition to my bike, Fits perfectly on my motorcycle, Easy installation, thank u seller very well packed,…Read full reviewShow less
High and low tone options, Perfect addition to my bike, Fits perfectly on my motorcycle, Easy installation, thank u seller very well packed, safe and secured ang items complete and wlang nwawala
Enhances safety on the road, Great value for money, Durable and long-lasting, Easy installation, Perfect addition to my bike, Impressive sou…Read full reviewShow less
Enhances safety on the road, Great value for money, Durable and long-lasting, Easy installation, Perfect addition to my bike, Impressive sound quality, Improves visibility, Improves visibility,
Enhances safety on the road, Impressive sound quality, Fits perfectly on my motorcycle, Easy installation, Loud and clear horn, Great value …Read full reviewShow less
Enhances safety on the road, Impressive sound quality, Fits perfectly on my motorcycle, Easy installation, Loud and clear horn, Great value for money, Perfect addition to my bike,
Great value for money, High and low tone options, Fits perfectly on my motorcycle, Enhances safety on the road,
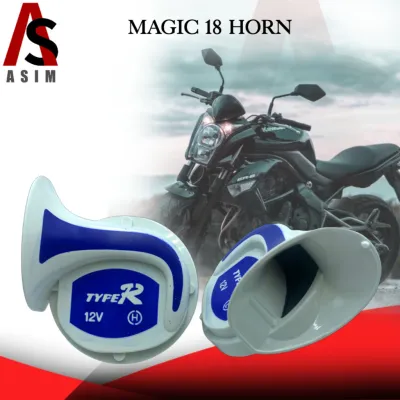
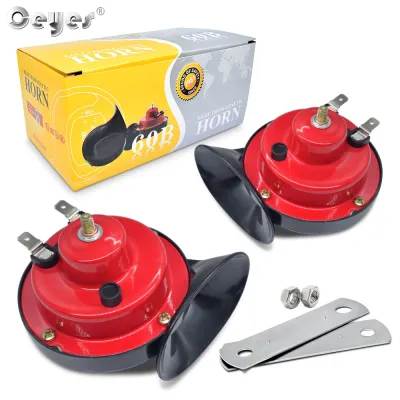
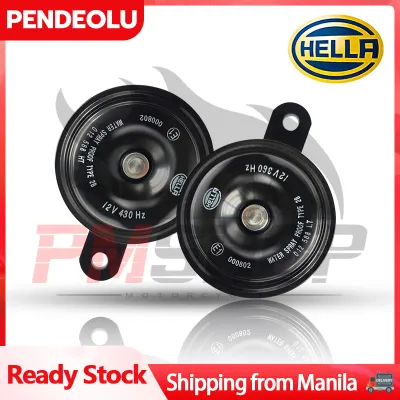
336 Lazada user ratings
🔧Ease of Installation: hindi maayos yung pagkapack hindi man lang nilagyan bubble wrap nakabukas na yung kahon sa loob nang plastic buti di …Read full reviewShow less
🔧Ease of Installation: hindi maayos yung pagkapack hindi man lang nilagyan bubble wrap nakabukas na yung kahon sa loob nang plastic buti di nabasag.
good... 🔧Ease of Installation:10 🎧Sound Quality:parang car 🛠️Durability:dont know kung ilang taon aabutin. mkinis nmn at maayos ang made
Enhances safety while driving!, Perfect for motorcycles and boats!, dahil dyan may 5 star ka sa akin seller⛤⛤⛤⛤⛤
lakas thank you seller
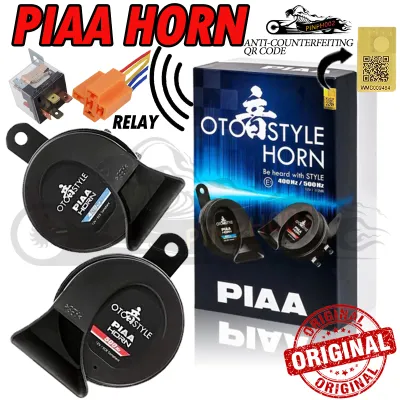
6,654 Lazada user ratings
Ideal for developing countries, Resistant to high temperatures and corrosion, 🛠️Durability:Excellent 🎧Sound Quality:not yet installed but I t…Read full reviewShow less
Ideal for developing countries, Resistant to high temperatures and corrosion, 🛠️Durability:Excellent 🎧Sound Quality:not yet installed but I think sounds is excellent 🔧Ease of Installation:It is easy to install when I see the appearance of the buzzer thanks Lazada, seller, courier and rider for recommending, quality materials, fast and safe delivery of the items...
High-quality horn for cars and motorcycles, Loud and attention-grabbing sound, Ideal for developing countries, Universal fit for various veh…Read full reviewShow less
High-quality horn for cars and motorcycles, Loud and attention-grabbing sound, Ideal for developing countries, Universal fit for various vehicles, Durable and reliable in extreme conditions, Resistant to high temperatures and corrosion, Enhances safety on the road, Easy to install and use,
Easy to install and use, 🎧Sound Quality:Enhances safety on the road, 🔧Ease of Installation:High-quality horn for cars and motorcycles,
Easy to install and use, Universal fit for various vehicles, 🛠️Durability:10/10 🎧Sound Quality:10/10 🔧Ease of Installation:10/10
wow anganda Ang bilis pa dumating salamat boss rider kahit nabasa kanang ulan talagang deliver mo talaga
3,737 Lazada user ratings
recieved na po agad, napaka bilis lang, kaka ship out lang kaninang madaling araw, na reciever na agad, kawawa lang yung box, good nmn ung i…Read full reviewShow less
recieved na po agad, napaka bilis lang, kaka ship out lang kaninang madaling araw, na reciever na agad, kawawa lang yung box, good nmn ung item, working din at malakas, ok narin para sa mutor, thanks seller lazada and rider
salamat po sa seller malakas po busina compare sa iba 5 star sana tumagal sa susunod na busina uli
Quality:Mukhang matibay Appearance:Maganda Performance:Hindi masyadong malakas pero ok na rin
maganda sya malakas Ang tunog 5star k skin, salamat Lazada at kay kuya rider...
Quality:good Appearance:nice Performance:to be tested the product later
1,107 Lazada user ratings
Quality:10 Appearance:10 Performance:10 High-quality horns for motorcycles and cars., Loud and attention-grabbing., Ideal for off-road use.,…Read full reviewShow less
Quality:10 Appearance:10 Performance:10 High-quality horns for motorcycles and cars., Loud and attention-grabbing., Ideal for off-road use., Durable and long-lasting., Easy to install., Powerful sound emission!, Thank you so much
High-quality horns for motorcycles and cars., Ideal for off-road use., Perfect for highway applications., Durable and long-lasting., Perfect…Read full reviewShow less
High-quality horns for motorcycles and cars., Ideal for off-road use., Perfect for highway applications., Durable and long-lasting., Perfect for highway applications.,
all goods astig sounds nearly similar in fortuner 5 star is not enough to this product i gave 10 star on it.
Great value for the price., Easy to install., Ideal for off-road use., Perfect for highway applications.,
High-quality horns for motorcycles and cars., Loud and attention-grabbing., Great value for the price.,
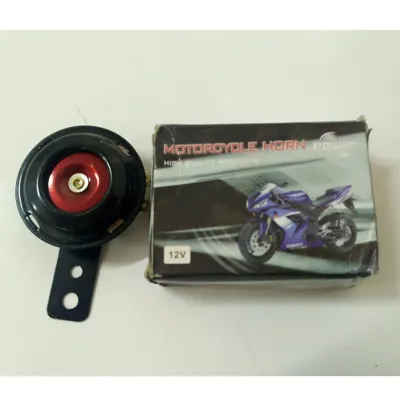
104 Lazada user ratings
sa wakas natanggap ko na Ang order kong limang horn, medyo natagalan nga lang ang delivery dahil inabot ng Oct. 3 imbes na Sept.26
compatible to my Honda wave .. I think it's durable enough and also affordable .. thanks seller for this product.
Loud and clear sound, mura and worth the buy, sakto naman sya for my mio! Perooooo 2 naka install sa akin!
Improved horn for better attention, Compact and easy to install, Loud and clear sound,
ibang klase dumating Hindi tulad ng nasa picture
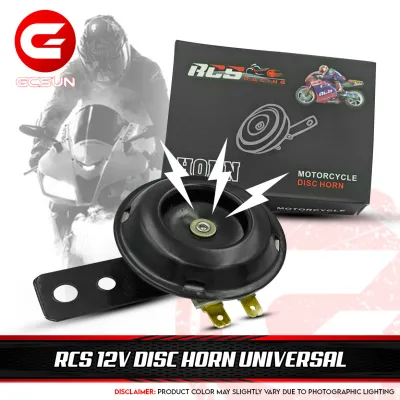
634 Lazada user ratings
High-quality sound, Great for safety, Perfect for my motorcycle, Great for safety, Universal fit, Makes my presence known, Easy to install, …Read full reviewShow less
High-quality sound, Great for safety, Perfect for my motorcycle, Great for safety, Universal fit, Makes my presence known, Easy to install, Adds a stylish touch to my motorcycle,
Adds a stylish touch to my motorcycle, Universal fit, Great for safety, Durable and long-lasting, Loud and clear!, High-quality sound, Makes…Read full reviewShow less
Adds a stylish touch to my motorcycle, Universal fit, Great for safety, Durable and long-lasting, Loud and clear!, High-quality sound, Makes my presence known, ty po complete.
received kona po yung item ok naman po yung item ok naman po yung tunog naikabit kona po thanks lazada seller and the courier
Great for safety, Easy to install, Adds a stylish touch to my motorcycle, Adds a stylish touch to my motorcycle,
Adds a stylish touch to my motorcycle, High-quality sound, Durable and long-lasting, Universal fit,
Prices are valid at publication and may change. Please refer to the product page for the latest price.
Gather all necessary tools and materials before starting the job. You will need a set of wrenches or sockets to mount the horn, wire strippers, a high-quality crimping tool, and a digital multimeter to test voltage and continuity. For materials, prepare marine-grade primary wire (typically 14 to 16 AWG for high-draw horns), insulated spade connectors, ring terminals, heat shrink tubing, and a heat gun or lighter. Avoid using cheap electrical tape, as it degrades rapidly under the high heat and humidity common in tropical climates.
Choosing the Mounting Location
Selecting the right mounting location is critical for both the longevity of the horn and the safety of your ride. The horn must be positioned where it can project sound forward clearly without being blocked by fairings or structural components. However, you must also ensure that the horn does not interfere with the physical operation of the motorcycle. Check the clearance around the front forks, steering stem, and front fender. Compress the front suspension fully to verify that the fender will not strike the horn when hitting a bump on the road.

Keep the horn away from extreme heat sources such as the radiator, engine cylinder head, and exhaust headers. High temperatures can melt the plastic housing of the horn, damage its internal diaphragm, or degrade the wire insulation, leading to premature failure or short circuits. Additionally, position the horn bell facing forward and angled slightly downward. This downward angle is essential for preventing water, road grime, and debris from pooling inside the horn’s acoustic chamber. In regions with heavy seasonal rainfall, water accumulation inside a forward-facing horn will quickly muffle the sound and corrode the internal contacts.
Identify a solid, structural frame member or an existing factory bracket to mount the horn. Avoid mounting heavy aftermarket horns directly to thin plastic fairings or body panels, as the vibration from both the engine and the horn itself will eventually crack the plastic. The mounting point must be rigid enough to withstand constant road shocks and engine vibrations without flexing or loosening over time.
Step-by-Step Wiring and Installation Process
Executing the physical mounting and electrical connections in a logical sequence prevents unnecessary rework and ensures a clean installation. Always secure the physical mount of the horn and any associated relays before routing any electrical wires. This allows you to measure the exact length of wire needed for each connection, preventing excess slack or overly tight wires that could pull loose during steering.
When routing wires, your primary goal is protection. Keep all wiring harnesses away from sharp metal edges, moving parts, and high-heat zones. Use protective plastic wire loom or split tubing to shield the wires from abrasion, and secure them to the frame using high-quality, UV-resistant zip ties.
Mounting the Horn Bracket
Begin by attaching the mounting bracket to your chosen location on the frame. If you are lucky, the new horn will fit directly onto the factory horn bracket. If the new unit is larger or heavier, you may need to use the universal metal bracket typically included with aftermarket horns, or fabricate a simple custom bracket. Ensure the bracket is made of a durable, corrosion-resistant metal like stainless steel or painted steel to withstand wet road conditions.
Apply a drop of medium-strength threadlocker to the mounting bolts before tightening them. Motorcycle engines, especially single-cylinder and twin-cylinder models, produce significant vibrations that can easily back out unsecured bolts over time. Tighten the bolts securely using the appropriate wrench, ensuring the bracket does not twist or touch any surrounding components.
A critical step during physical mounting is establishing a solid ground connection if your horn design relies on frame grounding. If the horn grounds through its mounting bracket, you must scrape away any paint, rust, or anodized coating on the frame at the contact point to expose bare, shiny metal. A poor ground connection is the single most common cause of weak, distorted, or non-functional horns. If the horn has a dedicated negative terminal, you will instead run a ground wire directly to a clean frame ground point or back to the negative terminal of the battery.
Routing and Connecting the Wires
Before cutting any wire, determine whether your new horn requires a relay. Low-draw horns (typically drawing under 4 amps) can usually be connected directly to the stock horn wires using spade connectors. However, high-draw horns (such as dual-tone electromagnetic horns or compact air horns) draw significantly more current. Connecting a high-draw horn directly to the stock wiring can burn out your handlebar switch, melt the thin factory wires, or blow the stock fuse. For these horns, you must install a standard 4-pin 12V automotive relay.
To wire a relay, follow this standard configuration: Connect Pin 30 of the relay directly to the positive terminal of the battery, incorporating an inline fuse holder with an appropriate fuse (usually 10 to 15 amps) placed as close to the battery as possible. Connect Pin 87 of the relay to the positive terminal of the new horn. Connect Pins 85 and 86 to the two factory wires that originally connected to your stock horn; these wires will act as the trigger circuit. When you press the handlebar horn button, it sends a low-current signal to the relay, closing the internal switch and allowing high-current power to flow directly from the battery to the horn via Pin 30 and Pin 87. Finally, connect the negative terminal of the horn to a clean chassis ground or the battery’s negative terminal.
Route all wires carefully along the motorcycle’s frame, following the existing factory wiring harness whenever possible. Ensure there is enough slack around the steering head to allow the handlebars to turn fully from lock to lock without pulling or straining the wires. Use wire strippers to expose about a quarter-inch of copper wire, crimp the appropriate insulated connectors securely using a dedicated crimping tool, and slide heat shrink tubing over the connections. Shrink the tubing using a heat gun to create a watertight seal that protects the copper from corrosion.
Testing and Troubleshooting
Once all physical and electrical connections are secure, it is time to test the system. Reconnect the negative terminal of your motorcycle battery and turn the ignition key to the “on” position. Press the horn button briefly to check for immediate and consistent operation. The sound should be loud, clear, and instantaneous.
If the horn sounds weak, raspy, or distorted, start your troubleshooting by checking the ground connection. A loose or painted ground point restricts current flow, preventing the horn from vibrating at its designed frequency. Use a multimeter to check for voltage drop across the circuit. If the voltage at the horn terminals is significantly lower than the battery voltage when the button is pressed, your wiring gauge may be too thin, or there may be high resistance in your connections. Also, ensure that the horn body or diaphragm is not physically touching any part of the motorcycle frame or fairings, as physical contact will dampen the vibration and ruin the sound.
If the horn does not sound at all, listen closely for a clicking sound from the relay when you press the button. If the relay clicks but the horn is silent, the issue lies in the high-current power supply (Pin 30, Pin 87, the inline fuse, or the horn ground). If the relay does not click, the issue is in the trigger circuit (Pins 85 and 86, the handlebar switch, or the factory wiring). If the horn blows continuously as soon as the key is turned on, you likely have a stuck relay, a short circuit in the trigger wiring, or a faulty handlebar switch.
Legal and Maintenance Considerations
Before riding on public roads, ensure your new horn complies with local regulations. In the Philippines, the Land Transportation Office (LTO) and local government units regulate vehicle modifications, including horn decibel levels and sound types. Horns must not produce siren-like, emergency-vehicle sounds, or excessively loud, disruptive noises that exceed local decibel limits. Upgrading to a standard, loud dual-tone disc horn is generally acceptable and enhances safety, but excessively loud air horns designed for large trucks may result in fines or inspection failures.
Incorporate horn maintenance into your regular motorcycle upkeep schedule. Periodically check the mounting bracket bolts to ensure they have not vibrated loose. Inspect the electrical terminals for signs of corrosion, which can build up quickly due to road salt, dirt, and rain. A basic relay kit or replacement wiring parts can be sourced from local motorcycle parts shops for around ₱150 to ₱300, making regular upkeep highly affordable.
To prevent moisture ingress and corrosion in highly humid or rainy conditions, apply a small amount of dielectric grease to all exposed electrical connections and terminal plugs. This non-conductive silicone grease seals out water and oxygen, ensuring your horn remains reliable even during heavy monsoon downpours.
Frequently Asked Questions (FAQ)
Can I install a dual-tone horn on my stock motorcycle?
Yes, you can install a dual-tone horn on most stock motorcycles, but you must assess your vehicle’s electrical capacity first. Dual-tone horns consist of two separate horns (one high-pitched and one low-pitched) working together, which doubles the current draw compared to a single horn. Most stock motorcycle stators and batteries can handle this brief electrical load, but you must use a 12V relay and a dedicated, fused power wire running directly from the battery. Wiring a dual-tone horn directly to the stock horn wires without a relay will likely blow the factory fuse, damage the thin stock wiring, or burn out the contacts inside your handlebar switch.
Why does my new horn sound weak or distorted?
A weak or distorted sound is almost always caused by a poor electrical ground or physical interference. If the ground connection is made on a painted, rusted, or dirty part of the frame, the electrical resistance will limit the current reaching the horn, resulting in a muffled or weak sound. Another common cause is mounting the horn in a way that allows the metal housing or diaphragm to touch another component, such as a fairing or bracket. The horn relies on rapid physical vibration to produce sound; any physical contact with the horn body will dampen these vibrations, causing a distorted tone. Ensure the horn hangs freely on its bracket and has a clean, bare-metal ground connection.
Community discussion
Share your experience or ask a question. Comments are reviewed before publication.