
A motorcycle brake caliper is the heart of your hydraulic braking system, converting fluid pressure into the mechanical clamping force needed to slow you down. When a caliper fails, your stopping power drops instantly, putting you at extreme risk on the road. Knowing whether to rebuild or replace this critical component depends on identifying key physical symptoms—such as fluid leaks, uneven pad wear, or a spongy lever—and inspecting the internal condition of the caliper body.
Because brakes are a critical safety system, any disassembly or modification must be performed in strict accordance with the manufacturer’s instructions. A qualified professional should handle the installation if you lack the proper training or tools. This guide helps you identify the physical and visual warning signs of caliper failure, safely inspect the system, and determine whether a rebuild or a full replacement is the correct path forward.
Visual and Physical Warning Signs of a Failing Brake Caliper
In tropical climates like the Philippines, high humidity, coastal salt air, and heavy seasonal rains accelerate the degradation of rubber seals and metal components. One of the most immediate warning signs of a failing caliper is a brake fluid leak. Look closely at the area around the piston seals, the rubber dust boots, and the bleeder valve. Even a tiny smear of hydraulic fluid indicates that a seal has failed, which can quickly contaminate your brake pads and ruin your stopping power.
Products mentioned in this guide
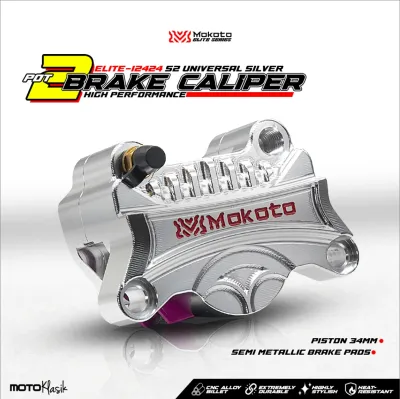
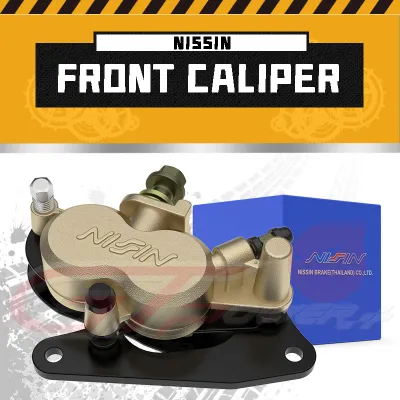
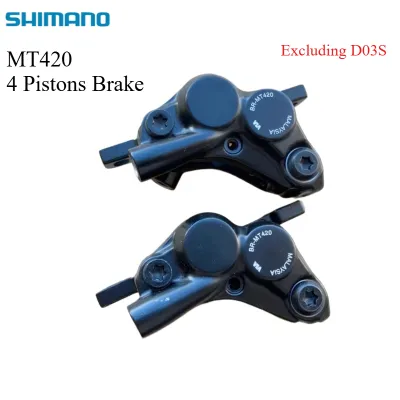
Prices are valid at publication and may change. Please refer to the product page for the latest price.
Another critical symptom is a spongy, inconsistent, or fading brake lever feel. When seals degrade, they not only let fluid out but also allow air to enter the hydraulic lines. Because air is compressible, pulling the brake lever will feel soft or mushy, and you may find yourself squeezing the lever all the way to the handlebar grip before the brakes engage.
Uneven brake pad wear is a classic indicator of caliper trouble. If you notice that one brake pad is significantly thinner than the other, or if the pad surface looks glazed and shiny, the caliper is likely failing to distribute pressure evenly. This often happens when the caliper slide pins seize or when a piston becomes stuck in its bore, forcing one pad to drag continuously against the spinning rotor.
Piston sticking or sluggish retraction prevents the brake pads from releasing fully when you let go of the lever. You might feel the motorcycle resisting forward motion, or hear a constant metallic scraping sound as you ride. Over time, this constant friction generates extreme heat, which can warp your brake disc and cause the brake fluid to boil, leading to sudden brake fade.
How to Safely Inspect Your Motorcycle Brake Caliper
Before you begin any physical inspection, safety must be your top priority. Always wait for the brake rotor, pads, and caliper to cool down completely after a ride. Operating temperatures can easily cause severe burns if you touch the metal components too soon.

Start with a thorough visual check of the exterior. Look for signs of external corrosion, which is common in areas with high moisture levels. Inspect the rubber dust boots for tears, cracks, or dry rot, and check if the slide pins are dry or seized. Damaged boots allow road grime and water to enter the internal cylinder, leading to rapid wear of the piston and seals.
To observe piston movement safely, elevate the motorcycle on a paddock stand so the wheel spins freely. With the caliper still mounted, gently apply the brake lever while watching the pistons. They should extend smoothly and retract slightly when you release the lever. Never pump the lever aggressively while the caliper is removed from the rotor, as this can push the pistons completely out of their bores, causing a major fluid spill and introducing massive amounts of air into the system.
If you spot structural cracks in the caliper body, deep gouges, or severe fluid leaks during this inspection, stop immediately. Do not attempt to ride the motorcycle or force any components back into place. Consult your specific motorcycle service manual to identify the correct disassembly procedures and safety precautions.
Repair vs. Replace: Deciding the Best Path Forward
Deciding whether to rebuild your existing caliper or replace it entirely depends on the physical condition of the internal components. A rebuild is often highly effective if the damage is limited to soft rubber parts. If the caliper cylinder walls are completely intact, the slide pins are dirty but undamaged, and the pistons show only minor seal degradation without metal damage, a standard rebuild kit is a practical choice.
Conversely, certain conditions make a full replacement non-negotiable. If you find deep pitting, scored cylinder bores, structural cracks, or severe internal corrosion inside the caliper body, the unit is no longer safe to use. No amount of cleaning or new seals can restore a damaged cylinder wall, and attempting to reuse a compromised caliper shell risks sudden hydraulic failure under hard braking.
Always refer to your motorcycle’s original-vehicle documentation to verify the exact caliper mounting position, interface dimensions, and road legality before purchasing any replacement parts. Check your manufacturer’s service manual to verify the availability of official rebuild kits and to find the exact torque specifications for the caliper mounting bolts and banjo bolts. Using the correct torque is vital; under-tightening can lead to loose components, while over-tightening can strip the threads in the soft aluminum caliper body.
When making your decision, weigh the cost and effort of a rebuild kit against a complete new or OEM-equivalent caliper assembly. While a rebuild kit is generally less expensive in terms of parts, it requires significant time, patience, and absolute cleanliness. If you lack the tools or the clean workspace required, purchasing a pre-assembled, complete caliper can save hours of labor and provide peace of mind.
Safety Boundaries and Professional Service Limits
Brake maintenance is a high-stakes task where mistakes have immediate safety consequences. One of the greatest risks of DIY brake work is improper brake bleeding. If even a tiny bubble of air remains trapped in the hydraulic system, your braking efficiency will drop dramatically, potentially causing complete brake failure when you need it most.
Additionally, brake fluid is highly corrosive and must be handled with extreme care. It can cause severe skin irritation upon contact and will quickly strip or bubble your motorcycle’s paint, fairings, and plastic trim if spilled. Always keep clean rags and a bottle of water nearby to neutralize and wipe away any accidental spills immediately, and only use fluids for label-authorized applications.
Rebuilding a caliper also demands specialized tools and conditions. Removing stubborn, seized pistons often requires compressed air or specialized piston expansion pliers to avoid scratching the polished metal surfaces. The assembly must take place in a clean-room environment free of dust, lint, and moisture, as even a single grain of sand can tear a new seal or score the cylinder wall.
Ultimately, you must recognize your own technical limits. If you do not have the proper tools, if the service manual instructions seem unclear, or if you feel any doubt about the integrity of your braking system at any stage of the process, stop immediately. Take your motorcycle or the removed caliper to a qualified professional mechanic to ensure the work is completed safely and correctly.
Frequently Asked Questions (FAQ)
Can I ride my motorcycle with a sticking brake caliper?
No, you should never ride a motorcycle with a sticking brake caliper. A sticking caliper causes the brake pads to drag constantly against the rotor, generating intense heat that can quickly warp the disc and wear down your pads prematurely. More critically, this extreme heat can transfer to the brake fluid, causing it to boil and resulting in a sudden, complete loss of braking power.
How often should brake calipers be serviced or rebuilt?
Caliper service is primarily condition-based rather than strictly mileage-based. You should perform a visual inspection of your calipers during every routine brake pad change or oil service. In highly humid or dusty environments, calipers may require more frequent cleaning and lubrication of the slide pins to prevent seizing, but you should always refer to your motorcycle manufacturer’s recommended maintenance schedule for specific intervals.
Community discussion
Share your experience or ask a question. Comments are reviewed before publication.