
Choosing the right brake shoes for your Yamaha Mio i 125 is a critical decision that directly impacts your safety on the road. The choice between Original Equipment Manufacturer (OEM) parts and aftermarket alternatives involves balancing predictable performance against upfront cost. Genuine Yamaha OEM brake shoes offer guaranteed physical fitment, factory-tested friction characteristics, and complete warranty compliance. Conversely, reputable aftermarket options can provide a highly cost-effective alternative, provided you carefully verify their compatibility, material quality, and manufacturing standards. Ultimately, the best choice depends on your budget, mechanical experience, and daily riding conditions.
Understanding Brake Shoe Compatibility and Safety Standards
The rear braking system of the Yamaha Mio i 125 relies on a mechanical drum brake setup. Unlike front disc brakes, which are highly visible, drum brakes house their friction components inside a sealed hub. This design makes regular inspection and precise component matching absolutely vital. Because the brake shoes operate out of sight, any mismatch in dimensions or friction material can lead to sudden failure without immediate visual warning.
Before purchasing any replacement brake shoes, you must verify the exact part numbers and drum diameter specifications. Referencing your Yamaha Mio i 125 owner’s manual is the most reliable way to confirm these details. Even minor variations in the shoe arc or width can prevent the shoes from making full contact with the inner drum surface. This incomplete contact reduces braking force and causes uneven wear, which can warp the drum over time.
Products mentioned in this guide
![Mio i 125 Brake Shoe Set Yamaha Genuine Parts for Motorcycle Genuine Parts 〽️ [5D9-F540K-00]〽️ (Check Description)!!!](https://img.lazcdn.com/g/ff/kf/S6356808935f5425b8f6806f4cb959685d.jpg_400x400q80.jpg_.webp)
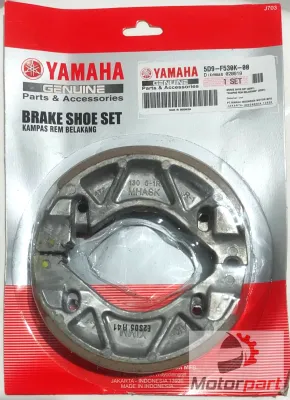
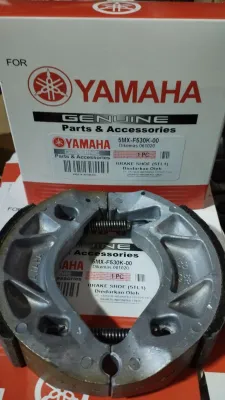
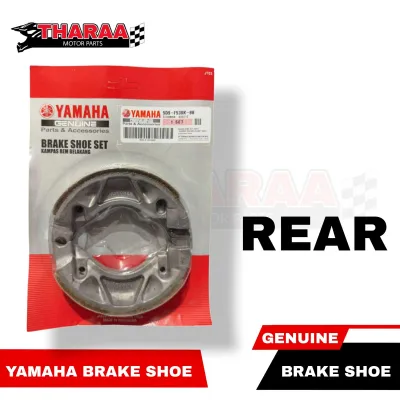
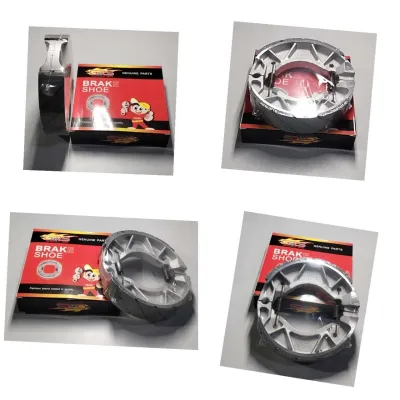
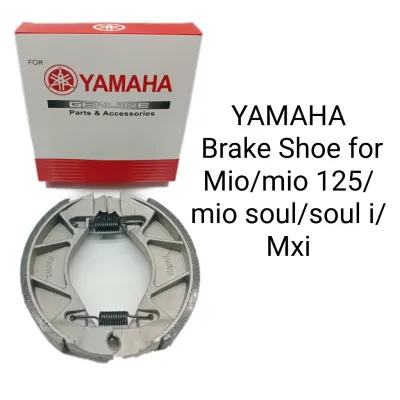
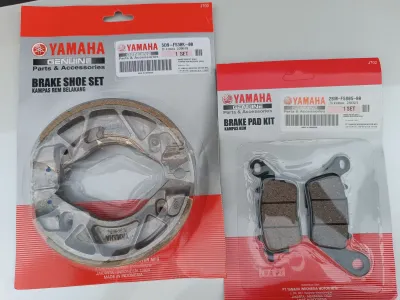
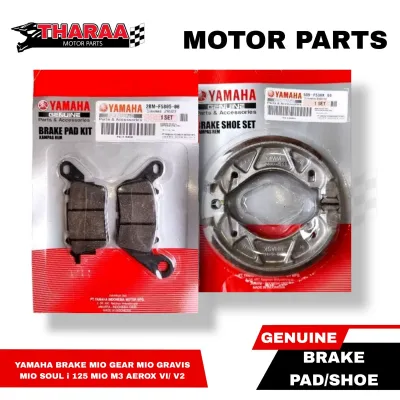
Prices are valid at publication and may change. Please refer to the product page for the latest price.
The safety-critical nature of drum brakes cannot be overstated. In tropical climates characterized by high humidity, heavy seasonal rains, and localized flooding, the braking system is constantly exposed to moisture and road debris. Incorrectly fitted brake shoes or low-quality friction materials are highly susceptible to issues like brake fade, glazing, or complete delamination—where the friction lining physically detaches from the metal backing. Such failures can result in a sudden loss of rear braking power, posing severe risks during emergency stops.
To mitigate these risks, always consult the manufacturer’s service manual before undertaking any replacement work. The service manual outlines specific installation boundaries, including the maximum allowable wear limits for the drum, the correct spring tension, and the precise torque specifications for the brake cam and pivot pins. Adhering to these official guidelines ensures that the entire assembly functions as a cohesive safety system.
Genuine Yamaha OEM Brake Shoes: Predictability and Warranty
Opting for genuine Yamaha OEM brake shoes provides a level of predictability that is difficult to replicate with third-party alternatives. These parts are engineered specifically for the Mio i 125, meaning the friction material formulation is precisely calibrated to match the scooter’s weight, engine power, and intended operating conditions. This exact calibration ensures consistent stopping distances and predictable lever feel under both dry and wet conditions.

When you purchase genuine parts, you are paying for the assurance of exact physical fitment. The metal backing plates are cast to precise tolerances, eliminating the risk of binding or excessive play within the brake hub. This precision minimizes uneven wear on the brake drum, extending the overall lifespan of your rear wheel assembly. Furthermore, using OEM parts preserves any active manufacturer warranties on your scooter, as authorized service centers require genuine components to maintain coverage.
In terms of pricing, genuine Yamaha brake shoes generally command a premium. While the upfront cost in ₱ is higher than most aftermarket options, this price reflects the rigorous quality control and testing standards imposed by the manufacturer. Genuine parts are readily available through authorized Yamaha dealerships and official brand channels, ensuring you receive authentic components rather than counterfeit goods. For riders who prefer a “fit-and-forget” solution with guaranteed baseline performance, the higher initial investment is often justified by the peace of mind it provides.
Aftermarket Brake Shoes: Evaluating Third-Party Alternatives
The aftermarket industry offers a vast array of brake shoes for the Yamaha Mio i 125, ranging from premium performance options to budget-friendly replacements. Navigating this market requires a systematic approach to ensure you do not compromise on safety. While some aftermarket brands meet or even exceed OEM standards, others may pose significant safety hazards due to substandard manufacturing.
To identify reputable aftermarket manufacturers, look for established brands with a documented history in motorcycle braking systems. Reliable brands provide clear, professional packaging that includes visible part numbers, batch codes, and specific compatibility listings for the Mio i 125. They also openly state their friction material specifications—such as whether the shoes use organic, semi-metallic, or non-asbestos organic (NAO) compounds.
Conversely, you should strongly avoid unbranded, generic, or suspiciously cheap brake shoes often found on online marketplaces. These products frequently lack proper safety labeling, material specifications, or quality control certifications. Using ultra-cheap brake shoes carries a high risk of friction material failure, rapid wear, and severe damage to your brake drum, which can lead to costly repairs.
When selecting an aftermarket option, always cross-reference the manufacturer’s part number with the OEM reference number. This step is crucial to verify that the aftermarket shoe matches the exact drum clearance and shoe arc required for the Mio i 125. A shoe with an incorrect arc will not sit flush against the drum, leading to a spongy brake lever feel and highly inefficient stopping power.
Key Decision Factors: Matching Brake Shoes to Your Riding Needs
Choosing between OEM and aftermarket brake shoes is not a one-size-fits-all decision. By evaluating your specific riding habits, budget, and mechanical confidence, you can determine which option aligns best with your needs.
You should choose genuine OEM brake shoes if your primary goal is hassle-free maintenance and guaranteed factory specifications. This path is highly recommended if your Mio i 125 is still under warranty, or if you prefer the simplicity of buying directly from an authorized dealer. Additionally, if you lack the mechanical experience to evaluate third-party product specifications, sticking with OEM parts removes the guesswork and ensures your scooter remains as safe as the day it left the showroom.
On the other hand, choosing a reputable aftermarket brand is a highly viable option if you own an older, out-of-warranty scooter and want to minimize maintenance costs. This choice is suitable provided you are willing to spend the time verifying part numbers and purchasing only from established, well-reviewed brands. High-quality aftermarket shoes can deliver reliable daily performance at a fraction of the OEM price, making them an excellent value proposition for budget-conscious commuters.
However, you must verify your specific riding demands before making a final choice. If you regularly carry heavy loads, operate your scooter as a delivery vehicle, or frequently navigate steep descents in hilly regions, your rear brakes will experience extreme thermal stress. In these demanding scenarios, standard budget aftermarket shoes may fade rapidly. You should seek a professional assessment from a qualified mechanic to determine if OEM shoes or specialized, heavy-duty aftermarket options are required to handle the increased heat and load.
Installation, Inspection, and Maintenance Best Practices
Regardless of the brand you choose, the safety and performance of your new brake shoes depend heavily on proper installation and ongoing maintenance. Brakes are a safety-critical system, and shortcuts during the replacement process can lead to catastrophic failure on the road.
Before installing new brake shoes, it is essential to thoroughly clean the entire brake drum assembly. Use a dedicated brake cleaner to remove accumulated brake dust, road grime, and any traces of grease or oil. While cleaning, inspect the inner surface of the brake drum for signs of wear, deep scoring, or out-of-round conditions. If the drum is heavily worn or damaged, installing new shoes will not restore proper braking performance, and the drum itself may need to be machined or replaced.
During installation, pay close attention to the brake return springs and the actuator cam. Inspect the springs for tension loss or corrosion, and replace them if they show signs of fatigue. Apply a very light coat of high-temperature brake grease to the pivot pins and the cam contact points, taking extreme care not to get any grease on the friction material or the drum surface. Once assembled, adjust the brake cable play according to the service manual specifications to ensure the lever has the correct amount of free play.
After installing new shoes, a proper bedding-in procedure is required. Avoid hard, sudden braking for the first few kilometers to allow the new friction material to gradually conform to the shape of the brake drum. If you do not possess the specific tools, a calibrated torque wrench, or the mechanical confidence to perform these safety-critical steps, always have the work completed by a qualified motorcycle mechanic.
Frequently Asked Questions (FAQ)
How often should I replace the brake shoes on my Yamaha Mio i 125?
Brake shoe lifespan varies widely based on riding style, payload, and environmental conditions rather than a fixed mileage interval. You should inspect your brakes regularly using the wear indicator pointer located on the rear brake cam arm; if the pointer aligns with the wear limit mark when the brake is fully applied, the shoes must be replaced. Additionally, replace the shoes immediately if you hear scraping or squealing noises, experience a sudden increase in brake lever travel, or notice a significant drop in stopping power.
Can I use brake shoes from a different Yamaha scooter model on the Mio i 125?
You should never assume that brake shoes from other Yamaha models are compatible with the Mio i 125, even if they look identical. Different scooter models often feature variations in drum diameter, shoe width, spring attachment points, or friction material compounds designed for different vehicle weights. Always verify the exact part number specified for the Mio i 125 in the official parts catalog to prevent fitment issues or braking system failure.
Community discussion
Share your experience or ask a question. Comments are reviewed before publication.