
Quick Answer: OEM vs. Aftermarket Caliper Brackets
When choosing a caliper bracket for xrm 125 motorcycles, genuine OEM Honda brackets remain the safest and most reliable choice for daily riding. Because the front brake system directly impacts your physical safety on the road, installing a factory-spec original equipment manufacturer (OEM) bracket ensures perfect alignment, zero-tolerance machining, and tested metallurgical strength. Genuine parts eliminate the risk of caliper misalignment, which can lead to uneven brake pad wear, reduced stopping power, or catastrophic component failure.
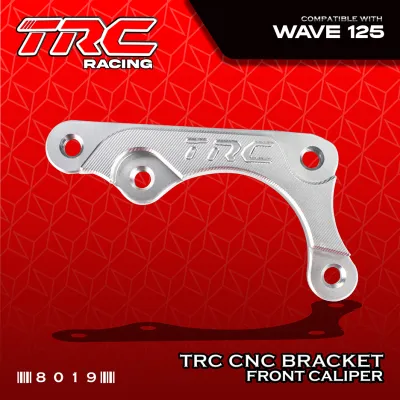
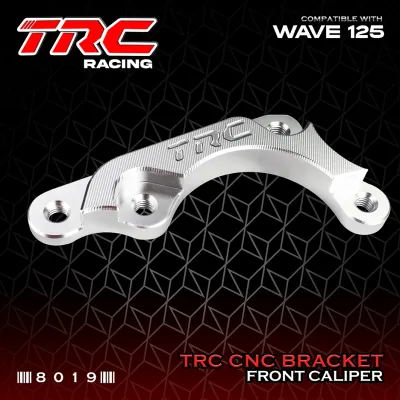
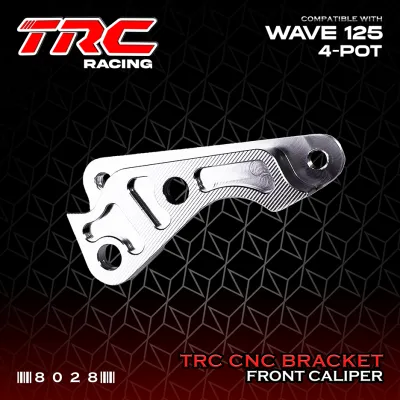
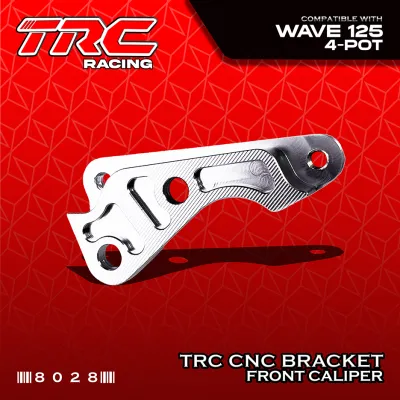
Aftermarket caliper brackets are a viable alternative, but their suitability is highly conditional. If you are upgrading your Honda XRM 125 with an oversized brake disc rotor for enhanced stopping power, a high-quality, CNC-machined aftermarket bracket from a reputable manufacturer is often necessary to offset the caliper correctly. However, choosing cheap, unbranded aftermarket brackets to save a few pesos is a dangerous compromise. For critical brake components, always prioritize structural integrity and proven brand reputation over low upfront costs.
Safety First: Why Caliper Brackets Are Critical for Braking
The front brake system of your motorcycle relies on a delicate balance of hydraulic pressure, friction, and mechanical leverage. At the center of this system is the caliper bracket, a heavy-duty metal connector that anchors the brake caliper to the front fork outer tube. When you pull the front brake lever, the caliper pistons squeeze the brake pads against the spinning disc rotor. This action generates immense kinetic friction, which the caliper bracket must absorb and transfer directly into the front suspension of the motorcycle.
Products mentioned in this guide
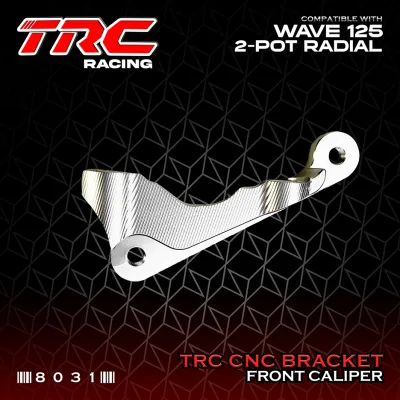
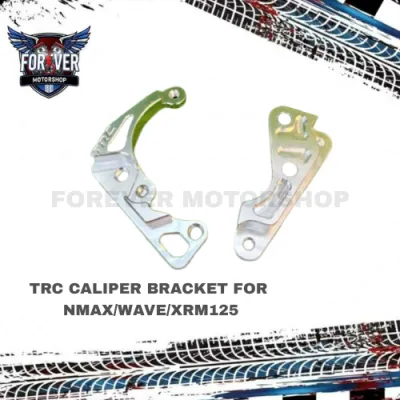
Prices are valid at publication and may change. Please refer to the product page for the latest price.

Because the caliper bracket handles these severe shear forces during sudden stops, any structural weakness can lead to immediate danger. If a bracket bends, cracks, or flexes under load, the brake caliper will shift out of its designated plane. This misalignment can cause the brake pads to bite the rotor unevenly, resulting in a sudden loss of hydraulic pressure or, worse, causing the caliper to bind against the rotor or wheel spokes. A locked front wheel at high speeds almost always results in a severe crash.
In the Philippines, motorcycles like the Honda XRM 125 are subjected to demanding operating conditions. Riders frequently navigate heavily congested urban traffic, steep mountain passes, unpaved provincial roads, and deep water during the rainy season. These environments expose brake components to high thermal shock, continuous vibration, and corrosive road grime. A compromised or poorly manufactured bracket is far more likely to fail under these punishing conditions.
Furthermore, modifying or replacing safety-critical brake components with unverified parts can violate local roadworthiness guidelines enforced by the Land Transportation Office (LTO). If your motorcycle is involved in an accident and is found to have substandard, non-compliant brake modifications, you may face insurance claim denials and legal liabilities. Ensuring that your caliper bracket meets strict manufacturing standards is not just a matter of performance, but a fundamental requirement for road safety.
The Case for Genuine OEM Honda Brackets
Opting for a genuine OEM Honda caliper bracket for xrm 125 ensures that your motorcycle’s braking system operates exactly as the manufacturer intended. Honda engineers design these brackets to match the precise metallurgy, weight distribution, and structural dimensions of the XRM 125 front suspension. This dedicated engineering guarantees a perfect, drop-in fit without the need for modifications, shims, or custom spacers.
OEM brackets are typically manufactured using high-pressure die-cast steel or specialized ductile iron alloys. These materials undergo rigorous factory testing to determine their fatigue limits, ensuring they can withstand hundreds of thousands of braking cycles without developing micro-cracks. Additionally, the mounting holes on an OEM bracket are drilled with sub-millimeter precision, aligning perfectly with the fork slider bosses and the caliper slide pins. This exact fitment prevents play or rattling, which maintains a firm and consistent feel at the brake lever.
Despite these clear safety and performance benefits, sourcing genuine OEM parts presents a few practical challenges for riders in the Philippines:
- Higher Upfront Cost: Genuine Honda parts carry a premium price tag at authorized Honda 3S shops compared to standard aftermarket alternatives.
- Sourcing and Availability: Depending on your location, local dealerships may not always have the specific bracket for your XRM 125 model year in stock, leading to waiting periods that can ground your daily commuter.
- Lack of Modification Support: OEM brackets are strictly designed for stock-diameter disc rotors, meaning they cannot accommodate oversized aftermarket discs.
Navigating Aftermarket Caliper Bracket Options
The aftermarket industry offers a massive selection of components for the Honda XRM 125, ranging from high-performance upgrades to cheap, generic replacements. Sourcing an aftermarket caliper bracket requires a clear understanding of the differences between reputable performance brands and unbranded, low-cost replicas. Well-known aftermarket brands utilize modern manufacturing techniques, such as CNC (Computer Numerical Control) machining from solid billets of 6061-T6 or 7075-T6 structural aluminum alloy, which provides an exceptional strength-to-weight ratio and excellent resistance to corrosion.
These premium aftermarket brackets are highly sought after by riders who modify their XRM 125 for specific riding conditions. For instance, upgrading to a larger front disc rotor (such as a 260mm or 290mm disc) requires an aftermarket offset bracket to push the caliper further outward. Reputable aftermarket manufacturers design these brackets with precise geometry to ensure the brake pads still achieve full contact with the larger rotor surface, maximizing braking leverage without sacrificing structural stability.
Conversely, the market is also flooded with cheap, unbranded caliper brackets sold on various online marketplaces and unregulated physical shops. These parts are often produced using low-grade gravity casting methods, which can leave microscopic air pockets (porosity) inside the metal. While these brackets may look shiny and identical to premium options on the outside, their internal structural voids make them highly brittle. Under the sudden, intense stress of an emergency stop, these low-cost castings can snap without warning, leaving the rider with zero front braking capability.
Head-to-Head: Comparing OEM and Aftermarket Brackets
When deciding between an OEM and an aftermarket caliper bracket for xrm 125, comparing their key technical and practical dimensions side-by-side helps clarify the trade-offs. The table below outlines how these options perform across the most critical purchasing factors.
| Feature | Genuine OEM Honda Bracket | Reputable Aftermarket Bracket | Cheap Unbranded Bracket |
|---|---|---|---|
| Fitment & Alignment | Perfect plug-and-play; exact factory tolerances | Excellent; may require specific alignment checks for custom setups | Poor; often requires filing, shimming, or forced bolting |
| Material Quality | Certified cast steel or ductile iron; highly fatigue-resistant | CNC-machined 6061-T6/7075-T6 billet aluminum or high-grade steel | Low-grade cast aluminum or zinc alloys; prone to internal voids |
| Structural Safety | Maximum; certified by Honda's global safety standards | High; engineered and tested for performance applications | Low; high risk of sudden cracking or shearing under load |
| Cost Range | Premium (₱800 – ₱1,800 depending on the assembly) | Moderate (₱400 – ₱1,200 depending on brand and design) | Very Low (₱150 – ₱350) |
| Availability | Sourced via authorized Honda 3S shops; subject to dealer stock | Widely available at established local motorcycle parts shops | Flooded on online marketplaces; easily accessible but risky |
| Warranty Support | Covered under Honda's parts warranty when dealer-installed | Limited manufacturer warranty from authorized distributors | None; sold "as-is" with no consumer protection |
Fitment and Machining Precision
Installing a genuine OEM bracket is a straightforward process because the spacing, thread pitches, and bolt offsets are manufactured to Honda’s exact blueprints. This precision ensures that the brake caliper sits perfectly parallel to the disc rotor. If the bracket is even slightly misaligned, the brake pads will contact the rotor at an angle. This uneven contact causes rapid, irregular pad wear, introduces brake squeal, and generates excessive heat that can warp the disc rotor over time.
Many cheap aftermarket brackets suffer from poor quality control, resulting in misaligned mounting holes or incorrect offsets. Riders often attempt to fix these alignment issues by adding washers as shims or filing down the mounting faces of the bracket. Modifying a bracket in this manner is highly dangerous, as it introduces uneven stress points and weakens the metal, significantly increasing the likelihood of structural failure under heavy braking loads.
Material Strength and Durability
Honda’s OEM brackets are made from metallurgical compositions designed to handle cyclic loading, meaning they can flex slightly under extreme force without plastic deformation or cracking. Reputable aftermarket brands match or exceed this structural integrity by using CNC-machined billet aluminum, which undergoes anodizing to protect the metal from the salty air and heavy rains common in coastal areas of the Philippines. These premium parts often feature clear laser-etched brand markings and material certifications.
In contrast, unbranded aftermarket brackets rarely feature any manufacturer markings, material specifications, or quality control stamps. They are typically made from cheap, recycled aluminum scrap melted down and poured into simple molds. These brackets lack the tensile strength required to withstand continuous vibration and high-temperature cycles. Over time, exposure to rough roads and thermal expansion can cause these low-grade metals to develop stress fractures that are invisible to the naked eye until the component fails completely.
Pricing and Local Availability
While a genuine OEM Honda bracket represents a higher initial investment, it offers unmatched long-term value by eliminating the safety risks and premature wear associated with substandard parts. Sourcing OEM parts in provincial areas of the Philippines can sometimes require visiting multiple authorized dealerships or waiting for shipping from central warehouses in Metro Manila, which can be inconvenient if you rely on your motorcycle for daily livelihood.
Reputable aftermarket brackets provide a balanced middle ground, offering solid availability at local motorcycle accessory shops and trusted online dealers at a slightly lower price point than OEM. However, riders must resist the temptation of ultra-cheap unbranded options. Saving a few hundred pesos on a critical brake component can quickly result in thousands of pesos in repair bills for damaged forks, broken calipers, and ruined body panels, not to mention the invaluable cost of personal physical injury.
How to Decide: Choosing the Right Bracket for Your XRM 125
To make an informed decision, you must evaluate your specific riding habits, your budget, and whether your Honda XRM 125 retains its stock configuration or has been modified. Use the following guidelines to select the safest and most practical option for your motorcycle.
Choose OEM if:
- You use your Honda XRM 125 as a daily commuter, a delivery vehicle, or for hauling heavy agricultural loads, where maximum reliability is non-negotiable.
- Your motorcycle retains its original factory suspension, front fork setup, and stock-diameter disc rotor.
- You prefer a simple, plug-and-play installation with zero modifications or alignment worries.
- You want the peace of mind that comes with factory-certified safety standards.
Choose Reputable Aftermarket if:
- You are upgrading your front brake system with a larger, oversized disc rotor to improve stopping power on steep terrains or high-speed routes.
- You are sourcing from an established, recognizable brand that provides clear product warranties and uses CNC-machined billet aluminum.
- You want to customize the aesthetic look of your front wheel assembly using anodized color options that match your bike's theme.
- You have access to a professional mechanic who can verify the alignment and fitment of the aftermarket assembly.
Avoid Unbranded/Cheap Aftermarket if:
- The bracket lacks any manufacturer logos, brand markings, or material specifications on the packaging or the part itself.
- The price seems unusually low compared to both OEM and established aftermarket brands.
- The mounting holes look roughly drilled, or the metal surface shows visible casting lines, pitting, or rough edges.
- The seller cannot provide a clear return policy or verify the exact compatibility with your specific XRM 125 model year.
Verify First if:
- You are unsure of your exact Honda XRM 125 variant. The mounting points, bolt spacing, and fork slider designs can vary between the XRM 125 Dual Sport (DS), Dual Sport Extreme (DSX), Motard, and older carbureted versus newer fuel-injected (FI) generations. Always check your motorcycle's user manual or consult an authorized dealer to verify your specific model year and chassis code before purchasing any brake component.
Professional Installation and Safety Verification
Because the front braking system is your primary means of stopping a motorcycle, installing a new caliper bracket is a task that demands absolute precision. It is highly recommended to have the installation, alignment checks, and subsequent brake system service performed by a qualified motorcycle mechanic at a reputable service center. If you choose to perform the installation yourself, you must strictly adhere to the safety boundaries and guidelines outlined in the official Honda XRM 125 service manual.
Before beginning the installation, ensure that the motorcycle is securely supported on a flat, level surface using a center stand or paddock stand. Clean all mounting surfaces on the front fork outer tube and the brake caliper thoroughly using a dedicated brake cleaner spray to remove dirt, grease, and old thread-locking compound. Inspect the fork mounting bosses for any signs of hairline cracks, stripped threads, or physical deformation, as a damaged fork leg must be replaced immediately before a new bracket can be safely installed.
When mounting the caliper bracket, the absolute most critical tool required is a calibrated torque wrench. Never rely on hand-tightening or simple L-wrenches, as under-tightened bolts can vibrate loose over time, while over-tightened bolts can easily strip the aluminum threads in the fork outer tube or shear the mounting bolts entirely. Always apply a medium-strength thread-locking compound (such as blue thread locker) to the mounting bolt threads to prevent them from backing out due to engine and road vibrations. Torque all fasteners strictly to the manufacturer’s specified torque values:
- Bracket-to-Fork Bolts: Typically require a torque specification of approximately 30 Nm (Newton-meters), though you must verify the exact value in your specific model's service manual.
- Caliper-to-Bracket Bolts: Require precise torquing to ensure the caliper slide pins can move freely without binding.
While the caliper bracket is removed, take the opportunity to inspect the adjacent components of your front brake assembly. Check the thickness of your brake pads; if they are worn close to or beyond the wear indicator grooves, replace them with fresh pads. Inspect the disc rotor for deep scoring, excessive grooving, or warping, and measure its thickness with a micrometer to ensure it remains above the minimum service limit stamped on the rotor itself. Finally, clean and lubricate the caliper slide pins with a high-quality, silicone-based grease to ensure smooth caliper movement and prevent uneven pad wear. Once the installation is complete, pump the front brake lever several times to restore hydraulic pressure and perform a low-speed test in a safe, controlled environment before returning to public roads.
Community discussion
Share your experience or ask a question. Comments are reviewed before publication.