
Quick Answer: Which Coolant Reservoir Tank Should You Choose?
Choosing between an Original Equipment Manufacturer (OEM) and an aftermarket coolant reservoir tank for your Honda Click or Yamaha Mio depends on your budget, mechanical confidence, and how quickly you need your scooter back on the road.
Select an OEM tank if you prioritize an exact fit, guaranteed material compatibility with factory-specified coolants, and long-term reliability under harsh operating conditions. Genuine parts eliminate the guesswork of alignment and ensure the plastic can withstand years of intense heat cycles without degrading.
Opt for an aftermarket tank if you are working within a strict budget, need an immediate replacement from a local neighborhood shop, and are comfortable verifying the physical dimensions and hose alignments yourself before completing the installation.
Products mentioned in this guide
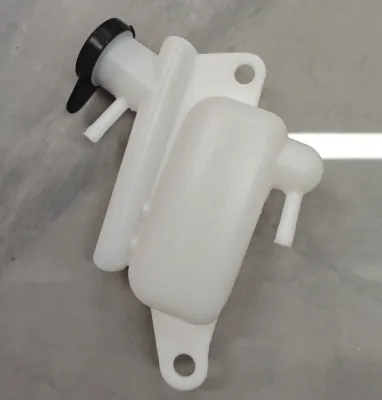
![[TOP SLAE] CLICK 150 & CLICK 125 V1 / V2 V3 COOLANT RESERVOIR / TANK RESERVE HONDA GENUINE](https://img.lazcdn.com/g/p/8deb73744ee3a45a6ba9415754f342c7.jpg_400x400q80.jpg_.webp)
![CLICK 150 & CLICK 125 V1 / V2 V3 COOLANT RESERVOIR / TANK RESERVE HONDA GENUINE [Fast Delivery]](https://img.lazcdn.com/g/p/2e6fd0ab81b55eba2395fcad1be0c964.jpg_400x400q80.jpg_.webp)
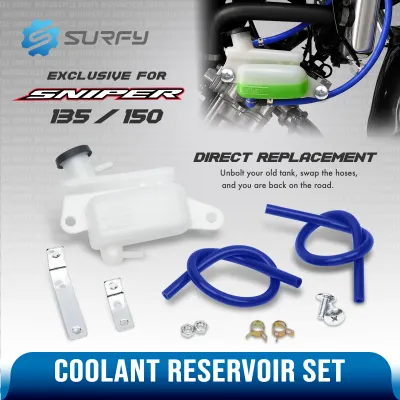
Prices are valid at publication and may change. Please refer to the product page for the latest price.
Before purchasing either option, inspect your scooter to confirm whether the original mounting brackets on the frame are still intact and whether any aftermarket modifications have altered the routing of your cooling lines.
Why the Coolant Reservoir Tank Matters for Your Scooter
The coolant reservoir tank, often called the expansion or overflow tank, plays a vital role in the closed-loop cooling system of your scooter. As your engine runs, the coolant heats up and expands, creating pressure that forces excess fluid out of the radiator and into the reservoir. When the engine cools down, the resulting vacuum draws the fluid back into the radiator to maintain a consistent volume of coolant.

If this tank fails, the entire thermal management system of your scooter is compromised. A cracked or leaking reservoir allows coolant to escape, which quickly leads to air locks in the cooling lines. Without sufficient fluid and pressure, your engine will rapidly overheat, risking severe mechanical failures such as warped cylinder heads, blown head gaskets, or a completely seized motor.
Liquid-cooled scooters like the Honda Click and Yamaha Mio operate under demanding conditions, especially when navigating congested urban traffic in tropical climates. The packaging inside these scooters is incredibly tight, leaving very little clearance between the hot engine components, the frame, and the plastic fairings. A reservoir tank must fit perfectly within its designated space to avoid rubbing against vibrating parts, which can cause premature wear and sudden leaks.
Evaluating OEM Coolant Reservoir Tanks
Genuine OEM replacement tanks from Honda and Yamaha are engineered specifically for the exact make, model, and year of your scooter. This precise engineering guarantees that every mounting tab, screw hole, and hose barb aligns perfectly with your scooter’s frame and existing plumbing. You will not need to stretch hoses, bend brackets, or modify your fairings to make the tank fit.
OEM tanks are manufactured using high-grade, automotive-spec plastics designed to resist the chemical additives found in modern coolants. These materials are formulated to endure thousands of rapid temperature swings without becoming brittle, cracking, or discoloring over time. This material integrity ensures that the molded level markings remain highly visible, allowing you to perform quick visual checks during routine maintenance.
However, sourcing genuine OEM parts can sometimes present challenges. Authorized dealerships and official service centers may not always have the exact reservoir tank for your specific model year in stock, potentially leading to waiting periods while the part is ordered. Additionally, genuine components carry a higher price tag in ₱ compared to third-party alternatives, which can be a deciding factor if you are on a tight maintenance budget.
Assessing Aftermarket Coolant Reservoir Tanks
Aftermarket coolant reservoir tanks are highly popular due to their immediate availability and budget-friendly pricing. These parts are widely stocked by local motorcycle spare parts shops and various online marketplaces, making them an attractive option if you need to perform an emergency repair to get your daily commuter back on the road without delay.
The primary appeal of aftermarket tanks is their lower cost in ₱, which allows riders to allocate their maintenance budget to other critical areas like engine oil, brake pads, or tires. For older scooter models where OEM parts may be discontinued or difficult to find, aftermarket manufacturers often provide the only viable path to keeping the vehicle operational.
Despite these benefits, aftermarket parts require a higher level of scrutiny from the buyer. Because these tanks are often mass-produced to fit a broad range of model variants, you may encounter minor physical discrepancies. The plastic walls may be thinner than the OEM standard, the hose barbs might have slightly different outer diameters, and the mounting tabs may require slight filing or washers to align securely with your scooter’s frame. Checking seller ratings, reading detailed customer reviews, and physically inspecting the part upon delivery are essential steps to ensure you receive a functional component.
Side-by-Side Comparison: OEM vs Aftermarket
When deciding between these two paths, comparing their core attributes side-by-side can help clarify which option aligns best with your current repair strategy.
| Feature | OEM Reservoir Tank | Aftermarket Reservoir Tank |
|---|---|---|
| Fitment Accuracy | Perfect; matches factory specifications exactly | Variable; may require minor adjustments or shims |
| Material Durability | High; engineered for long-term heat resistance | Moderate; plastic thickness and quality vary by brand |
| Relative Cost | Higher investment in ₱ | Budget-friendly; lower upfront cost |
| Local Availability | May require ordering through authorized dealers | High; widely available in local shops and online |
| Installation Effort | Direct bolt-on; no modifications needed | May require hose trimming or bracket alignment |
To evaluate the quality of any replacement tank before installing it, you can perform several simple, observable checks:
- Mold Seam Lines: Inspect the seams where the two halves of the tank are joined. On high-quality tanks, these seams are smooth, thick, and uniform. Avoid tanks with thin, ragged, or visibly separating seams, as these are common failure points under pressure.
- Plastic Clarity: The plastic should be translucent enough to let you clearly see the coolant level inside, yet rigid enough that it does not flex easily when squeezed firmly by hand.
- Hose Barb Sturdiness: Gently wiggle the inlet and outlet ports. They should feel solid and integrated into the main body of the tank. Any signs of cracking or excessive flexing at the base of the barbs indicate a high risk of snapping during hose installation.
Choosing OEM offers long-term peace of mind and minimizes the risk of installation headaches. Conversely, choosing a reputable aftermarket tank provides immediate convenience and cost savings, provided you are willing to spend a few extra minutes verifying the build quality and fitment during the installation process.
How to Inspect and Install Your Replacement Tank
Before beginning any work on your scooter’s cooling system, ensure the engine has been turned off and is completely cold to the touch. Working on a hot engine carries a severe risk of burns from pressurized coolant or hot metal components. Always consult your scooter’s official workshop manual for specific torque values and routing diagrams before proceeding.
Start by performing a thorough visual inspection of your new replacement tank. Look closely for any micro-cracks, manufacturing debris trapped inside the chamber, or flashing left over from the molding process on the hose barbs. Clean the area around your old reservoir tank to prevent dirt and road grime from falling into the open cooling lines during the swap.
As you remove the old tank, take the opportunity to inspect the surrounding components of your cooling system. Check the rubber coolant hoses for signs of dry rot, swelling, or cracking, and replace them if they feel soft or brittle. Inspect the spring clamps to ensure they still retain strong tension, and examine the radiator cap gasket for any tears or flat spots that could prevent the system from holding pressure.
Once the new tank is securely mounted, connect the hoses and ensure the clamps are positioned correctly behind the barb flares. Refill the system with the manufacturer-recommended coolant mixture. To prevent air pockets from trapping heat inside your engine, follow the proper bleeding procedure: with the radiator cap off, start the engine and let it idle for a few minutes, gently squeezing the radiator hoses to encourage trapped air bubbles to rise and escape through the filler neck. Top off the coolant level in both the radiator and the reservoir to the designated fill lines before sealing the system.
If you find that the mounting points on an aftermarket tank do not align with your scooter’s frame without applying excessive force, stop the installation immediately. Forcing a plastic tank into a misaligned position puts constant stress on the mounting tabs, which will eventually cause them to snap due to engine vibrations. In such cases, consult a qualified professional mechanic or source a replacement part that matches your vehicle’s mounting configuration perfectly.
Frequently Asked Questions (FAQ)
Can I use a universal coolant reservoir tank on my Honda Click or Yamaha Mio?
Using a universal coolant reservoir tank is generally not recommended for the Honda Click or Yamaha Mio due to the extremely tight space constraints under the fairings. Universal tanks rarely feature the correct mounting tab configurations, which can force you to use temporary fasteners like zip-ties that fail under constant engine vibration. Additionally, you must carefully measure the hose barb diameters on a universal tank; if they do not match your scooter’s original hoses, you risk creating persistent coolant leaks or restricting the flow necessary for proper system expansion.
How often should I check the coolant level in the reservoir tank?
It is best practice to inspect your coolant level at least once a month or during every routine oil change. Always check the level when the engine is completely cold, ensuring the fluid sits between the molded MIN and MAX lines on the side of the tank. Take a moment to inspect the plastic tank itself for any signs of yellowing, surface spider-cracks, or crusty colored residue around the seams and hose connections, as these are early warning signs that the plastic is becoming brittle and needs replacement.
Is it safe to repair a cracked coolant reservoir tank with sealants?
Attempting to repair a cracked reservoir tank with chemical sealants, epoxy, or hot glue is not a safe or reliable solution. The constant temperature fluctuations and pressure changes within the cooling system cause the plastic tank to expand and contract, which quickly breaks the bond of temporary adhesives. A failed repair can lead to a sudden, complete loss of coolant while riding, resulting in rapid engine overheating and expensive internal engine damage. Replacing the damaged tank entirely is the only secure way to maintain the integrity of your scooter’s cooling system.
Community discussion
Share your experience or ask a question. Comments are reviewed before publication.