
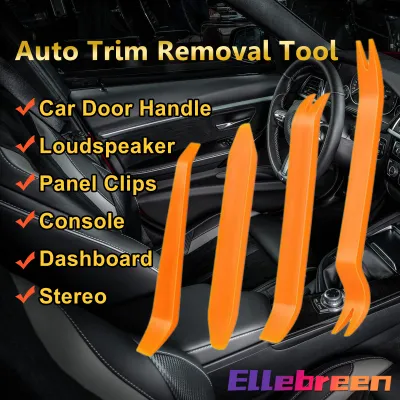
Plastic trim removal tools are the safest default choice for the vast majority of car interior components because their material hardness is lower than that of the surrounding cabin plastics, vinyl, and leather. This physical difference ensures that if excessive force is applied, the tool will deform or snap before it gouges, scratches, or cracks expensive dashboard panels. However, metal trim removal tools remain indispensable for high-tension metal clips, structural brackets, or stubborn fasteners that would easily bend or break a plastic tool. Choosing between them requires evaluating the specific panel material, the type of fastener holding it in place, and the amount of leverage needed for a clean release.
To prevent costly interior damage, you must match the tool’s physical properties to the vulnerability of the surface you are working on. While a single tool set cannot safely cover every scenario, understanding how plastic and metal interact with your car’s cabin allows you to disassemble components cleanly and professionally. Always verify your specific vehicle model, year, and trim level documentation before attempting disassembly, as clip locations and mounting interfaces vary widely and cannot be inferred from general category terms.
How Tool Materials Interact with Car Interiors
The fundamental difference between plastic and metal trim tools lies in their material hardness and yield strength. Plastic tools, typically molded from high-strength nylon polymers or fiber-reinforced plastics, are designed to flex under load. This flexibility acts as a built-in safety valve; when you apply too much prying force, the plastic tool yields or bends, absorbing the energy rather than transferring it directly into the delicate dashboard substrate. Nylon also has a low coefficient of friction, allowing it to slide over textured vinyl and leather without leaving scuff marks.
Products mentioned in this guide
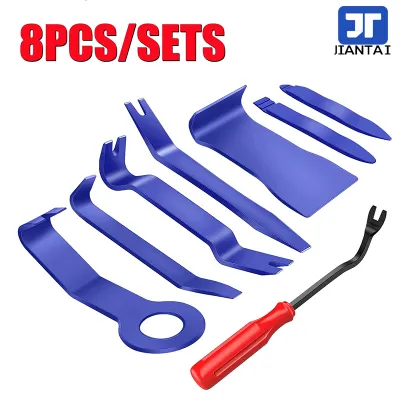
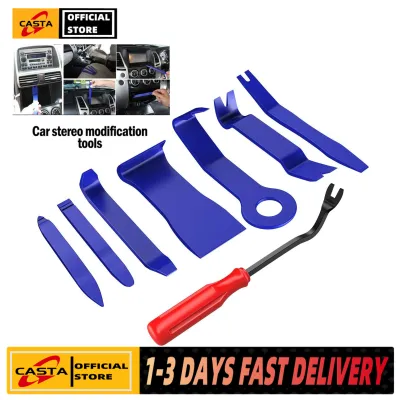
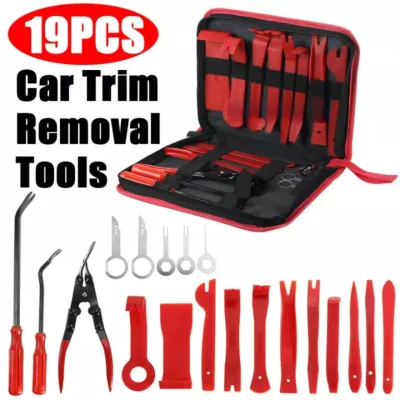
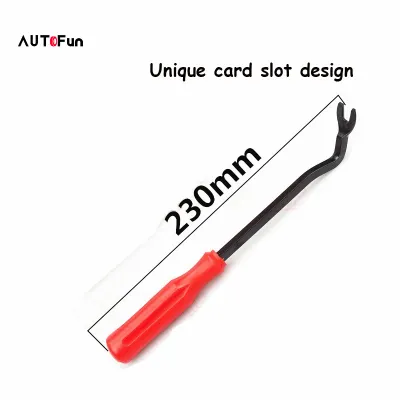
Prices are valid at publication and may change. Please refer to the product page for the latest price.
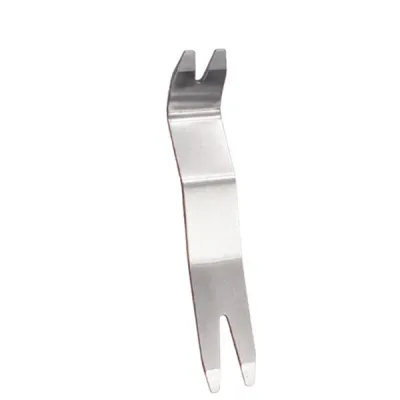
Metal trim tools, usually forged from carbon steel or chrome-vanadium alloys, possess incredibly high rigidity and tensile strength. They do not bend or flex under normal hand pressure, which allows you to apply maximum leverage directly to a stubborn fastener. However, because steel is significantly harder than any plastic, vinyl, or wood veneer in your car, any direct contact between an unprotected metal edge and an interior panel will result in immediate gouging, scratching, or denting. The rigid edge concentrates all the prying force onto a tiny focal point, which can easily crush soft-touch plastics.
Furthermore, tool geometry plays a critical role in surface safety. Plastic tools must be manufactured with relatively thick, wedge-shaped edges to maintain structural integrity. This thickness distributes the prying force over a wider surface area, reducing localized stress on the panel. Metal tools can be machined with razor-thin, tapered edges that slide effortlessly into the tightest panel seams. While this thin profile is highly efficient for initiating a pry point, it also behaves like a dull blade, posing a high risk of slicing into soft interior materials if the tool slips.
When to Choose Plastic Trim Removal Tools
Plastic trim removal tools should be your primary choice for any visible, delicate, or high-value interior surfaces. Modern automotive cabins feature highly sensitive materials such as piano black gloss trim, painted silver plastics, soft-touch polyurethane dashboards, and genuine leather wraps. These surfaces are incredibly vulnerable to cosmetic damage. A plastic tool minimizes this risk, making it the ideal choice for removing infotainment bezels, air vent grilles, center console surrounds, and door card perimeters.

These tools are perfectly suited for standard interior fasteners, including plastic push-in rivets, Christmas tree clips, and light friction-fit decorative moldings. Because these fasteners require relatively low extraction force, a high-quality nylon tool provides more than enough leverage to pop them free. If the clip is stubborn, the plastic tool will safely deform slightly around the clip head, distributing the load and preventing the clip from tearing out of its mounting slot on the panel.
However, plastic tools have distinct physical limitations that you must monitor during use. Over time, the fine wedged edges of nylon tools will wear down, round off, or develop sharp nicks and burrs from contact with metal clips. A damaged plastic edge can still scratch delicate surfaces, requiring regular inspection and replacement. Additionally, if you attempt to use a plastic tool on a heavy-duty structural clip, the tool may bend completely or snap, potentially sending sharp plastic shards flying or leaving broken tool tips trapped inside the panel cavity.
Safe Applications for Metal Trim Removal Tools
Metal trim removal tools are specialty instruments that should only be used when plastic tools fail or are physically incapable of performing the task. The primary scenario for a metal tool is the extraction of high-tension spring steel clips, which are commonly used to secure heavy radio cages, instrument clusters, and structural dash brackets. These metal-to-metal connections require immense pulling force that would instantly snap or deform a plastic tool. Metal tools are also necessary for removing heavily corroded fasteners in older vehicles, where moisture and age have fused the clip to the metal chassis.
To use a metal trim tool safely, you must implement mandatory protective measures to isolate the hard steel from the vehicle’s interior. Never allow raw metal to make contact with visible cabin surfaces. Before inserting the tool, wrap the metal tip in multiple layers of high-quality painters tape or heavy-duty masking tape to create a soft buffer. Alternatively, you can insert a sacrificial plastic barrier—such as a thin plastic shim or an old plastic card—between the metal tool and the panel to act as a protective fulcrum shield, absorbing the pressure of the pry.
There are several interior surfaces where metal tools must be strictly avoided under all circumstances. Never use a metal tool near LCD infotainment screens, instrument cluster lenses, glossy acrylic trims, or soft vinyl wraps. A single slip with a metal tool in these areas can cause permanent, non-repairable gouges or shatter delicate glass and plastic substrates. If a metal tool is required to release a clip behind a delicate panel, ensure the tool only contacts the hidden metal subframe and the clip itself, completely bypassing the cosmetic face of the trim.
Evaluating Your Specific Removal Task
Before you insert any tool into a panel seam, take a moment to evaluate the fragility of the components and the visibility of the working area. Ask yourself if a scratch in this location would be immediately visible to passengers or if it is hidden deep within the footwell or door jamb. If the area is highly visible, always begin with your softest plastic tool. Only escalate to a stiffer plastic or a protected metal tool if the initial attempt fails to budge the panel, ensuring you document the process and proceed with extreme caution.
Next, estimate the resistance of the fasteners based on the vehicle’s age, design, and environmental exposure. In tropical climates like the Philippines, interior cabins are subjected to intense solar heat and high humidity. This environmental stress accelerates the degradation of plastic components, making older cabin panels and clips extremely brittle. Brittle plastic is highly prone to cracking or shattering under tension. If you are working on an older vehicle exposed to these conditions, expect the clips to resist release and break easily, requiring a slow, methodical approach with wide-plastic tools to distribute the load as broadly as possible.
Finally, inspect the condition of your tools before starting the job. Run your finger along the edges of your plastic pry bars to check for rough spots, dirt, or embedded metal shavings from previous jobs, sanding them smooth if necessary. For metal tools, inspect any molded rubber tips or vinyl coatings for chips, cracks, or wear. If the protective coating is compromised, re-wrap the tool with fresh tape or replace it entirely to prevent raw steel from scraping against your vehicle’s components.
Safe Removal Techniques to Prevent Damage
Regardless of the tool material you choose, employing the correct physical technique is the most critical factor in preventing interior damage. Begin by locating all hidden screws, release tabs, and natural seam lines. Many modern door panels and center consoles appear to be held entirely by friction clips, but actually feature hidden screws concealed behind small plastic covers, inside door pull pockets, or behind the door handle bezel. Forcing a panel that is still secured by a metal screw will instantly crack the plastic substrate, resulting in a costly replacement that can easily exceed ₱10,000 for OEM parts.
Once you have verified that all screws are removed, locate the natural seam line or the designated pry point. Insert your plastic tool gently, using a sliding motion rather than a direct stab. Once the tool is wedged into the seam, apply gradual, even pressure. Avoid sudden, violent jerking motions, which shock the plastic and cause clips to snap violently. Whenever possible, use multiple support points by inserting a second plastic tool nearby to distribute the lifting force evenly across the panel edge.
While working, pay close attention to physical and auditory stop signals. If you observe stress whitening—where the dark plastic of the panel begins to turn light gray or white under tension—stop immediately, as this indicates the material is reaching its physical limit and is about to crack. Listen carefully for faint cracking or straining sounds. If the panel resists moderate prying force, do not simply push harder. Stop, remove the tool, and re-verify the panel layout in your vehicle’s service manual to ensure you haven’t missed a hidden fastener or an interlocking tab.
Additionally, establish a clear safety boundary when working near the vehicle’s electrical or restraint systems. If you are removing trim panels on the steering wheel, A-pillars, or side roof rails where airbags are housed, always consult the original-vehicle instructions before proceeding. Accidental deployment of an airbag can cause severe personal injury and catastrophic vehicle damage. Always disconnect the vehicle’s battery and wait the manufacturer-specified discharge time before working near any yellow-sleeved wiring harnesses or airbag modules, or seek qualified professional assistance.
Building a Versatile Trim Removal Kit
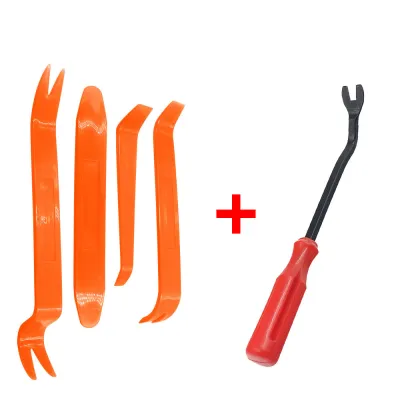
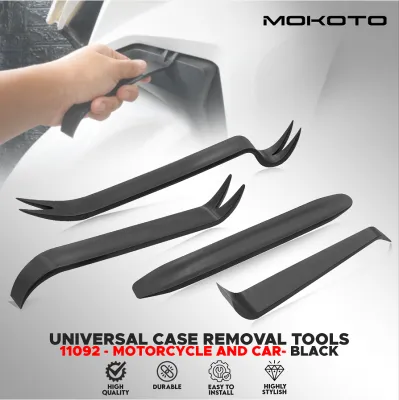
A professional and safe approach to car interior maintenance requires a versatile kit containing a mix of both plastic and metal tools, rather than relying on a single material. For daily interior tasks, your kit should feature a variety of high-quality nylon pry tools. Essential shapes include a wide-edge wedge for lifting large door panels, a narrow-tipped tool for tight dash seams, an angled pry bar for reaching behind panels, and a dual-forked clip remover designed to slide directly under plastic push pins to lift them without shearing the heads off.
Specialized metal tools should be added to your kit to handle specific, high-leverage tasks. A forged metal clip removal pliers or a heavy-duty metal pry bar with a comfortable, ergonomic handle is invaluable for under-hood plastic rivets, trunk liners, or heavy door card clips. These metal tools allow you to apply direct, mechanical force to the metal clip itself, bypassing the delicate plastic panel entirely. Ensure these metal tools are stored in a separate compartment or a protective roll-up pouch to prevent them from clashing with and nicking your plastic tools.
Proper tool maintenance and storage will extend the life of your kit and protect your vehicle’s interior. Store your tools in a clean, dry environment away from direct sunlight, as prolonged UV exposure can make plastic tools brittle over time. Clean your tools after each use with a mild soap and water solution to remove any grease, dirt, or adhesive residue that could transfer to your car’s upholstery during the next job. By maintaining a clean, organized, and diverse kit, you will always have the correct, damage-free tool ready for any automotive interior project.
Frequently Asked Questions (FAQ)
Can I use a standard flathead screwdriver instead of a dedicated trim tool?
You should strictly avoid using a standard flathead screwdriver to pry car interior panels. Screwdrivers are made of hardened steel with sharp, narrow, and square edges designed to turn screws, not distribute prying force. Using one concentrates immense pressure on a tiny area, which will instantly gouge plastic, tear leather, dent sheet metal, or chip paint. Furthermore, screwdrivers lack the specialized angles and curved fulcrums of dedicated trim tools, forcing you to pry at awkward angles that increase the likelihood of slipping and causing severe cosmetic damage to your cabin.
How do I safely extract a broken plastic clip left inside the panel?
When a plastic clip breaks, the head often snaps off, leaving the ribbed shank trapped inside the metal mounting hole of the vehicle’s body. To extract it safely without scratching the surrounding paint or enlarging the sheet metal hole, use a pair of needle-nose pliers or a specialized thin-nosed metal clip extraction tool. Slide the tool directly under the remaining collar of the broken clip, grip it firmly, and pull straight outward in a single, controlled motion. Avoid rocking the tool side-to-side against the painted metal, as this can chip the paint and lead to rust formation over time.
Are OEM trim removal tools significantly better than aftermarket options?
OEM trim removal tools are often designed for the specific clip tolerances and panel clearances of a particular vehicle manufacturer, but high-quality aftermarket kits offer comparable safety and performance at a much lower cost. The key factor is the material composition rather than the brand name. Avoid cheap, brittle ABS plastic aftermarket tools, which snap easily and can scratch surfaces. Instead, look for aftermarket kits made from impact-resistant, glass-reinforced nylon. These provide the ideal balance of structural rigidity, flexibility, and surface safety required for professional-grade interior work.
Community discussion
Share your experience or ask a question. Comments are reviewed before publication.