
Finding a 12V cooling fan that fits a Honda Click or Yamaha Mio without modifying the factory wiring requires sourcing a dedicated plug-and-play auxiliary fan kit. These kits must feature an independent, pre-assembled wiring harness that connects directly to the scooter’s battery terminals. By utilizing a standalone harness equipped with its own inline fuse and relay, you can install an auxiliary fan without cutting, splicing, or tapping into the sensitive factory wiring of your scooter. This approach keeps the electrical upgrade completely isolated from the main wiring harness, protecting your vehicle’s electronics while providing additional cooling.
In the tropical climate of the Philippines, where riders frequently encounter extreme ambient heat, heavy rain, and prolonged idling in urban traffic, auxiliary cooling is a popular consideration. However, maintaining the integrity of your scooter’s electrical system is paramount. Modifying factory wires can lead to costly component failures, electrical shorts, or voided manufacturer warranties. This guide outlines how to identify a genuine plug-and-play setup, verify physical and electrical compatibility for your specific scooter model, and select a safe, reliable 12V fan kit.
Understanding "Plug-and-Play" for Scooter Cooling Fans
When browsing online marketplaces or local motorcycle parts shops, the term “plug-and-play” is frequently used as a marketing label. For a scooter cooling fan, a true plug-and-play installation means the kit can be mounted and powered without altering any original factory wires. It should not require stripping insulation, crimping aftermarket terminals onto original wires, or using electrical tape to secure loose connections. Instead, the kit must rely on dedicated, matching connectors that interface directly with existing accessory ports or connect straight to the battery terminals.
Products mentioned in this guide
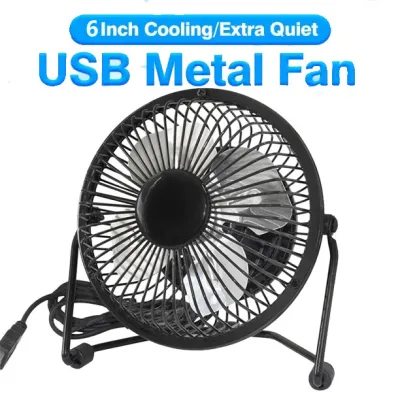
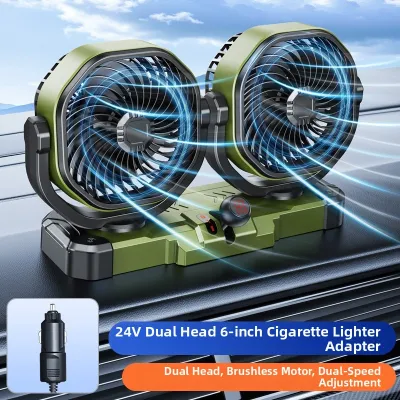
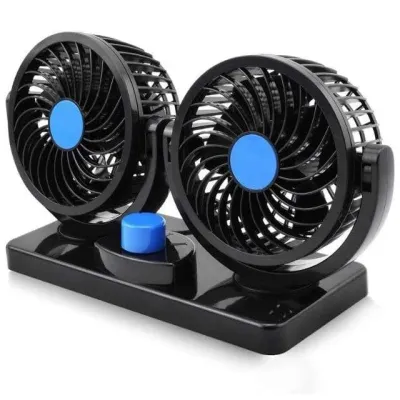
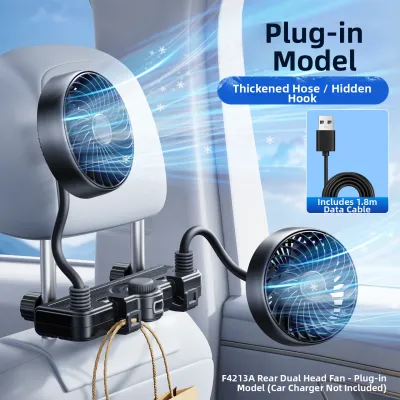
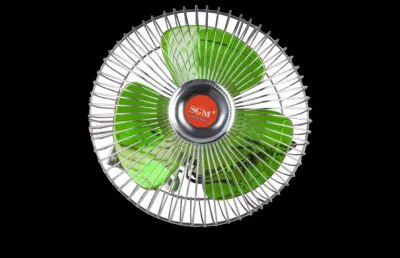
Prices are valid at publication and may change. Please refer to the product page for the latest price.
Deceptive “easy wire” kits often claim to be plug-and-play but actually require you to splice into the factory wiring harness to draw power or signal. Splicing into original wires, especially near the electronic control unit (ECU) or sensor loops, introduces significant risks. It can create high-resistance points, lead to voltage drops, and expose the copper core to moisture, which accelerates corrosion in high-humidity environments. If a short circuit occurs in a spliced line, it can damage expensive electrical components or even present a fire hazard.
To prevent these risks, a reliable auxiliary fan kit must operate as an isolated secondary circuit. This configuration requires a dedicated wiring harness that includes a heavy-duty relay and an inline fuse. The relay acts as an electromagnetic switch, drawing high-current power directly from the battery to run the fan, while using a low-current signal to turn the system on and off. This design ensures that the high electrical load of the fan motor never travels through the scooter’s original switches or delicate factory circuits.
For riders in the Philippines, where heavy downpours and flooded streets are common, the physical construction of the wiring harness is just as important as its electrical design. A genuine plug-and-play harness should feature fully insulated wires protected by high-temperature loom sleeves. It must also utilize waterproof connectors, such as sealed automotive plugs, to prevent water ingress from causing short circuits or corrosion during wet-season riding. Compromising on wiring quality for the sake of a cheaper kit can quickly lead to electrical failure on the road.
Key Compatibility Checks for Honda Click and Yamaha Mio
Before purchasing any 12V auxiliary fan, you must verify whether your specific scooter model and variant can physically and electrically support the upgrade. Not all scooters are designed with the same cooling systems or electrical capacities, and assuming universal compatibility can result in components that are impossible to mount or dangerous to operate.

Cooling System Verification
Auxiliary radiator fans are designed exclusively for liquid-cooled engines. You must verify if your specific scooter variant features a liquid-cooling radiator. In the Honda Click family, models such as the Honda Click 125i, Click 150i, and Click 160i are liquid-cooled and feature a side-mounted radiator. In contrast, the Yamaha Mio family is highly diverse. While models like the Yamaha Mio Aerox 155 feature liquid-cooling systems, many standard Mio models, including the Mio Sporty, Mio i 125, Mio Soul i 125, and Mio Gear, are strictly air-cooled.
Air-cooled engines rely on ambient airflow and a plastic cooling fan attached directly to the engine crankshaft to regulate temperatures. Attempting to mount an electric 12V auxiliary fan to an air-cooled engine block or CVT cover is highly ineffective, provides no measurable cooling benefit, and introduces unnecessary electrical load and physical vibration risks. Always consult your owner’s manual to confirm your engine’s cooling type before proceeding.
Physical Clearance and Mounting
Once you have confirmed your scooter is liquid-cooled, you must assess the physical clearance around the radiator shroud. Measure the depth, width, and height of the radiator assembly to ensure the auxiliary fan can fit within the fairings. Keep in mind that aftermarket modifications, such as crash guards, custom radiator covers, or modified body panels, can significantly reduce the available space. The fan must be mounted securely without touching the delicate aluminum radiator fins directly, as constant vibration can rub holes in the coolant channels, leading to leaks.
Electrical Capacity (Stator and Rectifier)
Every scooter has a limited electrical budget determined by the output of its stator and regulator-rectifier. The stator generates alternating current (AC), which the regulator-rectifier converts to direct current (DC) to power the headlights, fuel pump, ignition system, ECU, and charge the battery. You should check your scooter’s service manual to find the maximum wattage or amperage output of the charging system.
At idle or low engine speeds, such as when idling at a traffic light, the stator’s output is at its lowest. If the combined draw of your stock electronics and the auxiliary fan exceeds the stator’s charging output, the system will draw the remaining power from the battery. Over time, this will drain the battery, eventually leaving you stranded with a scooter that refuses to start.
OEM Connector Availability
Some scooter models feature factory-reserved auxiliary or accessory connectors hidden behind the front fairings or near the battery compartment. These ports are designed to supply switched 12V power for accessories like USB chargers or auxiliary lights. If your scooter has an available OEM accessory port, you can search for a fan kit that features a matching connector. If no such port exists, the safest plug-and-play route is a direct-to-battery harness that uses an ignition-switched relay signal, which can be tapped safely using a non-destructive fuse adapter in the main fuse box.
Selection Criteria for Plug-and-Play 12V Fans
To ensure the 12V fan you select is safe, efficient, and durable, you should evaluate any potential kit against a strict set of physical and electrical criteria. Avoid generic cooling fans that do not provide clear specifications or lack proper automotive-grade wiring harnesses.
Connector and Harness Quality
Inspect the wiring harness included with the fan kit. It should feature thick-gauge copper wiring, a pre-wired relay socket, and a waterproof inline fuse holder containing an appropriately rated fuse (typically 5A to 10A depending on the fan’s draw). The connectors should be sealed with rubber gaskets to prevent water and dust from entering the electrical contacts. Avoid kits that arrive with bare wire ends, thin insulation, or low-quality plastic connectors that can easily degrade under engine heat.
Power Draw (Amperage)
Choose a fan with a low amperage draw to protect your scooter’s charging system. For small scooter radiators, a fan drawing between 1.0 and 2.5 amperes is generally sufficient to provide effective airflow without overloading the stator. Avoid high-draw fans designed for larger motorcycles or automotive applications, as these will quickly deplete your battery during slow-speed riding or prolonged idling.
Airflow Configuration (Push vs. Pull)
Radiator fans are designed as either “pusher” or “puller” fans, and they are not interchangeable. A pusher fan is mounted on the front of the radiator and pushes air through the fins, while a puller fan is mounted behind the radiator and pulls air through. You must select a configuration that matches your scooter’s radiator placement and natural airflow direction. Installing a fan that blows air in the opposite direction of natural riding wind will stall the airflow through the radiator, causing the engine to overheat rapidly when you speed up.
Trigger Mechanism
You must decide how the auxiliary fan will be activated. There are two primary trigger mechanisms for plug-and-play kits:
- Thermal Switch Trigger: This system uses a temperature sensor adapter installed inline with the radiator hose. When the coolant temperature reaches a specific threshold (typically around 85°C to 90°C), the thermal switch closes, automatically activating the fan. This is the preferred method for automated, hands-free cooling in stop-and-go traffic.
- Manual Toggle Switch: This system relies on a handlebar-mounted switch that allows you to turn the fan on and off manually. While simpler to wire, it requires you to constantly monitor your scooter's temperature gauge or engine behavior and manually manage the fan's operation.
Specification Checklist
Use the following reference table to evaluate the features of any 12V auxiliary fan kit before making a purchase:
| Feature Category | Recommended Specifications (Safe & Reliable) | Red Flags (Avoid) |
|---|---|---|
| Wiring Harness | Pre-built with waterproof connectors, relay, and inline fuse | Bare wires, electrical tape joints, no relay or fuse included |
| Power Consumption | Low amperage draw (1.0A to 2.5A) matching stator limits | High-draw car fans, unspecified or missing amperage ratings |
| Mounting Hardware | Model-specific brackets or secure rubber-insulated mounts | Zip-ties pushed directly through radiator fins |
| Ingress Protection | IP67 or higher waterproof and dustproof rating | Exposed motor housing, non-waterproof switches |
| Trigger System | Direct battery connection with ignition-switched relay | Direct connection to battery without switch, relay, or fuse |
Installation Safety and Electrical Limits
When performing any electrical installation on your scooter, adhering to strict safety protocols is essential to prevent damage to the vehicle and ensure personal safety. If you are uncomfortable working with electrical circuits, always consult a qualified professional.
Pre-Installation Safety
Before beginning the installation, park your scooter on a level surface, turn off the ignition, and allow the engine to cool completely. Locate the battery and disconnect the negative (black) terminal first. Disconnecting the negative terminal cuts the ground connection to the scooter’s frame, preventing accidental short circuits if a tool touches a live wire and the frame simultaneously during the installation process.
Routing and Heat Protection
When routing the auxiliary fan’s wiring harness from the radiator to the battery, follow the path of the existing factory wiring loom wherever possible. Secure the harness using heavy-duty, UV-resistant cable ties. Ensure the wires are kept far away from high-heat areas, such as the exhaust manifold and engine cylinder head, as extreme heat can melt wire insulation and cause a short circuit. Additionally, verify that the harness does not interfere with moving parts, such as the steering column, suspension components, or the cooling fan blades.
Fuse and Relay Verification
Never bypass the inline fuse or replace it with a higher-amperage fuse than recommended by the kit manufacturer. The fuse is a critical safety device designed to melt and break the circuit if the current exceeds safe limits. If the fuse blows immediately after installation or during operation, do not simply insert a larger fuse. A blown fuse indicates an underlying problem, such as a pinched wire shorting against the frame, a faulty relay, or a seized fan motor. Inspect the entire circuit to identify and resolve the issue.
When to Seek Professional Help
While plug-and-play kits are designed for straightforward installation, certain scenarios require professional expertise. You must stop the installation and consult a qualified motorcycle electrician or an authorized service center if:
- The purchased kit does not match your scooter's mounting points or requires modifying the radiator shroud.
- The instructions require you to cut, splice, or pin into any factory wires or the ECU harness.
- Your scooter experiences electrical symptoms after installation, such as dimming headlights, slow engine cranking, or warning lights on the dashboard.
- You are unsure how to safely access your scooter's battery or routing paths.
Working on modern scooter electrical systems requires precision. Taking your vehicle to a professional can save you from costly mistakes and ensure your auxiliary cooling system operates safely and effectively.
Frequently Asked Questions (FAQ)
Can I install a 12V fan on an air-cooled Honda Click or Yamaha Mio?
No, you should not install an auxiliary 12V fan on an air-cooled scooter. Air-cooled engines rely on the physical design of the engine block, cooling fins, and a mechanical fan attached to the crankshaft to dissipate heat. Attempting to mount an electric auxiliary fan to these surfaces is highly ineffective because it does not replicate the targeted heat transfer of a liquid-cooled radiator. Furthermore, mounting an electric fan in these areas introduces severe vibration risks, physical mounting issues, and unnecessary electrical strain on a charging system that is not designed to support high-draw accessories.
Will adding an auxiliary 12V fan drain my scooter's battery?
It can if the fan’s power consumption exceeds the charging system’s output. At idle, such as waiting at a red light in heavy traffic, a scooter’s stator produces minimal electrical current. If your auxiliary fan, headlights, and other accessories draw more power than the stator generates, the system will draw the deficit from the battery, eventually draining it. Before installing a fan, verify the charging system’s health, check the battery voltage, and ensure the fan’s amperage draw is low enough to prevent battery drain during prolonged idling.
Do I need a relay for a plug-and-play 12V scooter fan?
Yes, a relay is highly recommended for safety and reliability. A relay acts as an electrically operated switch, allowing a low-current signal, such as a small handlebar switch or thermal sensor, to control the high-current power path directly from the battery to the fan. Without a relay, the high current required to run the fan motor must pass directly through your switch or sensor, which can lead to overheated wires, melted switches, and premature electrical failure.
Community discussion
Share your experience or ask a question. Comments are reviewed before publication.