
When upgrading your motorcycle’s braking performance, selecting a high-quality rear discbrake convertion set requires an evaluation that goes far beyond brand reputation or visual styling. The rear brake is vital for stabilizing your chassis, controlling corner entry, and providing reliable stopping power under heavy loads. To make an informed choice, you must compare specific engineering dimensions: the caliper’s manufacturing method, the precision of the mounting bracket, the metallurgy of the rotor, and the hydraulic sizing of the master cylinder. The most reliable option is not simply the most expensive kit on the market, but the one that perfectly matches your motorcycle’s weight, wheel clearance, and existing hydraulic architecture.
Quick Answer: What to Compare in a Rear Discbrake Convertion Set
Comparing rear disc brake conversion kits requires looking at how the individual components work as a unified system. A mismatched kit can lead to poor lever feel, rapid pad wear, or dangerous wheel lockups. When evaluating brands, prioritize kits that offer CNC-machined mounting brackets over stamped options, as they ensure precise caliper alignment. Additionally, look for forged aluminum calipers rather than cast ones if you ride aggressively or carry heavy loads. The rotor should be made of a high-grade stainless steel alloy treated to resist corrosion, especially in humid or coastal environments. Finally, ensure the master cylinder bore size is hydraulically matched to the caliper’s piston area to maintain progressive, predictable lever modulation.
Comparing Caliper and Master Cylinder Build Quality
The hydraulic components of your conversion kit are the heart of the braking system. They dictate how much force you need to apply at the pedal and how that force translates into clamping pressure at the rear wheel.
Products mentioned in this guide
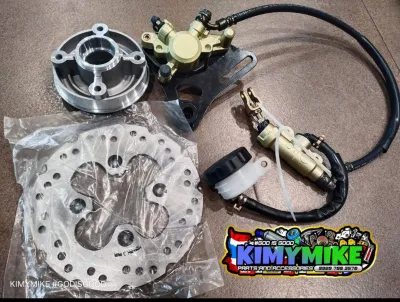
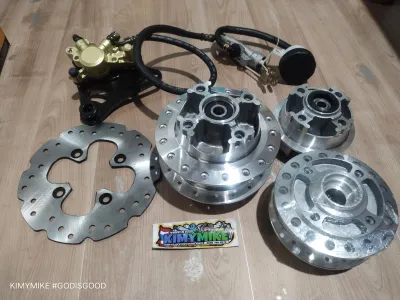
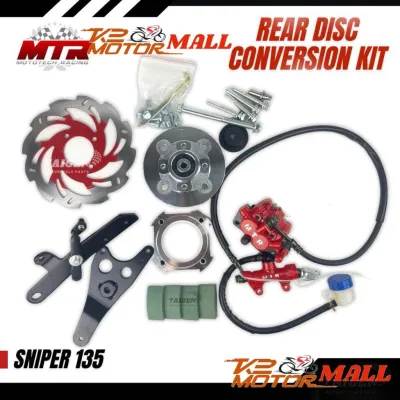
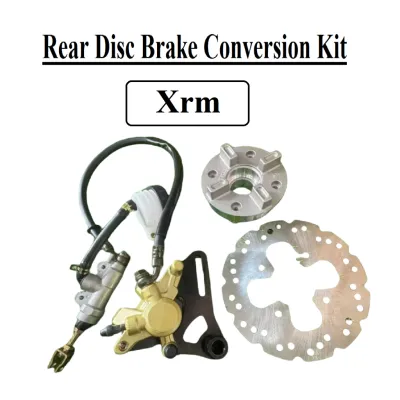
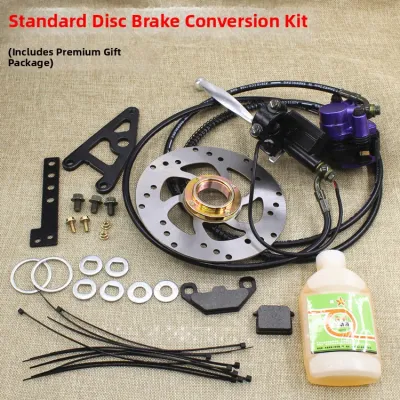
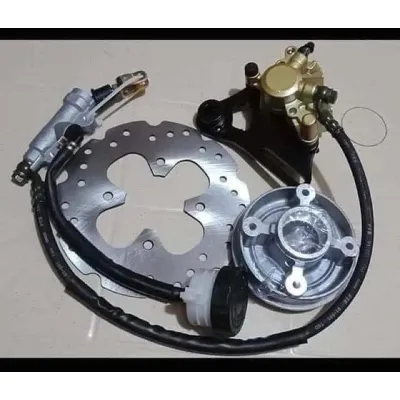
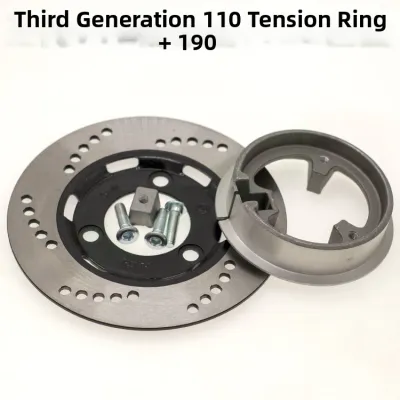
Prices are valid at publication and may change. Please refer to the product page for the latest price.

Caliper Material and Piston Design
When comparing caliper options, the manufacturing method is a primary indicator of durability and performance. Forged aluminum calipers are created by compressing solid metal under immense pressure, which refines the grain structure and eliminates internal voids. This process results in a highly rigid caliper that resists flexing under extreme hydraulic pressure, providing a firm, consistent lever feel and superior heat dissipation. In contrast, cast aluminum calipers are made by pouring molten metal into molds. While cast calipers are more affordable and perfectly adequate for daily city commuting, they are more susceptible to microscopic porosity and can flex slightly under hard braking, which can lead to a softer pedal feel.
Piston configuration is another critical factor for rear brake systems. Rear calipers typically utilize either a single-piston or a dual-piston design. Because the rear wheel only handles a fraction of the total braking force—typically 20% to 30%—the caliper must be carefully engineered to prevent premature wheel lockup. Dual-piston calipers distribute pressure more evenly across the brake pad surface, reducing uneven pad wear and offering more progressive modulation. Single-piston sliding calipers are simpler, lighter, and easier to maintain, but they may require more frequent inspections to ensure the slider pins remain lubricated. Always verify the piston diameter and seal material ratings directly from the manufacturer’s technical specifications rather than relying on vague marketing terms. High-quality kits use seals made of Ethylene Propylene Diene Monomer (EPDM) or high-grade silicone, which are rated to withstand extreme operating temperatures without degrading or leaking fluid.
Master Cylinder Sizing and Fluid Compatibility
The master cylinder acts as the pump that sends hydraulic fluid to the caliper. The relationship between the master cylinder’s bore size (piston diameter) and the caliper’s piston area determines the system’s hydraulic leverage ratio. A mismatch in this ratio will severely compromise your braking control. If the master cylinder bore is too large, it will push a large volume of fluid with very little pedal travel, resulting in an overly stiff, wooden pedal feel that lacks progressive modulation, making it incredibly easy to accidentally lock up the rear wheel. Conversely, if the bore is too small, the pedal will feel soft and spongy, requiring excessive travel to move the caliper pistons, which can lead to the pedal bottoming out before full braking force is achieved.
To avoid these issues, compare the recommended master cylinder displacement and bore size provided in the kit’s documentation. Reliable brands explicitly state the ideal bore size (such as 12.7mm or 14mm) required to operate their calipers effectively. Furthermore, you must verify brake fluid compatibility. Most modern conversion kits are designed to operate with DOT 3 or DOT 4 glycol-based brake fluids, while some high-performance setups may specify DOT 5.1. Never use DOT 5 silicone-based fluid in a system designed for glycol-based fluids, as this will cause the rubber seals to swell, disintegrate, and lead to sudden hydraulic failure. Always check the kit’s manual and your motorcycle’s original reservoir specifications to ensure absolute compatibility.
Evaluating Brake Rotor Materials and Design for Humid Climates
The brake rotor is subjected to intense friction and thermal stress. In tropical regions characterized by high humidity, coastal salt air, and sudden heavy rainfall, the rotor’s material composition and design are critical to maintaining consistent braking performance and preventing premature wear.
Rotor metallurgy determines how well the disc can handle heat and resist environmental degradation. Standard stainless steel alloys, such as SUS420, are highly popular because they offer excellent corrosion resistance and sufficient hardness for daily riding. High-carbon steel rotors provide superior heat capacity and thermal stability, making them highly resistant to warping under heavy braking loads. However, high-carbon steel is highly susceptible to surface rust when exposed to moisture, requiring more diligent maintenance and regular riding to keep the friction surface clean. For most riders in tropical climates, a high-grade stainless steel rotor is the most practical and low-maintenance choice.
The physical design of the rotor—whether it is drilled, slotted, or features a wave pattern—plays a significant role in wet-weather performance. Drilled holes and slots act as escape routes for water, mud, and outgassing brake dust. During heavy downpours, a solid rotor can suffer from a temporary loss of friction as a film of water builds up between the pad and the disc. Drilled and slotted designs sweep this water away instantly, ensuring immediate bite. However, these cutouts reduce the overall surface area available for pad contact and can accelerate brake pad wear. Wave rotors offer a distinct aesthetic and reduce unsprung weight, but they have less thermal mass, meaning they can heat up faster under prolonged downhill braking.
When comparing kits, check the rotor’s thickness and the manufacturer’s stated minimum wear limits, which are typically stamped directly onto the rotor face. Thicker rotors (usually 4mm or thicker) possess a higher thermal capacity and are much less likely to warp under heavy loads, though they do add slightly more unsprung weight to the rear suspension. In highly humid or coastal environments, verify if the rotor has undergone specialized anti-corrosion treatments, such as electrophoretic deposition (e-coating) on the non-contact surfaces, or if it is constructed from marine-grade stainless steel to prevent localized pitting and cosmetic rust.
Assessing Bracket Precision and Mounting Hardware
The mounting bracket and hardware are the structural backbone of any rear disc brake conversion. They must keep the caliper perfectly aligned with the rotor under extreme physical forces.
Bracket Manufacturing and Thickness
The manufacturing method of the caliper bracket directly influences the safety and alignment of your braking system. CNC-machined brackets, typically milled from high-strength billet aluminum (such as 6061-T6 or 7075-T6) or high-tensile steel, offer exceptional dimensional accuracy. This precision ensures that the caliper sits perfectly parallel to the rotor, preventing uneven brake pad wear, drag, and squealing. On the other hand, stamped or basic cast brackets often exhibit minor dimensional variances and structural imperfections.
You should carefully check the bracket’s thickness and the reinforcement around the mounting holes in the product specifications. A bracket that is too thin or poorly engineered will flex under the immense torque generated during hard braking. This flex causes the caliper to twist slightly relative to the rotor, leading to uneven pad wear, reduced braking efficiency, and caliper binding, which can lock up the rear wheel or damage the wheel hub. Ensure that the bracket design is engineered specifically for your motorcycle’s swingarm dimensions, axle diameter, and chain or belt adjusters to guarantee a secure, flush fit.
Fastener Quality and Rust Prevention
The bolts securing your caliper and bracket are subjected to severe shear and tensile stresses. High-quality conversion kits include high-tensile strength fasteners, typically rated Grade 8.8, Grade 10.9, or specialized motorcycle-grade flange bolts. Using low-grade or unrated bolts in a braking system is an extreme safety hazard, as they can shear off under heavy braking, leading to immediate catastrophic failure.
Anti-corrosion treatments on these fasteners are essential, particularly in climates with frequent rain or high humidity. Look for bolts that feature zinc plating, Dacromet, or nickel coatings. These treatments prevent rust and stop galvanic corrosion from occurring where steel bolts interface with aluminum brackets—a common issue that can cause bolts to seize permanently. Never reuse old, stretched, or corroded axle bolts or mounting hardware when installing your new conversion kit; always use the fresh, high-grade hardware supplied by the manufacturer or source certified replacements.
Critical Compatibility and Safety Verifications
Before purchasing any rear disc brake conversion kit, you must perform several non-negotiable compatibility and safety verifications. Brakes are the most critical safety system on your motorcycle, and a single mismatched component can have severe consequences on the road.
First, cross-reference the kit’s exact fitment list with your motorcycle’s specific make, model, and year of manufacture. Motorcycle manufacturers frequently update swingarm designs, axle diameters, wheel hub offsets, and spacing clearances between model generations. A kit designed for a 2022 model may not fit a 2026 version of the same motorcycle, even if the model name remains identical. Do not rely on generic product listings that claim “universal fitment” for a wide range of models.
Second, measure the spatial clearance of your rear wheel assembly. You must ensure there is sufficient radial and lateral clearance inside the wheel rim so that the new caliper and its mounting bracket do not rub against the wheel spokes, the rim barrel, or the hub flanges. This is especially critical if you are running aftermarket wheels or wider-than-stock tires, which can significantly reduce the available clearance.
Third, address the critical safety boundary regarding Anti-lock Braking Systems (ABS). If your motorcycle is equipped with ABS, installing a non-ABS-specific conversion kit can disable or severely disrupt the system. The ABS ECU relies on precise wheel speed sensor readings to detect lockups. A non-compatible kit may block the sensor, lack the mounting point for the sensor bracket, or fail to align with the tone ring. This can trigger dashboard warning lights, disable the ABS entirely, or cause dangerous, unpredictable braking behavior during emergency stops. If your bike has ABS, the conversion kit must explicitly state ABS compatibility and include the correct sensor mounting provisions and tone rings.
Finally, keep in mind that brake modifications directly impact vehicle safety and road legality. Always consult your motorcycle’s original manufacturer manual and the conversion kit’s instructions before starting. If instructions conflict, the item is unidentified, or the use is not covered, stop and consult the manufacturer or a qualified professional. Ensure all fasteners are torqued to the exact manufacturer-specified settings and the hydraulic system is thoroughly bled to eliminate air bubbles. Never attempt to modify brackets, grind swingarm tabs, or drill new mounting holes to force a non-compatible kit to fit.
Decision Framework: Selecting Your Rear Brake Kit
To finalize your selection, use this conditional framework to match your riding style, environment, and budget with the right rear disc brake conversion kit.
- Choose a premium forged kit with CNC brackets and slotted rotors if you frequently carry heavy loads, ride with a pillion passenger, navigate steep mountain passes, or prioritize high-speed thermal stability and progressive modulation. These kits represent a higher initial investment—typically ranging from ₱6,000 to ₱12,000 or more—but offer the structural integrity and heat dissipation required for demanding conditions.
- Choose a standard cast kit with solid stainless rotors if your riding consists primarily of daily city commuting, standard stop-and-go urban traffic, and you require a reliable, cost-effective upgrade that improves wet-weather performance over drum brakes. These kits generally fall into the entry-to-mid price bands, ranging from ₱2,500 to ₱5,000, providing excellent value without compromising basic safety.
- Verify first if your motorcycle is equipped with an active ABS system, requires custom wheel spacers to maintain proper chain or belt alignment, or if the kit's master cylinder assembly physically conflicts with your existing handlebar switchgear, throttle cables, or aftermarket footpeg mounts.
Ultimately, the “best” brand is not simply the one with the most aggressive marketing or the lowest price tag, but the manufacturer that provides exhaustive, verified compatibility data, certified material specifications, and clear, comprehensive installation instructions tailored to your specific motorcycle.
Frequently Asked Questions (FAQ)
Can I install a rear disc brake conversion set on a drum brake motorcycle myself?
While the mechanical steps of bolting on brackets and mounting calipers may seem straightforward to an experienced DIY enthusiast, motorcycle braking systems are critical safety components. Professional installation is highly recommended. If you choose to perform the assembly yourself, you should have the completed installation thoroughly inspected and verified by a qualified mechanic before riding. Proper hydraulic bleeding to eliminate air bubbles, precise torque wrench settings on all mounting fasteners, correct brake line routing to prevent pinching or stretching during swingarm travel, and proper pad bedding are all essential steps to ensure your safety and prevent catastrophic brake failure on the road.
Will a larger rear brake rotor improve my motorcycle's stopping power?
A larger rear rotor provides greater mechanical leverage and a larger surface area for heat dissipation, which helps prevent brake fade during prolonged or heavy braking. However, it will not significantly reduce your motorcycle’s minimum stopping distance, as the front brake is responsible for 70% to 80% of your total stopping power. Installing an oversized rear rotor or pairing it with overly aggressive brake pads can actually make the rear brake too sensitive. This increases the risk of rear wheel lockup and loss of traction, particularly on wet, slippery, or uneven road surfaces, which can lead to dangerous, uncontrollable skids.
Community discussion
Share your experience or ask a question. Comments are reviewed before publication.