
When your scooter’s reverse gear refuses to engage, the issue is typically caused by a misaligned mechanical linkage, an active safety interlock, a faulty electrical switch, or internal transmission wear. Depending on whether your scooter uses a mechanical lever or an electronic button, the failure might manifest as a loose handle with no resistance, a whirring motor that produces no rear-wheel movement, or a complete lack of response when you initiate the command.
Diagnosing this problem requires a systematic, low-risk approach before you attempt any complex disassembly or purchase replacement parts. Many reverse gear issues on modern gas-powered and electric scooters are actually safety features working as intended, or simple cable adjustments that you can perform with basic tools. Identifying the symptoms early prevents unnecessary strain on your transmission and saves you from costly repairs at the workshop.
Initial Safety Checks and Basic Observations
Before reaching for your toolbox, you must rule out the built-in safety mechanisms designed to prevent accidental reverse acceleration. Most modern scooters, especially larger maxi-scooters and electric three-wheel utility models common in the Philippines, incorporate safety interlocks that disable the reverse function under specific conditions.
Products mentioned in this guide
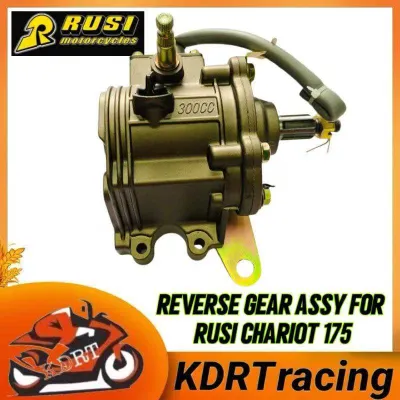
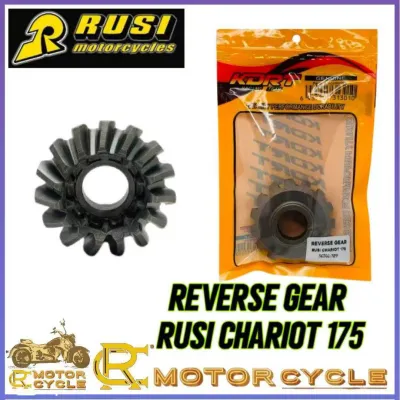
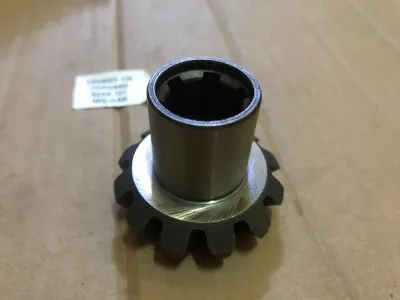
Prices are valid at publication and may change. Please refer to the product page for the latest price.
First, position your scooter on a flat, stable surface and ensure the main center stand is fully deployed. Many manufacturers integrate a safety switch into the side stand or center stand assembly. If the stand is retracted or only partially deployed, the safety circuit remains open, preventing the reverse gear or reverse motor from engaging.
Next, pay close attention to your brake levers. A common design requirement for reverse activation is the complete engagement of the rear or front brake. Squeeze the brake lever firmly while attempting to engage the reverse gear. If the brake switch is dirty, worn, or misaligned, it will fail to send the necessary electrical signal to the controller, leaving the reverse mechanism inactive even if you pull the lever or press the button.
Physical obstructions are another frequent culprit, particularly in tropical climates where road debris, mud, and heavy rain are common. Inspect the reverse engagement lever or handlebar button for accumulated dirt, grit, or dried mud that might physically block its movement. A button that cannot be fully depressed or a mechanical lever that is obstructed by debris will fail to actuate the internal mechanism.
For electric scooters or hybrid models utilizing an electric reverse motor, check your battery charge level on the dashboard. Low system voltage often prompts the onboard battery management system to disable auxiliary high-load functions, including the reverse motor, to conserve power for forward propulsion. Additionally, verify that your vehicle is not locked in a restricted riding mode or parking mode that disables reverse maneuvers.
Step-by-Step Diagnosis for Reverse Gear Issues
Mechanical Linkage and Cable Inspection
For internal combustion engine (ICE) scooters equipped with a mechanical reverse gear, the physical connection between your handlebar lever and the gearbox is the first critical point of failure. This connection relies on a steel cable and a series of external linkages that actuate the shift fork inside the transmission casing. Over time, these cables stretch, fray, or lose their tension due to regular use and exposure to environmental moisture.

Before purchasing a replacement reverse cable or linkage parts, verify your specific scooter model, manufacturing year, and transmission type from your vehicle’s official documentation. Never infer parts compatibility from a generic category term, as reverse mechanisms vary significantly between scooter brands. When performing adjustments, consult your original-vehicle instructions first. Adjusting the cable free play must be done within the safety boundaries specified by the manufacturer; incorrect tension can prevent complete gear engagement or cause the transmission to slip while riding.
To inspect this system, trace the path of the reverse cable from the handlebar lever down to the transmission housing. Look closely for any signs of physical damage, such as frayed steel strands, cracked outer sheathing, or severe bends that restrict smooth inner cable movement. If the cable is binding inside its housing, the force you apply at the lever will not translate to the gearbox linkage.
Next, have an assistant actuate the reverse lever while you observe the linkage connection at the transmission casing. Note whether the lever travels its full designed range of motion. If the handlebar lever moves freely but the linkage arm on the transmission barely budges, the cable has likely stretched beyond its adjustment limits or slipped from its mounting bracket.
If you find that the cable is intact but loose, refer to your scooter’s owner’s manual for the exact cable free play specifications. You can typically adjust this tension using the inline barrel adjusters located near the handlebar lever or at the bracket on the transmission casing. Tighten the adjuster until the excess slack is removed, ensuring the lever feels firm and successfully rotates the transmission linkage arm to its fully engaged position.
Electrical Switches and Wiring (For Electronic Reverse)
If your scooter features a push-button electronic reverse or is fully electric, the diagnosis shifts from mechanical cables to electrical circuits. These systems rely on a clean signal path from the handlebar switch to the electronic controller, which then directs power to the reverse motor or actuates an electronic solenoid.
For any electrical diagnostics or switch replacements, always refer to your original-vehicle instructions to locate the correct wiring paths and fuse ratings. Working on electrical circuits carries safety boundaries; improper wiring can cause short circuits or damage the main electronic controller. If your diagnostics reveal a faulty switch or damaged wiring harness, consider seeking qualified professional installation to ensure the repairs meet safety standards and road legality requirements.
Begin your electrical diagnosis by testing the reverse switch on the handlebar for electrical continuity. With the scooter’s ignition turned off, disconnect the switch wiring harness and connect a digital multimeter set to the resistance or continuity mode. Press the reverse button; if the multimeter does not beep or show a near-zero resistance reading, the internal switch contacts are likely corroded, worn, or damaged, requiring switch replacement.
Next, inspect the wiring harnesses that run along the steering column, under the body panels, and down to the lower transmission area. These harnesses are subject to constant flexing during steering and vibration during riding, which can pinch, chafe, or disconnect individual wires. Look for exposed copper, corroded connectors, or loose ground wires that could interrupt the low-voltage signal.
Finally, locate your scooter’s main fuse box, which is typically positioned under the seat or near the battery compartment. Consult your wiring diagram or the fuse box cover label to identify the fuses dedicated to the reverse motor, controller, or auxiliary control circuits. If you find a blown fuse, replace it with one of the exact same amperage rating; a blown fuse often points to a temporary electrical surge or a short circuit that must be resolved before riding.
Internal Transmission and Gear Wear
When your safety checks, cables, and electrical switches all pass inspection, the failure likely lies within the internal components of the transmission or gearbox. Internal issues require careful observation of physical and auditory symptoms to diagnose without immediately dismantling the complex drive system.
Start the scooter and attempt to engage the reverse gear while listening closely to the transmission casing. Auditory clues are highly revealing: a loud grinding sound, heavy clicking, or a high-pitched metallic whining noise indicates that the gear teeth are failing to mesh properly. This is often caused by a worn shift fork that cannot push the slider gear into position, or a damaged reverse idler gear.
Another clear symptom of internal failure occurs when the mechanical lever or electronic actuator moves completely into the “reverse” position, but the rear wheel remains stationary when you apply throttle. If you can hear the engine revving or the electric motor spinning without any corresponding wheel movement—and you have verified the rear brake is not seized—the internal gear teeth may be stripped, or the drive belt or chain inside the transmission may have snapped.
If you encounter any of these internal symptoms, do not force the reverse lever or repeatedly rev the engine in an attempt to break it free. Forcing a misaligned or damaged gear train can cause broken metal fragments to circulate through the gearbox, leading to catastrophic damage to the transmission casing, shafts, and adjacent forward gears.
Symptom and Solution Quick Reference Table
The following reference table summarizes the most common symptoms associated with scooter reverse gear failures, their probable causes, and the recommended next steps for diagnosis or repair.
| Symptom | Probable Cause | Next Step |
|---|---|---|
| Reverse lever feels completely loose with no physical resistance | Cable is stretched, frayed, or disconnected from the transmission linkage | Inspect cable connections, adjust free play using barrel adjusters, or replace the cable if frayed. |
| Button is pressed but there is no motor sound or dashboard response | Blown auxiliary fuse, faulty handlebar switch, or low battery voltage | Test switch continuity with a multimeter, check the fuse box, and verify battery charge level. |
| Reverse lever engages fully, but a loud grinding or clicking noise occurs | Stripped internal gear teeth, worn shift fork, or insufficient transmission oil | Stop operation immediately, check transmission oil level, and consult a professional mechanic. |
| Reverse gear will not engage while the scooter is parked on its wheels | Safety interlock active due to retracted stand or unapplied brake | Fully deploy the center stand, squeeze the rear brake lever firmly, and re-attempt engagement. |
When to Stop DIY and Seek Professional Service
While basic cleaning, cable tension adjustments, and fuse replacements are well within the scope of home maintenance, certain reverse gear issues cross the boundary into professional repair. Attempting to disassemble complex drive components without the proper training and tools can compromise your scooter’s safety and void your warranty.
You must stop your DIY efforts immediately if your diagnosis points to internal transmission damage. Accessing the internal gears, shift forks, or the continuously variable transmission (CVT) gear reduction box requires specialized pullers, clutch holding tools, and precise torque wrenches. Furthermore, these components must be reassembled in clean, dust-free conditions with exact tolerances to prevent oil leaks and premature wear.
Critical safety risks are involved when dealing with safety switches and interlocks. Never bypass, hotwire, or permanently disable brake lever switches or stand interlocks to force a malfunctioning reverse gear to work. Bypassing these safety systems can cause the scooter to unexpectedly surge backward or forward when starting the engine, leading to severe vehicle damage, property destruction, or personal injury.
For electric scooters, electrical diagnostics involving the main controller, high-voltage wiring, or the brushless reverse motor require specialized diagnostic software and safety equipment. Attempting to repair a faulty electronic controller or splicing into high-voltage cables without professional training carries a high risk of electrical shock and can permanently damage the vehicle’s sensitive electronic control unit (ECU).
Improper reassembly of any part of the drive system, including the transmission pulleys, belts, or gear shafts, can lead to sudden mechanical lockup while riding at high speeds. To ensure your safety on the road, always consult a qualified mechanic or an authorized service center if you are unsure of any diagnostic step or if the repair requires opening the transmission casing.
Preventive Maintenance for the Transmission and Drive System
Preventive maintenance is the most effective way to ensure your scooter’s reverse gear engages reliably and to extend the service life of your entire drive system. Implementing a routine care schedule protects vulnerable mechanical and electrical components from premature failure.
Regularly inspect and lubricate all external mechanical linkages, pivot points, and cables. In humid, tropical climates like the Philippines, frequent rain and road salt can quickly cause steel cables to rust and bind inside their sleeves. Apply a high-quality cable lubricant or silicone spray to the inner wire and pivot joints every few months to maintain smooth, effortless lever action.
When applying lubricants, cleaners, or gear oils, use them only for their label-authorized uses. A general lubricant or degreaser name does not prove it is safe for the surrounding plastics, rubber seals, or sensitive electronic sensors near your transmission casing. Always check your scooter’s manual for the approved gear oil specifications, and apply lubricants carefully to prevent contaminating the brake components or drive belt.
Changing your transmission or gear oil at the exact intervals specified in your owner’s manual is vital for internal gear health. Fresh gear oil keeps internal bearings lubricated, cushions the impact of gear engagement, and carries away microscopic metal shavings before they can wear down gear teeth. Always use the specific oil viscosity and API rating recommended by your scooter’s manufacturer, and inspect the drained oil for metallic glitter, which warns of internal wear.
When washing your scooter, exercise caution and avoid directing high-pressure water streams directly at electrical switches, handlebar controls, wiring harnesses, or transmission seals. High-pressure water can bypass rubber seals, causing internal corrosion in switches and contaminating your transmission oil with water, which rapidly destroys gears and bearings.
Finally, make it a habit to periodically engage and use the reverse gear during your regular riding routine, even if you rarely need it to park. Regular activation keeps the internal shift forks, slider gears, and electronic solenoids moving, preventing them from seizing or becoming sticky due to prolonged inactivity and accumulated grime.
Community discussion
Share your experience or ask a question. Comments are reviewed before publication.