
Replacing a broken side mirror glass is a highly manageable DIY task that requires patience, the correct replacement part, and gentle, even pressure to avoid damaging the delicate plastic housing or the motorized adjustment mechanism inside. In the Philippines, side mirrors are highly vulnerable to tight parking spaces, narrow streets, and passing motorcycles. A cracked or shattered mirror compromises your visibility and road safety. Before starting any automotive electrical or exterior work, consult your vehicle’s owner’s manual. If your mirror features complex integrated systems like blind-spot monitoring, cameras, or heating elements, verify the manufacturer’s instructions to determine if professional calibration or installation is required to maintain system safety.
Assessing the Damage and Preparing for the Repair
Before purchasing any parts or reaching for your tools, you must thoroughly evaluate the extent of the damage to your side mirror assembly. Check if the damage is strictly limited to the glass surface or if the surrounding plastic housing, turn signal repeaters, or blind-spot sensors have also sustained structural damage. If the outer housing is cracked, or if the internal motorized adjustment mechanism no longer responds to your cabin controls, simply replacing the glass will not restore full functionality. In such cases, you may need to replace the entire side mirror assembly rather than just the glass panel.
Next, verify the exact replacement glass part number using your vehicle’s manual or Vehicle Identification Number (VIN). Do not rely solely on the vehicle’s make, model, and year, as different trim levels often feature distinct mirror shapes, heating elements, or auto-dimming capabilities. Ensuring compatibility with your specific adjustment mechanism and mounting plate is crucial before proceeding.
Products mentioned in this guide

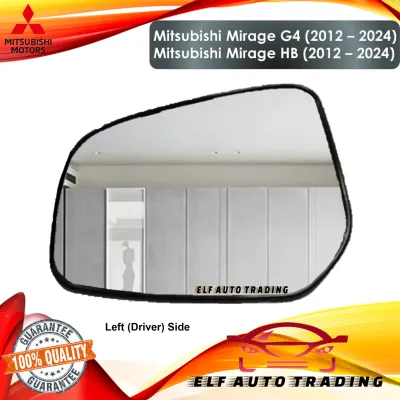
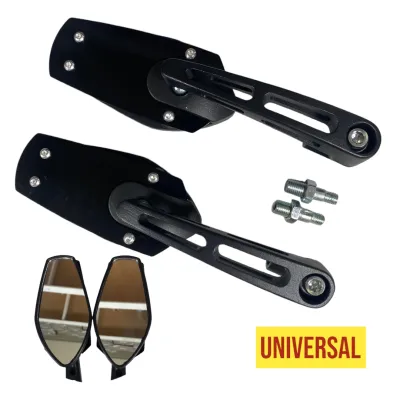
Prices are valid at publication and may change. Please refer to the product page for the latest price.
Finally, prepare a clean, flat, and well-lit workspace to perform the repair. Park your vehicle on a level surface and apply painter’s tape or a thick microfiber towel to the door panel directly beneath the mirror housing. This simple precaution protects your car’s paint and door panel from accidental scratches caused by falling glass shards or slipped tools during the replacement process.
Essential Tools and Materials for the Job
Having the correct tools on hand is essential to complete this repair safely without causing cosmetic or mechanical damage to your vehicle. Avoid using metal screwdrivers, butter knives, or other harsh metal implements to pry the glass, as these can easily gouge the plastic housing or crack the new glass panel. Instead, gather a set of plastic trim removal wedges, which are designed to apply leverage safely without marring plastic surfaces.

Safety gear is a critical component of this preparation. Always wear heavy-duty, cut-resistant gloves to protect your hands from sharp glass edges, and wear safety glasses to shield your eyes from tiny, flying glass fragments. Keep several clean microfiber cloths nearby to clean the housing interior and wipe down the new glass surface.
Before starting, check the replacement glass packaging or your vehicle’s service manual to determine if specific adhesives, double-sided mounting tapes, or specialized backing plates are required. Some vehicles utilize a simple snap-on clip system, while others rely on automotive-grade adhesive pads. Never use household glue or silicone sealants, as these may fail under high temperatures or humid tropical conditions. Additionally, avoid using excessive heat from a heat gun to soften old adhesive, as this can easily warp the plastic housing or melt delicate internal wiring.
Step-by-Step Guide to Removing the Broken Glass
To begin the removal process, use the vehicle’s power mirror controls to adjust the mirror glass to its maximum inward and downward angle. This creates a wide, accessible gap at the top outer corner of the mirror housing, providing a safe entry point for your tools. If your vehicle has manual mirrors, gently press the glass with your hands to achieve the same angle.
Carefully slide a wide plastic trim removal wedge into the gap behind the mirror glass. Aim for the center of the mirror where the backing plate connects to the motor actuator, rather than prying on the outer edges of the glass. Gently apply even, gradual outward pressure to release the plastic retaining clips. You may need to use your fingers, protected by cut-resistant gloves, to assist in spreading the force across a larger area.
A critical stop condition applies here: if you feel significant resistance, or if the glass is glued directly to a non-removable backing plate rather than clipped, stop immediately. Forcing the mirror can strip the delicate gears inside the adjustment motor or break the actuator plate entirely. If the glass does not release with moderate pressure, consult the manufacturer’s service manual to verify the specific mounting style.
Once the retaining clips release and the glass pops free, do not pull it away quickly. Carefully support the glass panel and check the back for any integrated wiring, such as heating element wires or blind-spot indicator plugs. Gently slide the wire terminals off the metal tabs on the back of the glass using small needle-nose pliers or your fingers. Note the exact orientation of these wires so you can reconnect them correctly to the new replacement glass.
Installing the Replacement Mirror Glass
Before installing the new glass, take a moment to prepare the mounting surface inside the housing. Use a dry microfiber cloth to wipe away any dust, dirt, or leftover glass fragments from the plastic actuator plate. If there is sticky residue from old adhesive tape, clean it using only label-authorized automotive adhesive removers or mild isopropyl alcohol, ensuring the solvent does not contact sensitive plastic sensors or seals.
Next, reconnect any integrated wiring to the new glass panel. Slide the heating element terminals or sensor plugs onto the corresponding metal tabs on the back of the replacement glass backing plate. Ensure the connectors are fully seated and locked in place to prevent them from vibrating loose over time due to road vibrations.
Align the replacement glass with the mounting plate inside the housing. Carefully match the plastic clips on the back of the new mirror with the corresponding rings or slots on the motor actuator. Double-check that the glass is centered within the housing opening before applying any pressure.
To secure the glass, place a clean, folded microfiber cloth over the center of the mirror to protect the surface. Using the flat of your hand or several fingers grouped closely together, press firmly and evenly directly in the center of the glass. You should hear a distinct click or snap as the retaining clips engage. Avoid pressing on the extreme outer edges of the glass, as this uneven distribution of force can easily crack the new mirror or cause it to pop out of the housing.
Testing the Mechanism and Final Adjustments
Once the new glass is securely snapped into place, you must verify that the adjustment mechanism functions correctly. Sit in the driver’s seat, turn on the vehicle’s accessory power, and operate the power mirror switch. Move the mirror fully up, down, left, and right to ensure the glass moves smoothly throughout its entire range of motion.
While operating the controls, listen closely for any unusual clicking, grinding, or slipping noises. These sounds can indicate that the glass backing plate is not fully seated on the actuator or that the internal motor gears were misaligned during the installation process. If you detect any resistance or strange noises, turn off the controls and inspect the mounting clips again.
Next, verify the operation of any integrated features based on your vehicle’s specific trim level. If your vehicle has heated mirrors, turn on the rear defogger and check if the mirror glass warms up. If it features blind-spot indicators or turn signals, have an assistant observe the mirror while you activate these systems to ensure all electrical connections are working perfectly. Finally, start the engine and check for any loose fitting or excessive vibration while idling, which would require re-seating the clips.
When to Stop and Seek Professional Help
While replacing side mirror glass is generally a straightforward DIY task, certain situations require the expertise of a professional automotive technician. If you discover stripped adjustment gears, broken plastic housing mounts, or damaged internal wiring during the disassembly process, a simple glass replacement will not solve the underlying issues. Attempting to repair complex internal motor components or severed wiring harnesses without proper training can lead to further damage.
Additionally, if the replacement glass does not easily fit or snap onto the mounting plate despite matching the part number, do not attempt to force it. Minor manufacturing variations in aftermarket parts can prevent proper engagement, and forcing the components can easily crack the new glass or break the expensive motor actuator inside the housing.
If your vehicle is equipped with advanced driver assistance systems (ADAS), such as cameras or blind-spot sensors integrated directly into the side mirror housing, professional calibration may be required after any disassembly. Consulting a qualified technician ensures these critical safety systems are functioning accurately and legally before you return to the road.
Frequently Asked Questions (FAQ)
Can I drive without the side mirror glass temporarily?
Driving without a functional side mirror is a significant safety hazard that severely limits your rearward visibility, especially in busy traffic conditions in the Philippines. Local land transportation regulations require vehicles to be equipped with functional rearview and side mirrors to ensure roadworthiness. If your mirror glass is missing or shattered, you should avoid driving the vehicle except to travel directly to a nearby repair shop or parts dealer, using extreme caution and relying heavily on your remaining mirrors and shoulder checks.
Does insurance cover side mirror glass replacement?
Whether your auto insurance covers side mirror glass replacement depends entirely on your specific policy terms, the cause of the damage, and your deductible amount. If the mirror was damaged in a collision or acts of vandalism, it may be covered under comprehensive or collision insurance. However, because the cost of a replacement glass panel is often relatively low, the expense may not exceed your policy’s deductible. It is advisable to check your policy details or contact your insurance provider to determine if filing a claim is financially practical.
Community discussion
Share your experience or ask a question. Comments are reviewed before publication.